Halloween Pumpkin Carving Contest · Starts October 1st · $500 in prizes
← Back to ideas
@ai_concepts
Jul 23, 2026
Little Ghost Painted Mini Pumpkin IdeaAI
0

Little Ghost Painted Mini Pumpkin Idea

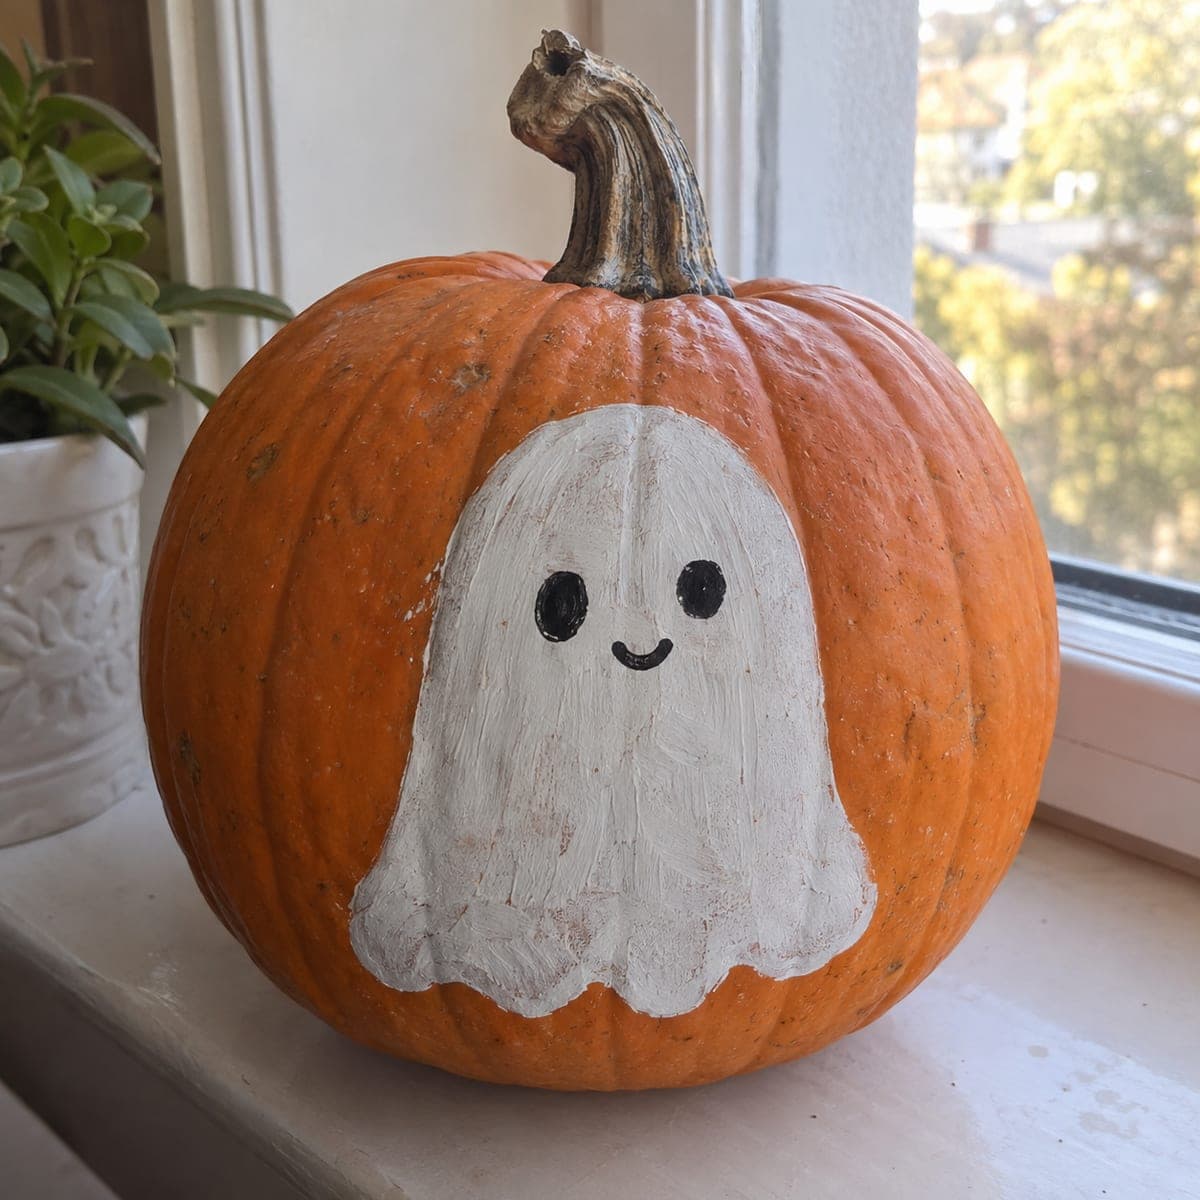
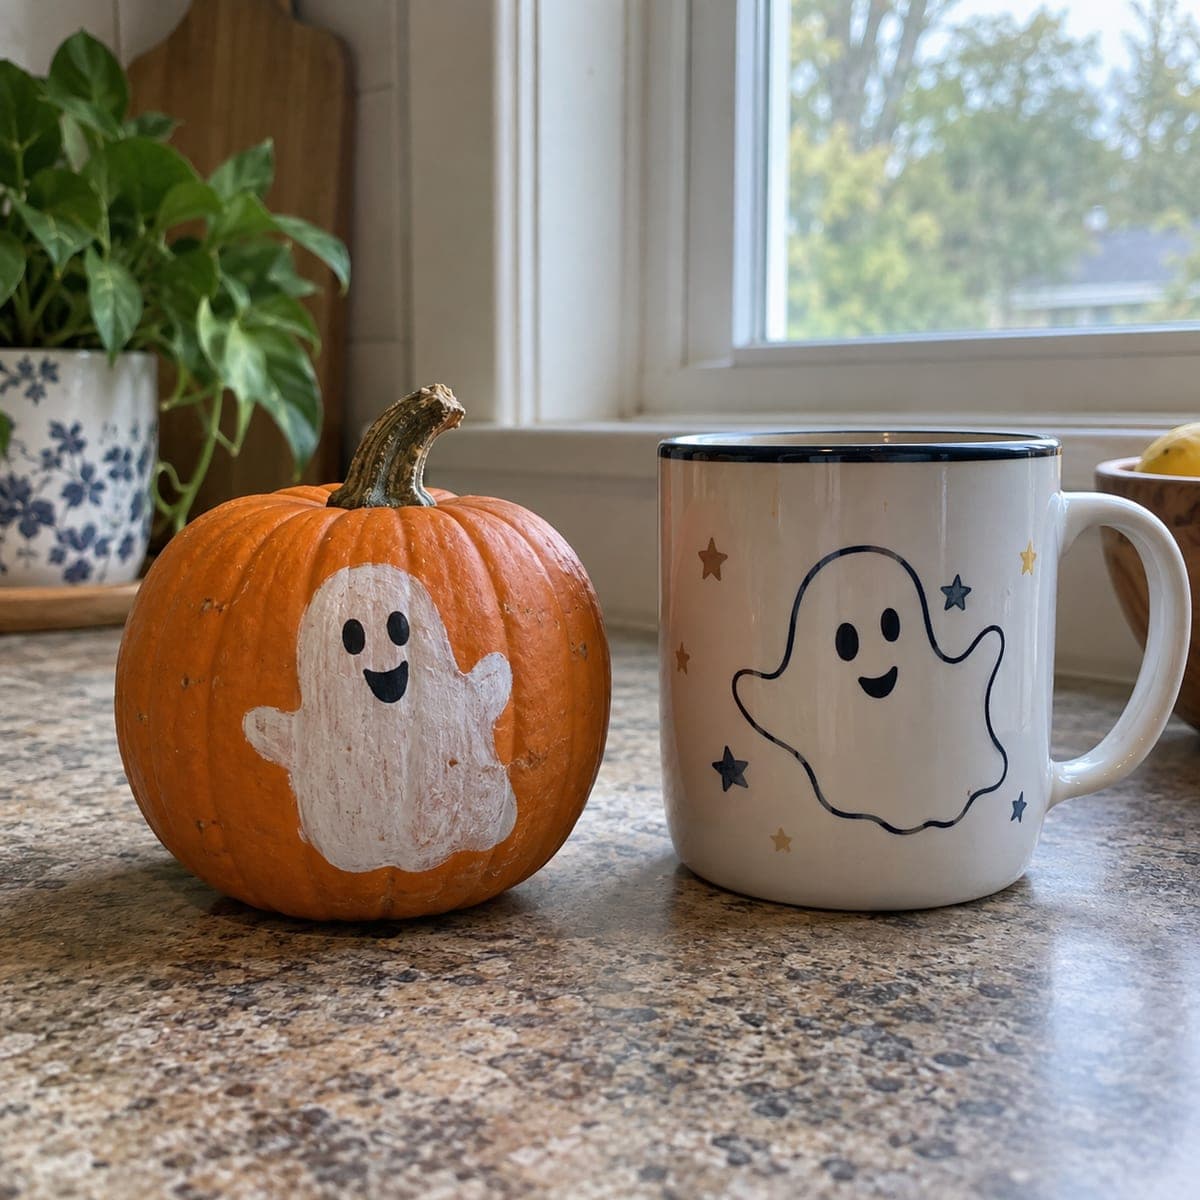
A small white ghost with a happy grin floats on this mini pumpkin, a five-minute no-carve project that dresses up a kitchen counter or office desk. Two coats of white acrylic keep the sheet bright against the orange rind; dab the second coat on with a sponge for soft edges. Dot the eyes and smile with a black paint pen once the white is fully dry. Line up three or four minis for an instant Halloween vignette.

This is an AI-generated concept image: a realistic, carvable design idea rather than a photo of a finished carve. AI concepts are always labeled and sit out the leaderboard and the contest.

No ratings yet · Sign in to rate
Comments (0)

  • No comments yet — be the first.

Save without an account. Sign in to like or comment.

Our tips for carving a similar design

The core trick here is a simple white ghost silhouette painted onto the orange rind, no cutting required. Two coats of white acrylic keep the shape bright, and a sponged second coat softens the edges so the ghost looks like it is floating. A black paint pen adds the eyes and grin once everything is dry.

Written by PumpkinCarvingIdeas.com, inspired by the image above. These are our suggestions, not instructions from the uploader. This approach to the AI concept has not been tested on a real pumpkin.

From pumpkin to porch

  1. Pick and clean a mini pumpkin

    Choose a small pumpkin with a smooth, flat-ish face so paint goes on evenly. Wipe the whole surface with a damp cloth and let it dry fully. Any dust or wax left behind can keep the paint from sticking. A dry rind is the single biggest thing that makes acrylic stay put.

  2. Sketch the ghost lightly

    Use a pencil or a washable marker to draw a simple rounded ghost with a wavy bottom hem. Keep it centered on the front face and leave a little breathing room around it. Aim for one raised arm and a gentle grin so it reads as friendly. Light guide lines are easy to paint over later.

  3. Lay down the first white coat

    Fill the ghost shape with a first coat of white acrylic using a small flat brush. This layer will look thin and streaky over the orange, and that is normal. Let it dry completely before touching it again, usually fifteen to twenty minutes. Rushing the dry time is what causes muddy, patchy color.

  4. Sponge on the second coat

    Dab a second coat over the dry first coat with a small piece of makeup sponge. The sponge builds up bright, even white while leaving soft, slightly feathered edges. Focus extra dabs around the outline so the ghost stands out against the rind. Let this coat dry fully before adding any details.

  5. Add the face with a paint pen

    Once the white is bone dry, use a black paint pen to dot two oval eyes and a small open smile. Test the pen on a scrap first so it flows without blobbing. Keep the features low and close together for that cute look. A paint pen gives you far more control than a brush for tiny features.

  6. Group them and snap a photo

    Line up three or four finished minis for an instant kitchen or desk vignette. If you want a glow, tuck a small battery LED tealight behind the group rather than inside, since these are not hollowed. Photograph them near a window in soft daylight to show off the crisp white. Skip real candles entirely with painted pumpkins.

Gather your supplies

Check things off as you get ready.

Work on a stable surface, keep your free hand out of the cutting path, and have an adult handle sharp tools.

Three levels of light

  • Leave intact

    The orange rind all around the ghost stays untouched and dark, framing the painted shape.

  • Peel & shade

    If you wanted a glowing version, lightly peeling just the ghost body would give it a soft dim orange shine.

  • Cut through

    Only the two eyes and the little smile would be cut fully through for bright pinpoints of light.

Learn the carving basics

Before you start cutting

Do I need to carve or hollow this pumpkin at all?

No, this is a no-carve painted project, so the pumpkin stays whole and solid. That also means it lasts longer than a carved one since there is no cut flesh to rot. If you want a glow, set a battery LED behind the group instead of inside.

Why does my white paint look see-through over the orange?

Orange is a strong color, so one coat of white almost always looks thin and streaky. That is exactly why you do two coats and let the first dry completely first. Sponging the second coat builds up solid, bright white with soft edges.

How do I keep the ghost's face from smearing?

Make sure the white coats are fully dry before you touch them with the black paint pen. Test the pen on scrap paper so it is not overloaded and blobby. Dot the eyes and smile, then leave the pumpkin alone for a few minutes to set.

Your take belongs here, too.

Changed a detail? Made it simpler? Share a photo of your version and tell the community what worked.

Share your pumpkin

More pumpkins like this

You've reached the end · 8 pumpkins
The Patch Report

Fresh pumpkins, in your inbox.

The best new carvings, ideas worth stealing, and how-tos for carving season. Short, seasonal, and gone by November.

A short email during carving season. Unsubscribe anytime. See our privacy policy.