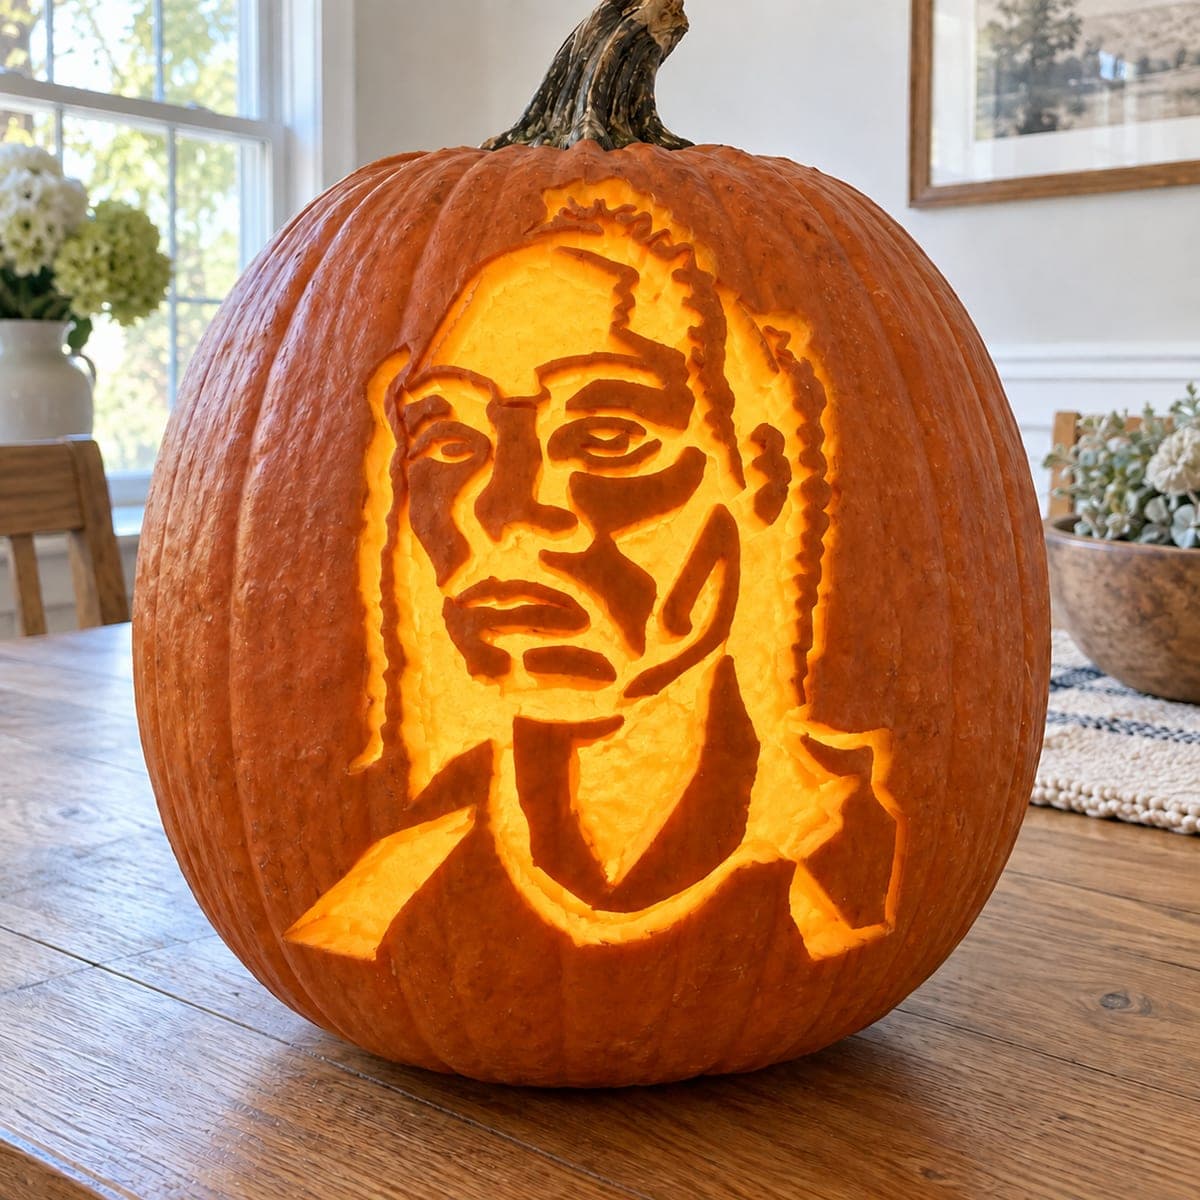
This cutout portrait pumpkin carving idea shows a woman's face with long braided or loc'd hair framing her cheeks, defined brow bones, and a composed expression, all rendered as pierced glowing shapes against the dark pumpkin skin. The cutout technique removes the lit areas of the face and hair strands completely, so the finished jack-o-lantern glows with a web of bright lines tracing the facial structure. Cut the individual hair strand outlines from the part downward so you can keep each lock's bridge connections intact before removing the wider face sections.
This is an AI-generated concept image: a realistic, carvable design idea rather than a photo of a finished carve. AI concepts are always labeled and sit out the leaderboard and the contest.
The core trick here is reading a face as a web of bright lines rather than solid shapes, so the light traces the brow, cheeks, lips, and each strand of hair. Work from a printed stencil taped tightly to the pumpkin, transfer every line by poking holes, then cut the thin hair and facial lines first while the surrounding skin still holds everything steady. Save the largest openings, like the neck and collar, for the very end.
Written by PumpkinCarvingIdeas.com, inspired by the image above. These are our suggestions, not instructions from the uploader. This approach to the AI concept has not been tested on a real pumpkin.
From pumpkin to porch
1
Pick a tall pumpkin and prep it
Choose a large, evenly shaped pumpkin with a broad, flat front so the portrait sits without distortion. Cut a lid from the bottom or back rather than the top, since a back opening keeps the front face clean and lets you set it over an LED light easily. Scoop the inside and thin the front carving wall to about one inch with a scraper. A thinner wall makes the fine lines much easier to cut cleanly.
2
Transfer the stencil carefully
Print the portrait to fit your pumpkin, then tape it flat, snipping the edges so it hugs the curve without wrinkling. Use a poking tool or push pin to dot along every line, spacing dots close together on the tight areas like the eyes and lips. Peel the paper and connect the dots lightly with a marker so you can see the full map. Double check that each hair strand still reads as a separate line before you cut.
3
Cut the thin facial and hair lines first
Start with a fine saw blade on the smallest interior lines, the eyes, brow, nose, and mouth, working from the center outward. Move to the hair strands next, cutting each lock's outline from the part downward as narrow slots. Leave short uncut bridges wherever two strands nearly touch so nothing collapses. Take your time and let an adult handle all blade work.
4
Open the larger face and background shapes
Once the delicate lines are done, remove the wider lit sections of the cheeks, forehead, and the gaps between hair strands. Push each piece gently inward or outward so you do not tear a neighboring bridge. Keep checking the front from a step back to make sure the face still reads as a face and not a blob of holes.
5
Cut the neck and collar openings last
The neck and collar are the biggest openings, so save them for the end when the pumpkin is at its weakest. Cut these in sections rather than one giant hole, leaving the angular collar edges as clean straight lines. Removing them last keeps the front wall rigid while you handle the fine detail above.
6
Light it and take your photo
Drop in a bright LED puck or a string of LED lights, never a candle, since the flame heat can warp thin bridges. Shoot in a dim room so the web of lines glows against the dark skin. If any area looks muddy, widen a cut slightly or shave the inside wall behind it to let more light through.
Gather your supplies
Check things off as you get ready.
Work on a stable surface, keep your free hand out of the cutting path, and have an adult handle sharp tools.
Three levels of light
Leave intact
The outer pumpkin skin and the dark facial planes like the sides of the nose, the shadowed eye sockets, and the gaps within the hair stay untouched so the features read.
Peel & shade
You could skin-peel the cheeks and brow ridges for a soft mid glow if you want gentler transitions between the bright lines and the dark skin.
Cut through
The traced facial lines, the individual hair strands, the neck, and the angular collar are cut all the way through for the brightest light.
How do I keep the thin hair strands from breaking off?
Cut each strand as a narrow slot rather than removing a wide chunk, and leave small uncut bridges wherever two strands almost meet. These bridges hold the surrounding skin in place. Thinning the inside wall also lets you use gentle pressure instead of forcing the blade.
This is a concept image, so can a real pumpkin actually hold all these lines?
Yes, if you simplify slightly and respect bridges. A real portrait like this works best on a large pumpkin with a thinned front wall, and you should keep the finest lines connected rather than fully outlined. Treat the picture as a target and adjust any spot that feels too fragile to cut.
What order keeps the pumpkin strongest?
Always cut the smallest interior lines first while the whole front wall is still solid. Move outward to the wider face shapes, then finish with the largest openings like the neck and collar. Big holes cut early leave the wall floppy and prone to tearing.
Your take belongs here, too.
Changed a detail? Made it simpler? Share a photo of your version and tell the community what worked.


Comments (0)