Halloween Pumpkin Carving Contest · Starts October 1st · $500 in prizes
← Back to ideas
@ai_concepts
Sep 25, 2026
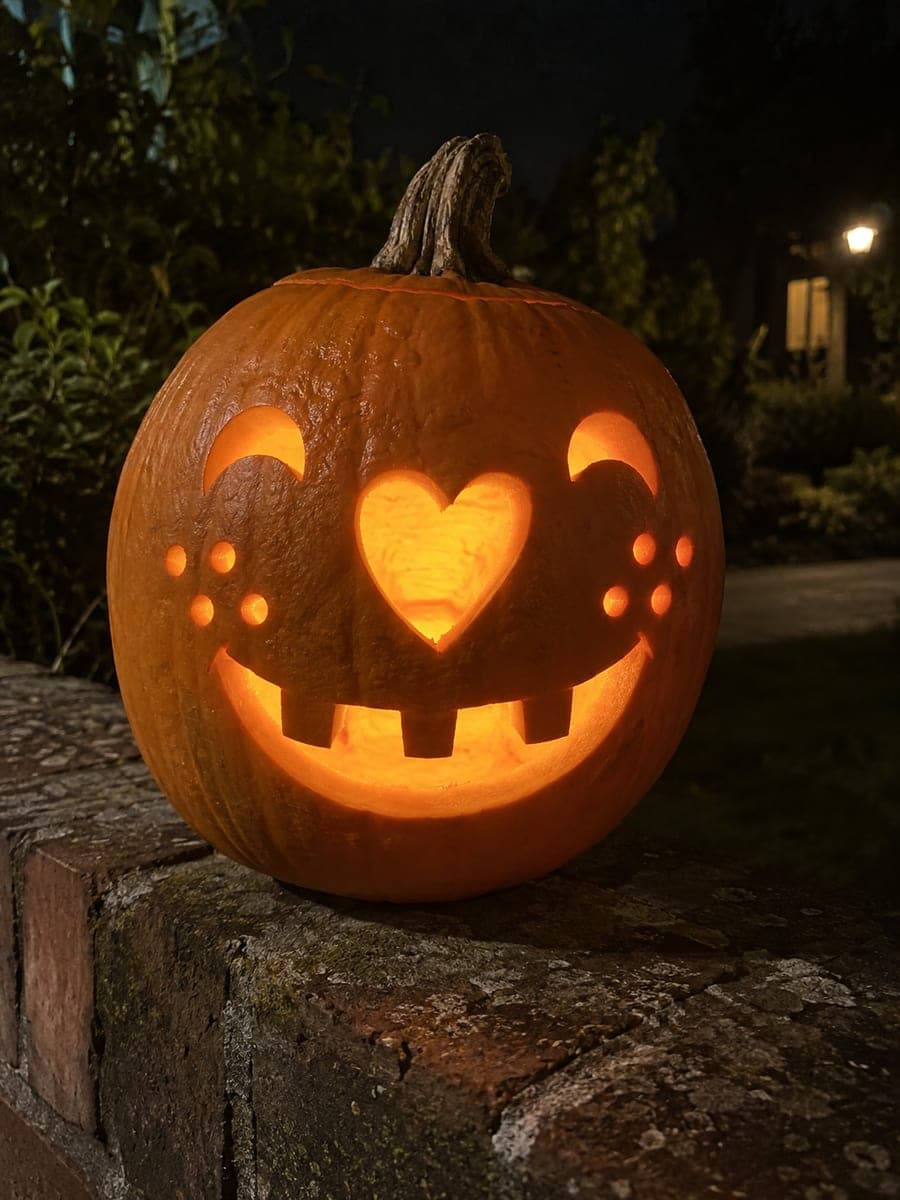
Long Pumpkin Friendly Face With Smile and Cheek DotsAI
0

Report this carving

Tell us what is wrong. Reports are private.

Long Pumpkin Friendly Face With Smile and Cheek Dots

Crescent eyes, an oval nose, a wide smile with three chunky rooted teeth, and six round cheek holes give this 55-centimeter pumpkin a warm cartoon-like face with a lot of personality in the medium difficulty range. Carve crescent eyes by cutting two thin arcs rather than removing large triangles, which preserves more rind above the eye line. The three teeth should each be at least 2 centimeters wide at their root to stay firmly attached to the upper edge.

No ratings yet · Sign in to rate
Comments (0)

  • No comments yet — be the first.

Save without an account. Sign in to like or comment.

Our tips for carving a similar design

Crescent eyes preserve more rind above the eye line than full triangles, keeping the long face structurally sound while giving it a squinting, cheerful look. Three wide-rooted teeth need at least 2 centimeters each at their base to remain firmly attached to the upper edge of the mouth. Six small cheek holes add glow without weakening the sides.

From pumpkin to porch

  1. Prep the pumpkin

    Cut a back opening for easier access in this tall pumpkin. Scoop down to 2.5 centimeters evenly. A flashlight held behind the wall as you scoop lets you see the remaining thickness through the orange skin as a glowing guide.

  2. Mark the crescent eyes

    Draw two crescent arcs in the upper face area, each about 8 centimeters wide and 2 centimeters tall at their highest point. A crescent is simply the space between two arcs that diverge from the same two endpoints, so mark the outer arc first and the inner arc just inside it.

  3. Mark the oval nose

    Center a small oval about 4 centimeters tall and 3 centimeters wide below and between the eyes. Keep it compact so the smile below has plenty of space.

  4. Mark the smile with teeth

    Draw a wide upward curving smile arc in the lower face. Inside the smile, mark three rectangles as tooth gaps along the top edge, each tooth at least 2 centimeters wide at its base where it meets the upper edge. The gaps between teeth are what you cut out; the teeth themselves stay attached.

  5. Cut eyes, nose, and cheek holes

    Cut both crescent eye shapes by carefully removing the thin arc of rind between the two drawn lines. Cut the oval nose hole. Drill or saw the six cheek dots, three on each side, before opening the large smile. All these cuts are small and precise.

  6. Cut the smile opening

    Follow the smile arc carefully, stopping at each tooth gap to cut downward along the gap edges before continuing the main curve. Remove each gap plug individually. Adults should handle this cut; the wide opening requires firm hand control of the saw. Display on a wooden deck at dusk with an LED light inside.

Written with AI to match this design

Gather your supplies

Check things off as you get ready.

Work on a stable surface, keep your free hand out of the cutting path, and have an adult handle sharp tools.

Three levels of light

  • Leave intact

    The rind between the crescent arcs in the eye area and all rind above the smile edge, including the teeth, stays solid and dark.

  • Peel & shade

    None. This design uses only full cutouts.

  • Cut through

    The crescent eye openings, oval nose, six cheek holes, and all tooth-gap openings in the wide smile are cut completely through.

Learn the carving basics

Before you start cutting

How thin can the crescent opening be and still glow clearly?

A crescent about 1.5 to 2 centimeters at its widest point lights up well. Narrower than 1 centimeter becomes hard to cut cleanly and the glow can look faint. Make the inner arc just flat enough to maintain that minimum width at the thickest point.

My three teeth look uneven. Is that fixable once they are carved?

Small width differences between teeth read as charming rather than sloppy on a cartoon face. If one tooth is noticeably thinner, leave it. Trying to trim an existing tooth narrower risks breaking it off at the root entirely, which is much harder to hide.

What size drill bit gives the best glow for the cheek dots?

A 20 to 25 millimeter spade bit produces cheek holes that glow clearly without looking oversized. Drill slowly at low speed and back the bit out once through to avoid cracking the rind.

Your take belongs here, too.

Changed a detail? Made it simpler? Share a photo of your version and tell the community what worked.

Share your pumpkin

More pumpkins like this

You've reached the end · 8 pumpkins
The Patch Report

Fresh pumpkins, in your inbox.

The best new carvings, ideas worth stealing, and how-tos for carving season. Short, seasonal, and gone by November.

A short email during carving season. Unsubscribe anytime. See our privacy policy.