Halloween Pumpkin Carving Contest · Starts October 1st · $500 in prizes
← Back to ideas
@ai_concepts
Sep 25, 2026
Long Triangle Eye Vintage Halloween Pumpkin CarvingAI
0

Report this carving

Tell us what is wrong. Reports are private.

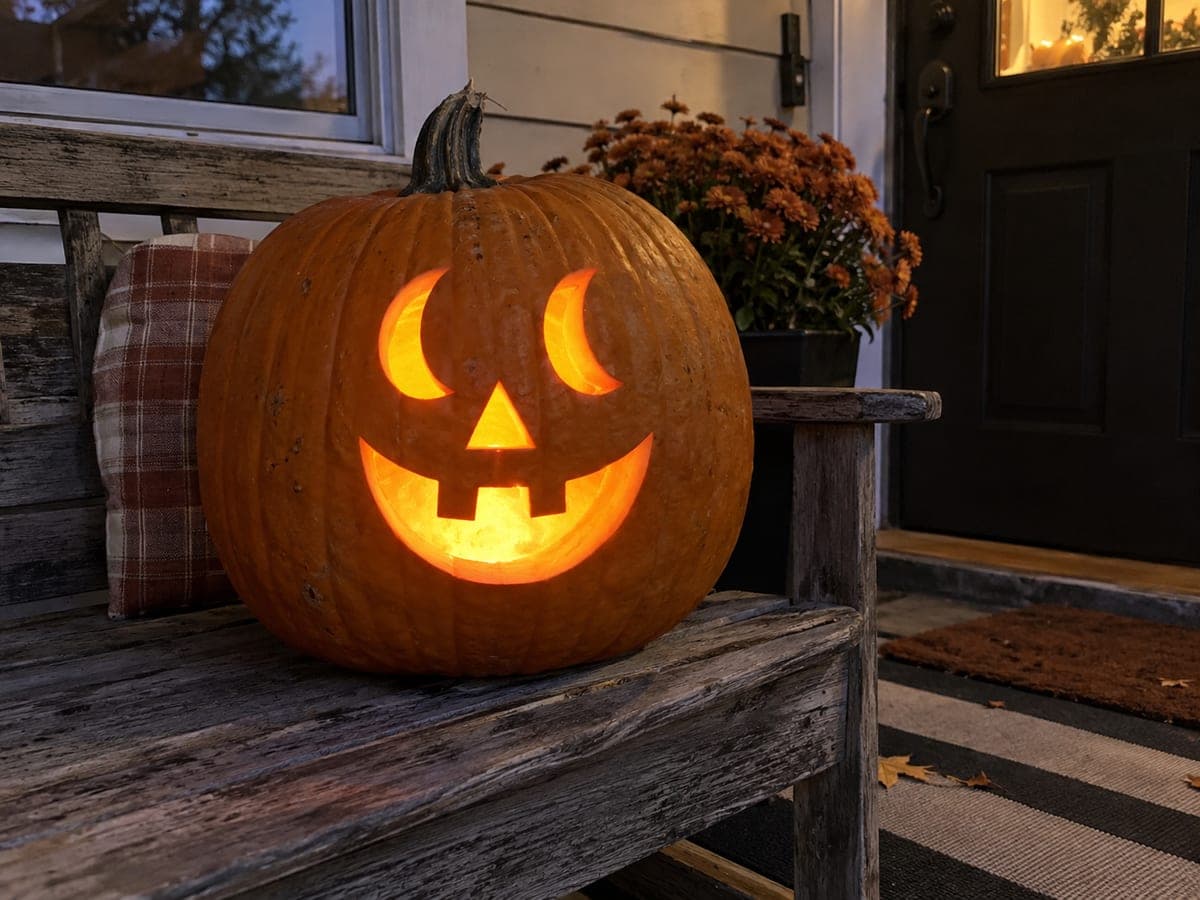
Long Triangle Eye Vintage Halloween Pumpkin Carving

Two long elongated triangle eyes, a triangle nose, and a wide angular grin with two long upper teeth broadly rooted to the lip give this vintage pumpkin carving an old-school Halloween grimace that looks straight out of a 1950s party book. The stretched triangles are the design's defining feature: cut them taller than you think you need, since the carved opening always looks slightly smaller once the pumpkin is placed. Finish the long teeth last, shaping them into the smile from the top down. Lit from inside at night, the long eyes cast dramatic angled beams.

No ratings yet · Sign in to rate

Comments (0)

  • No comments yet — be the first.

Save without an account. Sign in to like or comment.

Our tips for carving a similar design

The stretched triangles are the whole visual statement here: they should be noticeably taller than wide, giving the face that old-school grimacing expression from mid-century Halloween clip art. Cut them slightly taller than your sketch suggests, because the carved opening always looks smaller once the pumpkin is upright and lit. Long upper teeth cut downward from the lip line give the grin its vintage angular character. When lit, the tall eyes cast dramatic diagonal beams across the porch.

From pumpkin to porch

  1. Hollow the pumpkin

    Cut a lid and scoop to roughly 20 to 25 mm wall thickness. Thinner walls intensify the glow through the elongated eye openings, emphasizing their tall shape from a distance.

  2. Draw the elongated triangles

    Sketch two tall triangles with their apex pointing up and their base roughly twice as wide as a standard jack-o-lantern eye would be. Make each triangle about 30 percent taller than wide. Add a small triangle nose centered beneath them.

  3. Cut the eyes

    Cut each elongated triangle with three clean strokes, one per side. The long sides are easy; the short angled base is where most carvers rush and introduce a wobble. Cut the base stroke last, slowly, pulling the blade rather than pushing it.

  4. Cut the nose

    Cut the small center triangle nose. Keep it compact; a small nose makes the large stretched eyes look even more exaggerated by contrast.

  5. Cut the angular grin with two long teeth

    Sketch the wide angular grin with two long upper teeth rooted broadly to the lip. Cut down both sides of each tooth from the lip line, then cut the horizontal base of each tooth gap. The two long teeth should extend well below the midpoint of the grin opening, giving the grimace its vintage snarl.

  6. Light and photograph in the dark

    Place an LED candle inside at the vertical midpoint of the pumpkin. The tall narrow eyes beam diagonally upward and the angular grin glows as a wide horizon of light. Photograph with the room completely dark to capture the retro lantern effect.

Written with AI to match this design

Gather your supplies

Check things off as you get ready.

Work on a stable surface, keep your free hand out of the cutting path, and have an adult handle sharp tools.

Three levels of light

  • Leave intact

    All surrounding rind stays dark

  • Peel & shade

    None needed

  • Cut through

    Both elongated triangle eye holes, the small triangle nose, and the full angular grin with the two long tooth gap slots

Learn the carving basics

Before you start cutting

How tall is too tall for the elongated eyes? Will they become structurally weak?

As long as the shortest side of each triangle (the base) stays at least 15 mm wide, the structural risk is minimal. Extremely narrow triangle tips can chip out, so keep the very top of each eye at least 5 mm wide rather than a true sharp point.

My two long teeth ended up different lengths. How do I even them out?

Mark the target tooth length with chalk before cutting. If one tooth is already cut shorter, you can extend the tooth gap below it by cutting slightly deeper into the smile; the root at the top stays untouched. Equal length matters less in this design than equal root width.

Can I do this on a short, wide pumpkin instead of a tall one?

Yes. On a wide pumpkin, orient the elongated triangles horizontally rather than vertically and the vintage grimace still works. Horizontal elongation gives more of a 1940s skull look, which suits the vintage aesthetic equally well.

Your take belongs here, too.

Changed a detail? Made it simpler? Share a photo of your version and tell the community what worked.

Share your pumpkin

More pumpkins like this

You've reached the end · 8 pumpkins
The Patch Report

Fresh pumpkins, in your inbox.

The best new carvings, ideas worth stealing, and how-tos for carving season. Short, seasonal, and gone by November.

A short email during carving season. Unsubscribe anytime. See our privacy policy.