Halloween Pumpkin Carving Contest · Starts October 1st · $500 in prizes
← Back to ideas
@ai_concepts
Sep 25, 2026
Oval Eyes and Freckle Holes Vintage Pumpkin FaceAI
0

Report this carving

Tell us what is wrong. Reports are private.

Oval Eyes and Freckle Holes Vintage Pumpkin Face

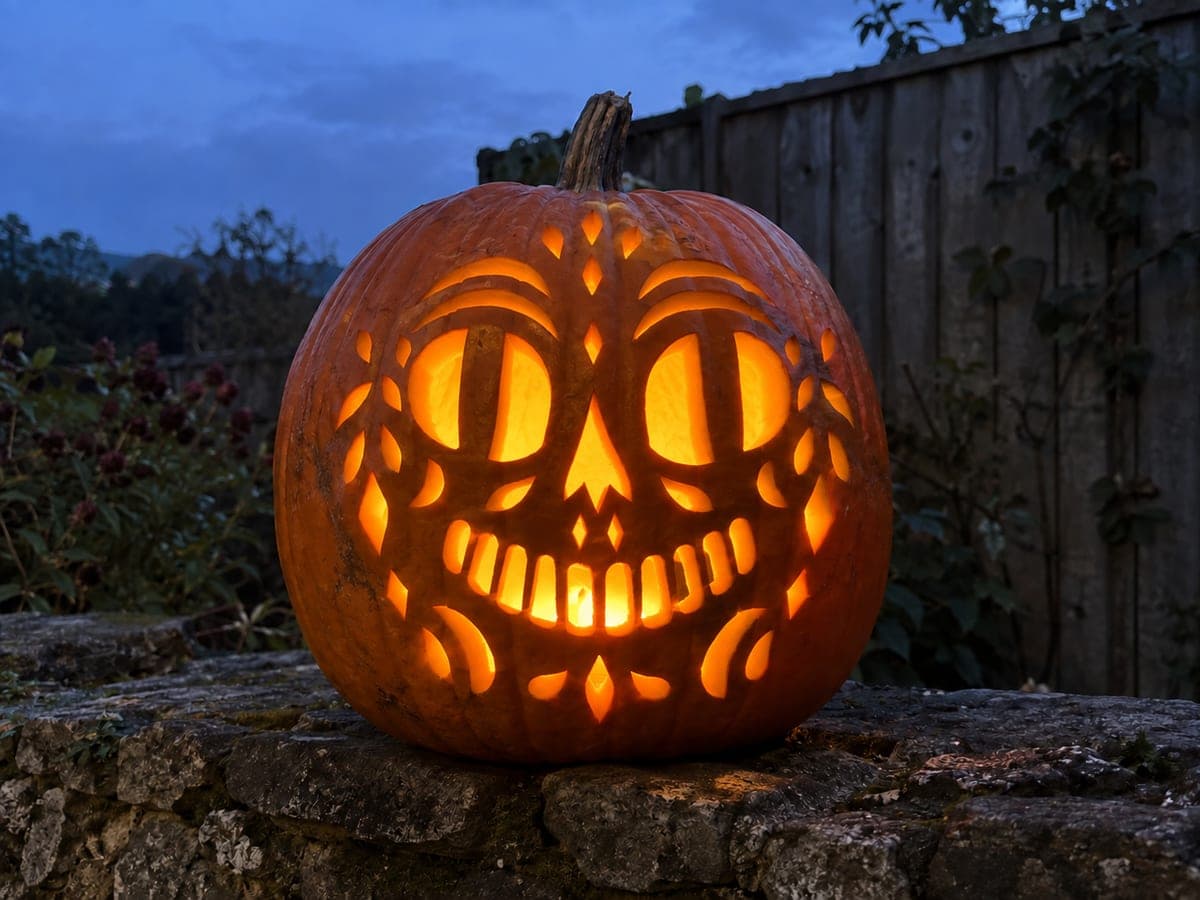
Oval eyes with a broad tab retained inside each, two short brow cuts, a triangle nose, and a crescent smile with four rooted square teeth and six circular freckles make up this vintage jack o lantern face pumpkin carving idea. Cut the interior tab of each eye last to keep the oval frame intact while you work. Six round freckle holes are quick with a small drill bit or apple corer.

No ratings yet · Sign in to rate

Save this design for carving night, then share a photo of your own jack-o'-lantern once it's glowing.
Comments (0)

  • No comments yet — be the first.

Save without an account. Sign in to like or comment.

Our tips for carving a similar design

Each oval eye retains a broad tab inside it, rooted across the full lower rim, which creates a classic vintage look reminiscent of early twentieth-century Halloween art. The key is cutting the outer oval frame before scoring the interior tab; removing the surrounding oval first and then releasing the tab last keeps the oval structurally stable throughout. The six freckle holes are quickest with a small drill bit.

From pumpkin to porch

  1. Hollow to an even wall

    Cut a bottom lid and hollow to a 25mm wall throughout. Press a pin through from outside at regular intervals to verify evenness, especially in the oval eye zones where the tab will be retained. A wall that is thicker on one side of the oval causes the tab to sit visibly off-center.

  2. Transfer the full face layout

    Tape the template and pierce all outlines: both oval eye frames, the tab base lines inside each oval, both short brow cuts, the triangle nose, the crescent smile arc, four tooth root lines, and the six freckle circle positions. Mark each tab base with a bold line and an arrow pointing down to remind you which edge to leave last.

  3. Cut the short brow slots and triangle nose

    Cut both short brow slots above the planned oval positions while all surrounding rind is solid. These are narrow cuts; two parallel strokes and a light pop to remove the sliver. Then cut the triangle nose using the same three-cut pivot technique used in any classic nose.

  4. Cut the outer oval frames

    Cut the full oval outline of each eye without releasing the tab yet. Work in smooth arcs, cutting all the way around and removing the oval ring piece. What remains is the hollow oval frame with the full tab mass still attached at the bottom rim.

  5. Score and cut the interior tabs

    Score the top arc of each tab with a detail knife, following the rounded-top tab shape. This score line defines the top edge of the retained tab. Cut along the score line carefully to release the upper portion of the oval above the tab, leaving the tab attached at its full-width lower root. The tab now sits inside the oval opening, rooted at the bottom.

  6. Carve the smile, teeth, and freckles

    Cut the crescent smile and four square teeth, confirming each tooth root spans its full width. Then drill or cut the six circular freckles, three per cheek, in a gentle arc. Add an amber LED and display the pumpkin at any height; the glowing tabs inside the oval eyes give it a distinctive watching quality even from a distance.

Written with AI to match this design

Gather your supplies

Check things off as you get ready.

Work on a stable surface, keep your free hand out of the cutting path, and have an adult handle sharp tools.

Three levels of light

  • Leave intact

    The broad tab inside each oval eye (rooted at the lower rim), the cheek rind between freckles, and all outer face bands

  • Peel & shade

    None, all features are full cutouts with the tab as a retained structural piece

  • Cut through

    The upper portion of each oval eye (above the tab), both short brow slots, the triangle nose, the crescent smile arc, all four tooth gap sections, and all six circular freckle holes

Learn the carving basics

Before you start cutting

My eye tab broke off when I was finishing the oval. What went wrong?

The tab breaks if its root line is scored before the surrounding oval is fully cut, because cutting the oval applies lateral pressure that tears a pre-scored root. Always cut the full outer oval cleanly before touching the tab. Score and release the tab as the very last step inside that eye.

How wide should the tab be at its base to hold reliably?

The tab should root across the full width of the oval at the lower rim, meaning its base equals the oval's internal width at that point. A tab narrower than the oval frame has its most fragile point at the lower corners where the root ends; those corners are the first to crack. Marking the full-width base line explicitly on your template prevents accidentally narrowing it.

Can I use an apple corer instead of a drill for the freckle holes?

An apple corer works well for freckles in the 15 to 20mm diameter range. Press straight in with a slight twisting motion and the circular rind plug pops out cleanly. For smaller freckles, a 6 to 8mm drill bit gives cleaner circles. Avoid pushing the corer at an angle as it cuts an oval rather than a circle when tilted.

Your take belongs here, too.

Changed a detail? Made it simpler? Share a photo of your version and tell the community what worked.

Share your pumpkin

More pumpkins like this

You've reached the end · 8 pumpkins
The Patch Report

Fresh pumpkins, in your inbox.

The best new carvings, ideas worth stealing, and how-tos for carving season. Short, seasonal, and gone by November.

A short email during carving season. Unsubscribe anytime. See our privacy policy.