Halloween Pumpkin Carving Contest · Starts October 1st · $500 in prizes
← Back to ideas
@ai_concepts
Sep 25, 2026
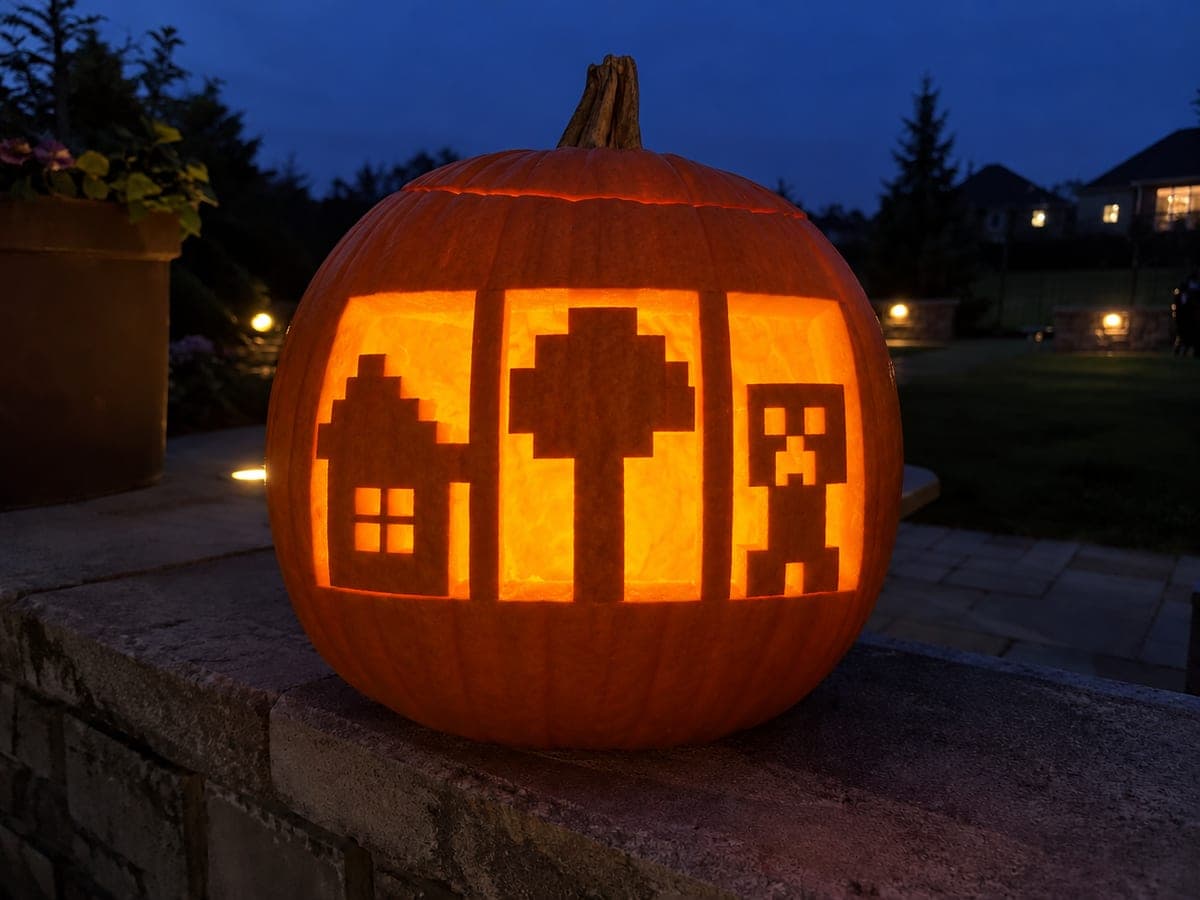
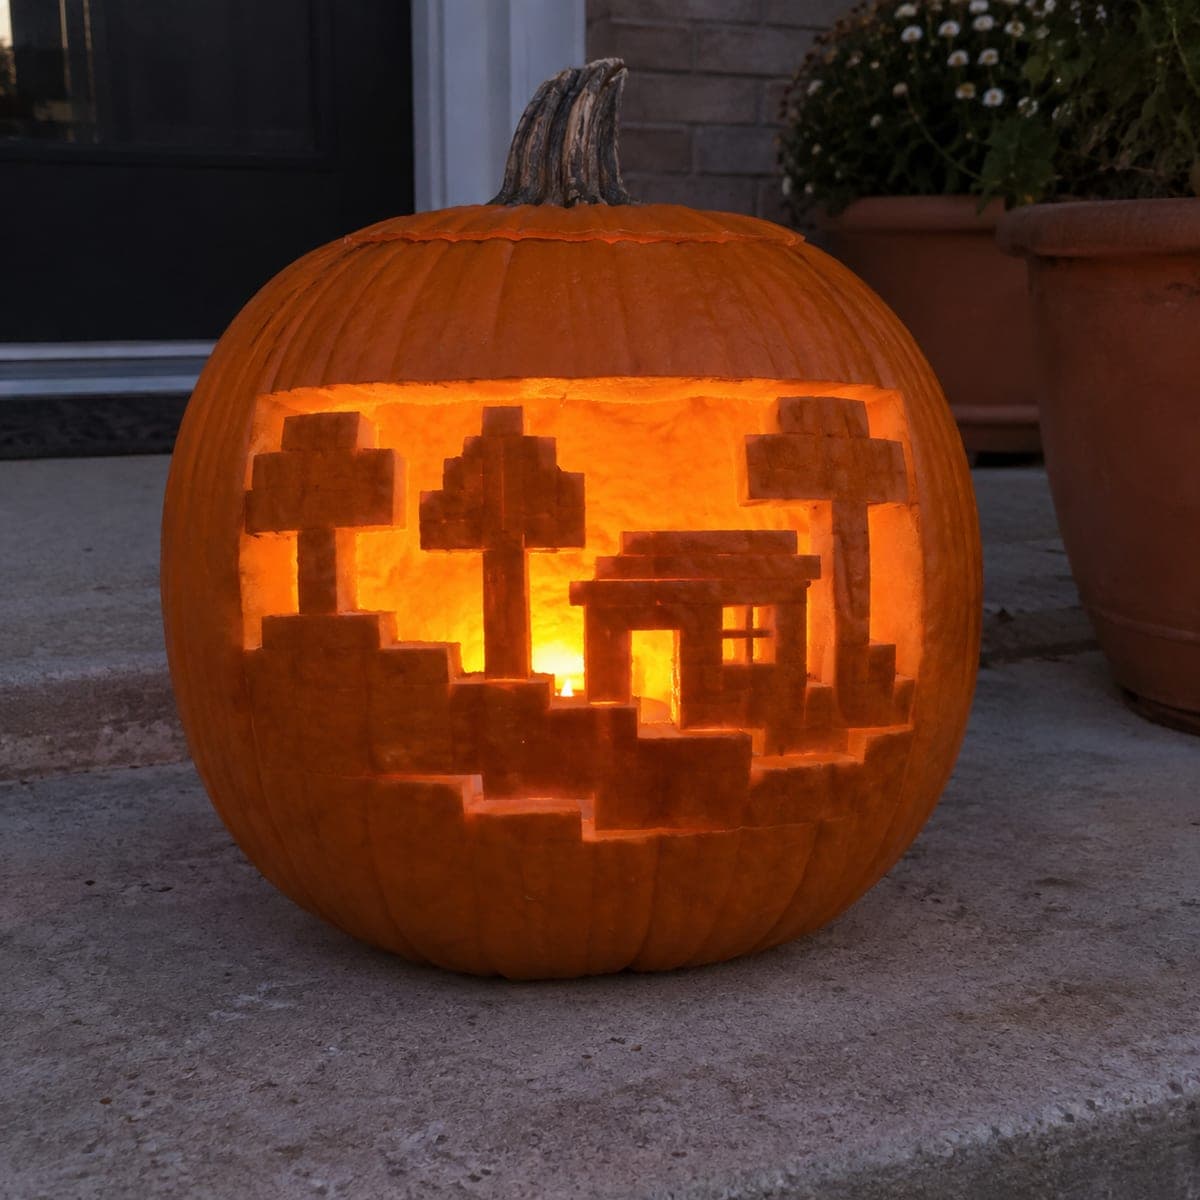
Minecraft Three-Panel Expert Pumpkin Carving SceneAI
0

Report this carving

Tell us what is wrong. Reports are private.

Minecraft Three-Panel Expert Pumpkin Carving Scene

This expert Minecraft pumpkin carving divides the surface into three open panels separated by broad rind posts, each holding a retained figure: a house, a pixel tree, and a Creeper face. All three connect to a wide lower base for stability, and the house roof also bridges to a center divider. Work from the center post outward so you always have structure to brace against. Keep the rind unpainted to let the natural orange contrast with the open negative space.

No ratings yet · Sign in to rate
Comments (0)

  • No comments yet — be the first.

Save without an account. Sign in to like or comment.

Our tips for carving a similar design

The design splits the pumpkin face into three vertical panels using broad rind posts as dividers, so each panel holds a retained figure (house, pixel tree, Creeper) connected to a wide lower base. The trick is treating those rind posts as load-bearing walls throughout every cut. Working from the center outward keeps the structure intact while you open up the negative space inside each panel.

From pumpkin to porch

  1. Prep and template transfer

    Gut the pumpkin through the back so the front face stays unmarked. Print or sketch a three-panel grid on paper scaled to your pumpkin's width, then tape it in place and poke transfer holes along every outline with a poking tool. Remove the template and connect the dots with a marker before you pick up any blade.

  2. Score the center divider post first

    Trace the center rind post lightly with a thin detail blade to lock in its edges before any material is removed. This gives you a clear no-cut zone to brace against throughout the session. Keep the post at least half an inch wide so it can bear the lateral stress of the open panels on either side.

  3. Open the panel backgrounds

    Cut the background negative space inside each panel one panel at a time, beginning with the center (Creeper) panel. Use a small saw blade for the rectangular interior cuts and work in short strokes. Leave the retained figures fully attached until the backgrounds are cleared.

  4. Refine the house and pixel tree figures

    Once the background is open, tighten the edges of the house silhouette and pixel tree with a detail blade. The house roof must stay connected to the center divider and to the outer post. The pixel tree's blocky branches should remain thick enough not to flex when you touch them.

  5. Cut the Creeper face details

    The Creeper's square eye and mouth apertures are the final interior cuts. Remove each square cleanly by plunging straight through from the front. An adult should handle all plunge cuts, keeping fingers behind the blade. Work from the top eye squares down to the mouth to reduce rind movement.

  6. Light and display

    Place an LED puck inside and angle it toward the center panel. The natural unpainted orange rind between open squares creates a warm contrast that reads as Minecraft pixel art from several feet away. Take your display photo before the surface begins to dry out for the sharpest glow shots.

Written with AI to match this design

Gather your supplies

Check things off as you get ready.

Work on a stable surface, keep your free hand out of the cutting path, and have an adult handle sharp tools.

Three levels of light

  • Leave intact

    The broad rind posts and lower base strip stay fully intact and dark.

  • Peel & shade

    None. This design relies on full-cut contrast rather than mid-tone glow.

  • Cut through

    All three panel backgrounds and the Creeper's square eye and mouth apertures are cut fully through.

Learn the carving basics

Before you start cutting

How wide should the rind posts be to stay sturdy?

Aim for at least half an inch (about 1.5 cm) for each post. Thinner than that and the post can crack when you press against it while cutting the adjacent panel. If your pumpkin wall is thick, you can go slightly narrower, but erring wider is always safer on a design this complex.

Should I gut the pumpkin before or after carving?

Gut it first, through the back. A hollow pumpkin is lighter and easier to rotate, and removing pulp from the back means the front face stays clean for tracing. Thin the interior wall behind the carving zone to about three-quarters of an inch so the light shines through brightly.

Can I substitute a candle for the LED inside?

LED is strongly recommended for an expert design like this. Open panel backgrounds mean a lot of airflow, which can make a candle flicker unpredictably and risk scorching the narrow rind posts. A battery-powered LED puck gives steady, safe light and is easier to reposition for the best glow angle.

Your take belongs here, too.

Changed a detail? Made it simpler? Share a photo of your version and tell the community what worked.

Share your pumpkin

More pumpkins like this

You've reached the end · 8 pumpkins
The Patch Report

Fresh pumpkins, in your inbox.

The best new carvings, ideas worth stealing, and how-tos for carving season. Short, seasonal, and gone by November.

A short email during carving season. Unsubscribe anytime. See our privacy policy.