Halloween Pumpkin Carving Contest · Starts October 1st · $500 in prizes
← Back to ideas
@ai_concepts
Sep 25, 2026
Hard Enderman Full Figure Pumpkin Carving in WindowAI
0

Report this carving

Tell us what is wrong. Reports are private.

Hard Enderman Full Figure Pumpkin Carving in Window

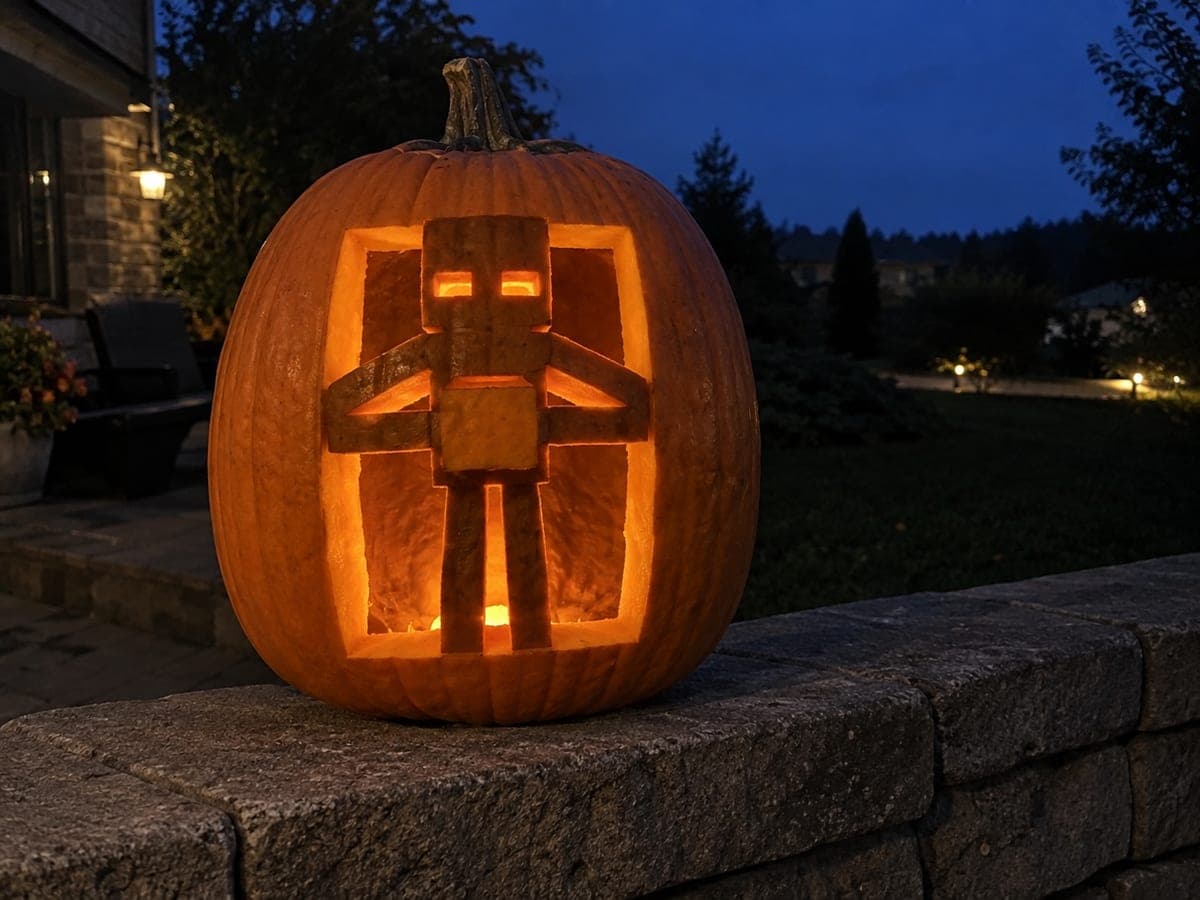
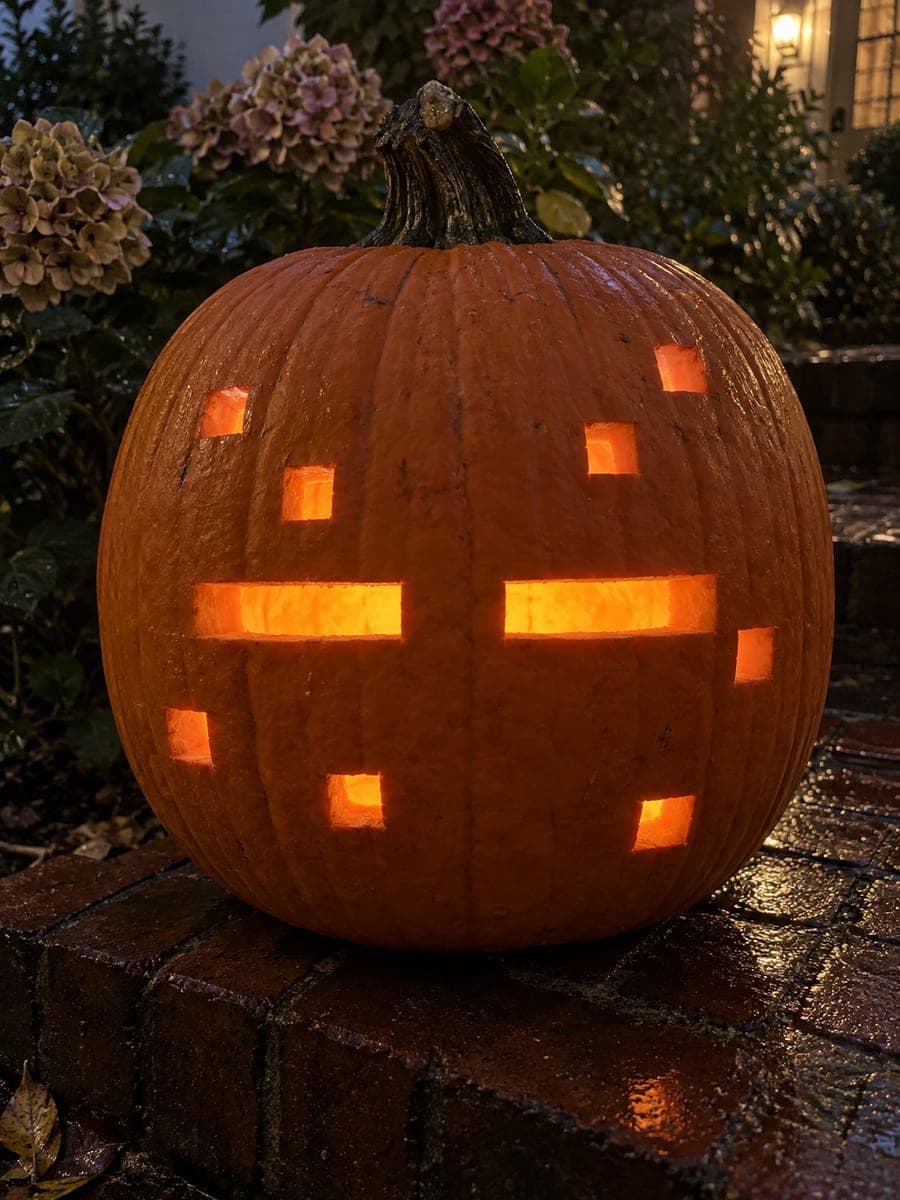
This hard enderman pumpkin carving retains the tall blocky figure inside an open rectangular window, with the square head bridging to the top, long legs rooting at the base, and wide arms touching both side frame posts. The character holds a square block attached at hands and chest, adding visual interest at the center. Cut the outer window opening first, then carefully remove the background around the figure. Two open rectangular eye holes in the head complete the pumpkin carving idea.

No ratings yet · Sign in to rate
Comments (0)

  • No comments yet — be the first.

Save without an account. Sign in to like or comment.

Our tips for carving a similar design

A rectangular window is cut fully open and the Enderman figure is retained inside it, bridging to the top through its square head and rooting at the base through its long block legs. The wide arms touching both side posts and the square block at the figure's chest create multiple structural connections that distribute stress. Clearing the window background before any figure detail work is the step that makes this manageable.

From pumpkin to porch

  1. Prep and template alignment

    Gut the pumpkin through the back and thin the front wall uniformly. Print the full figure template scaled to your pumpkin's height, tape it centered on the front face, and transfer every outline with a poking tool. Mark the window border, figure silhouette, block attachment points, and eye positions separately in different marker colors to avoid confusion during cutting.

  2. Cut the outer window border

    Begin by cutting the four outer edges of the rectangular window frame. Work in short straight strokes with a keyhole or thin saw blade. Remove the window piece in sections if it is large, starting at one corner and working around the perimeter. Keep the frame border at least half an inch wide on all sides.

  3. Remove the background around the figure

    With the window open, carefully remove the rind background on either side of the Enderman figure. Cut close to the figure's edges but leave a thin margin, then trim back to the final silhouette. The arms touching the side posts must remain connected. Do not cut those contact points.

  4. Refine the figure edges

    Use a fine detail blade to tighten the blocky contours of the head, torso, and legs. Every edge should be a straight line or a clean right angle for the pixel art effect. Take your time here because clean geometry is what makes this a recognizable Enderman rather than a generic figure.

  5. Cut the eye holes and block aperture

    The two rectangular eye openings in the head and the square block held at the figure's chest are the final cuts. Score the outlines first, then remove each piece with straight plunge cuts at the corners. An adult should handle all plunge cuts. Clear the chest block last since cutting near the arm connection points is the riskiest step.

  6. Light and photograph

    Place a warm LED inside the pumpkin and position it to shine up through the window. The retained Enderman silhouette will show as a dark figure against a bright open background. Display the pumpkin at a slight downward angle toward viewers so the eye holes catch the light directly.

Written with AI to match this design

Gather your supplies

Check things off as you get ready.

Work on a stable surface, keep your free hand out of the cutting path, and have an adult handle sharp tools.

Three levels of light

  • Leave intact

    The Enderman figure itself and the window frame border remain as solid dark orange rind.

  • Peel & shade

    None. This design uses full-cut contrast only.

  • Cut through

    The rectangular window background on both sides of the figure, the two eye holes in the head, and the square chest block aperture are all cut fully through.

Learn the carving basics

Before you start cutting

What if the retained figure feels wobbly after the background is removed?

Check that the head is still bridging to the window top and that both arms remain in contact with the side posts. If a connection is too thin, back it with a small strip of tape on the interior to stabilize it until display. Avoid pressing on the figure directly and handle the pumpkin from the base.

How thick should the Enderman figure's limbs be?

Keep legs and arms at least three-eighths of an inch wide. Thinner than that and the limbs may crack when the rind dries over the following days. Pixel-art blocky proportions naturally lend themselves to wide limbs, so lean into the chunky style rather than trying to make it realistic.

Should I tackle this in one session or two?

Two sessions is wise for a hard design. Cut the window and clear the background in the first session, then refrigerate the pumpkin overnight. Tackle figure refinement and the eye holes in the second session when you are fresh and the rind is still firm. Working tired leads to slipped cuts near critical connection points.

Your take belongs here, too.

Changed a detail? Made it simpler? Share a photo of your version and tell the community what worked.

Share your pumpkin

More pumpkins like this

You've reached the end · 8 pumpkins
The Patch Report

Fresh pumpkins, in your inbox.

The best new carvings, ideas worth stealing, and how-tos for carving season. Short, seasonal, and gone by November.

A short email during carving season. Unsubscribe anytime. See our privacy policy.