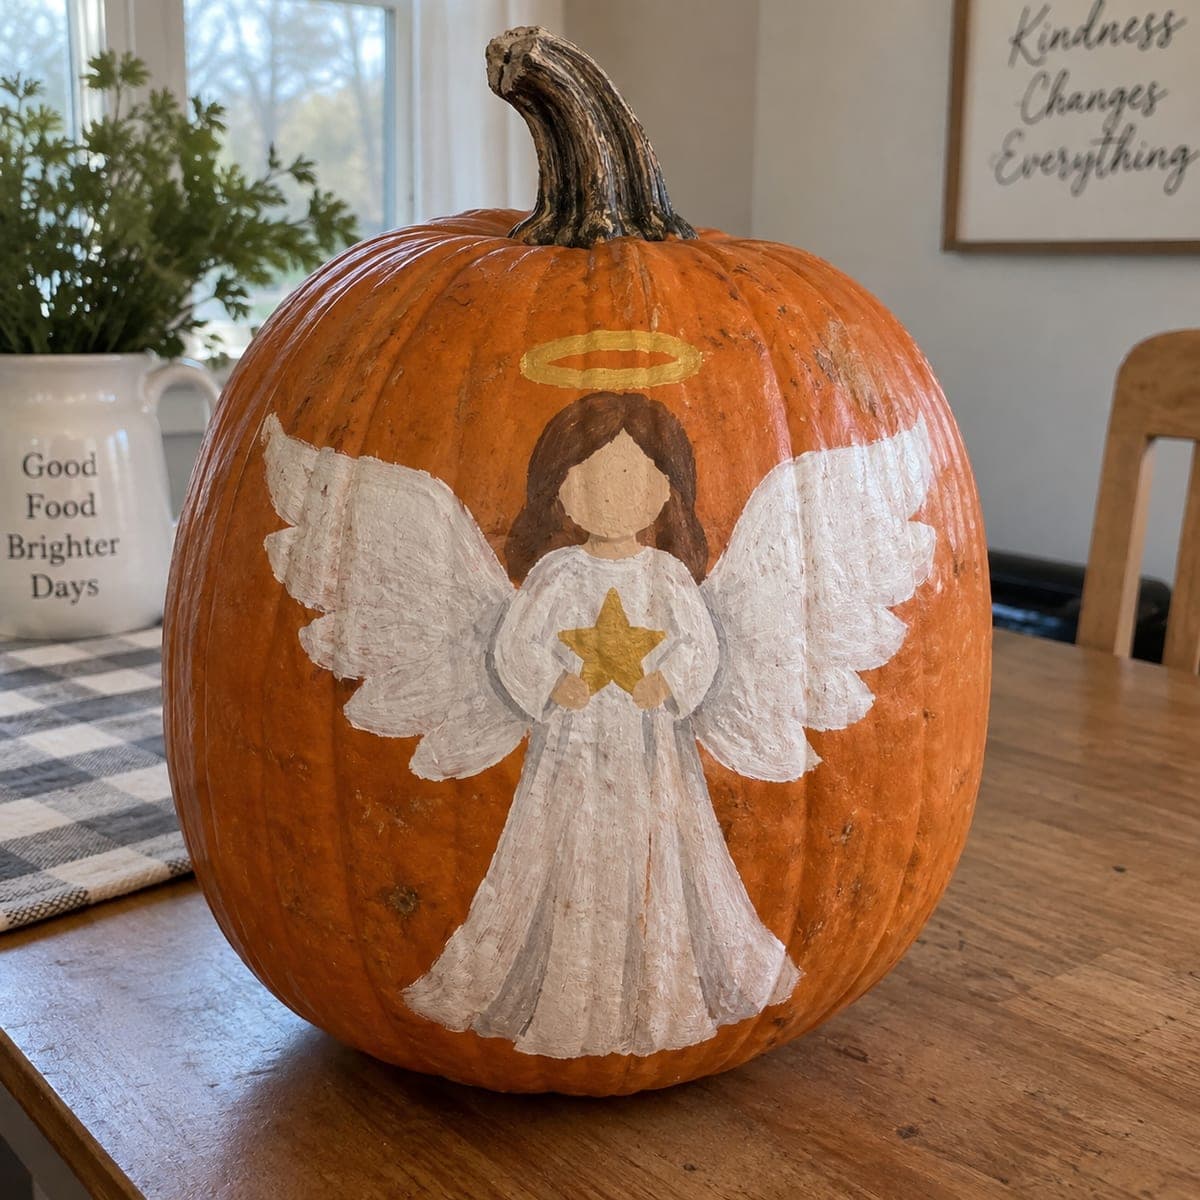
A white-robed angel figure with outstretched wings and a golden halo is painted on the front of a large orange pumpkin, holding a bright gold star. The no-carve design uses acrylic paint layered over a white gesso base so the colors pop against the uncut surface. Sketch the figure lightly in pencil first, fill in white wings before adding detail lines, and seal with a matte varnish once dry so it lasts through the season. This style suits an indoor holiday or Thanksgiving tablescape as well as a porch display.
This is an AI-generated concept image: a realistic, carvable design idea rather than a photo of a finished carve. AI concepts are always labeled and sit out the leaderboard and the contest.
The core trick here is a white gesso base that makes the acrylic angel, wings, and gold star pop against the untouched orange skin. Because nothing is cut, the pumpkin stays sturdy and display-ready for weeks, so the whole plan is about clean sketching, patient paint layers, and a protective seal. Keep in mind this is a concept image, so treat it as one way you could recreate the look at home.
Written by PumpkinCarvingIdeas.com, inspired by the image above. These are our suggestions, not instructions from the uploader. This approach to the AI concept has not been tested on a real pumpkin.
From pumpkin to porch
1
Clean and sketch the figure
Wipe the pumpkin down with a damp cloth and let it dry fully so paint will grip. Pick the flattest front panel and sketch the angel lightly in pencil, starting with the body, then the halo, wings, and star. Keep the figure centered and leave room at the base for the flared robe. Pencil lines can be erased or painted over, so work loosely at first.
2
Lay down a gesso base
Brush a thin coat of white gesso or white acrylic over the areas that will be light: the robe, both wings, and the halo ring. This base keeps the orange from bleeding through and makes later colors read true. Let it dry completely, then add a second coat if the orange still shows. A dry base is the difference between muddy and crisp final colors.
3
Fill the wings and robe
Paint the wings and robe solid white first, working in the direction the feathers and fabric would fall. Load the brush lightly so you get soft, streaky strokes rather than heavy blobs. Leave the halo and star areas unpainted for now so you do not smear the gold into the white. Let everything dry before moving on.
4
Add the gold star, halo, and hair
Fill the star and the thin halo ring with gold or metallic yellow acrylic, using a small round brush for clean points on the star. Paint the hair in brown and the face and hands in a soft skin tone. Keep the star centered where the hands meet so the figure looks like it is holding it. Small details go on last, so save the finest lines for a liner brush.
5
Outline and shade the details
With a fine brush, add light gray shading along the robe folds and the inner wing lines to give the figure depth. Outline the wings gently so they separate from the white robe. Add tiny highlights on the star tips if you want extra shine. Step back often to check that the shading stays subtle rather than heavy.
6
Seal and stage the display
Once every layer is bone dry, brush or spray on a matte varnish to protect the paint from moisture and handling. Let the seal cure per the label before you move the pumpkin. Set it on a tablescape or covered porch out of direct rain, and tuck a battery LED nearby for a warm glow. Snap your photo in soft light so the gold star catches the eye.
Gather your supplies
Check things off as you get ready.
Work on a stable surface, keep your free hand out of the cutting path, and have an adult handle sharp tools.
Three levels of light
Leave intact
The orange skin around the angel stays untouched and reads as the warm dark background for the whole scene.
Peel & shade
If you want a soft glow behind the figure, lightly skin-peel a halo of orange around the wings so it warms up without cutting through.
Cut through
For a hybrid look you could cut only the small star or the halo ring through the skin so those two accents shine brightest, saving those openings for last.
Do I need to gesso or can I paint straight onto the pumpkin?
You can paint directly, but the orange will show through white and turn it dull. A white gesso base under the robe, wings, and halo blocks that color so your whites stay bright. It also gives the acrylic a slightly toothy surface to grip, which helps the paint last.
How do I keep the star and gold looking crisp?
Let the surrounding white dry fully before adding gold so the colors do not blend into a smear. Use a small round brush and pull each star point outward in one stroke for clean tips. Metallic acrylics often need two coats to look solid over a light base.
Will this design last on a porch?
Sealed with matte varnish and kept out of direct rain, a painted pumpkin can hold up for several weeks, longer than any carved one. Cold, covered porches work well, but bring it in during hard freezes or storms. A real uncarved pumpkin stays firm much longer than a cut one, which is part of the appeal here.
Your take belongs here, too.
Changed a detail? Made it simpler? Share a photo of your version and tell the community what worked.
Comments (0)