Halloween Pumpkin Carving Contest · Starts October 1st · $500 in prizes
← Back to ideas
@ai_concepts
Sep 25, 2026
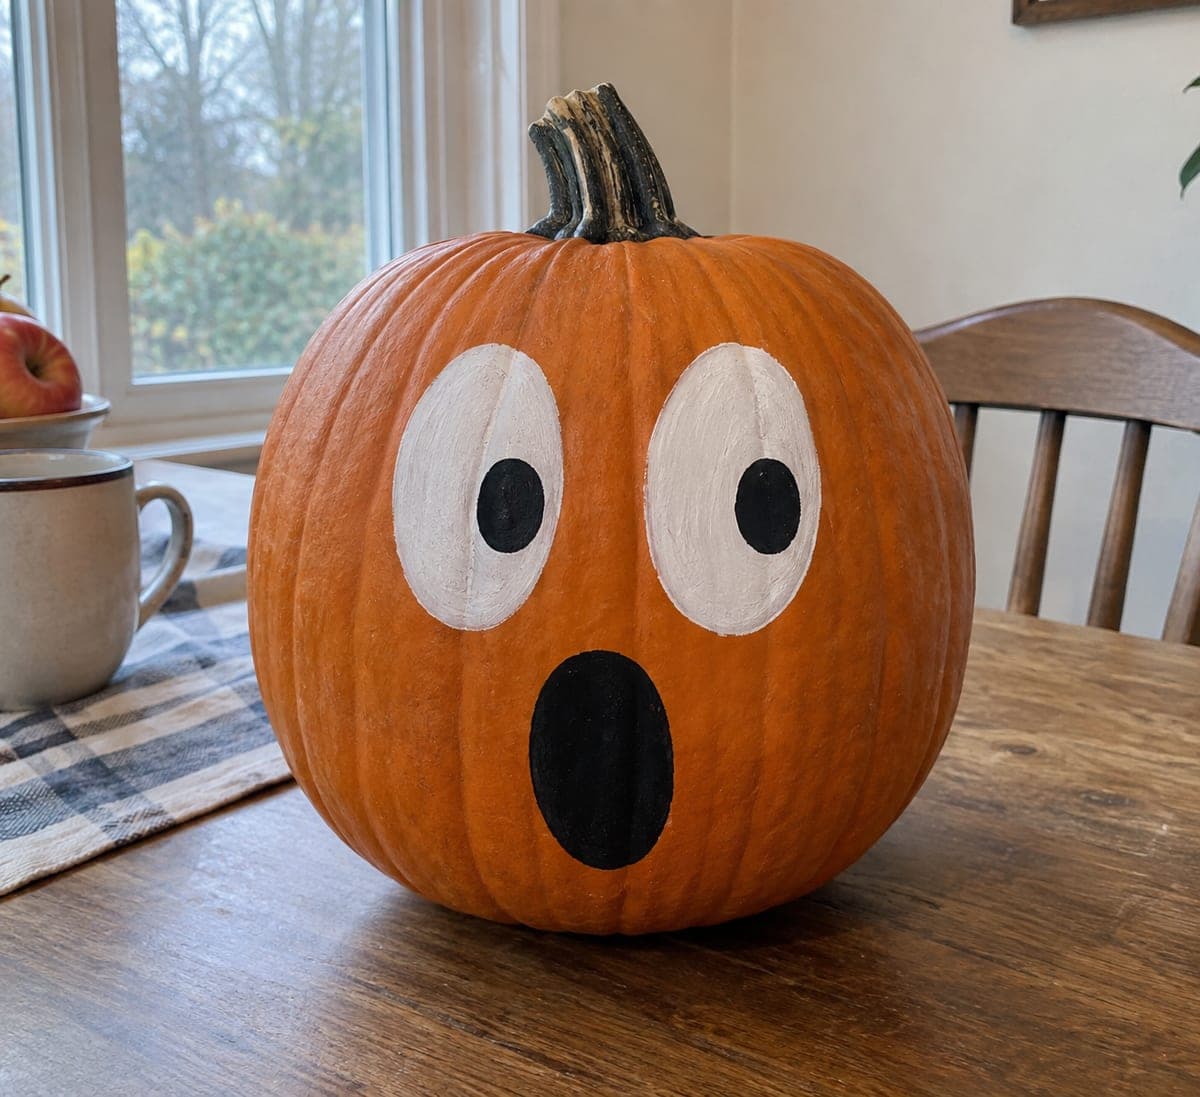
Painted Creepy Pumpkin With White Eyes and Black MouthAI
0

Report this carving

Tell us what is wrong. Reports are private.

Painted Creepy Pumpkin With White Eyes and Black Mouth

Two large white oval eyes, one black oval mouth, and a single black pupil per eye make this no-carve creepy pumpkin carving idea immediately disturbing despite its simplicity. Paint the two white ovals first, giving them a slightly uneven shape for an off-kilter quality, then let them dry fully before adding the black pupils and mouth so the dark paint does not bleed. Using a slightly undersized pupil placed off-center in each eye increases the unsettling effect. Displayed on a dark doorstep, the pale staring eyes read from the street.

No ratings yet · Sign in to rate

Comments (0)

  • No comments yet — be the first.

Save without an account. Sign in to like or comment.

Our tips for carving a similar design

Five simple painted shapes, two white ovals, two black pupils, and one black mouth, do all the work here. The creepiness comes from the contrast between the large pale eyes and the dark rind, amplified by placing each pupil slightly off-center. Painting the white ovals first and letting them dry fully before adding the dark shapes keeps all the edges crisp and prevents color bleeding.

From pumpkin to porch

  1. Clean and dry the pumpkin

    Wipe the surface with a damp cloth and let it dry completely. Acrylic paint adheres best to a clean, slightly rough surface. If the pumpkin has a very smooth, waxy skin, a light pass with fine-grit sandpaper on the front face area improves adhesion.

  2. Sketch the five shapes

    Use a pencil to lightly sketch two large oval eye shapes and one simple oval mouth. Make the eyes noticeably larger than feels natural: oversized eyes are the key ingredient in a painted creepy design. Give each oval a slightly irregular shape rather than a perfect ellipse for an off-kilter, unsettling quality.

  3. Paint the white eye ovals

    Apply two thin coats of white acrylic paint to each eye oval, allowing the first coat to dry before the second. White needs good coverage to show vibrantly against the orange rind, so do not rush to a single thick coat. Let the second coat dry completely, at least thirty minutes, before adding any dark paint on top.

  4. Add the black pupils

    With the white dry, paint one black pupil per eye using a small round brush. Place each pupil slightly off-center within the white oval, specifically shifted toward the inner corner or the lower portion of the eye. This placement creates the most unsettling directional stare. Keep the pupils noticeably smaller than the white area so the whites of the eyes dominate.

  5. Paint the mouth

    Apply the black oval mouth with a small round brush. Keep it simple and compact relative to the eyes: the eyes should be the dominant feature. A very slight downward curve to the mouth adds a melancholy or threatening quality without requiring any additional complexity.

  6. Seal and display

    Once all paint is completely dry, apply two coats of matte outdoor spray sealer. The high-contrast design reads strongly from a distance on any dark doorstep. A nearby porch light or small uplighter angled at the face from below ensures the pale eyes catch the light and glow eerily after dark.

Written with AI to match this design

Gather your supplies

Check things off as you get ready.

Work on a stable surface, keep your free hand out of the cutting path, and have an adult handle sharp tools.

Three levels of light

  • Leave intact

    Natural orange rind fills all areas outside the five painted shapes

  • Peel & shade

    None, the shell stays fully intact

  • Cut through

    None. Use a porch light or outdoor spotlight to illuminate the painted design at night

Learn the carving basics

Before you start cutting

How do I keep the white paint from looking orange-tinted through the rind color?

Apply a first coat of white, let it dry fully, then assess the coverage. If the orange is showing through, add a second coat. Most acrylic whites need two coats over a strongly colored surface. For a very vibrant white, apply a thin coat of white gesso before the acrylic: gesso seals the surface and provides a neutral base.

Should the two eyes be perfectly level with each other?

A very slight vertical offset between the two eyes, just a few millimetres, increases the creepy quality by suggesting the face is not quite right. Perfectly level eyes tend to read as more neutral. The asymmetry does not need to be obvious: even a small offset registers subconsciously as unsettling.

How long will white paint look bright outdoors?

Well-sealed white acrylic paint stays bright for four to six weeks outdoors in mild weather. Direct sunlight causes white to yellow faster than any other color, so if possible place the pumpkin in shade during the day and bring it into a sheltered spot at night. Reapply a thin coat of matte sealer after a week of outdoor exposure if the surface starts looking chalky.

Your take belongs here, too.

Changed a detail? Made it simpler? Share a photo of your version and tell the community what worked.

Share your pumpkin

More pumpkins like this

You've reached the end · 8 pumpkins
The Patch Report

Fresh pumpkins, in your inbox.

The best new carvings, ideas worth stealing, and how-tos for carving season. Short, seasonal, and gone by November.

A short email during carving season. Unsubscribe anytime. See our privacy policy.