Halloween Pumpkin Carving Contest · Starts October 1st · $500 in prizes
← Back to ideas
@ai_concepts
Aug 14, 2026
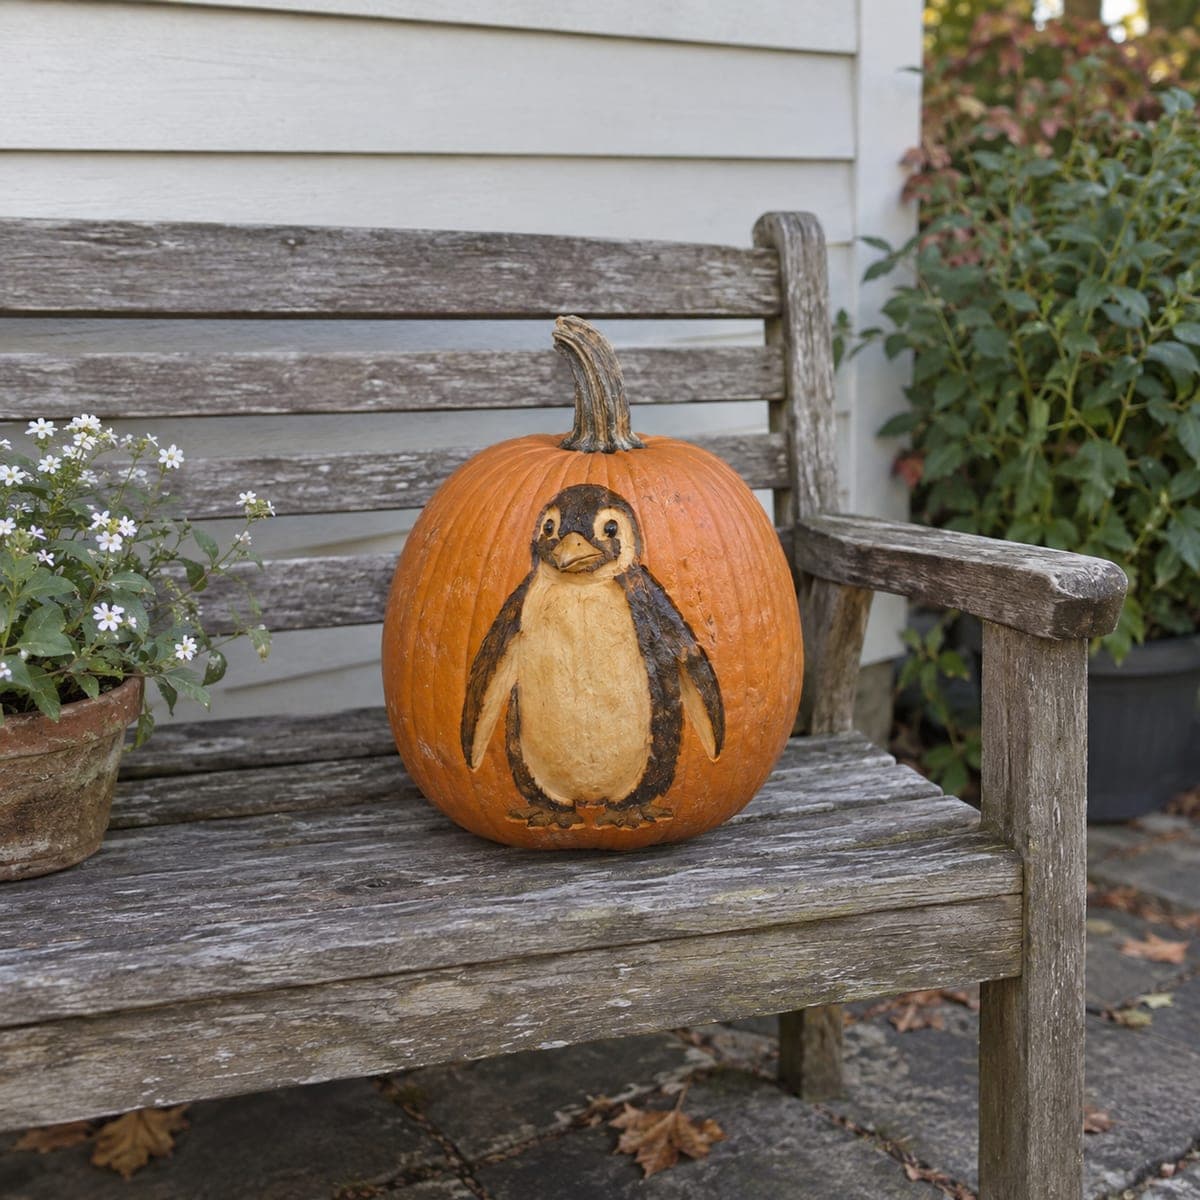
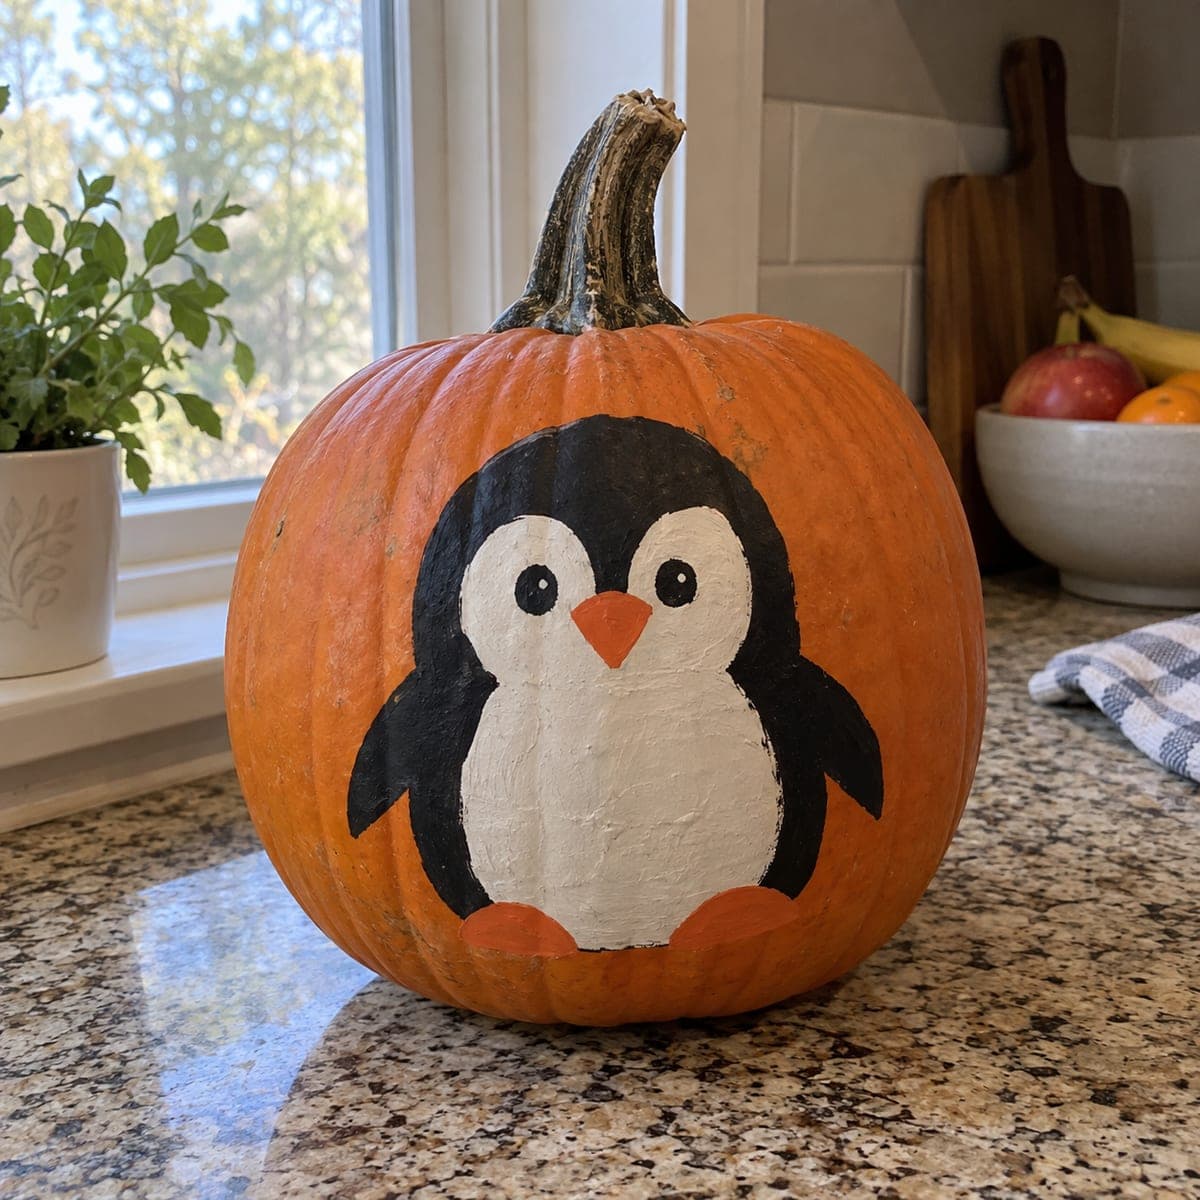
Penguin Painted Pumpkin on a Porch BenchAI
0

Penguin Painted Pumpkin on a Porch Bench

A plump penguin with dark flippers, a pale belly, and a little orange beak is painted straight onto this pumpkin's face, the orange rind cleverly left bare for the belly tone. Paint the dark head and wings first, then outline the belly so the negative space does the work. A stippled dry brush adds the soft feather texture along the edges. This no-carve pumpkin idea bridges Halloween and the winter holidays without a single cut.

This is an AI-generated concept image: a realistic, carvable design idea rather than a photo of a finished carve. AI concepts are always labeled and sit out the leaderboard and the contest.

No ratings yet · Sign in to rate
Comments (0)

  • No comments yet — be the first.

Save without an account. Sign in to like or comment.

Our tips for carving a similar design

The clever trick here is letting the pumpkin's bare orange rind stand in for the penguin's warm belly, so you paint around it instead of covering it. Block in the dark head and flippers first, then outline the belly and let that negative space carry the shape. Since this is a no-carve concept, everything happens on the surface with brushes, which keeps it beginner friendly and long lasting.

Written by PumpkinCarvingIdeas.com, inspired by the image above. These are our suggestions, not instructions from the uploader. This approach to the AI concept has not been tested on a real pumpkin.

From pumpkin to porch

  1. Prep and sketch the pose

    Wipe the pumpkin clean and dry so paint grips well. Pick the smoothest face and lightly sketch the plump penguin in pencil, keeping the body centered and the belly filling most of the middle. Leave a clear boundary where the bare rind will read as the pale belly. Step back and check the outline before any color goes down.

  2. Paint the dark head and flippers

    Load a medium brush with dark brown or black acrylic and fill the head, back, and both side flippers first. Work in smooth, even coats and let the belly area stay bare orange. Keep your edges clean where the dark meets the future belly line. Let this base layer dry fully before adding detail.

  3. Define the belly with the outline

    Trace a soft outline around the belly so the negative space of the bare rind pops as the pale front. Keep the line slightly irregular for a natural feather boundary rather than a hard shape. This is where the design comes together, so take your time and adjust while the paint is still workable. Let it dry.

  4. Add the face and beak

    Paint two round eyes with small white highlight dots so they catch the light. Add the little triangular orange beak low on the face, keeping it small and neat. A thin brush helps here, and you can steady your hand on the pumpkin. Let each color dry before layering the next so they stay crisp.

  5. Dry-brush the feather texture

    Dip a stiff brush in a little paint, wipe most of it off, then lightly stipple along the edges where dark meets belly. This soft, broken texture mimics fluffy feathers without looking painted-in. Build it up slowly, since you can always add more but cannot easily remove it. Feather the flipper edges the same way.

  6. Seal and stage the finish

    Once everything is dry, brush on a thin coat of matte acrylic sealer to protect the paint outdoors. Set the pumpkin on a porch bench or step for its photo, ideally in soft daylight or under a warm LED lantern. Because nothing is cut, this design will hold up for weeks and carry you toward the winter holidays.

Gather your supplies

Check things off as you get ready.

Work on a stable surface, keep your free hand out of the cutting path, and have an adult handle sharp tools.

Three levels of light

  • Leave intact

    The dark painted head, back, and flippers read as the deepest, shadowiest areas of the design.

  • Peel & shade

    The stippled dry-brush feather edges give a soft mid tone where dark meets pale.

  • Cut through

    The bare, unpainted orange rind of the belly stays the brightest, warmest part of the penguin.

Learn the carving basics

Before you start cutting

This is a no-carve design, so how do I light it for a photo?

Since nothing is cut, skip the interior light and rely on outside lighting instead. Soft daylight or a warm LED lantern set beside the pumpkin will bring out the paint colors. If you want a glow later, you could hollow the back and add a small LED, but the painted front reads best in ambient light.

How do I keep the belly looking like a belly and not just bare pumpkin?

The soft outline and dry-brush feathering along the edge are what sell it. A slightly irregular boundary makes the bare rind read as a fluffy front rather than an unpainted gap. Keep the darkest paint tight against that line so the contrast does the work.

Will the acrylic paint hold up outdoors?

Acrylic bonds well to clean, dry pumpkin skin and lasts far longer than a cut design. A thin coat of matte sealer after everything dries helps it resist dew and light rain. Keep the pumpkin out of direct downpours and it should stay sharp for weeks.

Your take belongs here, too.

Changed a detail? Made it simpler? Share a photo of your version and tell the community what worked.

Share your pumpkin

More pumpkins like this

You've reached the end · 8 pumpkins
The Patch Report

Fresh pumpkins, in your inbox.

The best new carvings, ideas worth stealing, and how-tos for carving season. Short, seasonal, and gone by November.

A short email during carving season. Unsubscribe anytime. See our privacy policy.