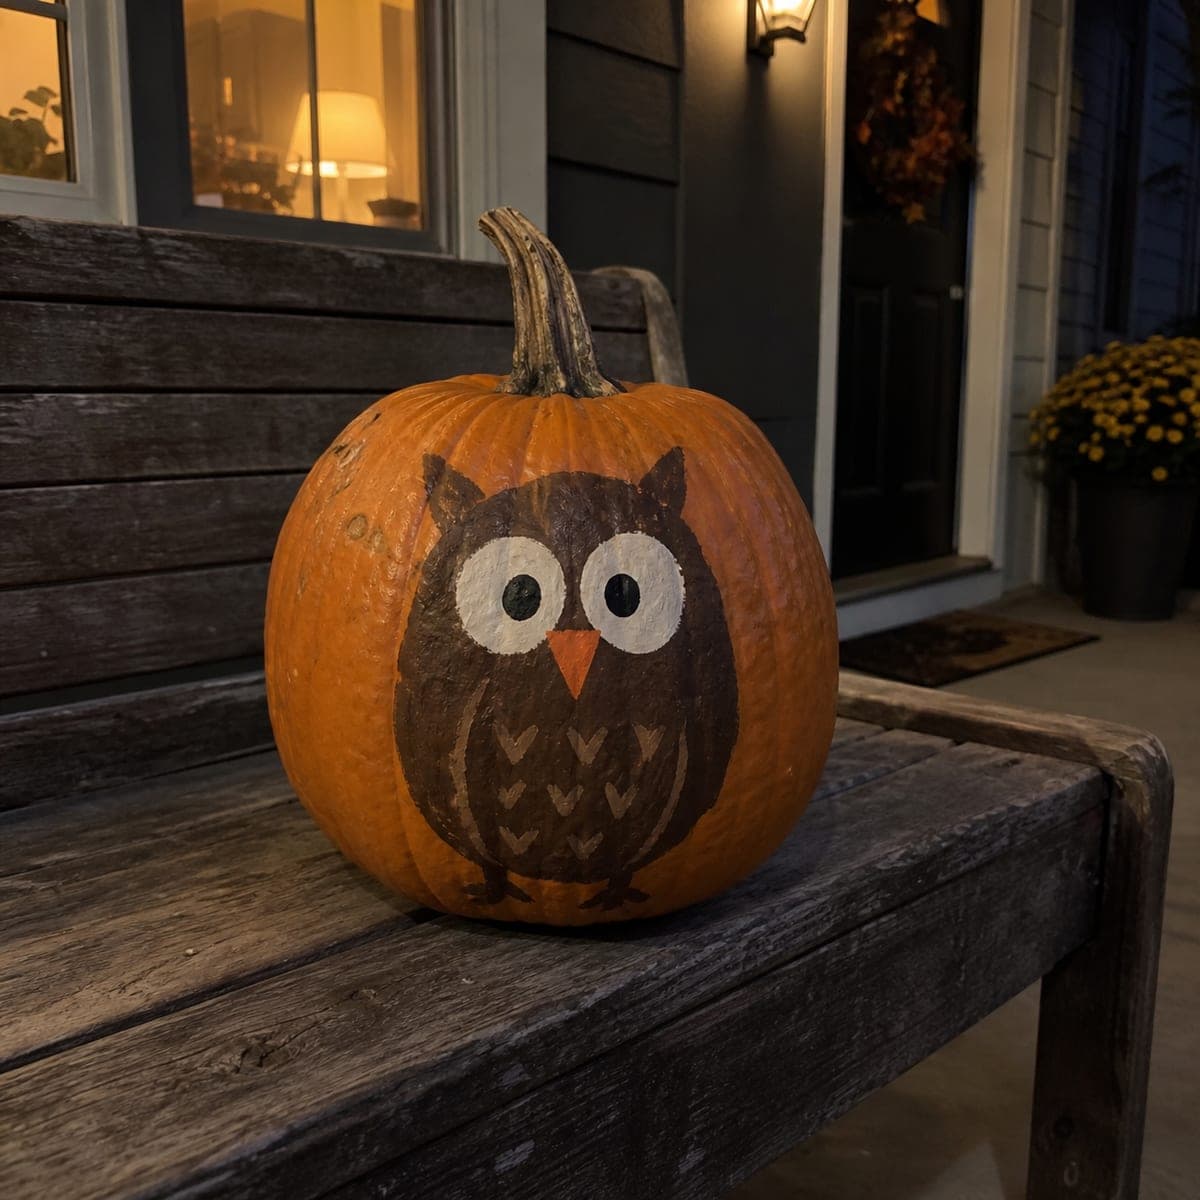
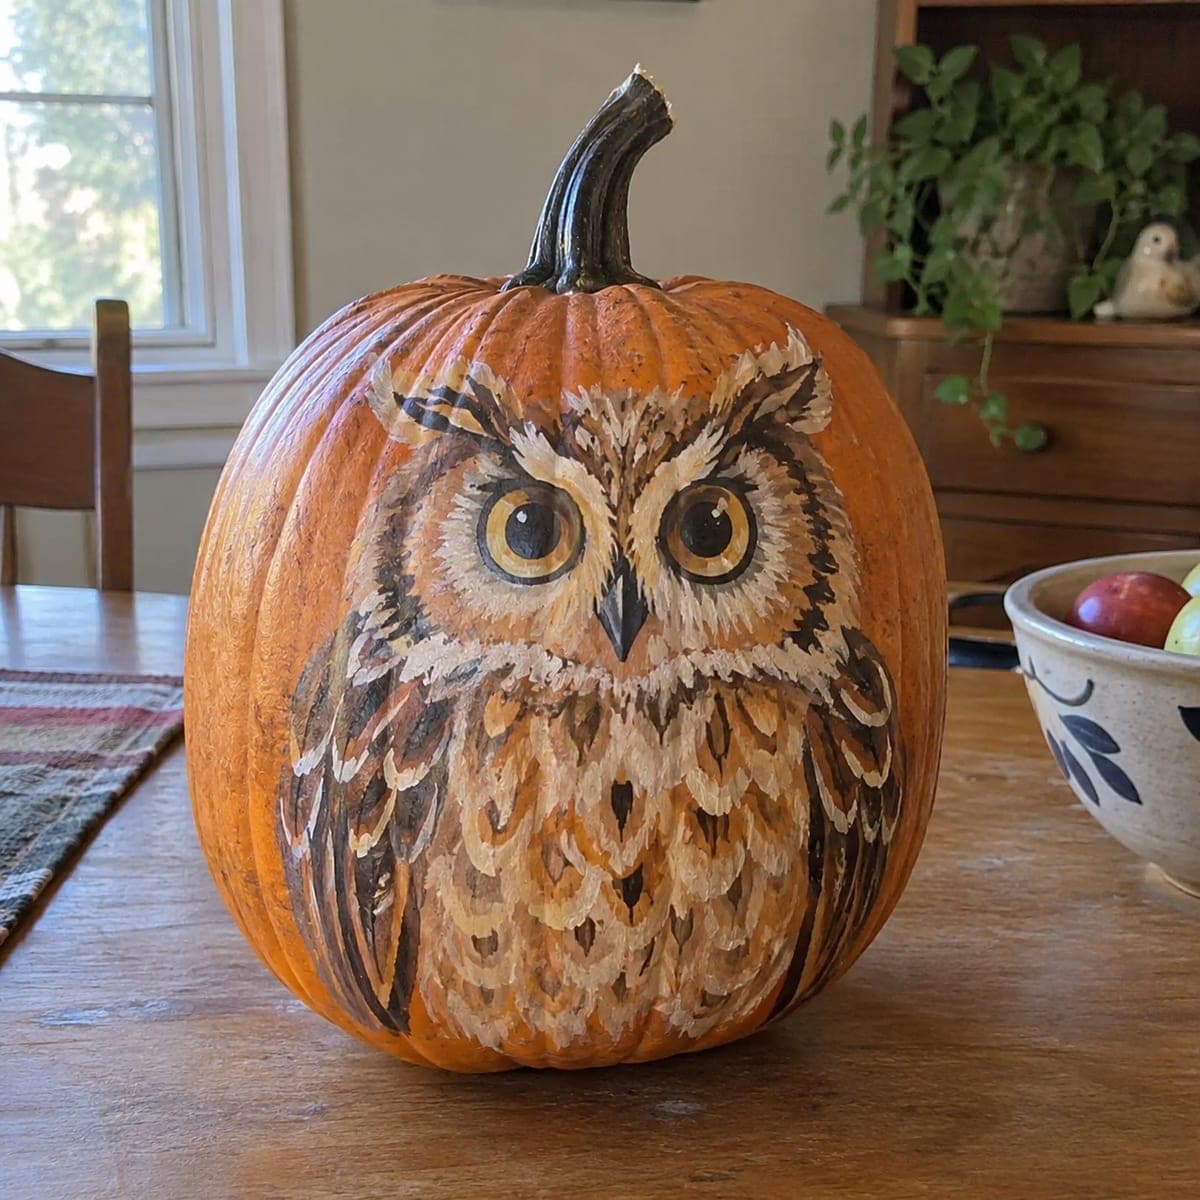
A wide-eyed cartoon owl perches on this painted pumpkin, with huge white eye circles, a tiny orange beak, and rows of chevron feathers on its belly. The design is all simple shapes, so kids can help sponge the brown body while an adult adds the eye rings. Leave the pumpkin's natural orange showing for the beak to save a paint color. This no-carve owl pumpkin holds up on a porch bench for weeks.
This is an AI-generated concept image: a realistic, carvable design idea rather than a photo of a finished carve. AI concepts are always labeled and sit out the leaderboard and the contest.
The whole design leans on simple stacked shapes, a rounded brown body, two big white eye circles, and a tiny beak, so nothing needs to be carved. Since this is a concept image and no real pumpkin exists, you could recreate it as an all-paint project by sketching the owl in pencil first, then filling from back to front. The clever move is leaving the pumpkin's natural orange bare for the beak, which saves a paint color and ties the whole look together.
Written by PumpkinCarvingIdeas.com, inspired by the image above. These are our suggestions, not instructions from the uploader. This approach to the AI concept has not been tested on a real pumpkin.
From pumpkin to porch
1
Wipe and dry the pumpkin
Pick a tall, smooth pumpkin so the round body has a clean canvas. Wipe the surface with a damp cloth to remove dirt and wax, then dry it completely. Paint grips much better on a clean, dry skin. Set it stem up on a towel so it does not roll while you work.
2
Sketch the owl in pencil
Lightly draw a big rounded body that fills most of the front, then add two pointed ear tufts at the top. Place two large circles for the eyes and a small triangle beak between them. Keep the pencil lines soft so they hide under the paint later. Step back and check that the shapes look balanced before you commit.
3
Sponge the brown body
This is the perfect step for kids to help with. Load a small sponge or a flat brush with brown acrylic and fill the whole body, ear tufts, and wing shapes. Paint carefully around the two eye circles and the beak triangle so the orange shows through there. Let this base coat dry fully, then add a second coat if it looks streaky.
4
Add the white eyes and details
An adult should paint the two white eye rings so the edges stay crisp. Once dry, add a black dot in each eye, leaving a tiny white catchlight for that wide-awake look. Paint short pale chevron rows down the belly and a couple of small feet at the bottom. The beak stays bare orange, so no paint is needed there.
5
Seal and display
Let everything dry for at least an hour, then brush on a thin coat of clear acrylic sealer to protect the paint from dew. Because nothing is cut, this owl holds up on a porch bench for weeks. If you want a soft glow at night, tuck a battery LED puck beside it rather than inside. Snap your photo in the evening light for the best look.
Gather your supplies
Check things off as you get ready.
Work on a stable surface, keep your free hand out of the cutting path, and have an adult handle sharp tools.
Three levels of light
Leave intact
The natural orange skin stays bare for the little beak and the background around the owl.
Peel & shade
The pale painted chevrons and the light catchlights in the eyes read as the soft mid tone against the brown.
Cut through
Nothing is cut on this no-carve design, so the bright white eye circles stand in as the highest-contrast pop.
Correct, this is a fully painted design with no cutting at all. That makes it safe for young helpers and means the pumpkin will not rot open at the cut edges. It can sit outside far longer than a carved jack-o-lantern.
What kind of paint holds up outside?
Acrylic craft paint works well and dries fast between colors. Once it is dry, seal the whole pumpkin with a clear acrylic spray so morning dew does not streak the colors. Reapply a light seal coat if it will face heavy rain.
How do I keep the white eyes from looking messy?
Sketch the circles in pencil first and let an adult paint the edges with a steady, smaller brush. Two thin coats of white cover better than one thick, blotchy coat. Add the black pupils only after the white is fully dry so the colors do not smear together.
Your take belongs here, too.
Changed a detail? Made it simpler? Share a photo of your version and tell the community what worked.
 AI
AI
Comments (0)