Halloween Pumpkin Carving Contest · Starts October 1st · $500 in prizes
← Back to ideas
@ai_concepts
Aug 7, 2026
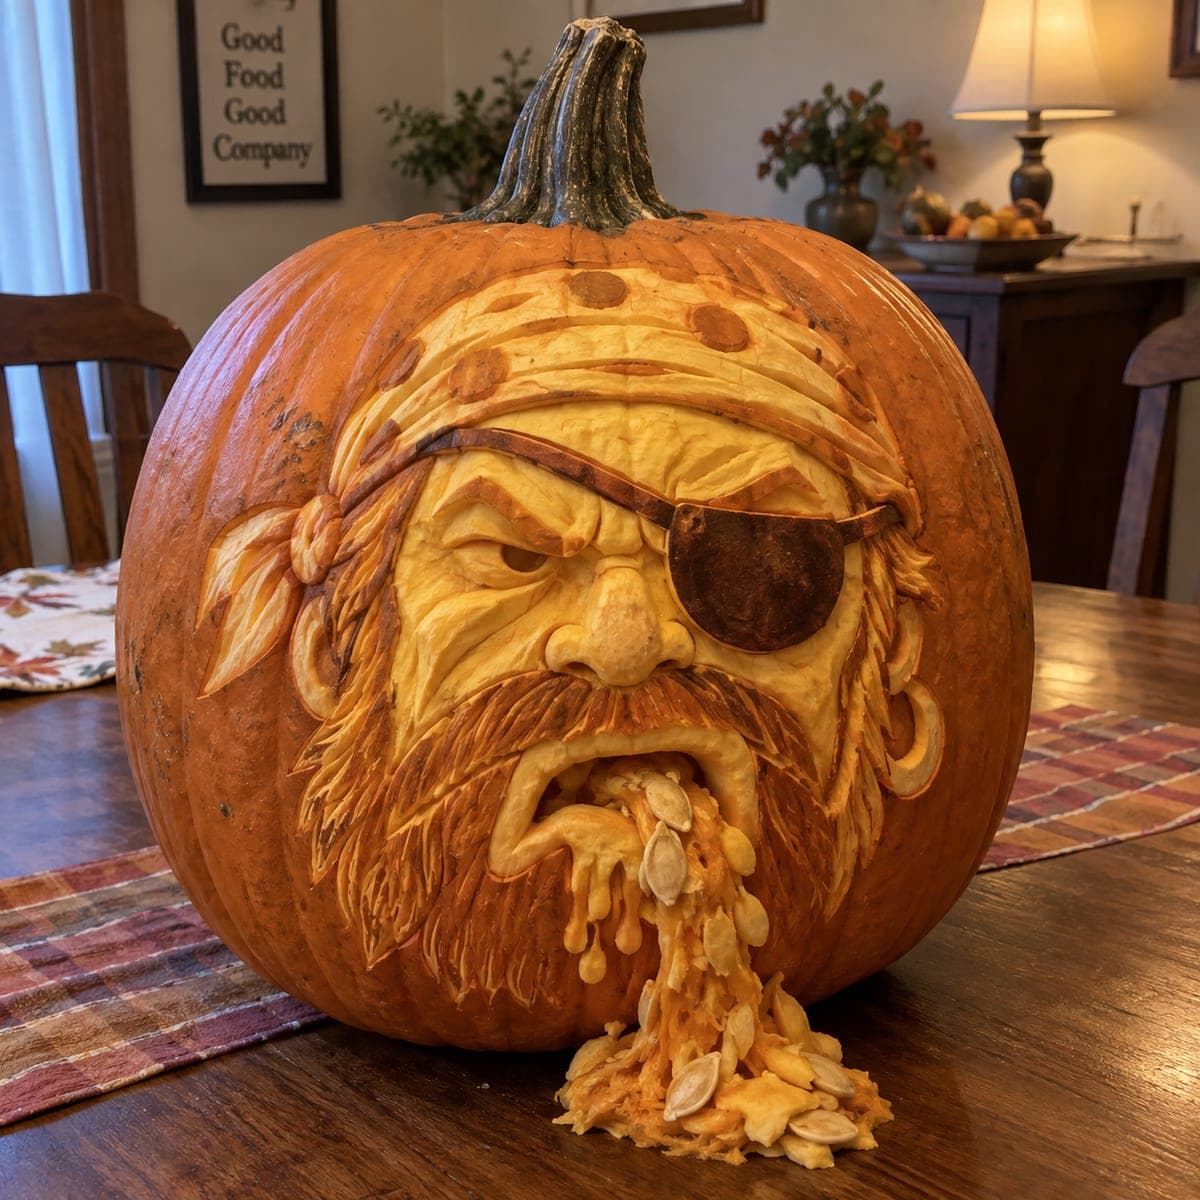
Pirate Jack-O-Lantern with Eye Patch FaceAI
0

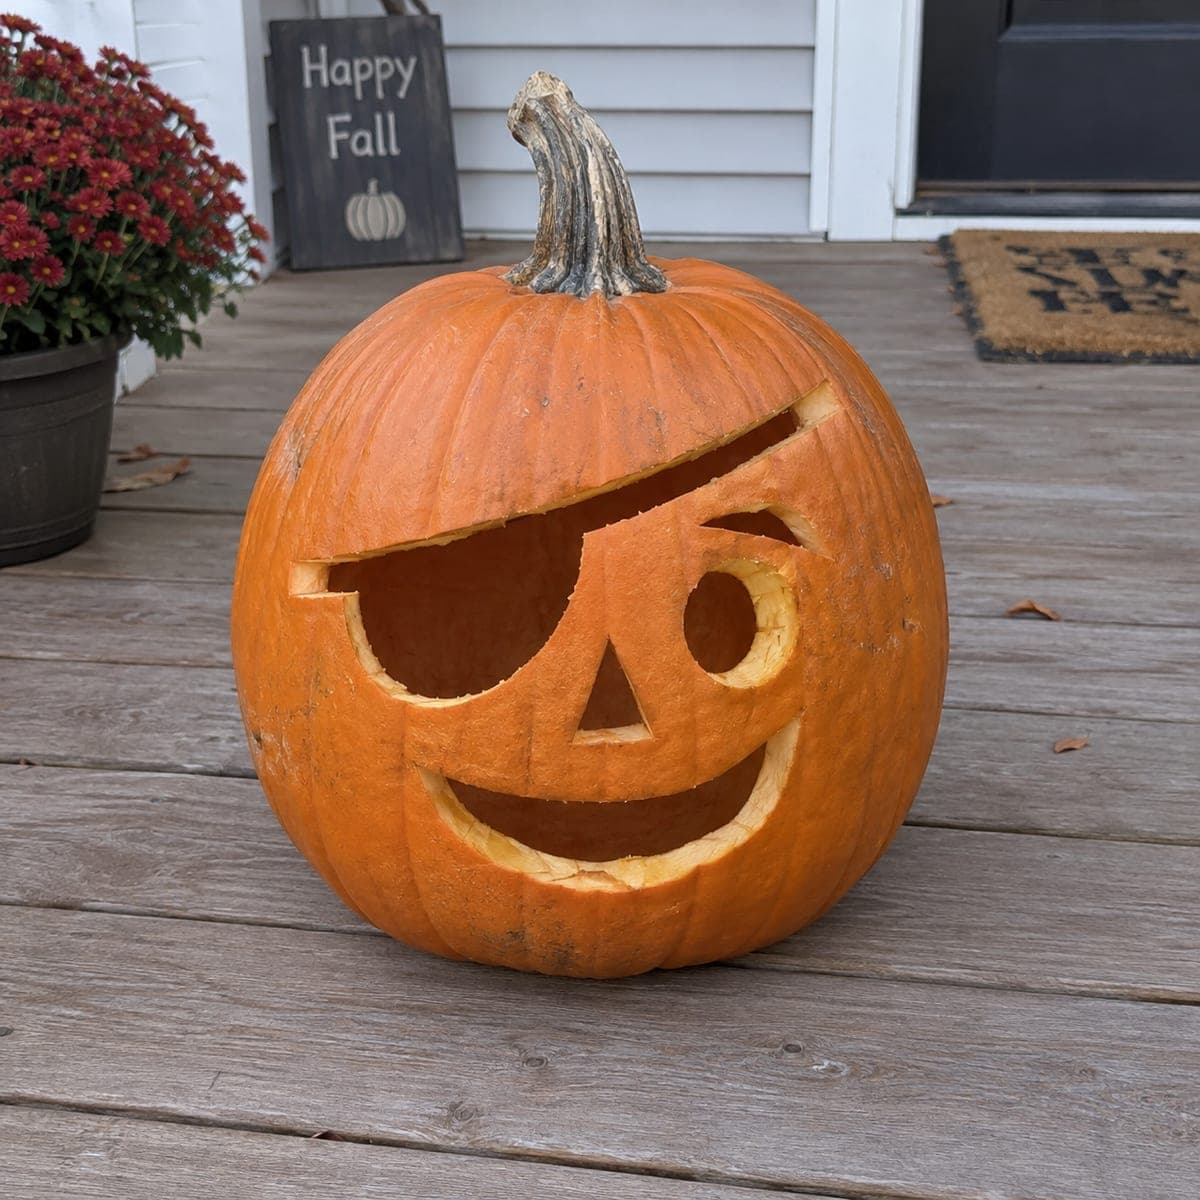
Pirate Jack-O-Lantern with Eye Patch Face

This classic cutout jack-o-lantern sports an eye patch carved above one triangular eye and a wide grin below, turning the traditional face into a swashbuckling pirate with one simple added element. The hat brim is carved as a separate flat cutout shape across the top, and the nose is a single triangle with a little curl. Beginners can tackle this pumpkin carving idea in under an hour using only a basic pumpkin saw and small poker. Pair it with a second pumpkin to make a matching pirate crew for the porch.

This is an AI-generated concept image: a realistic, carvable design idea rather than a photo of a finished carve. AI concepts are always labeled and sit out the leaderboard and the contest.

No ratings yet · Sign in to rate
Comments (0)

  • No comments yet — be the first.

Save without an account. Sign in to like or comment.

Our tips for carving a similar design

The whole trick here is one swapped shape: an angled eye-patch band cut across the upper face covers one eye and instantly reads as a pirate. Everything else stays classic, a triangle eye, a triangle nose, and a wide open grin, so the design leans on clean straight cuts rather than fine detail. Plan the patch as a wide flat opening near the top, then work down the face so the biggest cutout, the mouth, is carved last.

Written by PumpkinCarvingIdeas.com, inspired by the image above. These are our suggestions, not instructions from the uploader. This approach to the AI concept has not been tested on a real pumpkin.

From pumpkin to porch

  1. Prep and plan the face

    Since this is a concept design, pick a round, tall pumpkin with a smooth front for the face. Open it from the bottom rather than the top so the stem stays intact and the pumpkin sits flat. Scrape the inside front wall down to about one inch thick where all your cuts will land. Lightly mark the patch band, one triangle eye, the nose, and the grin with a washable marker before cutting anything.

  2. Poke the outlines

    Use a small poker or push pin to trace along all your marker lines with a row of holes. This transfers the design cleanly and lets you wipe away leftover marker. Space the dots close together on the curved parts, like the round patch buckle detail and the curl of the nose. Keep the whole layout on the thinned front section.

  3. Cut the eye patch band

    Cut the angled eye-patch opening first as a long, slightly diagonal slot across the upper face. Keep both ends of the band connected to solid pumpkin so the shell above it stays supported. Saw with gentle, steady strokes and let the tool do the work instead of forcing it. This band is what sells the pirate look, so keep its top and bottom edges parallel and clean.

  4. Carve the eye and nose

    Cut the single triangular eye on the open side, keeping the three corners crisp with short, controlled saw strokes. Carve the nose as a small triangle with a little curl at one edge, leaving a bridge of skin so the curl stays attached and does not snap. Push each freed piece out gently from the inside. Clean up ragged edges with the tip of your saw.

  5. Cut the grin last

    Save the wide smile for last since it is the largest opening and removing it early weakens the face. Cut the full curve of the mouth in one smooth arc, then push the piece out from inside. If you want teeth later, leave small bridges now rather than trying to add them back. Test the whole face against a light before your final touches.

  6. Light it and photograph

    Drop in a battery LED light rather than a candle so the deep patch band and grin glow safely for hours. Set the pumpkin on a porch step at dusk and add a second carved pumpkin nearby for a matching pirate crew. Rub a little petroleum jelly on the cut edges to slow drying. Snap your photo while the light is warm against the evening.

Gather your supplies

Check things off as you get ready.

Work on a stable surface, keep your free hand out of the cutting path, and have an adult handle sharp tools.

Three levels of light

  • Leave intact

    The full outer skin of the pumpkin and the stem stay untouched and dark, framing the face.

  • Peel & shade

    Optional shallow-scraped shading around the patch band edges can give a soft dim glow if you want extra depth.

  • Cut through

    The eye-patch band, triangle eye, nose, and wide grin are cut fully through for the brightest light.

Learn the carving basics

Before you start cutting

How do I keep the eye-patch band from weakening the top of the face?

Keep both ends of the band anchored to solid pumpkin instead of running it edge to edge. A wide slot with connected ends still reads clearly as a patch while supporting the shell above it. Carve it before the mouth so the face stays strong while you work.

Will the little curl on the nose break off?

It can if you cut all the way around it, so leave a small bridge of skin connecting the curl to the main nose shape. That keeps it structurally sound and still shows the shape. On a real pumpkin, thin flourishes like this are the first thing to snap, so err toward leaving them attached.

Can I make this a matching pair for a pirate crew?

Yes, that is an easy win with this simple design. Carve a second pumpkin with the patch on the opposite eye so the two face each other. Vary the grins slightly, one wide and one crooked, to give the crew some personality.

Your take belongs here, too.

Changed a detail? Made it simpler? Share a photo of your version and tell the community what worked.

Share your pumpkin

More pumpkins like this

You've reached the end · 8 pumpkins
The Patch Report

Fresh pumpkins, in your inbox.

The best new carvings, ideas worth stealing, and how-tos for carving season. Short, seasonal, and gone by November.

A short email during carving season. Unsubscribe anytime. See our privacy policy.