Halloween Pumpkin Carving Contest · Starts October 1st · $500 in prizes
← Back to ideas
@ai_concepts
Aug 21, 2026
Praying Angel With Feathered Wings Pumpkin ReliefAI
0

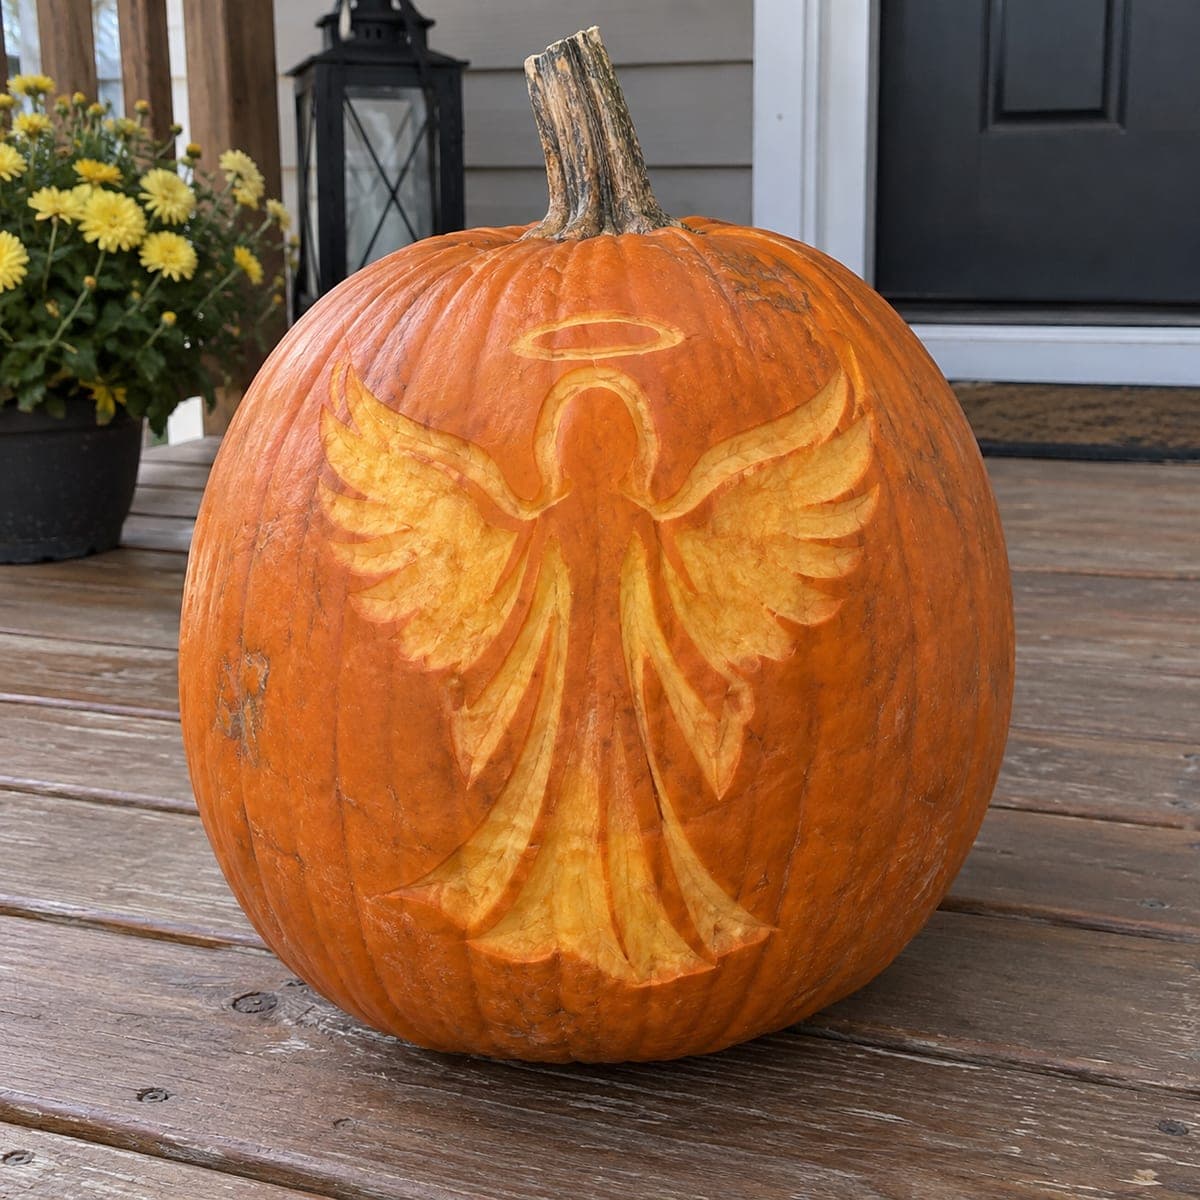
Praying Angel With Feathered Wings Pumpkin Relief

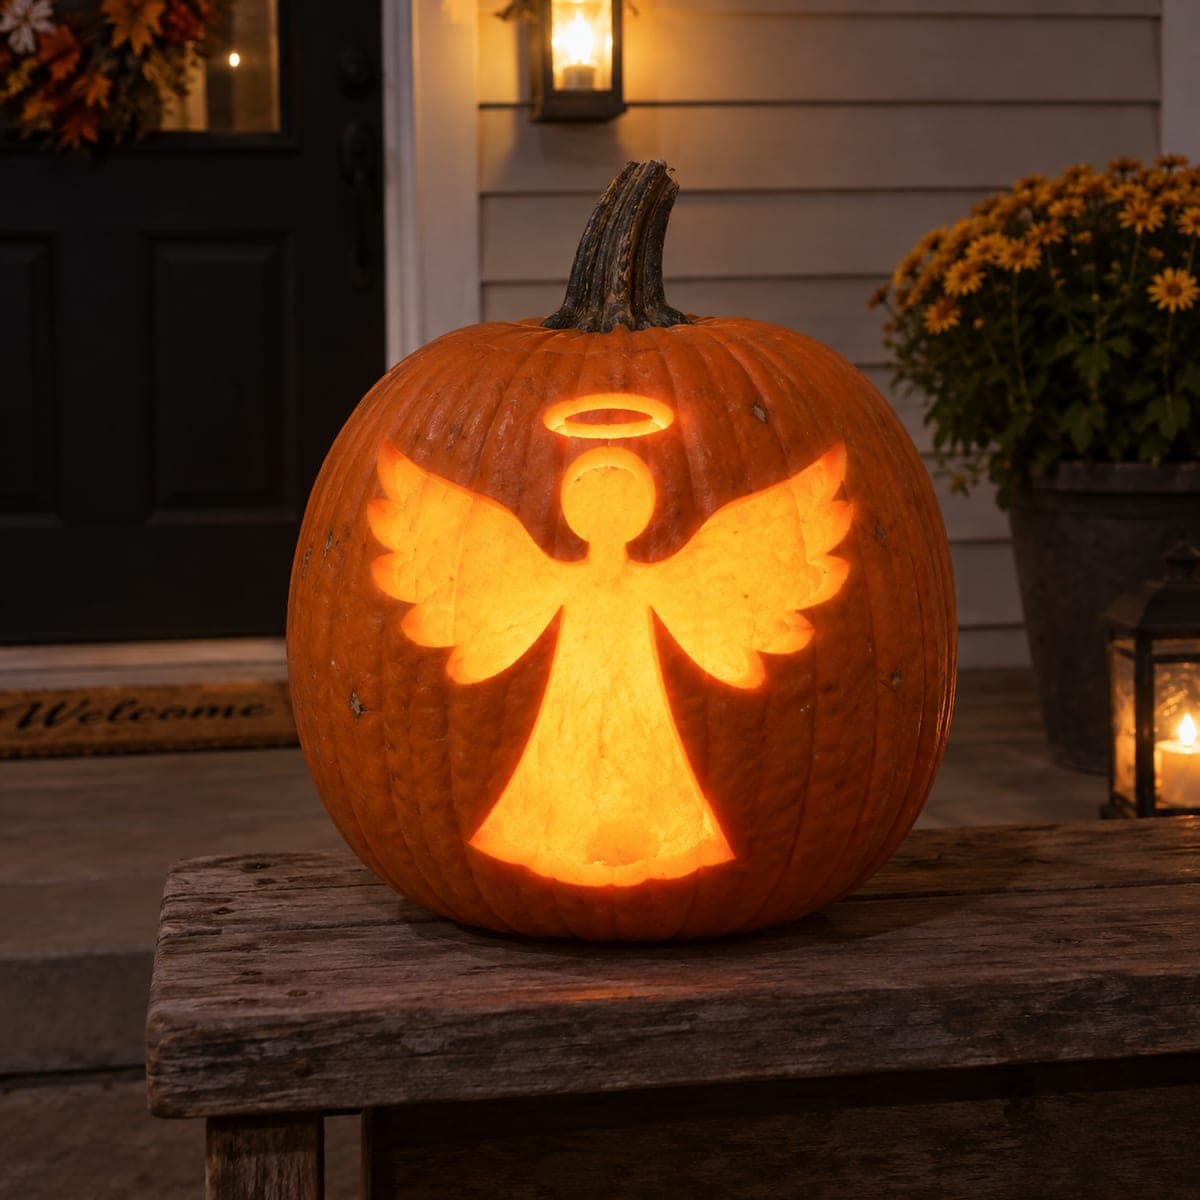
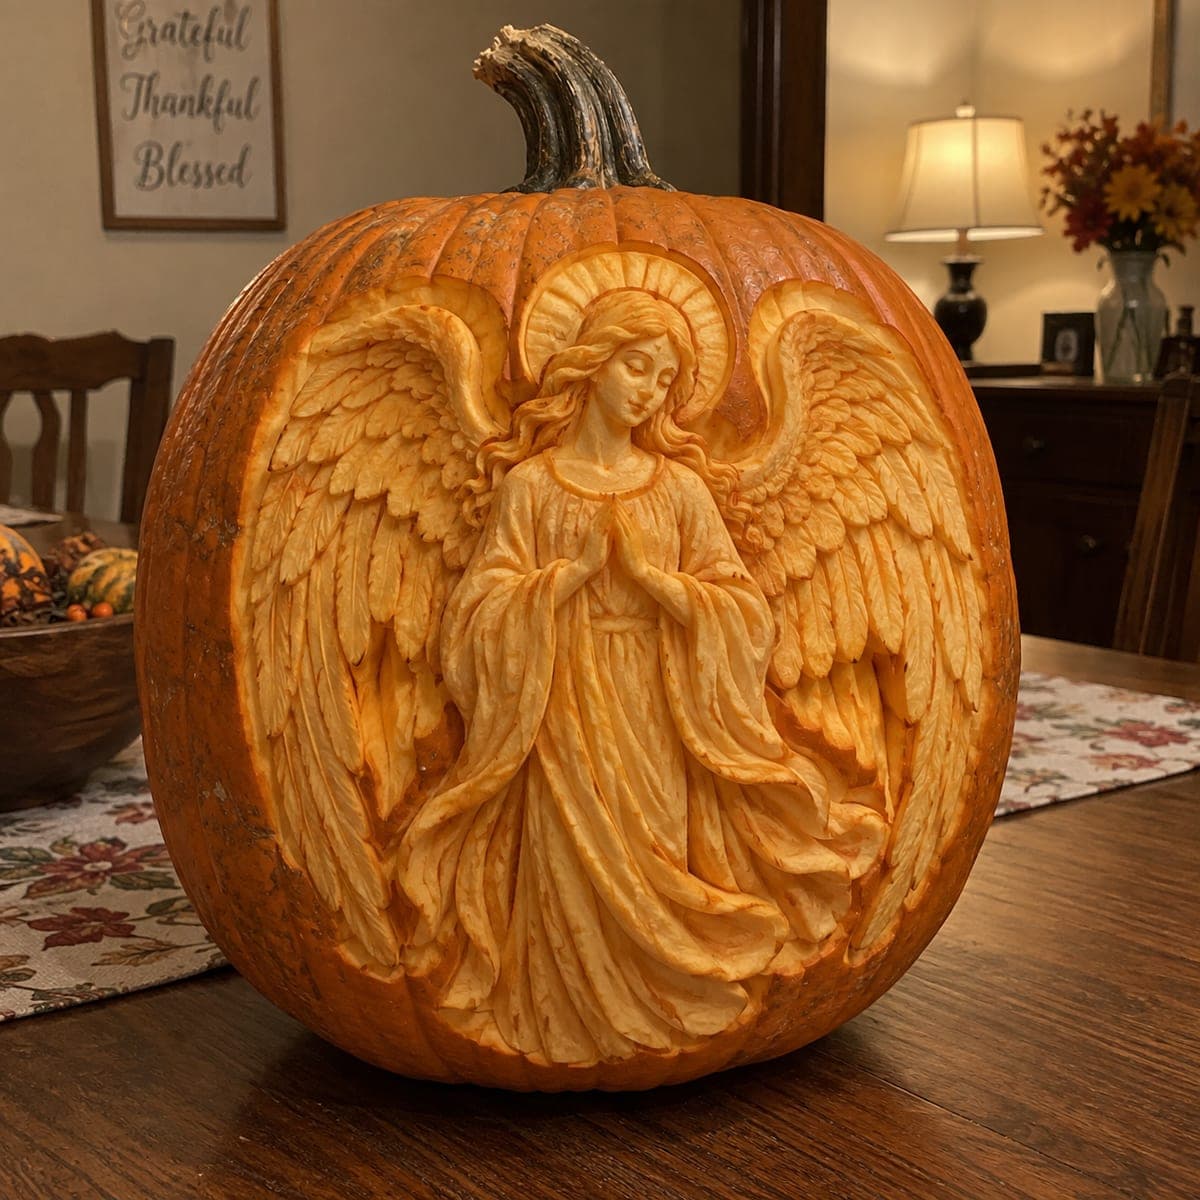
Wrapped in sweeping feathered wings, this praying angel is sculpted into the pumpkin with drapery folds and a glowing halo worthy of a cathedral carving. It is an expert relief project where the figure's robe is shaved in long fluid channels while the wings get individual feather cuts. Hollow the pumpkin extra thin behind the figure so lamplight brings out every fold after dark.

This is an AI-generated concept image: a realistic, carvable design idea rather than a photo of a finished carve. AI concepts are always labeled and sit out the leaderboard and the contest.

No ratings yet · Sign in to rate
Comments (0)

  • No comments yet — be the first.

Save without an account. Sign in to like or comment.

Our tips for carving a similar design

The core trick here is relief carving, where you never cut all the way through the front and instead shave the pumpkin wall to different depths so light glows through the thinned skin. The angel's robe is worked in long flowing channels while each wing feather is a separate shallow scoop, and a thin back wall lets an LED bring out every fold. Plan your depths before you start so the face and hands stay the palest, brightest parts of the figure.

Written by PumpkinCarvingIdeas.com, inspired by the image above. These are our suggestions, not instructions from the uploader. This approach to the AI concept has not been tested on a real pumpkin.

From pumpkin to porch

  1. Open the back and hollow extra thin

    Since no real pumpkin exists in this AI concept, pick a tall pumpkin with a smooth flat front if you want to recreate it. Cut a large access hole in the back, not the top, so the stem stays intact for the halo scene. Scrape the inside of the front wall down until it is roughly a half inch to three quarters inch thick, checking with your fingers as you go. A thin, even wall is what makes relief lighting work, so take your time here.

  2. Transfer the design and map your depths

    Tape a printed angel stencil to the front and poke the main outlines with a needle tool. Peel the paper and use a fine marker to note which areas will be deepest, such as the face, hands, and halo, versus the darker background. Think of the surface in layers before any blade touches it. A quick sketch of light zones now saves guesswork later.

  3. Shave the background and skin the halo

    Use a ribbon or loop tool to remove the skin around the figure so the background glows a soft dim orange. Peel, but do not cut through, the halo ring behind the head so it reads as a gentle glowing arc. Keep your strokes shallow and consistent so the background stays even. This step sets the stage the angel will sit against.

  4. Sculpt the robe in long channels

    Work the drapery with long, curved gouge strokes that follow the fall of the fabric from the shoulders to the hem. Vary the depth so the deepest valleys of the folds catch the most light and the raised ridges stay darker. Keep the hands and face slightly proud and lightly skinned so they become the brightest focal points. Step back often to check the flow of the folds under a lamp.

  5. Carve the feathers one at a time

    Give each wing feather its own shallow scoop, working in overlapping rows from the outer tips inward toward the body. Leave a thin ridge between feathers so they read as separate layers rather than a smooth sheet. Keep every feather attached to the wall, since these are relief cuts, not cutouts. Patience here is what separates a good wing from a great one.

  6. Light it and photograph in the dark

    Drop in a bright warm-white LED puck or a string of LEDs, never a candle, since the thin wall can scorch. Turn off the room lights and check that the face, hands, and halo glow brightest while the background stays dim. Touch up any spot that looks flat by shaving it a little thinner. Shoot your photo in near darkness to capture the full depth of the folds.

Gather your supplies

Check things off as you get ready.

Work on a stable surface, keep your free hand out of the cutting path, and have an adult handle sharp tools.

Three levels of light

  • Leave intact

    The untouched orange skin frames the outer edge and the darkest ridges between wing feathers and robe folds.

  • Peel & shade

    The skinned background and the halo ring glow a soft dim orange behind the figure.

  • Cut through

    No full cutouts on the front; the thinnest shaved areas of the face, hands, and halo read as the brightest glow.

Learn the carving basics

Before you start cutting

Do I ever cut all the way through on this design?

Not on the front. This is a relief sculpture, so the whole angel and wings are shaded by shaving to different depths, never punched through. The only real opening is the access hole you cut in the back for hollowing and lighting.

How thin should the front wall be?

Aim for about a half inch to three quarters inch across the whole front. That range is thin enough to glow when lit but still strong enough to hold the feather and fold detail. Check the thickness with your fingers from inside as you scrape.

How do I keep the face looking peaceful and not distorted?

Keep the face and hands as the palest, shallowest areas so they catch the most light, and use small, controlled strokes there. Work slowly and step back under a lamp often to check the expression. If a feature looks off, shave a touch more rather than digging deep, since you cannot add material back.

Your take belongs here, too.

Changed a detail? Made it simpler? Share a photo of your version and tell the community what worked.

Share your pumpkin

More pumpkins like this

You've reached the end · 8 pumpkins
The Patch Report

Fresh pumpkins, in your inbox.

The best new carvings, ideas worth stealing, and how-tos for carving season. Short, seasonal, and gone by November.

A short email during carving season. Unsubscribe anytime. See our privacy policy.