Halloween Pumpkin Carving Contest · Starts October 1st · $500 in prizes
← Back to ideas
@ai_concepts
Sep 14, 2026

Sunflower Relief Pumpkin for Fall Table DecorAI
0

Sunflower Relief Pumpkin for Fall Table Decor

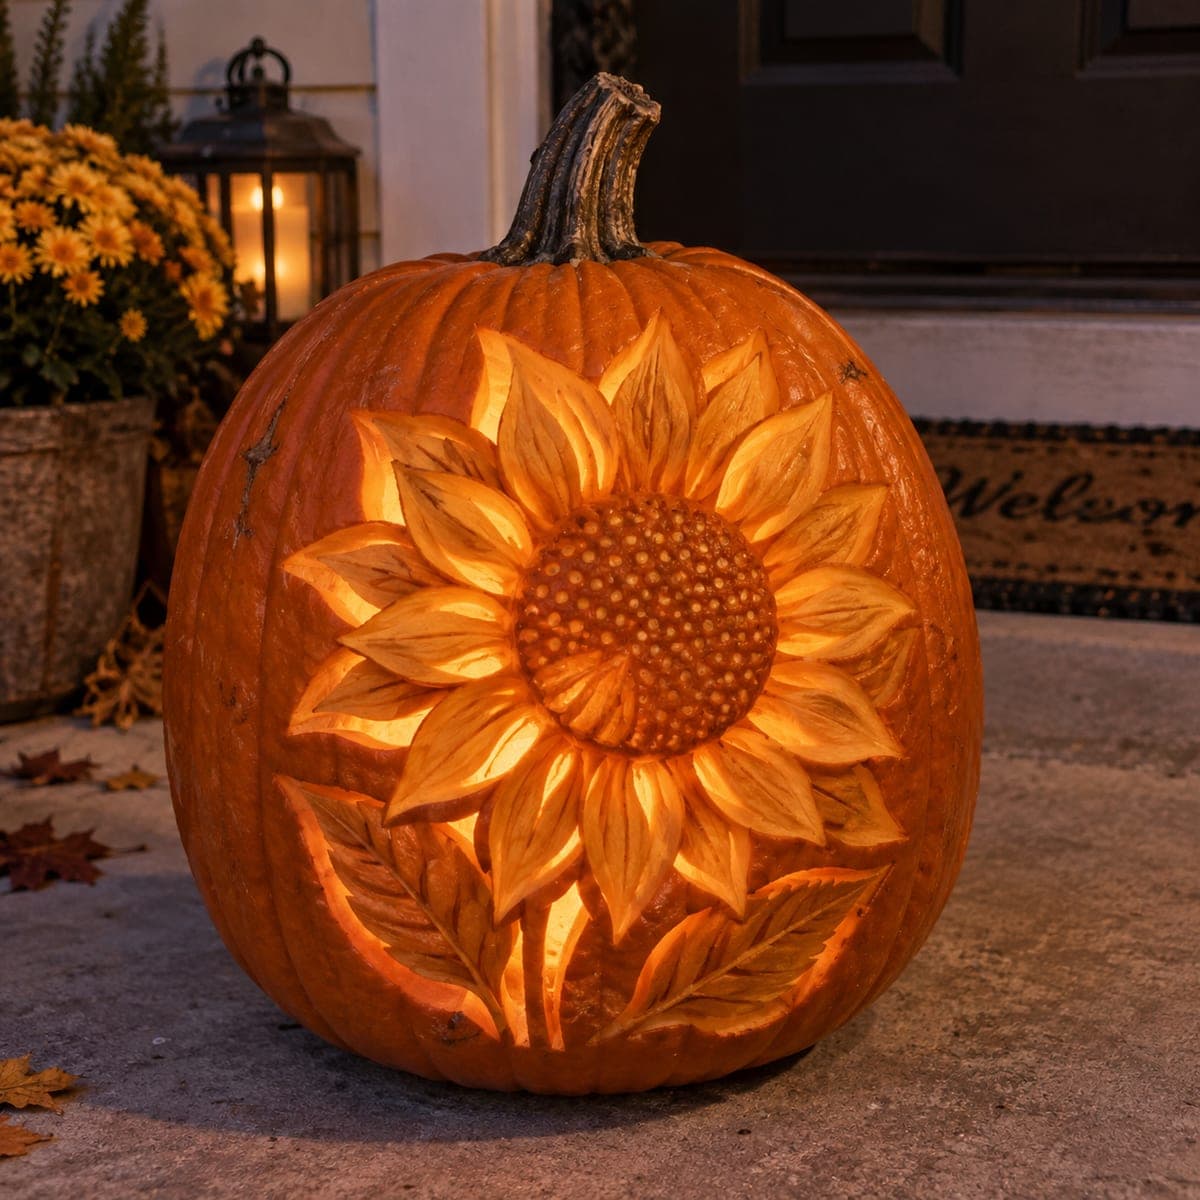
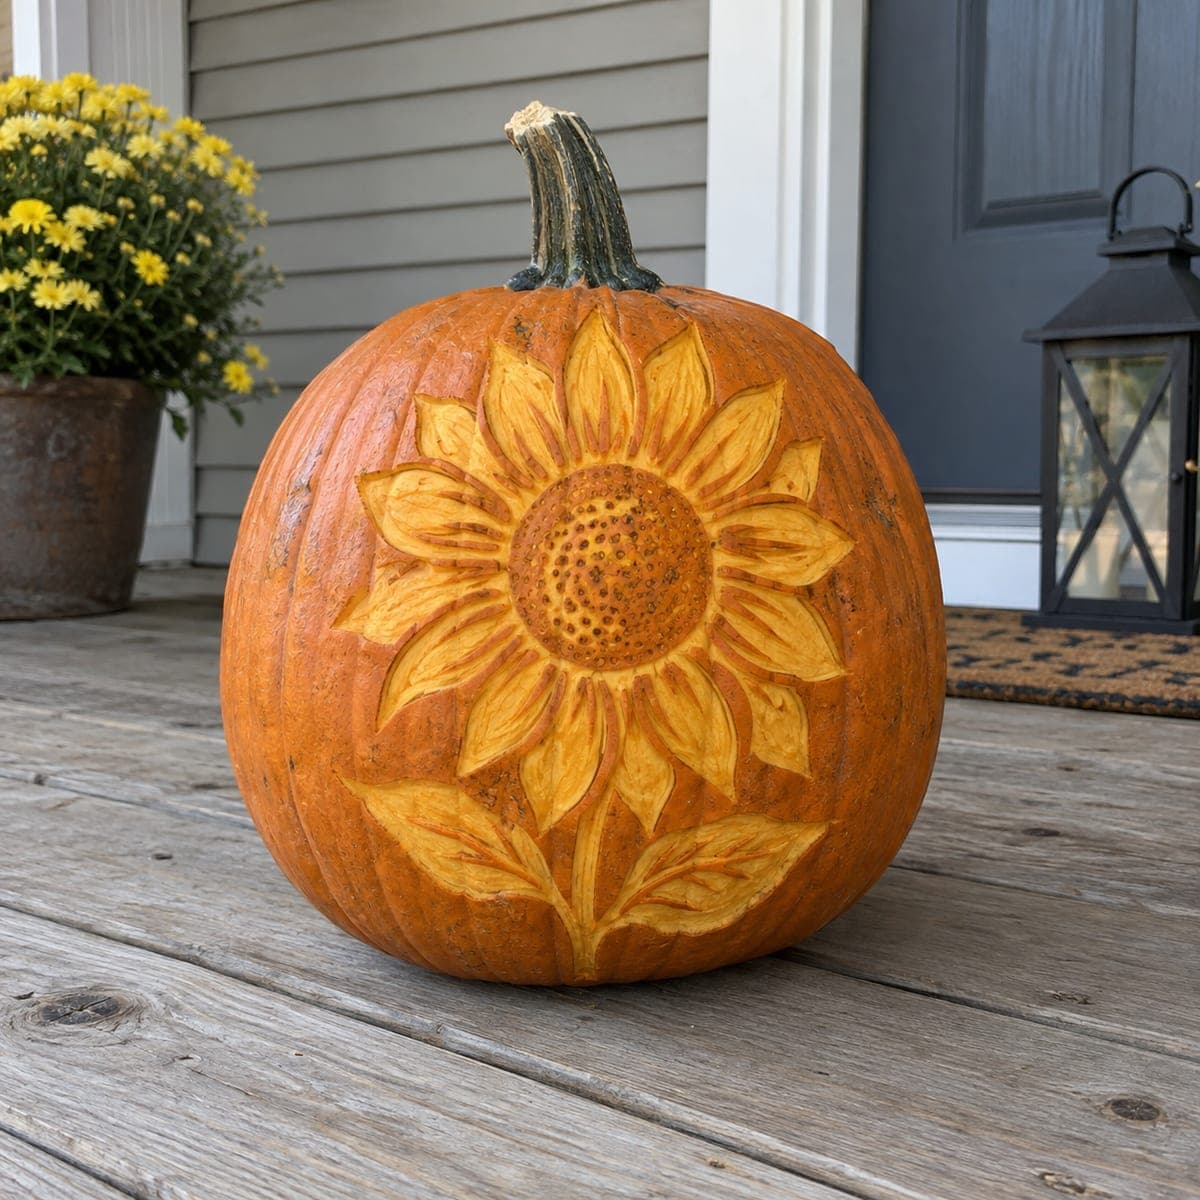
A huge sunflower blooms across this pumpkin in sculpted relief, with two rings of curling petals surrounding a center packed with carved seed bumps. It doubles as harvest decor from September through Thanksgiving, no candle required. Carve the seed head texture first with a small ball tool, then shape the petals so each one overlaps the layer behind it, and shave the leaves shallower so the flower stays the star.

This is an AI-generated concept image: a realistic, carvable design idea rather than a photo of a finished carve. AI concepts are always labeled and sit out the leaderboard and the contest.

No ratings yet · Sign in to rate
Comments (0)

  • No comments yet — be the first.

Save without an account. Sign in to like or comment.

Our tips for carving a similar design

The core trick here is relief carving, where you shave away depth instead of cutting all the way through, so the sunflower stands out as a raised sculpture rather than a backlit silhouette. The plan is to build from the center out: texture the seed head first, then layer two rings of overlapping petals, and finish with shallow leaves that sit lower than the flower. Since this is a concept image with no light inside, treat it as pure daytime table decor.

Written by PumpkinCarvingIdeas.com, inspired by the image above. These are our suggestions, not instructions from the uploader. This approach to the AI concept has not been tested on a real pumpkin.

From pumpkin to porch

  1. Sketch and rough out the flower

    Wipe the pumpkin clean and draw the round seed head, two petal rings, and the lower leaves with a washable marker. Pick the flattest, widest face so the whole bloom reads from across the room. Use a peeler or ribbon loop to shave the entire flower area down a few millimeters below the surrounding skin, which sets your working depth. Keep the outer background skin untouched so the design has a dark frame.

  2. Texture the seed head first

    Work the center while the surface is fresh and firm. Press a small ball-end clay tool or the tip of a loop tool to dimple hundreds of tiny bumps in a spiral pattern, denser at the edge and slightly larger toward the middle. Take your time and vary the pressure so the texture looks natural rather than stamped. Doing this first means you are not reaching over finished petals later.

  3. Carve the inner petal ring

    Outline the short inner petals that hug the seed head, then scoop the flesh so each petal rises slightly and tucks under the center. Angle your loop tool to leave a rounded, cupped surface on every petal. Lightly scratch a few lengthwise veins down each one for realism. Keep these petals a touch shallower than the outer ring so the layers stack visually.

  4. Shape the long outer petals

    Draw the longer, curling outer petals so their bases disappear behind the inner ring, which creates the overlap that sells the depth. Carve the flesh down around each petal edge so it appears to float above the layer behind it, and taper the tips thinner. Cut small V-grooves between neighboring petals to separate them cleanly. Keep petal tips attached to the pumpkin body so nothing snaps off.

  5. Drop the leaves back

    Sketch the two or three leaves below the bloom and shave their whole surface deeper than the petals so the flower clearly stays the star. Add a central vein and a few side veins with shallow scoops. Because the leaves are recessed, they read as background and give the sunflower room to pop. Clean up any ragged edges with a detail knife held by an adult.

  6. Seal and stage it

    Brush away shavings and wipe every carved surface, then coat the exposed flesh with a thin layer of petroleum jelly or a spray of lemon-water to slow browning. Set it on a runner or wood table in soft lamp light and photograph it from slightly above to catch the relief shadows. No candle or LED is needed since the light lives in the sculpted depth. Refrigerate overnight between display days to stretch its life toward Thanksgiving.

Gather your supplies

Check things off as you get ready.

Work on a stable surface, keep your free hand out of the cutting path, and have an adult handle sharp tools.

Three levels of light

  • Leave intact

    The outer background skin ringing the whole design stays untouched and dark to frame the bloom.

  • Peel & shade

    The petals and leaves get skin-peeled to a soft, matte tone that catches shadow and shows the sculpted layers.

  • Cut through

    Nothing is cut fully through on this relief design; depth and shadow do the work instead of backlight.

Learn the carving basics

Before you start cutting

Do I need a light inside for this to look good?

No. This is a relief sculpture, so all the drama comes from carved depth and the shadows it casts under normal room light. Skip the candle entirely and light the room instead, ideally with a warm lamp off to one side to deepen the petal shadows.

How do I get the bumpy seed head texture?

Use a small ball-end clay tool or the rounded tip of a mini loop tool and press dozens of little dimples in a spiral. Make them denser and finer at the outer edge and slightly larger toward the center. Work this area first so you are not leaning on finished petals while you poke.

How do I make the petals look layered instead of flat?

Overlap is everything. Carve the inner ring first and shallower, then tuck the base of each long outer petal behind that inner ring by scooping the flesh down around it. Dropping the leaves even deeper pushes them to the back and keeps the flower forward.

Your take belongs here, too.

Changed a detail? Made it simpler? Share a photo of your version and tell the community what worked.

Share your pumpkin

More pumpkins like this

You've reached the end · 8 pumpkins
The Patch Report

Fresh pumpkins, in your inbox.

The best new carvings, ideas worth stealing, and how-tos for carving season. Short, seasonal, and gone by November.

A short email during carving season. Unsubscribe anytime. See our privacy policy.