Halloween Pumpkin Carving Contest Β· Starts October 1st Β· $500 in prizes
← Back to ideas
@ai_concepts
Jul 28, 2026
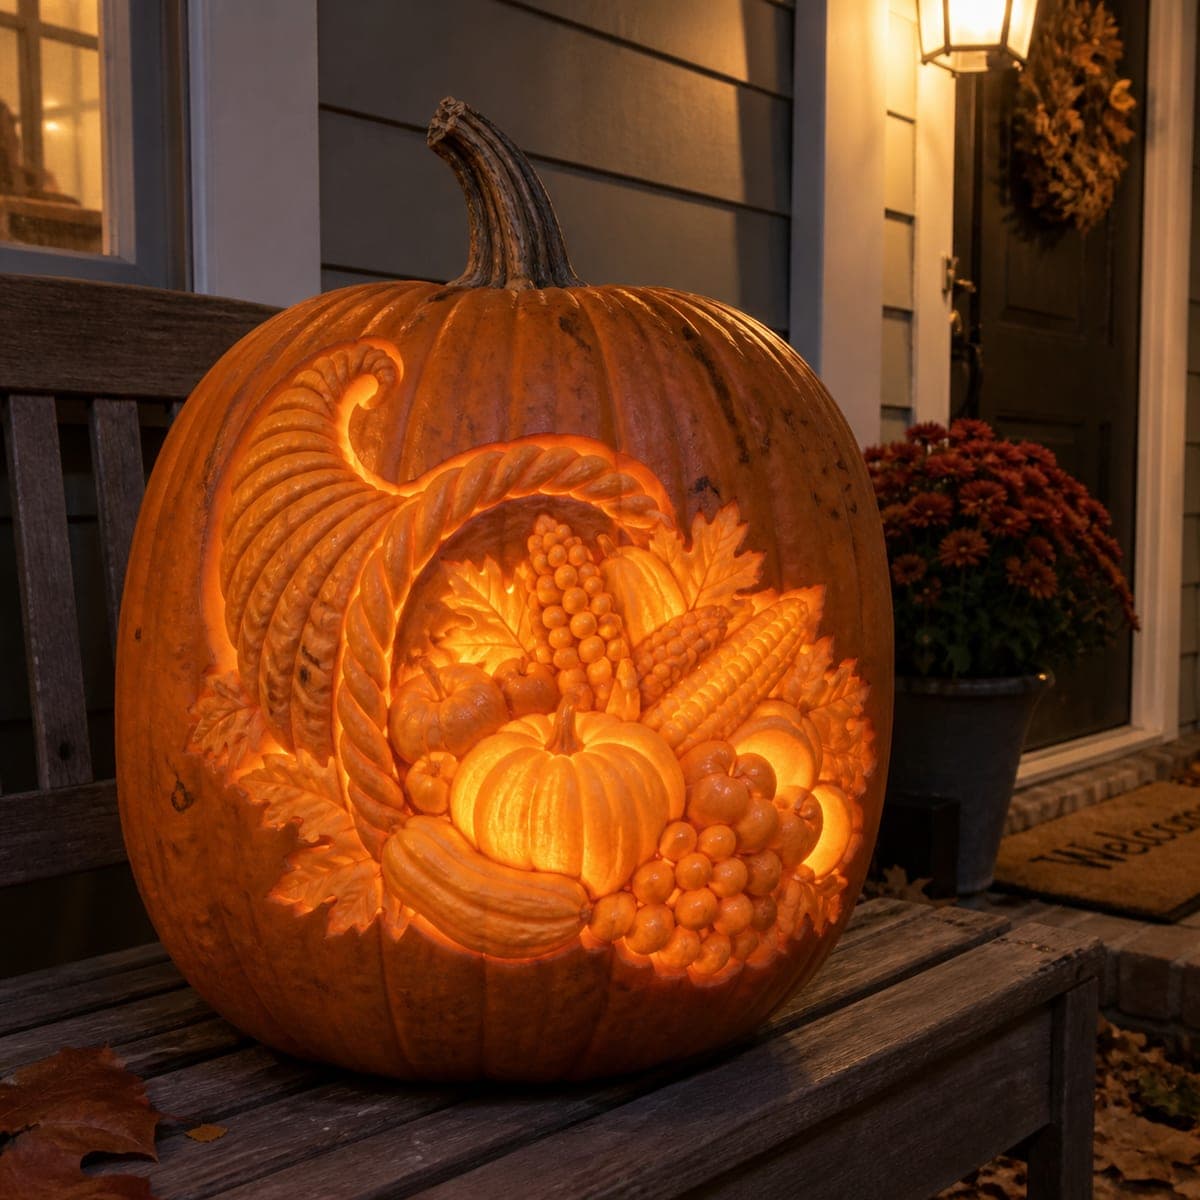
Cornucopia Harvest Relief Carved Giant PumpkinAI
0

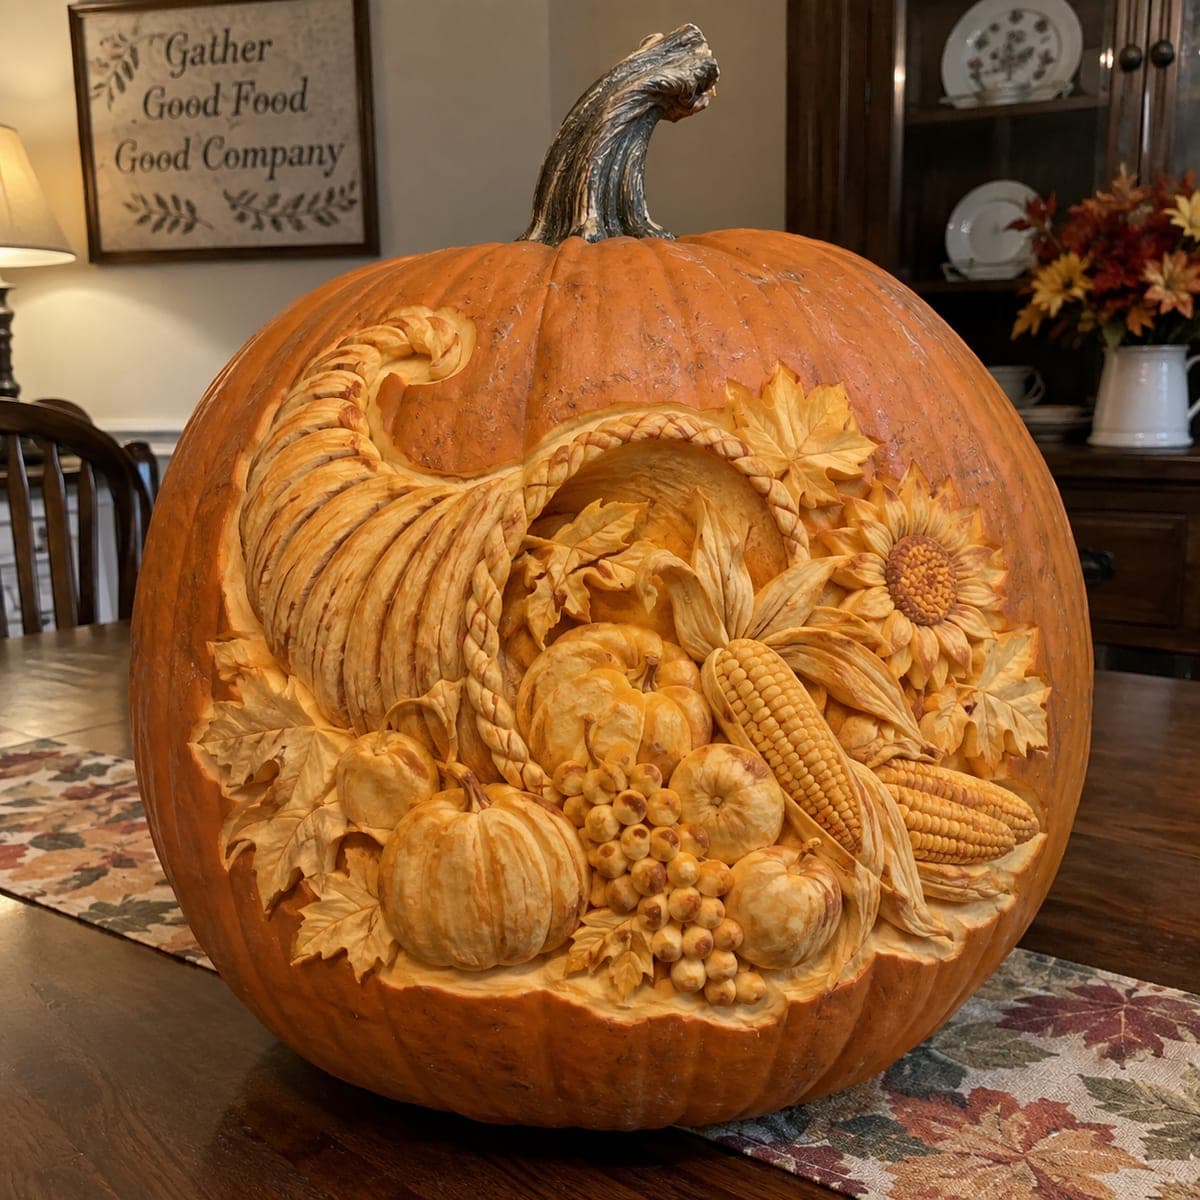
Cornucopia Harvest Relief Carved Giant Pumpkin

An overflowing cornucopia spills sculpted corn, grapes, gourds, maple leaves, and a full sunflower across this giant pumpkin in museum-quality relief. Every element is carved at a different depth, with the braided horn and corn kernels showing hours of loop-tool work. Start with the deepest background recess, then bring each fruit forward, saving fragile stems and tendrils for last. Because nothing is pierced, this harvest centerpiece works for Thanksgiving long after Halloween ends.

This is an AI-generated concept image: a realistic, carvable design idea rather than a photo of a finished carve. AI concepts are always labeled and sit out the leaderboard and the contest.

No ratings yet Β· Sign in to rate

Comments (0)

  • No comments yet β€” be the first.

Save without an account. Sign in to like or comment.

Our tips for carving a similar design

The core trick here is layered relief, where nothing pierces the shell and every element sits at its own depth to read as a single overflowing horn. The plan is to work back to front: hollow the deepest background first, then raise the cornucopia, fruit, and sunflower forward step by step. Fine stems, tendrils, and corn kernels come last so they stay supported the whole way through.

Written by PumpkinCarvingIdeas.com, inspired by the image above. These are our suggestions, not instructions from the uploader. This approach to the AI concept has not been tested on a real pumpkin.

From pumpkin to porch

  1. Prep the pumpkin and map the layers

    Choose a large pumpkin with a smooth, blemish-free front and cut a lid or a bottom access hole so you can add an LED later without piercing the design. Scrape the inner front wall down to an even thickness of about one inch so light and carving depth stay consistent. Transfer or sketch the full scene, marking which zones are deepest background, mid fruit, and raised foreground. Label the sunflower, corn, gourds, grapes, and the braided horn so you never lose track of depth order.

  2. Excavate the deepest background

    Start behind the fruit cluster where the shadows are darkest, removing skin and a shallow layer of flesh with a loop tool. Keep this recess uniform so the fruit later appears to sit inside the horn. Work slowly and check depth often, since you cannot add flesh back once it is gone. Leave a clear margin around every object you plan to raise forward.

  3. Shape the cornucopia horn and braid

    Round the horn so it tapers toward the curled tip, using a loop tool to sculpt the long ribbed grooves that give it volume. Carve the braided rim as a series of angled, overlapping strands, leaving small bridges of flesh between them so the braid stays strong. Keep the horn opening slightly recessed so the fruit reads as spilling out. Smooth transitions with a ribbon tool for a soft, sculpted surface.

  4. Bring the fruit and gourds forward

    Sculpt the round pumpkins, gourds, apples, and grape cluster so each one bulges above its neighbor, rounding edges to catch light. Undercut gently around the base of each piece to create a shadow line that separates it from the layer behind. For the grapes, carve a grid of small domes rather than fully freeing them, keeping every berry attached. Vary the depth between items so no two touch at the same plane.

  5. Detail corn, sunflower, and leaves

    Use a small loop tool to press rows of corn kernels into the cobs, then peel back the husks as thin raised flaps supported at the base. Carve the sunflower with a stippled center and shallow overlapping petals, and give the maple leaves veined surfaces with lightly skin-peeled edges. Save the thinnest stems and tendrils for last so they are not stressed during earlier work. Keep every fragile detail bridged to the flesh beneath it.

  6. Light it and photograph

    Set a battery LED inside through your access hole and aim it low so it grazes across the relief and deepens every shadow. Wipe cut surfaces and coat them with a thin layer of petroleum jelly to slow drying and browning. Chill the pumpkin overnight to keep the fine details crisp for display. Shoot it in soft side light on a fall runner to show off the depth.

Gather your supplies

Check things off as you get ready.

Work on a stable surface, keep your free hand out of the cutting path, and have an adult handle sharp tools.

Three levels of light

  • Leave intact

    The untouched orange skin at the top and sides of the pumpkin frames the scene and stays dark.

  • Peel & shade

    Skin-peeled surfaces on the fruit, sunflower, leaves, and horn glow a soft mid orange and carry the shading.

  • Cut through

    Since this relief is not pierced, reserve any true cutouts for tiny accent gaps in the braid or leaf edges for the brightest highlights.

Learn the carving basics

Before you start cutting

Do I need to cut all the way through anywhere?

No, this is a relief design where the shell is never pierced. You only remove skin and shallow flesh at different depths, which is what makes it safe to display through Thanksgiving. An interior LED provides the glow without any open windows.

How do I keep the corn kernels and grapes from breaking off?

Never fully free them from the surface. Carve kernels as pressed rows and grapes as a grid of small domes, leaving each one attached to the flesh beneath. Keeping them bridged means they hold up even with hours of detail work around them.

This looks like a concept image. Can a real pumpkin match it?

The reference is an AI concept, so no real pumpkin was carved, but the approach is achievable at a scaled back level of detail. Focus on three or four clear depth layers and simplify the busiest areas. A real pumpkin will read beautifully even without museum-level density.

Your take belongs here, too.

Changed a detail? Made it simpler? Share a photo of your version and tell the community what worked.

Share your pumpkin

More pumpkins like this

You've reached the end Β· 8 pumpkins
The Patch Report

Fresh pumpkins, in your inbox.

The best new carvings, ideas worth stealing, and how-tos for carving season. Short, seasonal, and gone by November.

A short email during carving season. Unsubscribe anytime. See our privacy policy.