Halloween Pumpkin Carving Contest Β· Starts October 1st Β· $500 in prizes
← Back to ideas
@ai_concepts
Jul 11, 2026
Sunflower Cornucopia Harvest Painted PumpkinAI
0

Sunflower Cornucopia Harvest Painted Pumpkin

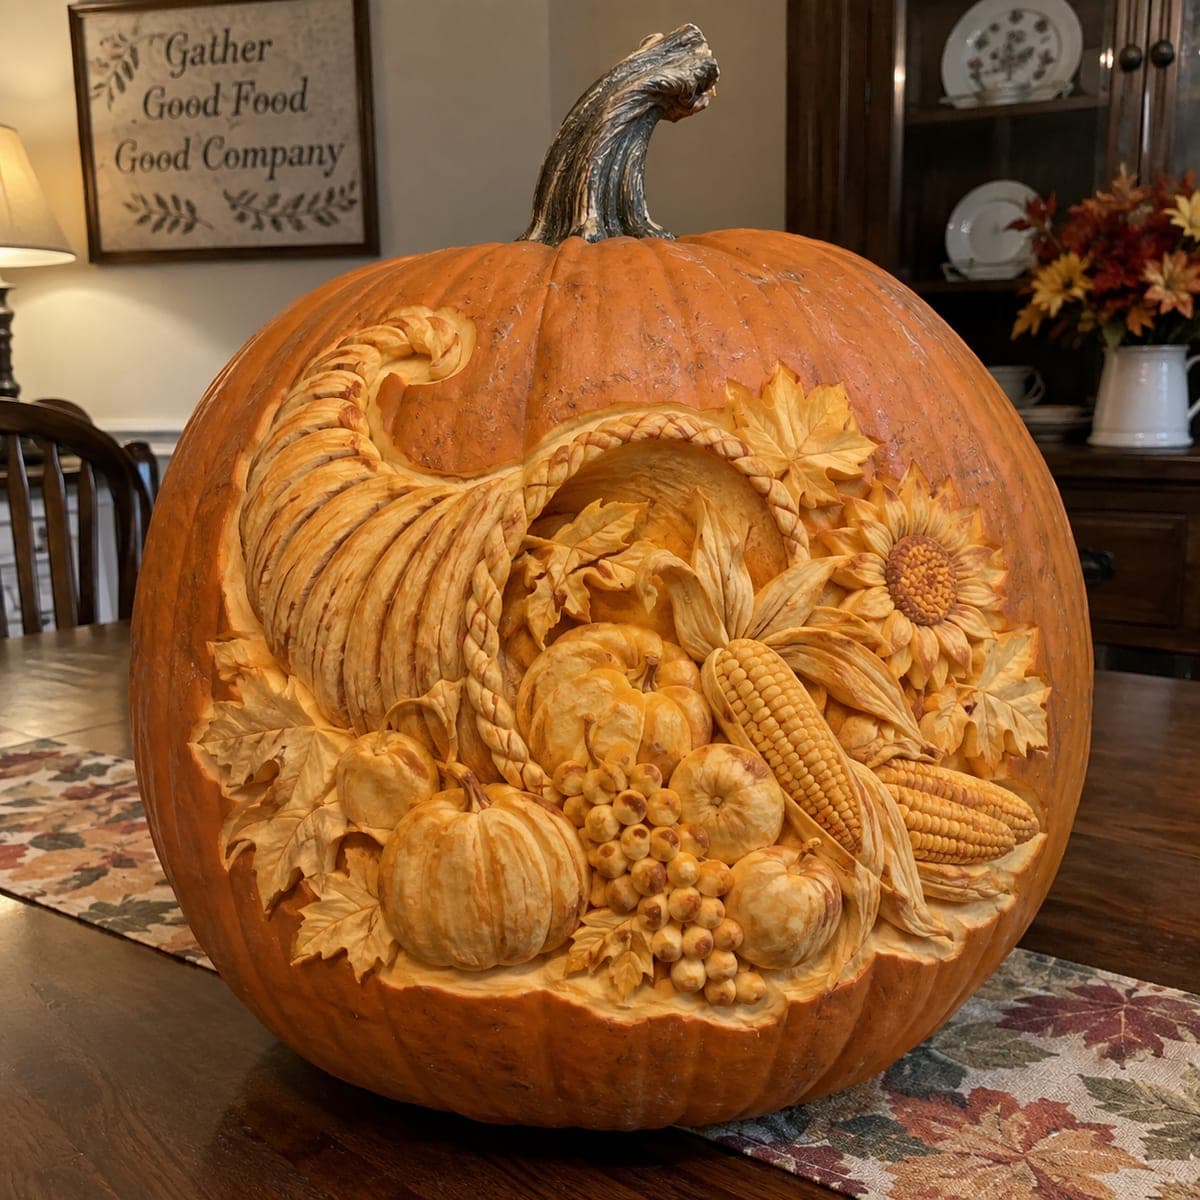
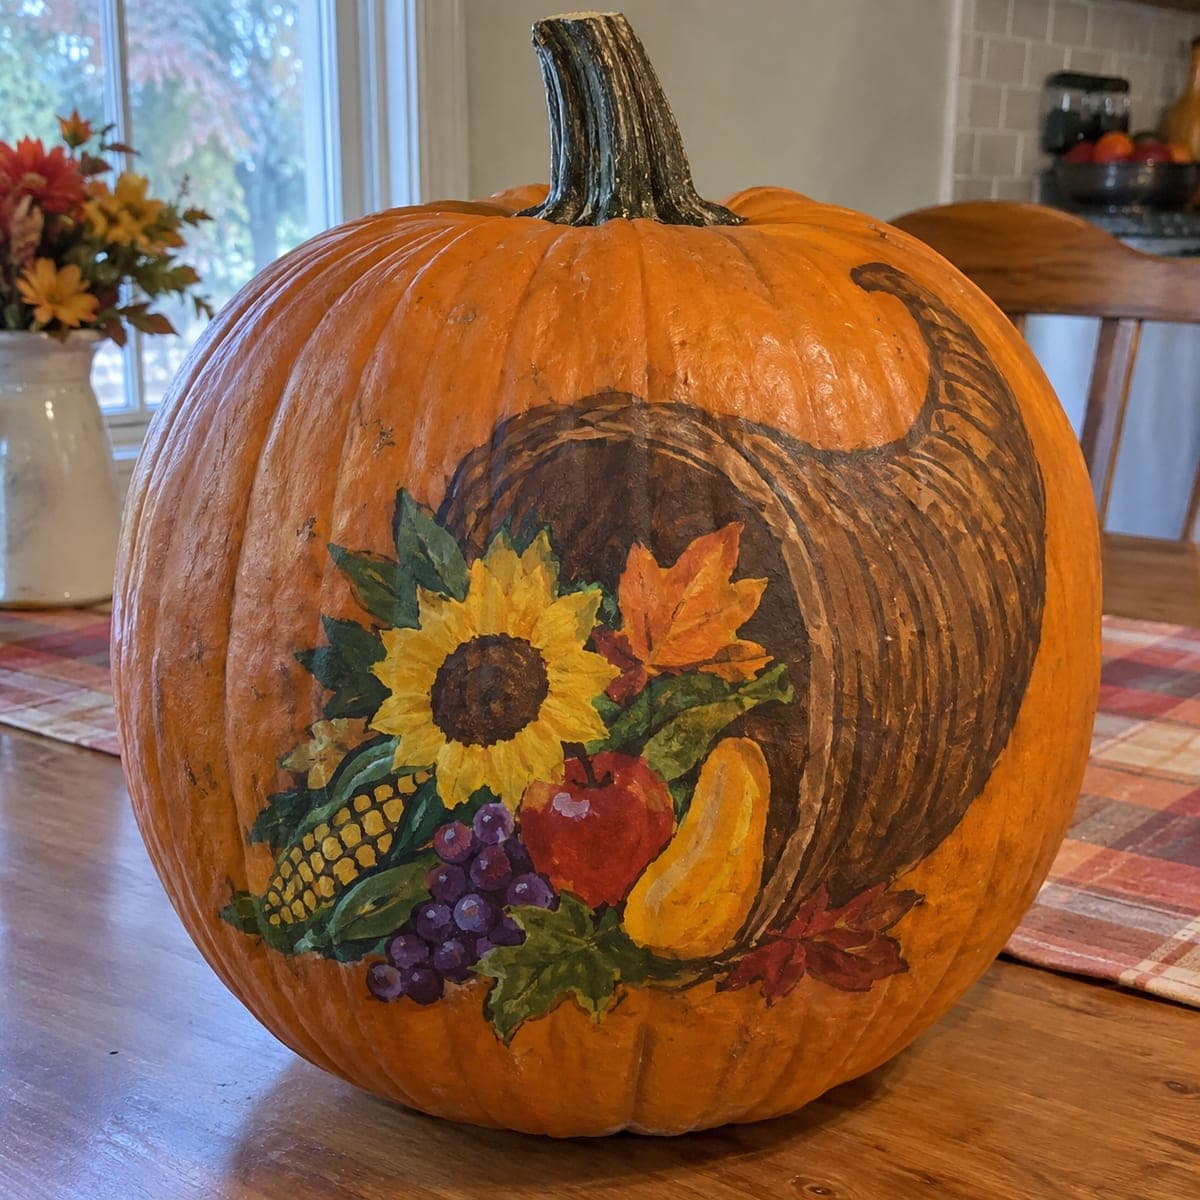
A brimming cornucopia spills sunflowers, grapes, corn, apples, and autumn leaves across this hand-painted harvest pumpkin. The folk-art style is forgiving; block in the brown horn first, then layer the fruit and flowers on top so overlaps look natural. Craft acrylics in six or seven fall colors cover the whole palette. Since it stays uncarved, this makes a Thanksgiving centerpiece that lasts from October straight through the holiday.

This is an AI-generated concept image: a realistic, carvable design idea rather than a photo of a finished carve. AI concepts are always labeled and sit out the leaderboard and the contest.

No ratings yet Β· Sign in to rate

Comments (0)

  • No comments yet β€” be the first.

Save without an account. Sign in to like or comment.

Our tips for carving a similar design

The core trick here is layering: block in the big brown cornucopia horn first, then paint the fruit, flowers, and leaves on top so the overlaps read as depth. Because it stays uncarved, this is a no-carve painted centerpiece rather than a lit lantern. Work light to dark within each element and let colors dry between layers so nothing muddies together.

Written by PumpkinCarvingIdeas.com, inspired by the image above. These are our suggestions, not instructions from the uploader. This approach to the AI concept has not been tested on a real pumpkin.

From pumpkin to porch

  1. Clean and sketch

    Wipe the pumpkin with a damp cloth and let it dry fully so paint grips the skin. Lightly pencil the cornucopia horn on one side, with its opening facing the fruit. Rough in the sunflower, corn, apple, grapes, squash, and a few leaves spilling out. Keep lines loose since folk-art style forgives small wobbles.

  2. Paint the horn base

    Mix two browns, one lighter and one darker, and block in the woven horn shape. Use curved strokes that follow the cone so the basket looks rounded. While it is still slightly wet, drag the darker brown in arcs to suggest the woven ridges. Let this base dry completely before adding anything on top.

  3. Layer the large fruit and flower

    Paint the sunflower petals in yellow, then deepen the center with brown and a few dark dots. Add the red apple, yellow squash, and the corn cob in gold with a grid of kernels. Work each item as a solid shape first, then come back for shadows where pieces overlap. Painting the biggest elements now gives you anchors for the smaller clusters.

  4. Add grapes and leaves

    Dot in purple grapes as a cluster, letting some overlap for a full bunch. Fill the gaps with green, orange, and red autumn leaves so the arrangement spills naturally from the horn. Tuck leaf tips behind the fruit to reinforce the layered look. Keep edges a little loose for that hand-painted feel.

  5. Highlights and outlines

    Add small white highlights to the grapes, apple, and squash so they look glossy. Trace a few thin darker outlines around petals and leaves to make shapes pop. Step back often to check balance and add a stray leaf if a corner looks bare. Let everything cure a few hours before handling.

  6. Seal and stage

    Once fully dry, brush on a matte or satin acrylic sealer to protect the paint from smudges and moisture. Set the pumpkin on a plaid runner or wood table with a few real gourds and mums around it. Snap your photo in soft daylight to capture the warm colors. Displayed indoors, a painted pumpkin like this can last from October through Thanksgiving.

Gather your supplies

Check things off as you get ready.

Work on a stable surface, keep your free hand out of the cutting path, and have an adult handle sharp tools.

Three levels of light

  • Leave intact

    Nearly the whole pumpkin stays whole and unpainted skin around the scene keeps its natural orange.

  • Peel & shade

    For a soft glow option, you could lightly shave the horn's back edge, but the painted version keeps the skin intact.

  • Cut through

    No cutouts here, this is a no-carve design, so there are no bright openings to light through.

Learn the carving basics

Before you start cutting

Do I need to carve anything at all?

No, this is a no-carve painted design, so the pumpkin stays whole. That is part of why it lasts so long, since an uncut pumpkin resists rot far better than a carved one. All the detail comes from layered acrylic paint.

What order should I paint the elements?

Start with the large brown cornucopia horn as your background. Once it is dry, add the biggest fruit and the sunflower, then finish with grapes, leaves, and highlights. Painting back to front lets the overlaps look natural without fussy masking.

How do I keep the colors from smearing together?

Let each layer dry before adding the one on top, especially the dark horn under the bright fruit. A hair dryer on low speeds this up. A final coat of acrylic sealer locks everything in and guards against smudges when you move the pumpkin.

Your take belongs here, too.

Changed a detail? Made it simpler? Share a photo of your version and tell the community what worked.

Share your pumpkin

More pumpkins like this

You've reached the end Β· 8 pumpkins
The Patch Report

Fresh pumpkins, in your inbox.

The best new carvings, ideas worth stealing, and how-tos for carving season. Short, seasonal, and gone by November.

A short email during carving season. Unsubscribe anytime. See our privacy policy.