Halloween Pumpkin Carving Contest · Starts October 1st · $500 in prizes
← Back to ideas
@ai_concepts
Aug 14, 2026
Cheerful Scarecrow Face Painted PumpkinAI
0

Cheerful Scarecrow Face Painted Pumpkin

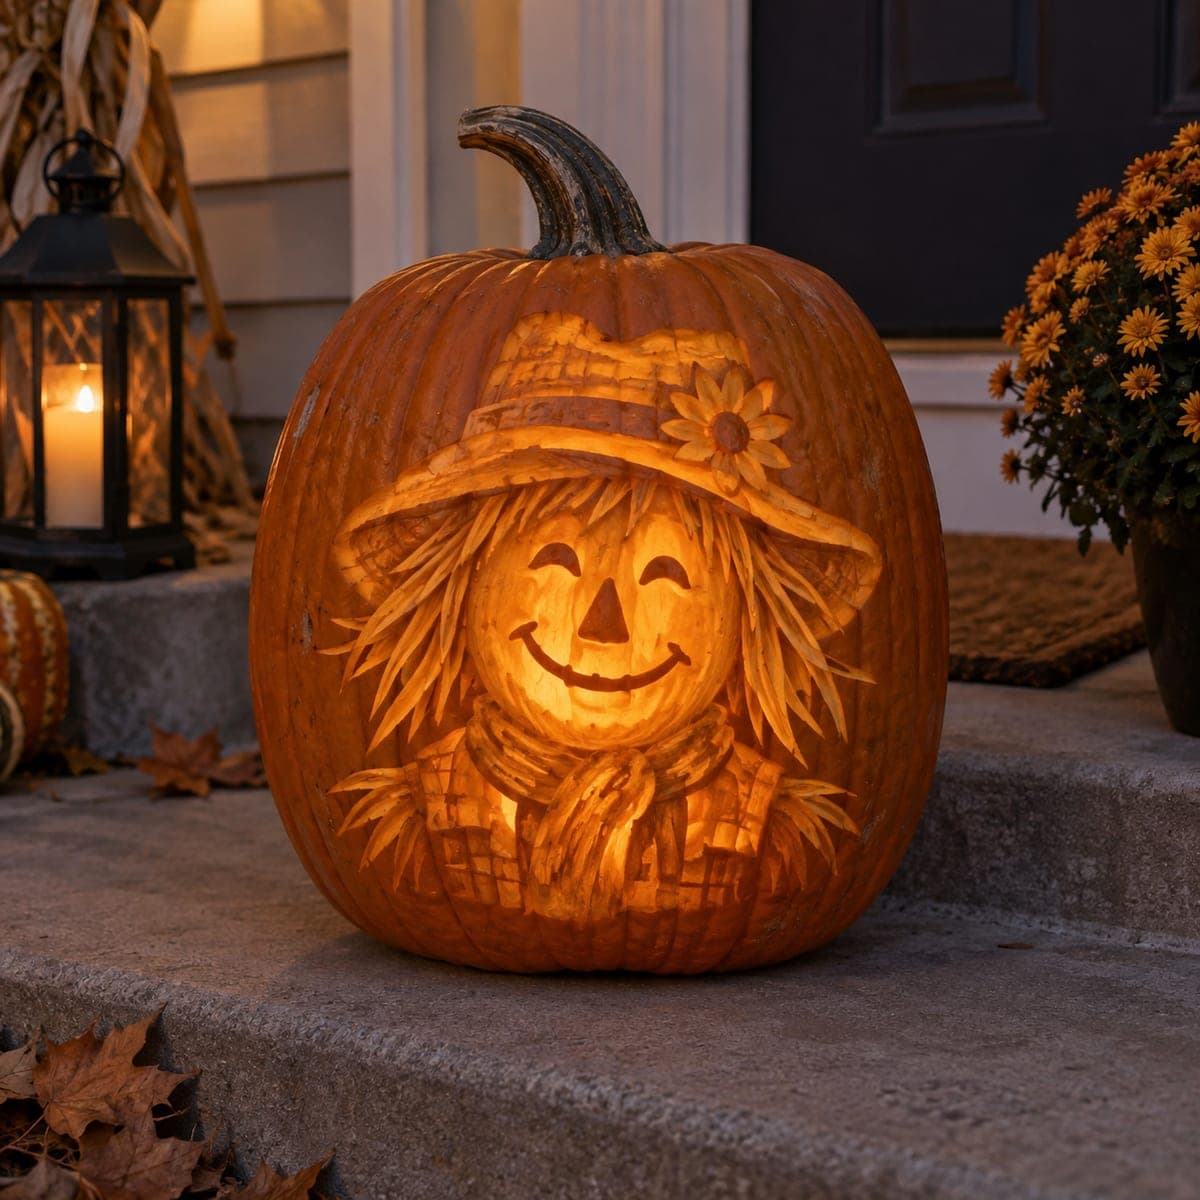
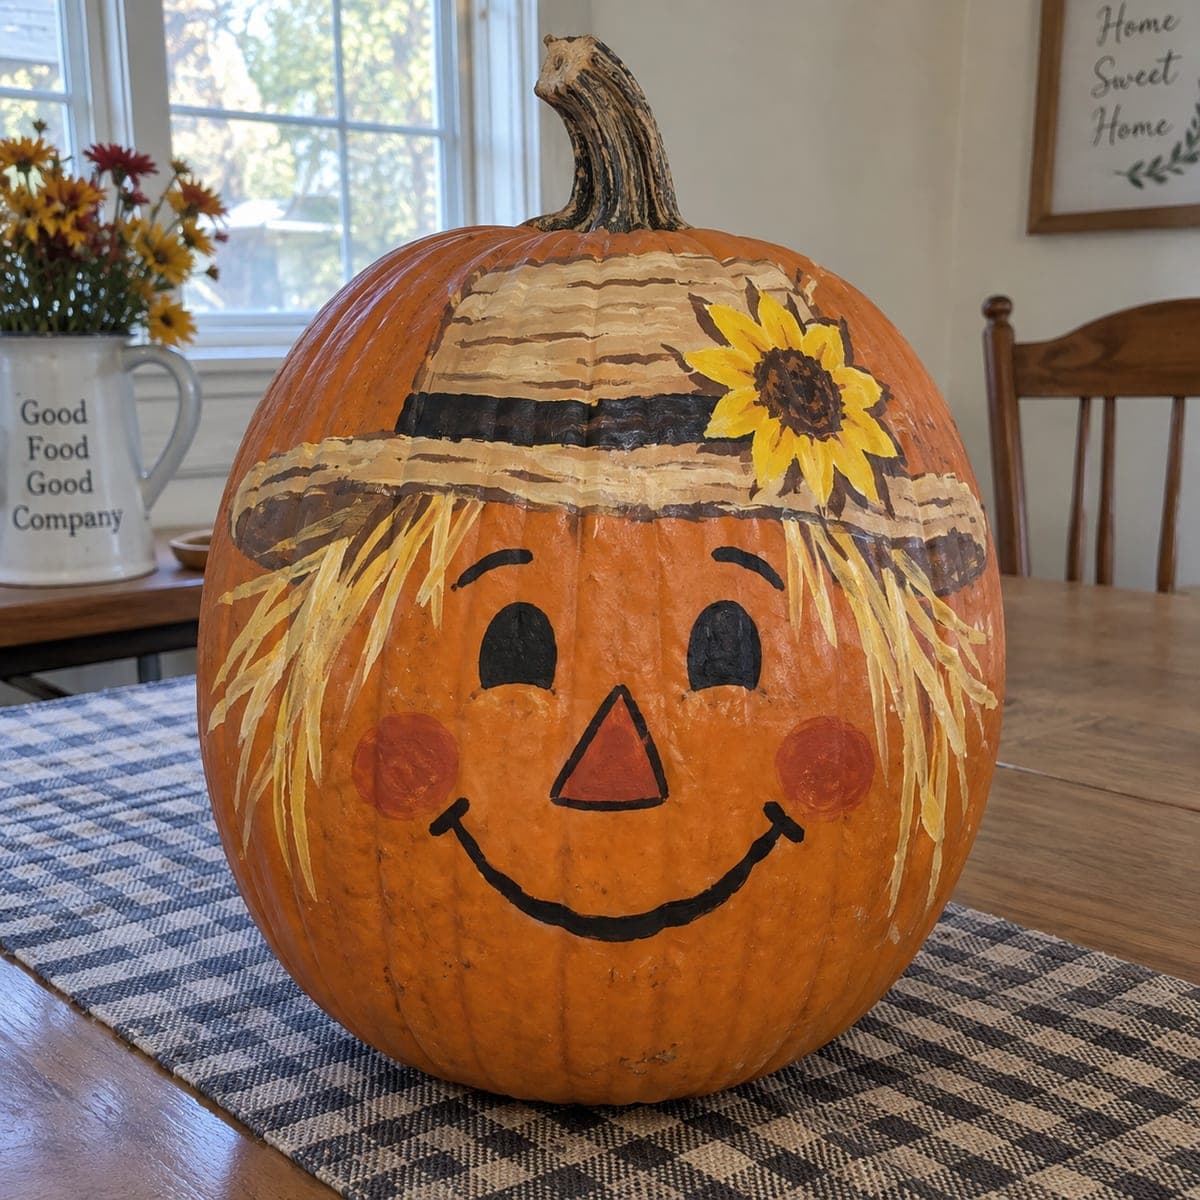
Wearing a straw hat with a sunflower and wisps of yellow straw hair, this scarecrow face turns a tall pumpkin into a friendly fall greeter. The whole design is acrylic paint, making it a good harvest decoration that can sit out from September through Thanksgiving. Paint the hat band and face features first, then drag a nearly dry brush in long strokes for the straw so it looks loose and textured.

This is an AI-generated concept image: a realistic, carvable design idea rather than a photo of a finished carve. AI concepts are always labeled and sit out the leaderboard and the contest.

No ratings yet · Sign in to rate
Comments (0)

  • No comments yet — be the first.

Save without an account. Sign in to like or comment.

Our tips for carving a similar design

The core trick here is dry-brushing loose yellow straw so the hair and hat brim look wispy and natural instead of flat. Everything is acrylic paint on an uncarved pumpkin, so you build it in layers: block the hat and face first, then add texture and small accents last. Because nothing is cut, it can sit out for weeks as a harvest decoration.

Written by PumpkinCarvingIdeas.com, inspired by the image above. These are our suggestions, not instructions from the uploader. This approach to the AI concept has not been tested on a real pumpkin.

From pumpkin to porch

  1. Clean and sketch

    Wipe the pumpkin with a damp cloth and let it dry fully so paint grips. Use a pencil or washable marker to lightly map the hat brim across the upper third, the two oval eyes, the triangle nose, and the wide smile. Keep the face centered on the flattest front panel. Step back and check the layout before you commit to paint.

  2. Block the hat and band

    Paint the straw hat in a soft tan base coat and let it dry. Add a dark band with a flat brush, keeping the edge crisp where it meets the tan. Two thin coats look better than one thick one, so let each layer dry before the next. This gives you a clean stage for the textured strokes later.

  3. Paint the face features

    Fill the eyes and outline the smile in black with a small round brush, using steady short strokes for smooth curves. Paint the triangle nose in orange-red and add two round rosy cheeks in a diluted orange. Let the black dry completely so it does not smear into the surrounding orange skin. Touch up any wobbly edges with a fine brush.

  4. Add the sunflower

    Place the sunflower on the hat brim beside the band. Paint a brown center circle first, then ring it with short yellow petals worked outward from the middle. Dot the center with darker brown for seed texture once the base is dry. Keep it small so it reads as a hat accent, not the main event.

  5. Dry-brush the straw

    Load a stiff brush with yellow, then wipe most of it off on a paper towel so the bristles are nearly dry. Drag long, light strokes outward from under the hat for the straw hair and along the brim for loose ends. Vary the length and let strokes overlap for a natural, scruffy look. Add a few pale highlights for depth.

  6. Seal and stage

    Once everything is bone dry, brush or spray on a clear matte sealer to protect the paint from moisture. Set the finished pumpkin on a runner or wood surface where fall light hits it. Snap your photo in daylight so the tan hat and yellow straw stay warm and readable. Keep it in a cool, dry spot to help it last into Thanksgiving.

Gather your supplies

Check things off as you get ready.

Work on a stable surface, keep your free hand out of the cutting path, and have an adult handle sharp tools.

Three levels of light

  • Leave intact

    The natural orange skin left unpainted across most of the face and cheeks stays as the warm base color.

  • Peel & shade

    This design is paint-only, so there is no peeled glow, but a thinned tan wash on the hat mimics a soft, lighter tone.

  • Cut through

    No cutouts are used here; if you want light, set a small LED beside the pumpkin rather than carving into it.

Learn the carving basics

Before you start cutting

Do I need to carve anything for this scarecrow?

No, this is a fully painted design with no cutting at all. That makes it beginner-friendly and long-lasting, since an uncarved pumpkin will not rot as quickly. If you still want a glow, place a battery LED next to it rather than hollowing it out.

How do I get the straw to look loose instead of like solid yellow patches?

The secret is dry-brushing. Load your brush, then wipe almost all the paint off on a paper towel before dragging long light strokes. The broken, streaky coverage reads as individual straws, so build it up gradually instead of pressing hard.

Will the paint hold up if I display it for weeks?

Acrylic paint is durable once dry, and a clear matte sealer adds moisture protection. Keep the pumpkin in a cool, dry spot out of direct rain to help it last from September into Thanksgiving. Wipe dust gently with a dry cloth rather than water.

Your take belongs here, too.

Changed a detail? Made it simpler? Share a photo of your version and tell the community what worked.

Share your pumpkin

More pumpkins like this

You've reached the end · 8 pumpkins
The Patch Report

Fresh pumpkins, in your inbox.

The best new carvings, ideas worth stealing, and how-tos for carving season. Short, seasonal, and gone by November.

A short email during carving season. Unsubscribe anytime. See our privacy policy.