Halloween Pumpkin Carving Contest · Starts October 1st · $500 in prizes
← Back to ideas
@ai_concepts
Aug 2, 2026
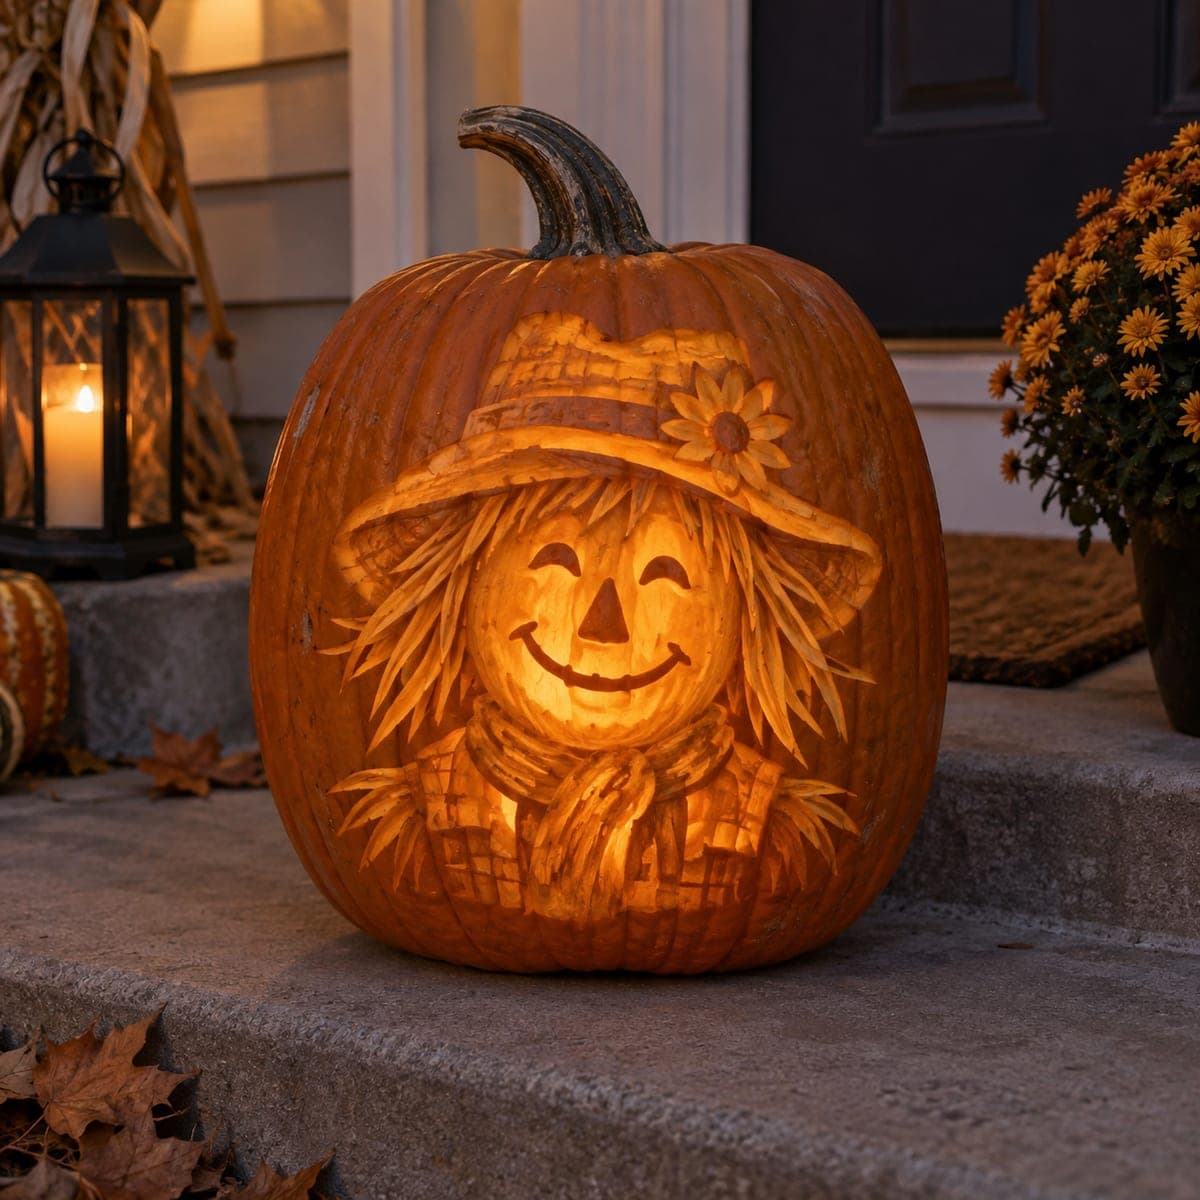
Smiling Scarecrow Face Etched Pumpkin DesignAI
0

Smiling Scarecrow Face Etched Pumpkin Design

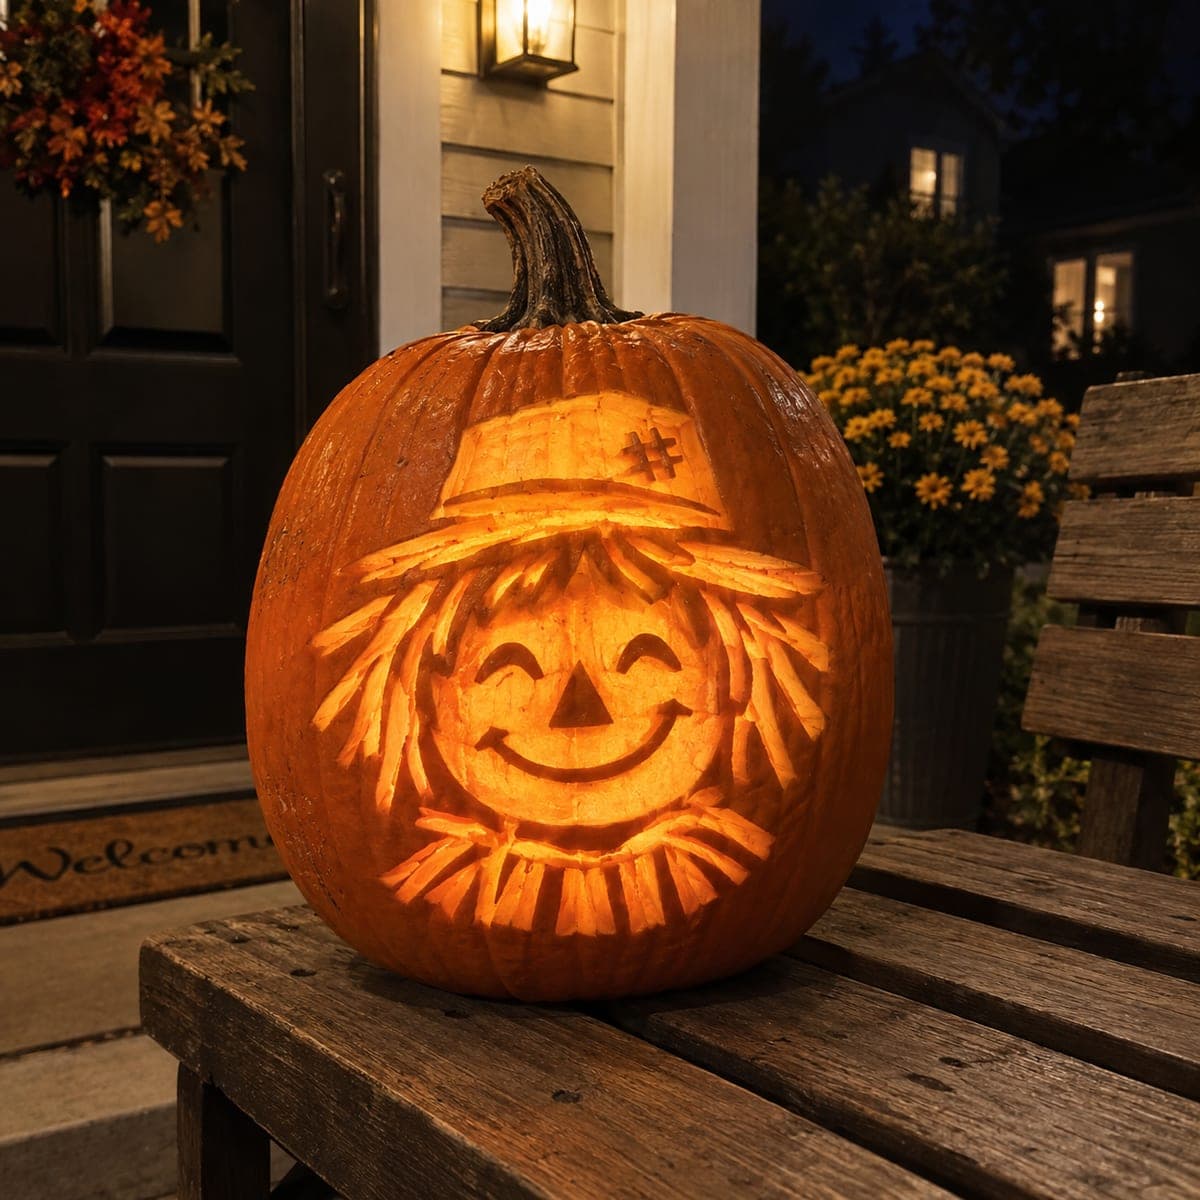
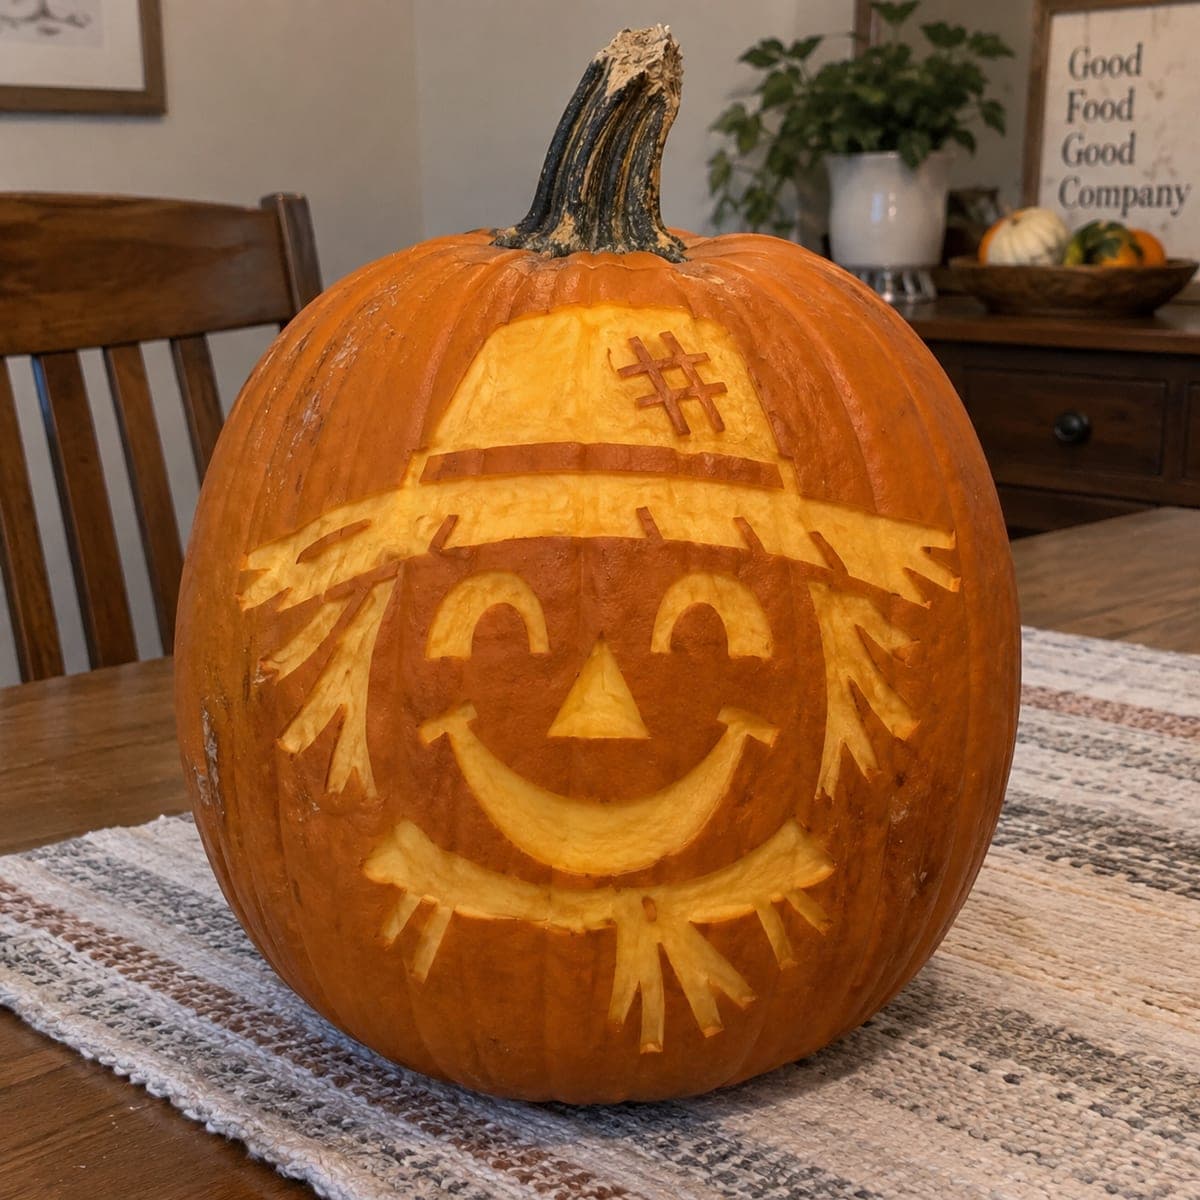
Straw hair sticks out from under a patched hat on this smiling scarecrow pumpkin, etched in shallow relief for a daytime harvest display. Skin-deep peeling exposes the pale flesh for the hat, grin, and straw tufts, so no interior light is needed and the pumpkin stays whole. Draw the face with a dry-erase marker first, peel the largest shapes with a ribbon tool, and add the straw with quick outward strokes.

This is an AI-generated concept image: a realistic, carvable design idea rather than a photo of a finished carve. AI concepts are always labeled and sit out the leaderboard and the contest.

No ratings yet · Sign in to rate
Comments (0)

  • No comments yet — be the first.

Save without an account. Sign in to like or comment.

Our tips for carving a similar design

The core trick here is shallow relief: instead of cutting all the way through, you peel away only the skin so the pale flesh glows soft against the untouched orange. The plan is to draw the whole scarecrow face first, peel the big shapes like the hat brim, grin, and eyes, then finish with quick outward strokes for the straw tufts. Because nothing is cut through, the pumpkin stays sealed and looks great in daylight without any light inside.

Written by PumpkinCarvingIdeas.com, inspired by the image above. These are our suggestions, not instructions from the uploader. This approach to the AI concept has not been tested on a real pumpkin.

From pumpkin to porch

  1. Draw the full face first

    Wipe the pumpkin clean and dry it so marker sticks. With a dry-erase marker, sketch the hat brim across the upper third, the patch stitching above it, then the two curved eyes, triangle nose, and wide smile below. Add short straw tufts poking out on both sides of the face and under the chin. Dry-erase wipes off easily, so redraw until the spacing feels balanced.

  2. Score your outlines

    Trace over every marker line with a small detail knife or a poker, cutting just through the skin and no deeper. This scoring gives you clean edges to peel up to and keeps the pale shapes crisp. Take your time on the curves of the eyes and grin. Adults should handle all the sharp tools here.

  3. Peel the big shapes

    Switch to a ribbon or loop tool and scrape the skin off inside the large areas: the hat, the two eyes, the nose, and the smile. Aim for an even, shallow depth so the flesh reads as one bright tone. Work slowly toward your scored lines so edges stay sharp. The exposed flesh will look pale and glow warm in daylight.

  4. Carve the patch and stitches

    For the hash-mark patch on the hat, peel only the thin lines so the patch reads as stitching over darker skin. Keep these grooves narrow and shallow. Leave the skin between the lines untouched so the pattern stays legible. This little detail is what sells the scarecrow look.

  5. Add the straw with quick strokes

    Give each straw tuft life by peeling short, tapering strokes that fan outward from the face. Vary the length a little so they look natural rather than combed. Keep the strokes shallow and let some skin show between them for contrast. A small gouge or the tip of your loop tool works well for these.

  6. Clean up and display

    Wipe away any leftover marker with a damp cloth and tidy stray edges. Rub a thin coat of petroleum jelly or vegetable oil over the peeled areas to slow drying and keep the flesh bright. No light is needed, so set it out on a table or porch in daylight. Snap your photo while the flesh is fresh and pale.

Gather your supplies

Check things off as you get ready.

Work on a stable surface, keep your free hand out of the cutting path, and have an adult handle sharp tools.

Three levels of light

  • Leave intact

    The untouched orange skin around the face and the background, plus the hat band, stays dark for contrast.

  • Peel & shade

    The hat, eyes, nose, grin, and straw tufts are skin-peeled to glow pale in daylight.

  • Cut through

    Nothing is cut through on this design, so it stays whole with no interior light.

Learn the carving basics

Before you start cutting

Do I need a light inside this pumpkin?

No. This is an etched, daytime design that relies on the pale peeled flesh showing against the darker skin. If you did want a faint evening glow you could add a small LED, but no cutouts means most of the light would stay hidden. Keep it as a whole-pumpkin harvest piece.

How deep should I peel so the shapes stay bright?

Just through the skin, about an eighth of an inch, until you hit the lighter flesh. Go for an even depth across each shape so the tone reads as one clean color. Peeling too deep makes the flesh mushy and can turn brown faster. Shallow and consistent wins here.

How do I keep the straw tufts from looking messy?

Draw them before you cut and pull each stroke outward from the face in one smooth motion. Vary the lengths slightly and leave skin between strokes so each straw stands apart. A few clean tufts read better than a dense scribble. Practice one stroke on the back of the pumpkin first.

Your take belongs here, too.

Changed a detail? Made it simpler? Share a photo of your version and tell the community what worked.

Share your pumpkin

More pumpkins like this

You've reached the end · 8 pumpkins
The Patch Report

Fresh pumpkins, in your inbox.

The best new carvings, ideas worth stealing, and how-tos for carving season. Short, seasonal, and gone by November.

A short email during carving season. Unsubscribe anytime. See our privacy policy.