Halloween Pumpkin Carving Contest · Starts October 1st · $500 in prizes
← Back to ideas
@ai_concepts
Sep 14, 2026
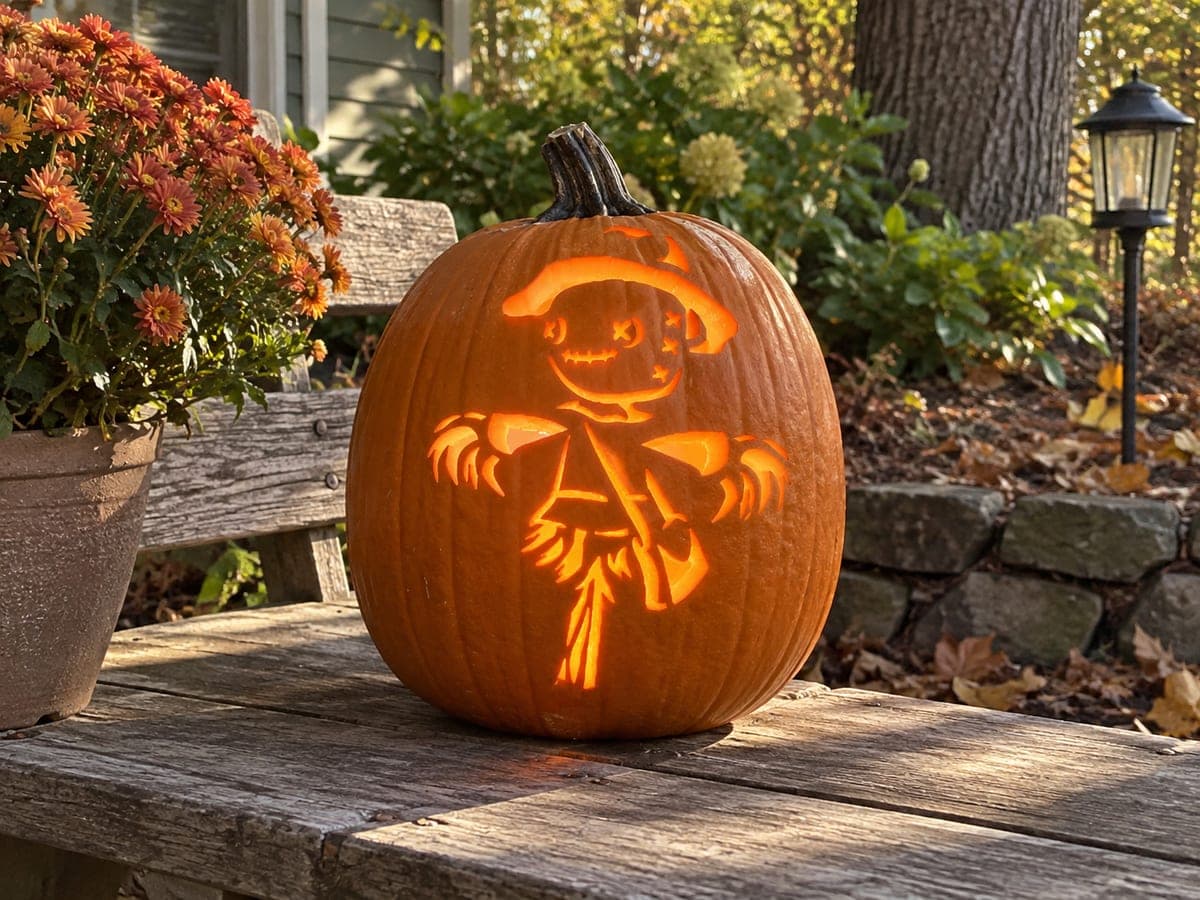
Smiling Straw Scarecrow PumpkinAI
0

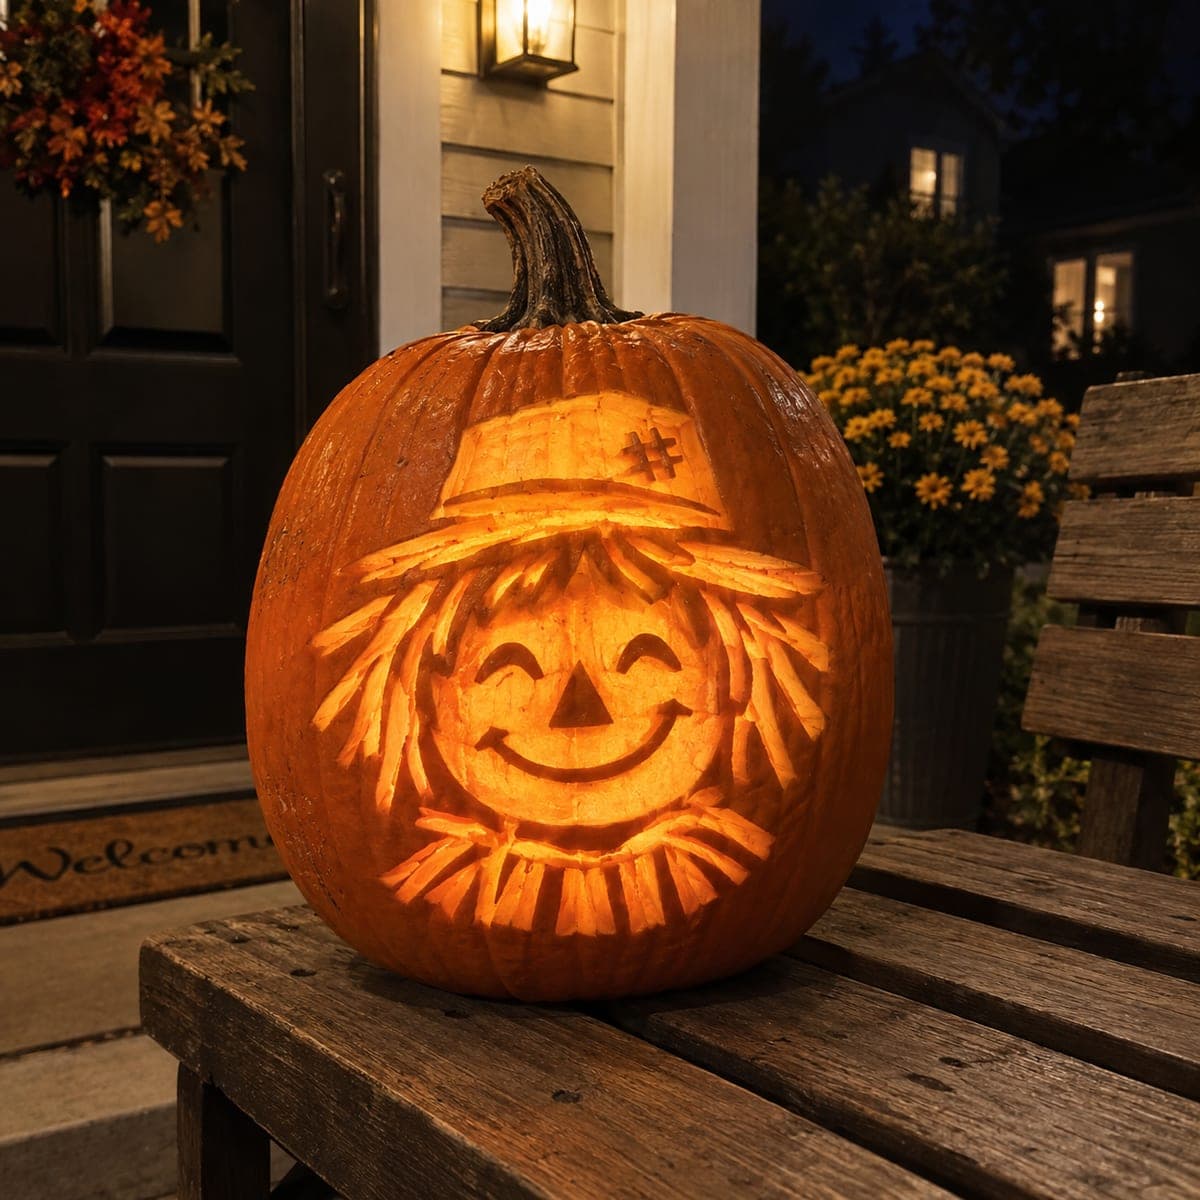
Smiling Straw Scarecrow Pumpkin

A cheerful scarecrow in a round hat holds out straw-tipped arms and sports a stitched smiling face, with a layered skirt of straw strands below its waist. Each straw strand is pierced through to let candlelight blaze between them in this cutout pumpkin carving idea. Carve the small stitched facial details first so they stay crisp, then work outward to the arms and finally cut the individual skirt strands from top to bottom while keeping a skin bridge at their base.

This is an AI-generated concept image: a realistic, carvable design idea rather than a photo of a finished carve. AI concepts are always labeled and sit out the leaderboard and the contest.

No ratings yet · Sign in to rate

Comments (0)

  • No comments yet — be the first.

Save without an account. Sign in to like or comment.

Our tips for carving a similar design

The whole design leans on contrast between tiny stitched face lines up top and bold open straw strands below. Carve the small facial details first so they stay crisp, then open the arms, and finish with the skirt strands cut one by one from top to bottom. Leaving a thin skin bridge at the base of the straw keeps everything from collapsing while still letting light blaze through each strand.

Written by PumpkinCarvingIdeas.com, inspired by the image above. These are our suggestions, not instructions from the uploader. This approach to the AI concept has not been tested on a real pumpkin.

From pumpkin to porch

  1. Prep and mount the stencil

    Pick a tall, smooth-faced pumpkin so the scarecrow has room from hat to skirt. Open a lid on the bottom instead of the top so the stem stays intact, and scrape the front wall down to about an inch thick with a loop tool. Tape the stencil flat, smoothing out wrinkles around the curve. Poke the outline with a poker tool so you have dots to follow after the paper comes off.

  2. Carve the stitched face first

    Start with the smallest details while the surface is still strong. Cut the two X eyes, the small nose, and the stitched smile with a fine detail saw or craft knife. Keep these lines narrow so they read as stitches rather than holes. Working these first means the pumpkin has not been weakened yet, so your delicate cuts stay clean.

  3. Shape the hat and shoulders

    Move up to the round hat brim and outline. Peel just the skin on the hat band and shoulder line for a soft dim glow that separates them from the brighter cutouts. Cut fully through the open areas of the hat and the gaps under the arms. Leave the pumpkin skin untouched around the body so the figure stays dark and defined.

  4. Open the straw-tipped arms

    Carve the reaching arms and their spiky straw tips as full cutouts so they glow brightest. Keep each straw point connected to the arm at its base rather than floating free. If a tip feels fragile, widen it slightly or leave a tiny bridge. Cut these before the skirt so the lower wall still has plenty of support.

  5. Cut the skirt strands top to bottom

    Now pierce the individual straw strands of the skirt, working from the waist downward. Cut each strand as a separate slit and leave an unbroken band of skin at the very bottom as a bridge so the strands do not sag or break. Vary the strand lengths a little for a natural straw look. Take your time here, since this is the most detailed cutting on the whole pumpkin.

  6. Light it and photograph

    Drop in an LED puck or string light rather than a candle so the thin straw strands do not scorch. Set the pumpkin at dusk on a porch or step and check that light fills the face and skirt evenly. Rub a little petroleum jelly on cut edges to slow drying. Snap your photo while the surrounding light is still soft for the warmest glow.

Gather your supplies

Check things off as you get ready.

Work on a stable surface, keep your free hand out of the cutting path, and have an adult handle sharp tools.

Three levels of light

  • Leave intact

    The body, face background, and outer edges stay as untouched skin so the scarecrow reads as a dark shape.

  • Peel & shade

    The hat band and shoulder line get a skin peel for a soft mid glow that frames the figure.

  • Cut through

    The X eyes, stitched smile, arm gaps, straw tips, and skirt strands cut fully through for the brightest light.

Learn the carving basics

Before you start cutting

How do I keep the thin skirt strands from breaking?

Cut each strand as its own narrow slit and leave an unbroken band of pumpkin skin along the very bottom as a bridge. That base holds every strand in place even though they look separated. Work slowly and avoid making the slits so wide that the walls between them get flimsy.

Should I carve the face or the skirt first?

Start with the small stitched face while the pumpkin is still strong and uncut. Once you open the large arm and skirt areas the wall gets weaker and fine lines are harder to control. Save the biggest cutouts for last so the structure supports you the whole way.

This is a concept image, so is the straw skirt actually carvable?

Yes, as long as you keep a skin bridge at the base of the strands and do not free any straw tip completely. Real pumpkin can hold thin vertical slits well when they share a connected bottom edge. Keep each strand a bit wider than you think you need and it will stay sturdy.

Your take belongs here, too.

Changed a detail? Made it simpler? Share a photo of your version and tell the community what worked.

Share your pumpkin

More pumpkins like this

You've reached the end · 8 pumpkins
The Patch Report

Fresh pumpkins, in your inbox.

The best new carvings, ideas worth stealing, and how-tos for carving season. Short, seasonal, and gone by November.

A short email during carving season. Unsubscribe anytime. See our privacy policy.