Halloween Pumpkin Carving Contest Β· Starts October 1st Β· $500 in prizes
← Back to ideas
@ai_concepts
Jul 27, 2026
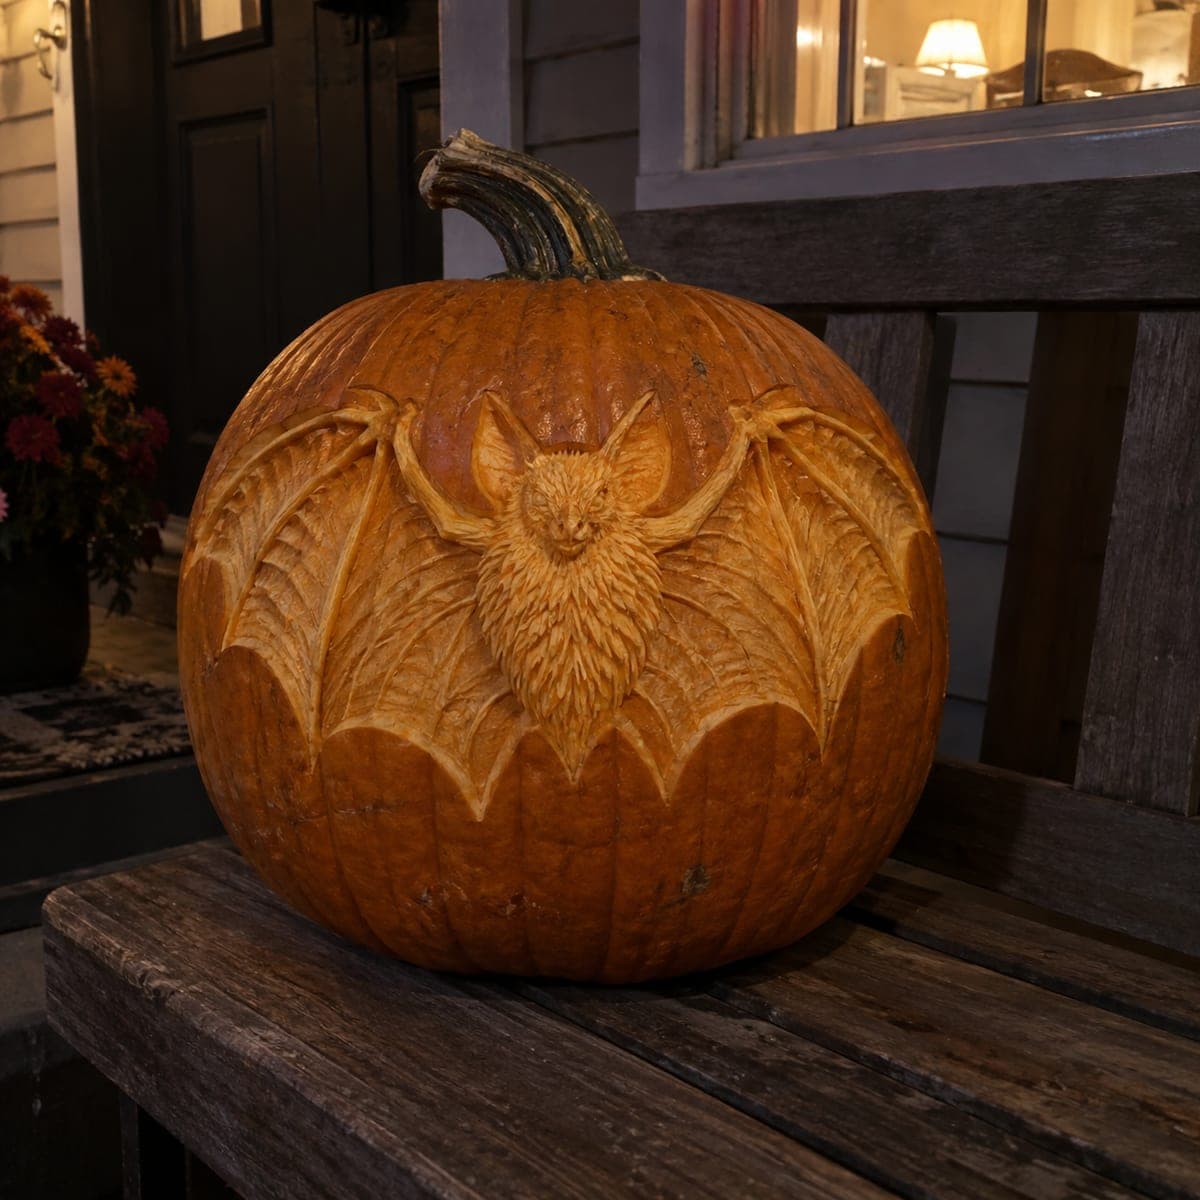
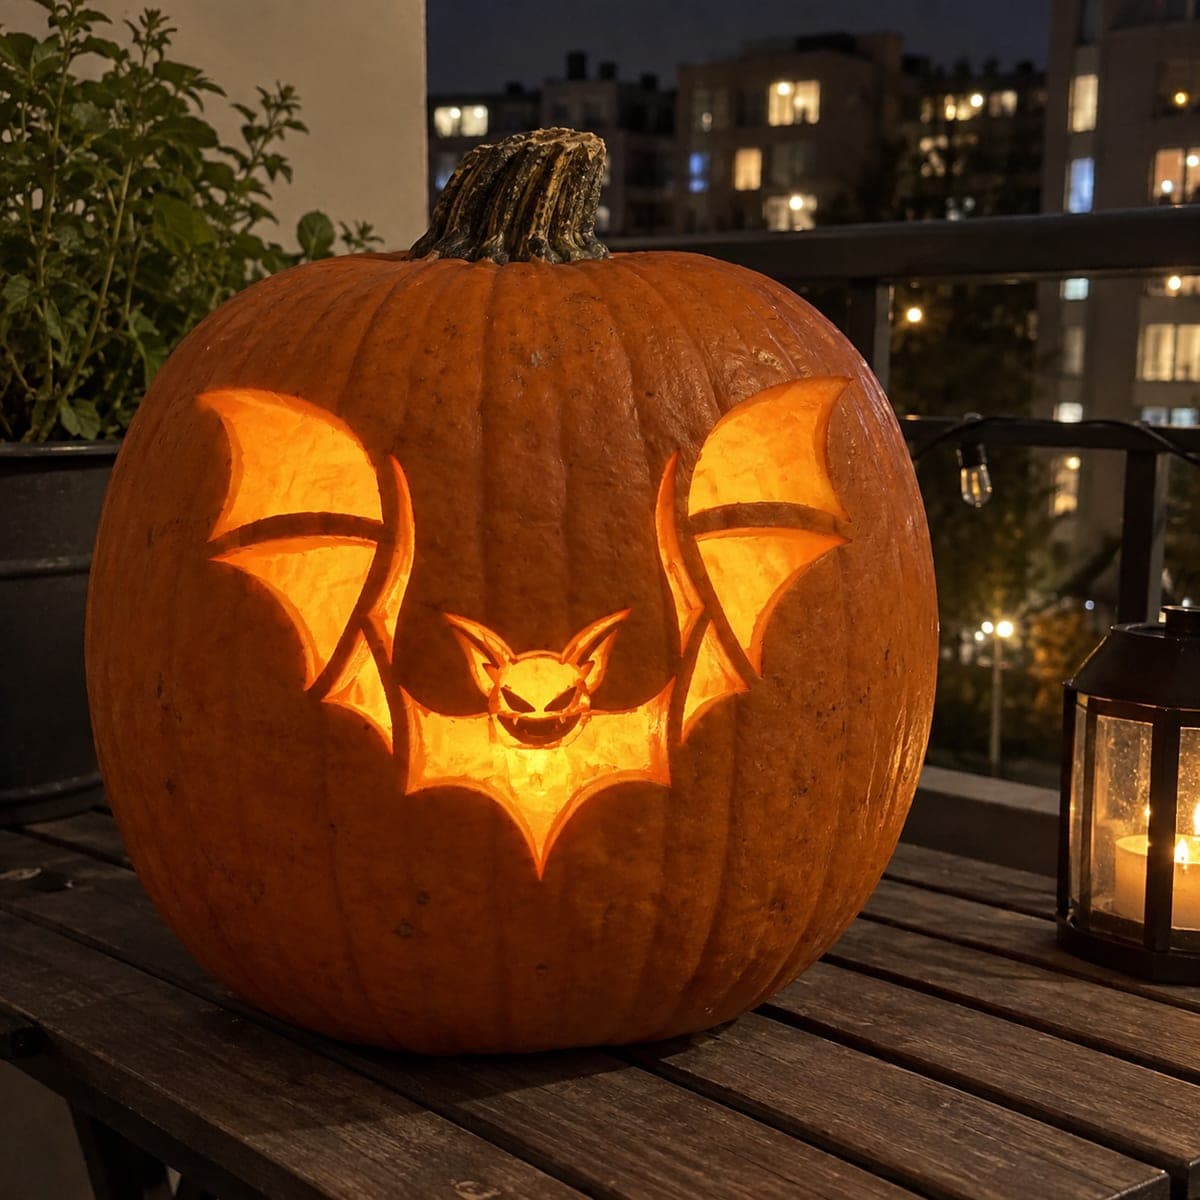
Spread-Wing Bat Relief Carved PumpkinAI
0

Spread-Wing Bat Relief Carved Pumpkin

A furry bat spreads scalloped wings across the entire face of this pumpkin, sculpted in relief so the wing bones, membrane ribs, and shaggy chest all catch the porch light. Every rib of the wings is a long shallow groove, so use a V-tool and keep your strokes flowing from body to wingtip. Skip the candle on this one; it is a daylight-and-lamplight carving best displayed on a bench at eye level.

This is an AI-generated concept image: a realistic, carvable design idea rather than a photo of a finished carve. AI concepts are always labeled and sit out the leaderboard and the contest.

No ratings yet Β· Sign in to rate

Comments (0)

  • No comments yet β€” be the first.

Save without an account. Sign in to like or comment.

Our tips for carving a similar design

The core trick here is relief carving, where you shave away only the top skin layer to build a raised bat that catches light instead of cutting all the way through. Plan the whole face as one image: a furry body in the center, two scalloped wings sweeping to the sides, and the scalloped lower edge dipping down like a bat silhouette. Because this is a light-and-shadow piece rather than a lit lantern, you never open the shell, so keep a tall smooth pumpkin and work slowly from the center out.

Written by PumpkinCarvingIdeas.com, inspired by the image above. These are our suggestions, not instructions from the uploader. This approach to the AI concept has not been tested on a real pumpkin.

From pumpkin to porch

  1. Pick a big smooth canvas and transfer the design

    Choose a tall, wide pumpkin with an even, blemish-free front so the wings have room to spread. Wipe it dry, then tape your bat stencil across the whole face and center the body just above the middle. Poke through the outlines with a pin or transfer tool so you have a dotted map of the body, wing bones, membrane ribs, and the scalloped bottom edge. Take a photo of the stencil first so you can check details later.

  2. Outline the whole bat with a V-tool

    Trace the main outline of the body and both wings with a small V-tool, cutting a shallow groove no deeper than a quarter inch. Keep the blade moving away from your bracing hand and take light passes rather than forcing depth. This outline locks in the shape and gives you clean edges to carve up to. Do not remove any full pieces yet; you are only scoring the design.

  3. Lower the background to lift the bat

    Using a loop or ribbon tool, gently scrape away the skin in the areas around and between the wings so the bat sits raised above a slightly recessed background. Go only a few millimeters deep and keep the surface even so the relief reads clearly. The peeled background will glow a soft orange in lamplight while the raised skin stays darker. Step back often to make sure the bat still pops against the field around it.

  4. Carve the wing ribs as flowing grooves

    Switch back to the V-tool and cut each membrane rib as one long shallow groove that flows from the body out to the wingtip. Let the grooves fan and curve naturally so the wings look stretched, and keep every rib connected to the wing bone so nothing weakens. Vary the pressure to make ribs deeper near the body and lighter at the edges. Leave thin ridges of skin between grooves as bridges so the wing stays strong.

  5. Sculpt the fur, face, and scalloped edge

    Give the chest and head a shaggy look with many short, overlapping strokes of the V-tool, all pointing downward like fur. Define the ears, snout, and eyes with careful shallow cuts, keeping any fang or point thick at the base so it will not snap. Round the scalloped bottom edge of the wings with a small gouge so each scallop has a soft raised lip. Work the finest detail last when your hand is warmed up.

  6. Seal, position, and light it for the photo

    Brush away crumbs, then rub the carved areas with petroleum jelly or a spray sealant to slow drying and deepen the color. Set the pumpkin on a bench at eye level as the design intends, since there is no interior light. Aim a warm LED lamp or porch light across the face from the side so the raised ribs and fur throw long shadows. Refresh the surface with a light water mist if it starts to dull over the next few days.

Gather your supplies

Check things off as you get ready.

Work on a stable surface, keep your free hand out of the cutting path, and have an adult handle sharp tools.

Three levels of light

  • Leave intact

    The raised bat body, wing bones, and outer skin stay untouched and read as the darkest, most solid form.

  • Peel & shade

    The recessed background between and around the wings gets skin-peeled so it glows a soft dim orange and pushes the bat forward.

  • Cut through

    Nothing is cut all the way through on this relief design; it is meant to be seen by lamplight, not lit from inside.

Learn the carving basics

Before you start cutting

Do I really carve it without cutting a lid or lighting it inside?

Yes. This is a relief sculpture, so you shave the surface instead of hollowing the shell. Skip the candle or interior LED and instead light it from the side with a warm lamp. Displaying it on a bench at eye level lets the shadows do the work.

How do I keep the wing ribs from looking messy?

Plan each rib as one continuous stroke that flows from the body out to the tip, and let them fan apart like an open umbrella. Practice the motion on the back of the pumpkin first. Keeping thin ridges of skin between the grooves also gives the wings structure and a crisp, layered look.

Since this is an AI concept, is the design actually carvable?

The pictured pumpkin is an AI concept, so no real one exists, but the design is realistic to reproduce in relief. Keep every wing rib and any fang or ear thick at the base so nothing breaks, and never carve deeper than a few millimeters. Treat the image as a target, not a set of steps someone actually performed.

Your take belongs here, too.

Changed a detail? Made it simpler? Share a photo of your version and tell the community what worked.

Share your pumpkin

More pumpkins like this

You've reached the end Β· 8 pumpkins
The Patch Report

Fresh pumpkins, in your inbox.

The best new carvings, ideas worth stealing, and how-tos for carving season. Short, seasonal, and gone by November.

A short email during carving season. Unsubscribe anytime. See our privacy policy.