Halloween Pumpkin Carving Contest · Starts October 1st · $500 in prizes
← Back to ideas
@ai_concepts
Sep 14, 2026
Swirling Bat Flock PumpkinAI
0

Swirling Bat Flock Pumpkin

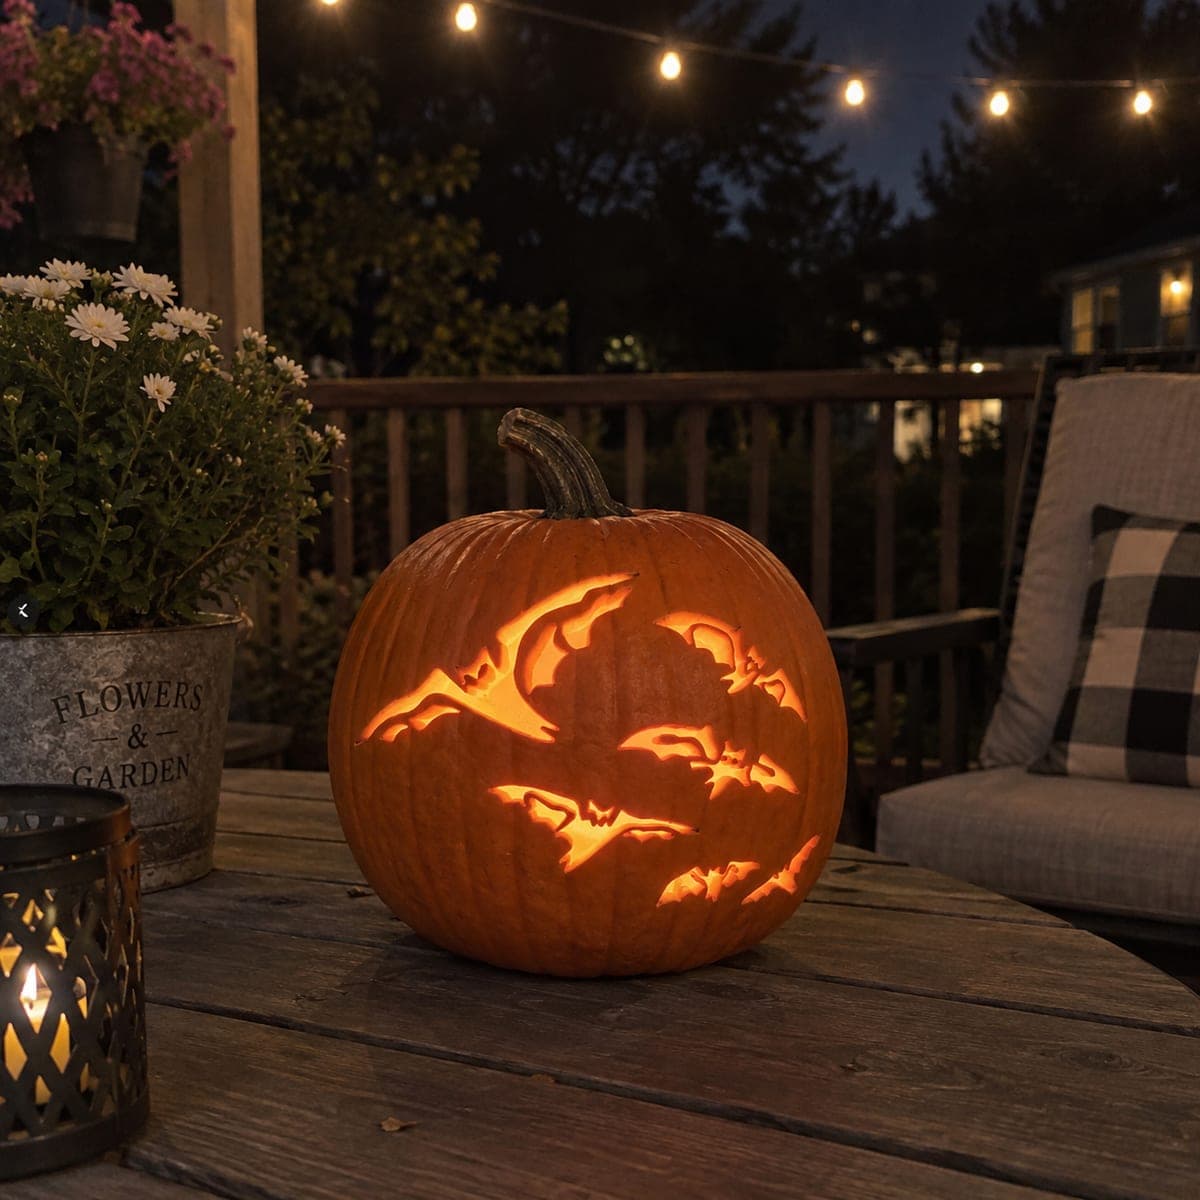
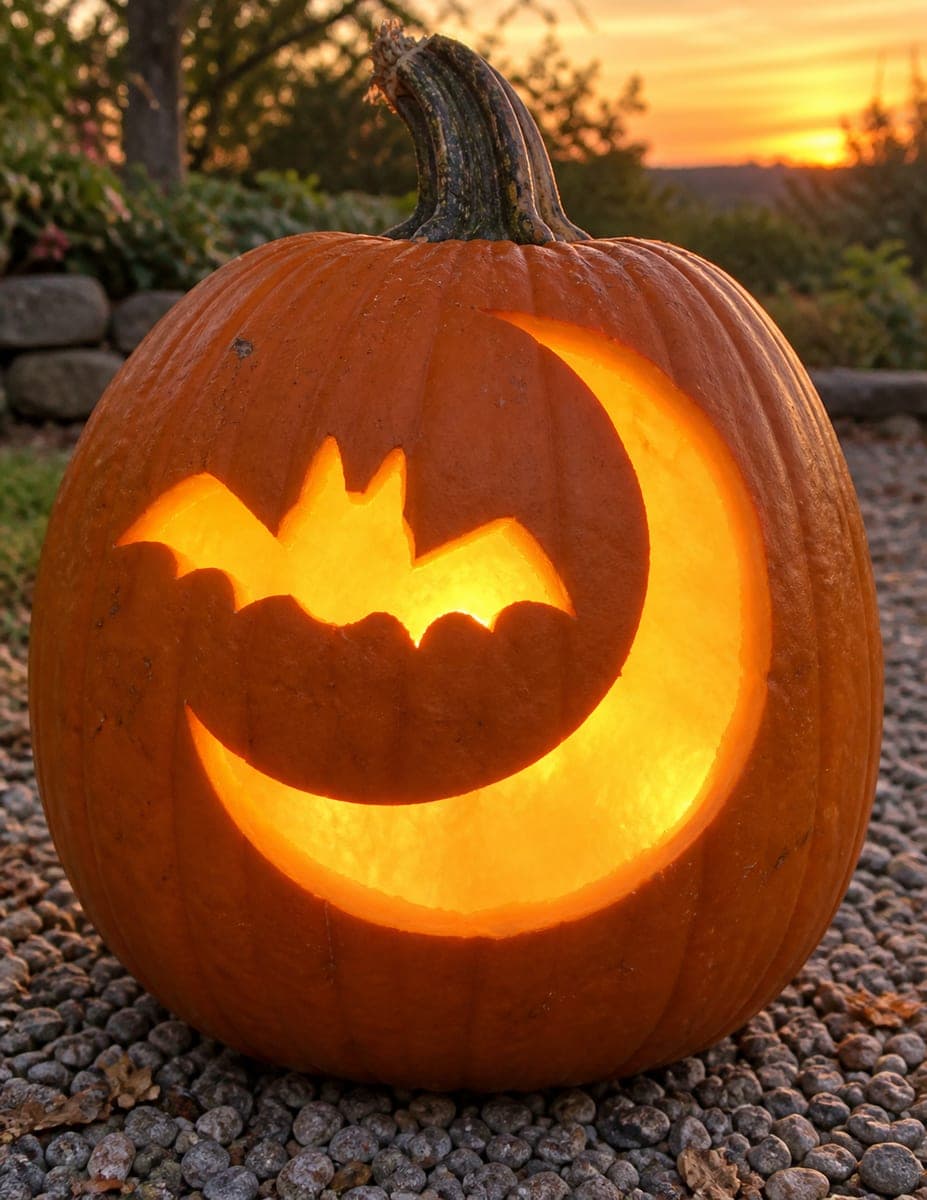
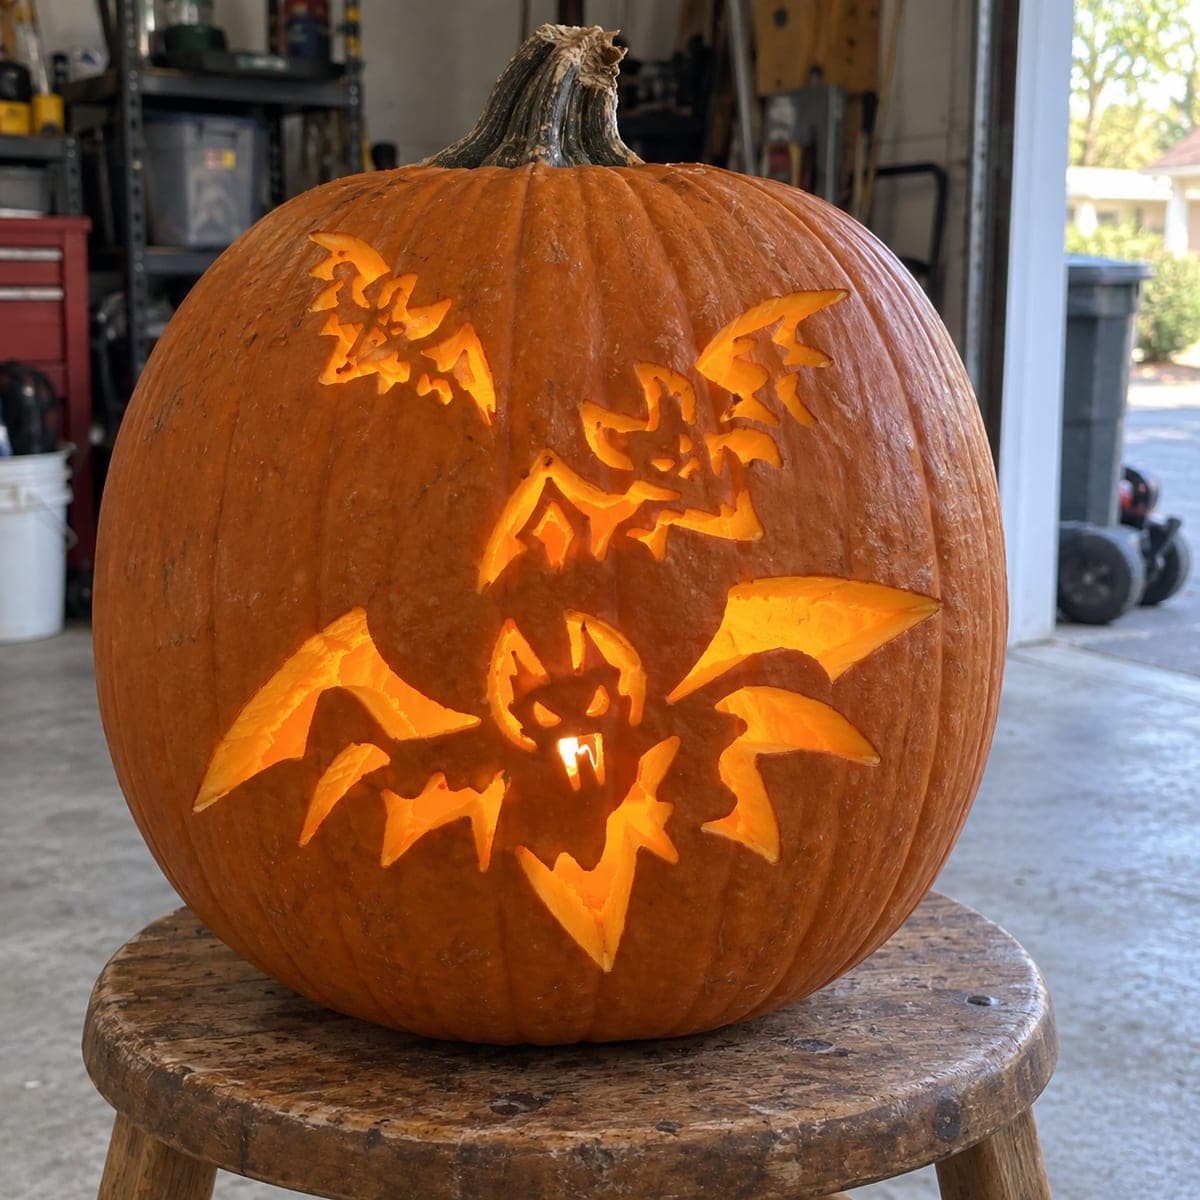
A loose swirling cluster of bats streams across the pumpkin in a crescent arc, with a large crescent moon glow anchoring the upper portion and five smaller bat shapes ranging from fully detailed to near-abstract spreading below in this artistic pumpkin carving design. The lit moon and bat interior sections are cut straight through, while dark rind forms the bat bodies and moon border. Begin with the moon cutout at the top, which establishes the composition's anchor, then carve bats from largest to smallest to keep your hand steady as the remaining wall thins. Viewed from across the yard, the crescent moon reads first and the bat swarm reveals itself as viewers draw closer.

This is an AI-generated concept image: a realistic, carvable design idea rather than a photo of a finished carve. AI concepts are always labeled and sit out the leaderboard and the contest.
No ratings yet · Sign in to rate

Comments (0)

  • No comments yet — be the first.

Save without an account. Sign in to like or comment.

Our tips for carving a similar design

The core trick here is negative space: the bright cutouts form the moon and the gaps inside the bats, while the dark rind left behind becomes the bat bodies and the moon's edge. Plan the layout as a loose crescent arc so the eye sweeps from the moon down through the swarm. Carve the moon first to lock in your composition, then work the bats from largest to smallest so your hand stays steady as the wall thins.

Written by PumpkinCarvingIdeas.com, inspired by the image above. These are our suggestions, not instructions from the uploader. This approach to the AI concept has not been tested on a real pumpkin.

From pumpkin to porch

  1. Prep and transfer the layout

    Cut a wide lid or a bottom opening and scoop the walls down to about one inch so light passes through cleanly. Tape your stencil smoothly over the front, easing out wrinkles on the pumpkin's curve. Poke the outlines with a pin or transfer tool, marking the moon, each bat body, and the small cutout gaps. Step back and confirm the crescent arc flows before you touch a blade.

  2. Carve the crescent moon first

    Start with the moon cutout at the top since it anchors the whole design. Use a fine saw and cut fully through along the crescent, leaving the dark rind border intact on the outer edge. Work slowly around the curve so the shape stays clean and rounded. This large opening gives you a reference point for balancing the bats below.

  3. Cut the largest bats

    Move to the biggest, most detailed bat and cut through the interior gaps that separate the wings from the body. Leave thin ribs of rind for the wing bones and the body so the bat reads as a solid dark silhouette against the glow. Keep at least a quarter inch of rind on any narrow bridge so it does not snap. Cut in short strokes and let the blade do the work rather than forcing it.

  4. Work down to the smaller bats

    Carve the remaining bats from medium to smallest, letting the shapes get looser and more abstract as they trail off. The tiniest bats can be simple pinched openings that only hint at a wing shape. Save these delicate cuts for now while the surrounding wall is still supported by uncut sections. Rotate the pumpkin as you go so you always cut toward open space, not toward your holding hand.

  5. Clean edges and add glow shading

    Go back and tidy every cut edge with a small detail blade so the light lines look crisp. For a softer transition around the moon or under the bats, scrape a thin layer of skin off with a loop tool to make dim orange glow zones. This peeled shading helps the swarm feel like it is fading into mist. Wipe away pulp bits so nothing blocks the light inside.

  6. Light it and photograph

    Drop in an LED puck or a string of battery lights and never use a candle, since open flame is unsafe and uneven. View it from across the yard first to confirm the moon reads instantly and the bats reveal themselves up close. Rub a little petroleum jelly on cut edges to slow drying if you want it to last. Snap your photo in low light so the glow pops against the dusk.

Gather your supplies

Check things off as you get ready.

Work on a stable surface, keep your free hand out of the cutting path, and have an adult handle sharp tools.

Three levels of light

  • Leave intact

    The bat bodies, wing bones, and the outer moon border stay as untouched skin so they read dark against the light.

  • Peel & shade

    Thin scraped zones around the moon and beneath the trailing bats give a soft dim orange fade like mist.

  • Cut through

    The crescent moon and the gaps inside each bat are cut straight through for the brightest glow.

Learn the carving basics

Before you start cutting

How do I keep the small abstract bats from tearing the wall?

Carve them last, once the larger cutouts are done but while nearby rind still supports the area. Keep each opening small and leave generous rind between them. If a spot feels fragile, simplify that bat to a single slit rather than a full wing shape.

Should the moon really be cut all the way through?

Yes, the moon is the brightest anchor of the design, so cut it fully through and leave only a thin rind border to define its crescent edge. If you want it a touch softer, scrape a narrow band of skin just inside the border. That blends the hard light line into the surrounding surface.

Since this is a concept image, will a real pumpkin hold this many cutouts?

It can if you keep the wall around one inch thick and leave real bridges between openings. Space the bats so no two large cutouts sit right next to each other, and keep wing bones at least a quarter inch wide. A firm, fresh pumpkin holds detail far better than a soft one.

Your take belongs here, too.

Changed a detail? Made it simpler? Share a photo of your version and tell the community what worked.

Share your pumpkin

More pumpkins like this

You've reached the end · 8 pumpkins
The Patch Report

Fresh pumpkins, in your inbox.

The best new carvings, ideas worth stealing, and how-tos for carving season. Short, seasonal, and gone by November.

A short email during carving season. Unsubscribe anytime. See our privacy policy.