Halloween Pumpkin Carving Contest · Starts October 1st · $500 in prizes
← Back to ideas
@ai_concepts
Sep 14, 2026
Three Flying Bats PumpkinAI
0

Three Flying Bats Pumpkin

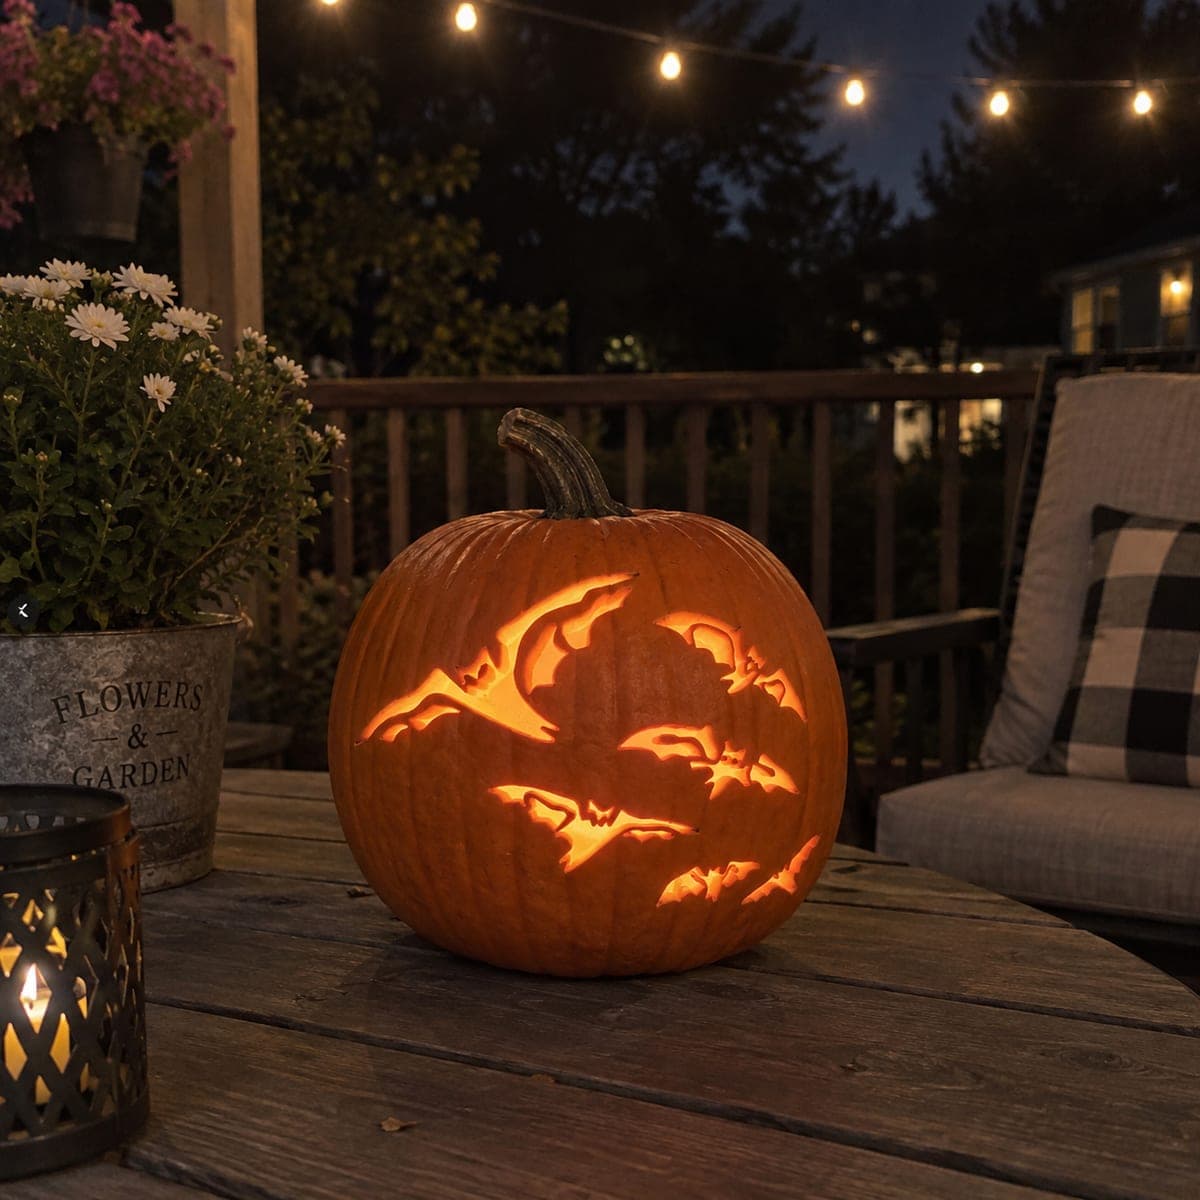
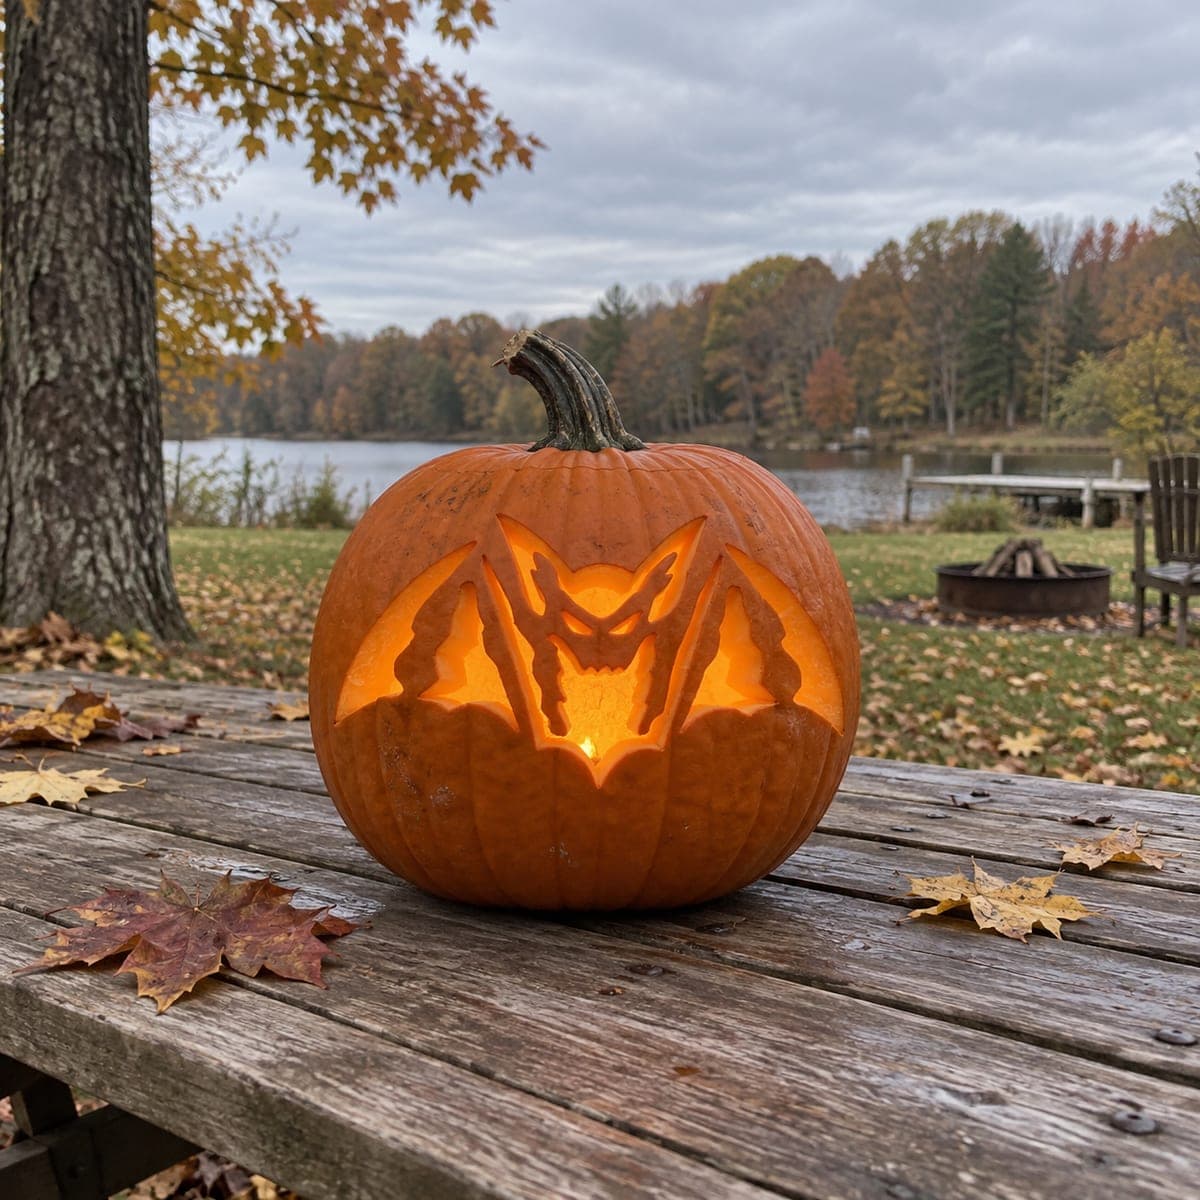
Three angular bats of descending size spiral upward across the pumpkin face, each one sharply detailed with pointed wings and a small evil face, creating a stacked flock composition for a scary pumpkin carving idea. Every lit section of each bat is cut clean through, with thin uncut strips forming the wing-bone lines and facial features. The smallest bat at the top has the narrowest cuts, so start there and work downward, letting each finished bat test your saw control before tackling the larger lower designs. A candle set slightly off-center toward the biggest bat at the bottom adds a natural glow gradient that makes the upper bats seem to fade into the night.

This is an AI-generated concept image: a realistic, carvable design idea rather than a photo of a finished carve. AI concepts are always labeled and sit out the leaderboard and the contest.
No ratings yet · Sign in to rate

Comments (0)

  • No comments yet — be the first.

Save without an account. Sign in to like or comment.

Our tips for carving a similar design

The core trick here is a stacked trio of bats that shrink as they climb, each one cut clean through while thin uncut strips hold the wing bones and little faces in place. Since this is a concept image, no real pumpkin exists, but you could recreate the look by transferring three bat outlines onto the face and carving from the smallest at top down to the largest at the bottom. Offsetting the light toward the bottom bat gives you a natural fade so the upper bats read as if drifting off into the dark.

Written by PumpkinCarvingIdeas.com, inspired by the image above. These are our suggestions, not instructions from the uploader. This approach to the AI concept has not been tested on a real pumpkin.

From pumpkin to porch

  1. Prep and clean the pumpkin

    Pick a tall, smooth pumpkin with a broad front face for the vertical flock. Cut a lid from the bottom or back rather than the top so the stem stays intact, then scoop the inside until the front wall is about one inch thick. Thin walls cut more easily and let the narrow bat details stay crisp. Pat the carving area dry before you tape on your stencil.

  2. Transfer the three bat outlines

    Position your stencil so the smallest bat sits high, the middle bat in the center, and the largest bat low and slightly off to one side. Tape it snug and poke the outlines with a transfer tool or pin, paying attention to the wing points and the tiny facial lines. Mark clearly which slivers are the wing bones and face features, because those are the strips you will leave uncut. Step back and check the spiral flow before you touch a blade.

  3. Carve the smallest top bat first

    Start with the top bat since its cuts are the narrowest and it is good practice for saw control. Use a fine detail saw and cut each lit shape clean through, working slowly around the pointed wing tips. Leave the thin strips that form the wing-bone lines and the small face intact so the shape reads clearly. Support the surrounding shell with your free hand and keep fingers behind the blade.

  4. Work down to the middle bat

    Move to the center bat and repeat the same clean cutouts, this time with slightly larger openings. Cut the inner wing sections and face gaps first while the shell around them is still solid. Save the widest openings for last so the pumpkin keeps its rigidity as long as possible. Gently push each freed piece outward to pop it loose rather than yanking it.

  5. Finish the large bottom bat

    The bottom bat has the boldest wings, so cut its interior detail lines before opening the big outer wing panels. Take the largest cutouts last to avoid weakening the face too soon. Ease any tight corners with a small blade and clean up ragged edges from the inside for a sharp silhouette. Trim the back of each cut at a slight angle to let more light pass through.

  6. Light it and photograph

    Set a battery LED slightly off-center toward the big bottom bat to build a glow gradient that fades up toward the smallest bat. Test in a dark room and rotate the light until the wing-bone strips stand out as dark lines against the glow. If any detail looks dim, shave the inside edge thinner to brighten it. Shoot your photo in low light so the flock seems to lift off into the night.

Gather your supplies

Check things off as you get ready.

Work on a stable surface, keep your free hand out of the cutting path, and have an adult handle sharp tools.

Three levels of light

  • Leave intact

    The uncut orange skin around and between the bats, plus the ridged upper face, stays dark for the night-sky backdrop.

  • Peel & shade

    Optional shallow skin-peeling just inside a wing edge can add a dim halo that softens the fade between bats.

  • Cut through

    Every wing panel, body gap, and open facial area is cut clean through for the brightest glow, with thin bridges left for wing bones and features.

Learn the carving basics

Before you start cutting

How do I keep the thin wing-bone strips from breaking?

Leave them as continuous bridges connected to the shell at both ends and never fully isolate them. Carve the openings on either side of a strip separately so the strip stays anchored. Use a fresh, sharp detail blade so you are slicing rather than tearing, and keep the wall around one inch thick for support.

Why start with the smallest bat at the top?

The top bat has the narrowest cuts, so it lets you dial in your saw control before you reach the bigger, more forgiving shapes below. It also means the pumpkin shell stays strong while you make the most delicate cuts. Working top to bottom keeps the largest openings for last, which protects the structure.

Where should I place the light for the fade effect?

Set a battery LED slightly off-center toward the largest bottom bat. That puts the strongest glow at the bottom and lets the upper bats read dimmer, so the flock seems to fade into the dark. Use an LED rather than a candle so you can position it low and off-center safely.

Your take belongs here, too.

Changed a detail? Made it simpler? Share a photo of your version and tell the community what worked.

Share your pumpkin

More pumpkins like this

You've reached the end · 8 pumpkins
The Patch Report

Fresh pumpkins, in your inbox.

The best new carvings, ideas worth stealing, and how-tos for carving season. Short, seasonal, and gone by November.

A short email during carving season. Unsubscribe anytime. See our privacy policy.