Halloween Pumpkin Carving Contest · Starts October 1st · $500 in prizes
← Back to ideas
@ai_concepts
Sep 14, 2026
Roaring T-Rex Head Relief Pumpkin CarvingAI
0

Roaring T-Rex Head Relief Pumpkin Carving

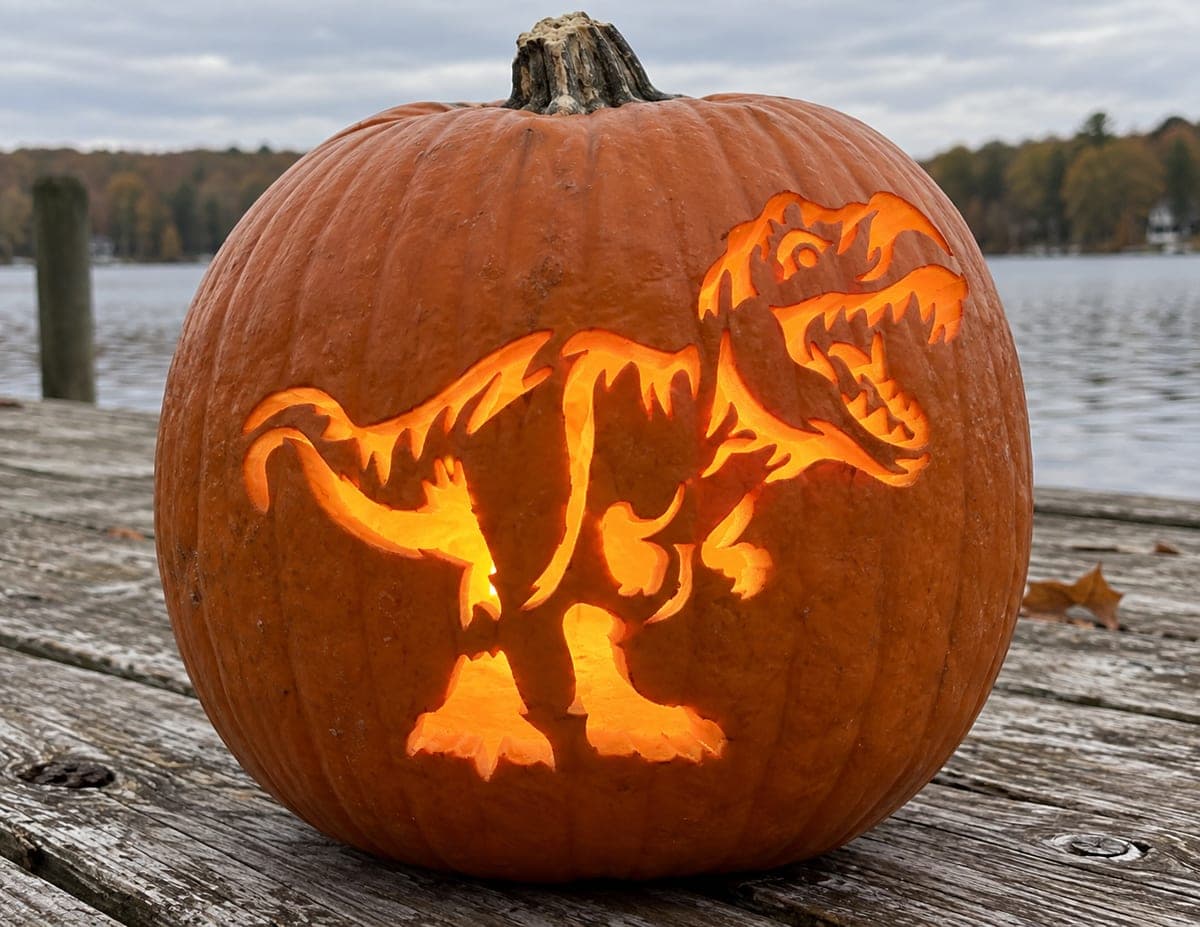
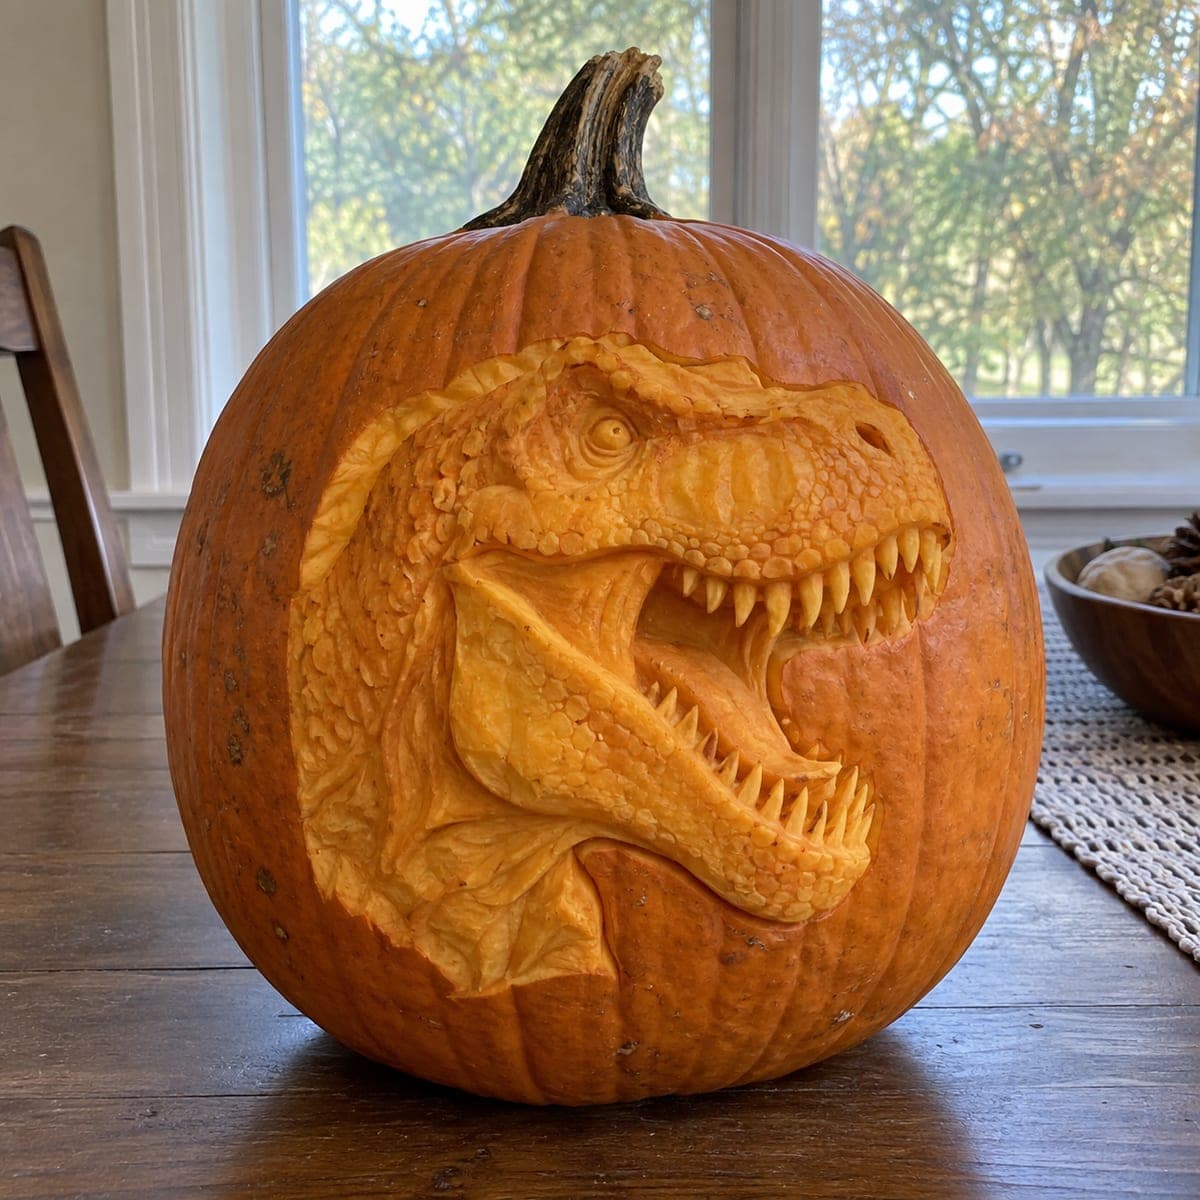
Jaws wide and teeth bared, a Tyrannosaurus rex head erupts from this pumpkin in deep sculpted relief, with scaly skin texture crosshatched across the snout. The open mouth is the hardest part, carved as a true hollow behind two rows of individually pointed teeth. Rough out the skull shape with a large loop tool, cut the mouth cavity next, and save the fragile teeth for the very end. Dinosaur-obsessed kids will lose their minds over this one on the table.

This is an AI-generated concept image: a realistic, carvable design idea rather than a photo of a finished carve. AI concepts are always labeled and sit out the leaderboard and the contest.

No ratings yet · Sign in to rate
Comments (0)

  • No comments yet — be the first.

Save without an account. Sign in to like or comment.

Our tips for carving a similar design

This design is a deep relief sculpture, not a cut-through jack-o-lantern, so almost all the effect comes from shaving the pumpkin skin to different depths rather than making holes. The core trick is a true hollow mouth carved behind two rows of pointed teeth, framed by a scaly snout you texture with shallow crosshatching. Plan to work from broad shapes to fine detail, and save the delicate teeth and the open mouth cavity for the very last steps so nothing snaps early.

Written by PumpkinCarvingIdeas.com, inspired by the image above. These are our suggestions, not instructions from the uploader. This approach to the AI concept has not been tested on a real pumpkin.

From pumpkin to porch

  1. Prep the pumpkin and transfer the profile

    Pick a large, tall pumpkin with a wide, smooth face and no soft spots. Cut a lid from the bottom instead of the top so the stem stays intact and the head has an unbroken canvas. Scrape the inside wall behind your work area down to about one inch so the relief and mouth cavity have room. Tape your T-rex profile stencil in place and poke or trace the main outlines: skull, jaw, eye, and the mouth opening.

  2. Rough out the skull in relief

    Use a large loop tool to shave away the background around the head, dropping it maybe a quarter inch below the surrounding skin so the dinosaur pops forward. Establish the big planes first: the dome of the skull, the long snout, the lower jaw, and the cheek. Keep your depth even and check the profile from the side often. Do not chase detail yet, just get the overall head standing proud of the pumpkin.

  3. Sculpt the contours and eye

    Switch to a smaller loop tool to round the brow ridge, sink the eye socket, and shape the muscle over the jaw. Carve the raised bony ridge above the eye and the curve of the nostril so the face reads from a few feet away. Round every hard edge slightly so the light rolls across the form instead of catching flat cuts. Step back frequently and compare left-to-right balance.

  4. Add scale texture and shading

    With a fine detail knife or a small V-tool, crosshatch shallow scales across the snout, cheek, and jaw, keeping the marks tighter near the eye and looser along the neck. Skin-peel selected areas by removing only the outer orange layer to create a mid-tone glow that separates the muscle groups. This shading layer is where the dinosaur comes to life, so vary your depth for highlights and shadows. Work patiently and blow away debris to see your progress.

  5. Carve the hollow mouth and teeth last

    Now cut the open mouth as a true cavity, removing flesh behind where the teeth will sit so it reads dark and deep. Leave a solid band of pumpkin along both jaw lines, then carefully carve each tooth as a raised triangle attached at its base, leaving small bridges of skin so none break free. Keep the upper and lower rows offset like a real bite. Cut this opening only after all texture is done, since the surrounding wall is much stronger while still solid.

  6. Light it and photograph

    Set one or two battery LED lights inside, one aimed up into the mouth cavity so it glows warm behind the teeth. Never use a candle, since the thin sculpted walls and teeth can scorch. Dry the cut surfaces, then wipe exposed flesh with a little petroleum jelly to slow browning. Shoot your photos the same evening while the relief is crisp and the teeth are sharp.

Gather your supplies

Check things off as you get ready.

Work on a stable surface, keep your free hand out of the cutting path, and have an adult handle sharp tools.

Three levels of light

  • Leave intact

    The untouched pumpkin skin around the head and along the outer background stays dark to frame the dinosaur.

  • Peel & shade

    The scaly snout, cheek, and jaw muscles are skin-peeled to varying depths for a dim orange glow that shows the sculpted texture.

  • Cut through

    The open mouth cavity is cut through so it reads brightest, throwing light up behind the two rows of teeth.

Learn the carving basics

Before you start cutting

This looks intimidating. Is it really mostly relief carving?

Yes, the bulk of the effect comes from shaving the skin to different depths rather than cutting all the way through. The only true opening is the hollow mouth. If you are comfortable with a loop tool and patient shading, you can build the head layer by layer.

How do I keep the teeth from breaking off?

Carve them dead last, after all texture and the mouth cavity are done, so the surrounding wall stays strong as long as possible. Shape each tooth as a raised triangle still attached at its base rather than a free-standing spike. Leaving small bridges of skin between teeth adds strength while still looking sharp.

Since this is an AI concept, can a real pumpkin actually look like this?

A close version is achievable, though a real pumpkin will not hold quite as much crisp detail as a rendered image. Choose a large, dense pumpkin with a thick wall so the relief has depth to work with. Keep the teeth slightly chunkier than the concept and rely on lighting to sell the drama.

Your take belongs here, too.

Changed a detail? Made it simpler? Share a photo of your version and tell the community what worked.

Share your pumpkin

More pumpkins like this

You've reached the end · 8 pumpkins
The Patch Report

Fresh pumpkins, in your inbox.

The best new carvings, ideas worth stealing, and how-tos for carving season. Short, seasonal, and gone by November.

A short email during carving season. Unsubscribe anytime. See our privacy policy.