Halloween Pumpkin Carving Contest · Starts October 1st · $500 in prizes
← Back to ideas
@ai_concepts
Jul 12, 2026
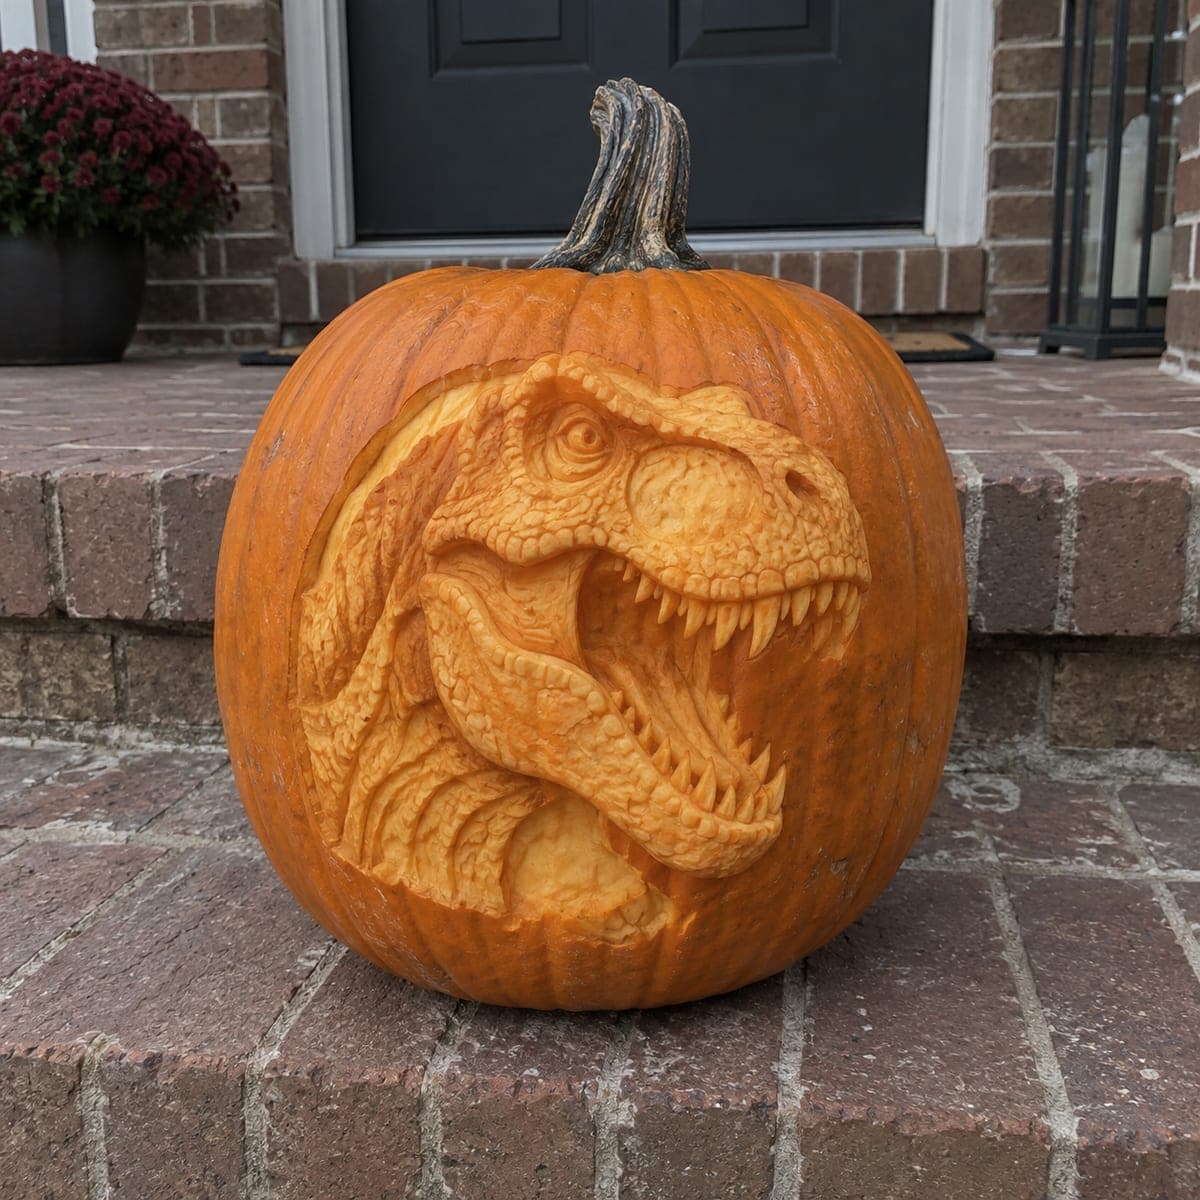
T-Rex Head Roaring Relief-Carved PumpkinAI
0

T-Rex Head Roaring Relief-Carved Pumpkin

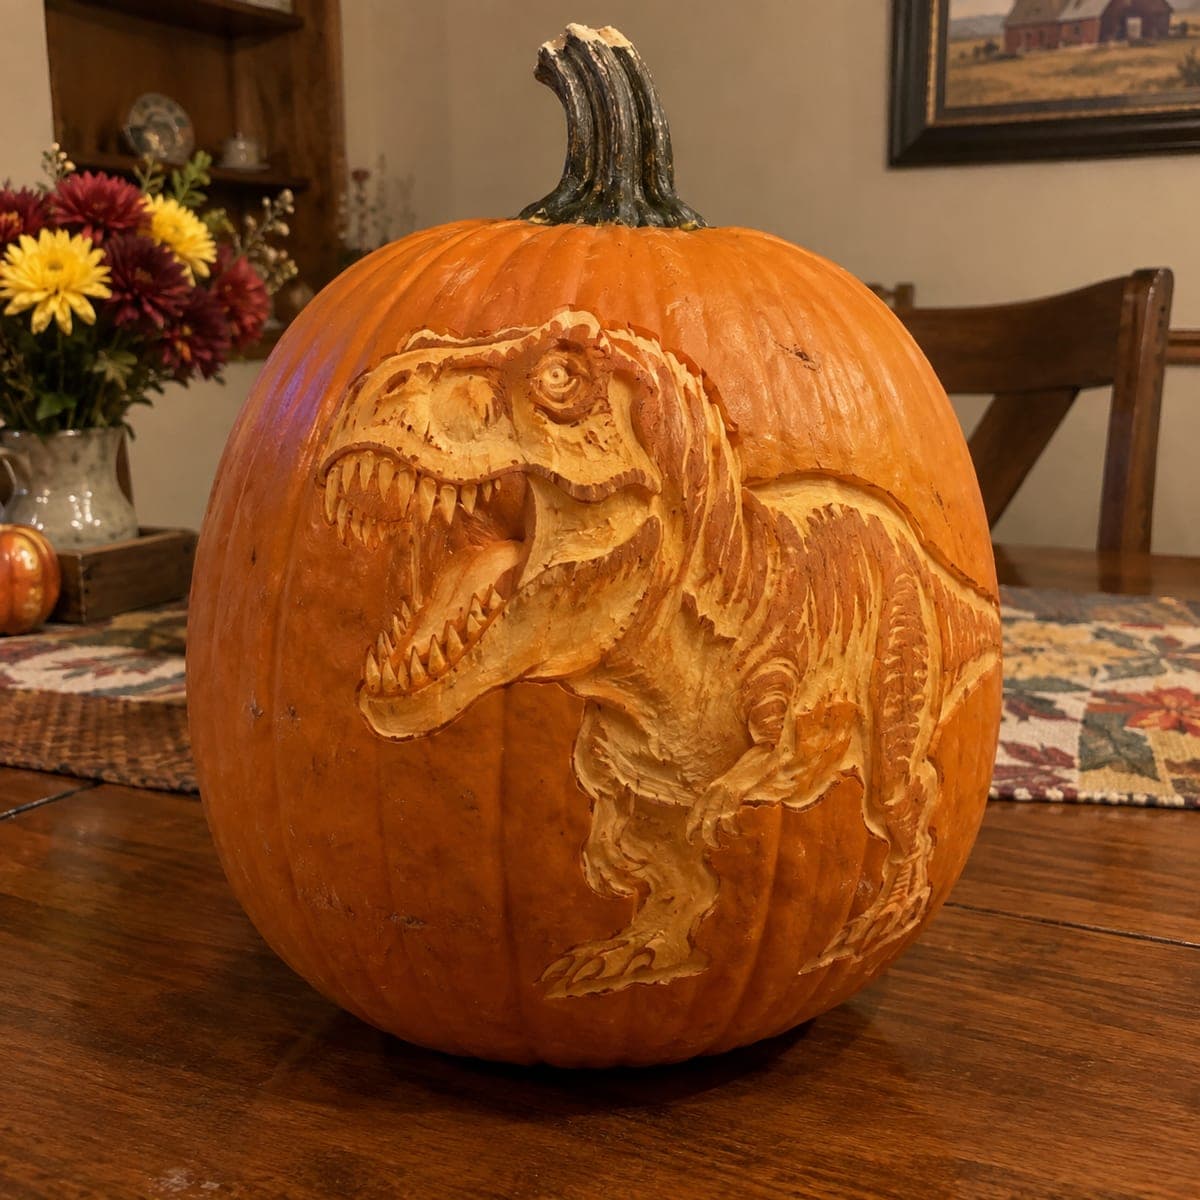
A massive T-Rex skull mid-roar is sculpted in deep relief across a large orange pumpkin, with sharp teeth, textured scales, and a wide-open jaw rendered in three-dimensional detail. The carving style removes so much material that the beast appears to break free from the surface. This is an expert-level pumpkin carving idea suited for a front stoop display where guests will stop to admire the detail. Carve the largest areas of removed skin first, then refine the teeth and eye socket with a fine detail tool.

This is an AI-generated concept image: a realistic, carvable design idea rather than a photo of a finished carve. AI concepts are always labeled and sit out the leaderboard and the contest.

No ratings yet · Sign in to rate

Comments (0)

  • No comments yet — be the first.

Save without an account. Sign in to like or comment.

Our tips for carving a similar design

The core trick here is relief carving, where you shave away layers of skin and flesh at different depths instead of cutting all the way through. The T-Rex head reads as three-dimensional because the jaw, teeth, and eye sit higher than the shadowed background around them. Plan it as a sculpture in shallow tiers, working from broad shapes down to the fine scale and tooth detail.

Written by PumpkinCarvingIdeas.com, inspired by the image above. These are our suggestions, not instructions from the uploader. This approach to the AI concept has not been tested on a real pumpkin.

From pumpkin to porch

  1. Prep the pumpkin and transfer the design

    Pick a large, wide pumpkin with a smooth, blemish-free face so you have room for the whole head. Cut a lid from the bottom or the back rather than the top so the stem stays intact, then hollow the wall on the carving side down to about one inch thick. Tape your stencil in place and poke the main outlines with a transfer tool. Mark the boundary of the head, the open jaw, the eye socket, and the rows of teeth before any cutting begins.

  2. Set the background depth first

    Use a wide ribbon or gouge tool to lower the area around the head, the deep shadow that makes the beast pop forward. Remove skin and a shallow layer of flesh across the background, keeping the depth even so the head reads as raised. Work slowly and keep both hands behind the blade. This is the largest removed area, so take your time and clear it before touching any detail.

  3. Rough in the major forms

    Block out the big planes of the skull, the snout, the upper jaw, and the lower jaw as separate raised masses. Round the top of the snout and step the lower jaw down so the mouth opening feels cavernous. Leave the teeth as solid ridges for now and do not thin them yet. Think in broad shapes here and save the crisp edges for later steps.

  4. Sculpt the scales and eye

    Switch to a fine detail loop and press in the pebbled scale texture across the snout and jaw, varying the size so it looks organic. Carve the eye socket deep and leave a small raised bump for the eyeball to catch light. Add the brow ridge and the folds around the nostril. Shallow, overlapping strokes build the leathery look without breaking through the wall.

  5. Refine the teeth and open jaw

    Define each tooth by carving the dark gum line around it and gently rounding the front face so it stands proud. Keep every tooth connected at its base, since thin free-standing points will snap. For the deepest part of the throat inside the open mouth, you can cut a full opening last to let light spill out. Cut this large hole after all detail work so the face stays rigid while you carve.

  6. Light it and display

    Drop in a bright LED puck or a string of battery lights, never a candle, since the thin relief areas can scorch. Angle one light low inside the mouth so the throat glows and the teeth cast shadows. Set the pumpkin on a covered front stoop out of direct rain and mist the cut surfaces to slow drying. Snap your photo at dusk when the glow reads best against the dark background.

Gather your supplies

Check things off as you get ready.

Work on a stable surface, keep your free hand out of the cutting path, and have an adult handle sharp tools.

Three levels of light

  • Leave intact

    The dark recessed background around the head stays as untouched skin so the beast appears to lunge out of shadow.

  • Peel & shade

    The snout, scales, and jaw are skin-peeled to varying depths for a soft mid orange glow that shapes the muscle and texture.

  • Cut through

    The deep throat inside the open mouth is cut through for the brightest light, making the roar feel lit from within.

Learn the carving basics

Before you start cutting

How do I keep the sharp teeth from breaking off?

Carve the teeth in relief rather than cutting all the way around them. Define each one by lowering the gum line and rounding the front face, but leave the base fully attached to the jaw. Solid, connected teeth hold up far better than thin free-standing points.

How thick should the wall be for this much relief carving?

Hollow the carving side down to about one inch, and only slightly thinner where you want the deepest glow. That gives you enough material to shave several depth layers without punching through. If a spot starts feeling flexible or translucent, stop removing material there.

Since this is a concept image, can a real pumpkin look this detailed?

Yes, relief carving on a large pumpkin can produce this sculptural look, though the pictured design is a digital concept. Expect to simplify the finest scales and keep the teeth chunkier than the render. Focus on strong depth contrast and clean shadows, which sell the effect more than tiny details.

Your take belongs here, too.

Changed a detail? Made it simpler? Share a photo of your version and tell the community what worked.

Share your pumpkin

More pumpkins like this

You've reached the end · 8 pumpkins
The Patch Report

Fresh pumpkins, in your inbox.

The best new carvings, ideas worth stealing, and how-tos for carving season. Short, seasonal, and gone by November.

A short email during carving season. Unsubscribe anytime. See our privacy policy.