Halloween Pumpkin Carving Contest · Starts October 1st · $500 in prizes
← Back to ideas
@ai_concepts
Sep 13, 2026
One-Eyed Cyclops Face Pumpkin CarvingAI
0

One-Eyed Cyclops Face Pumpkin Carving

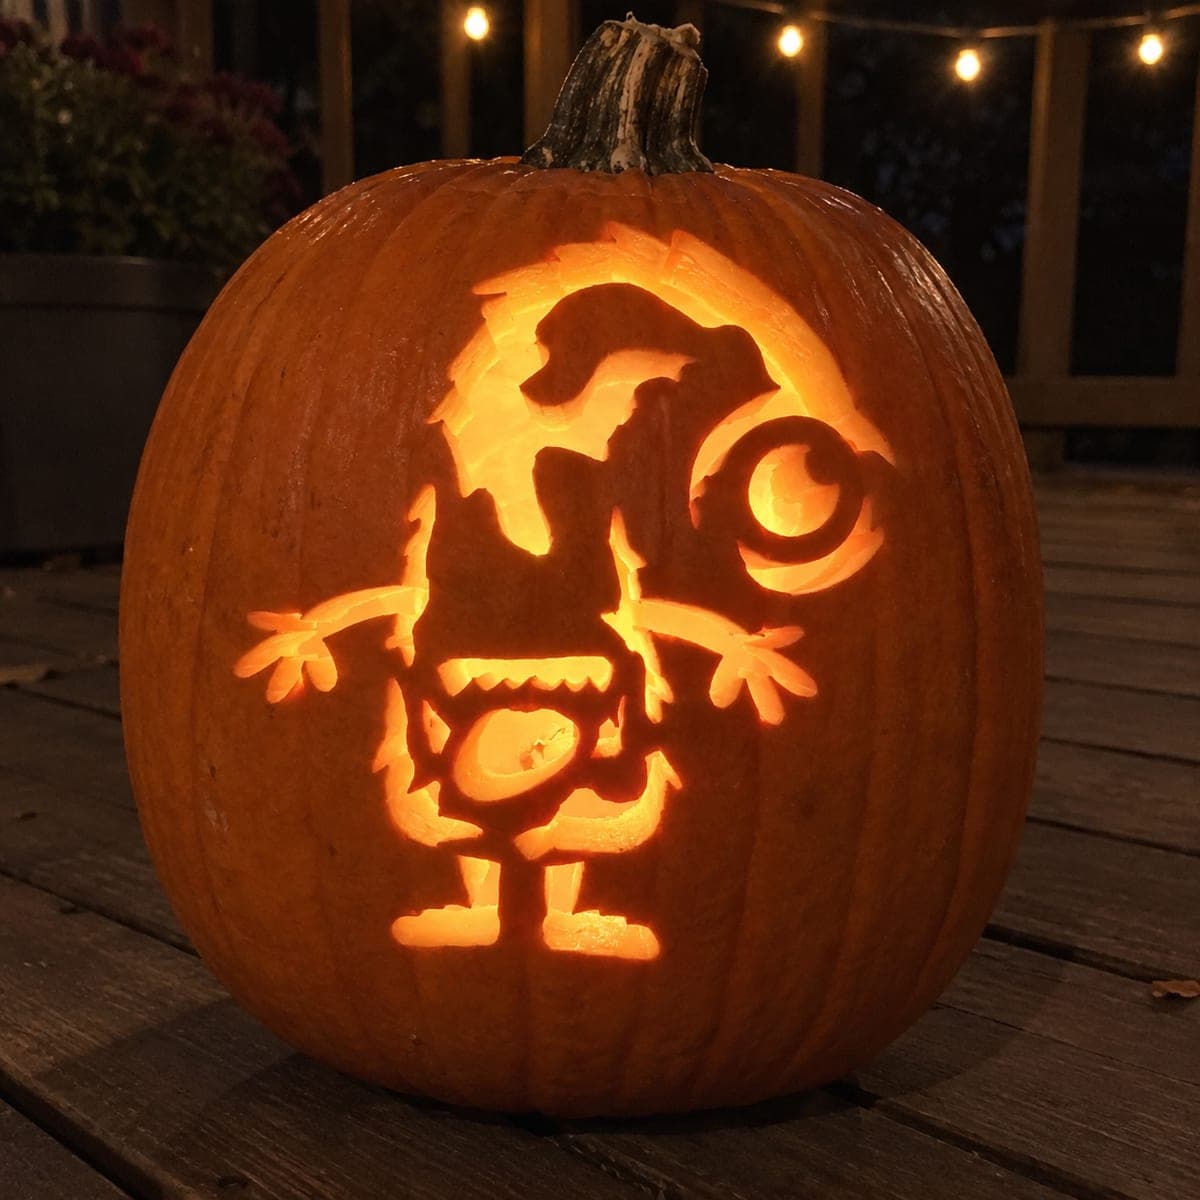
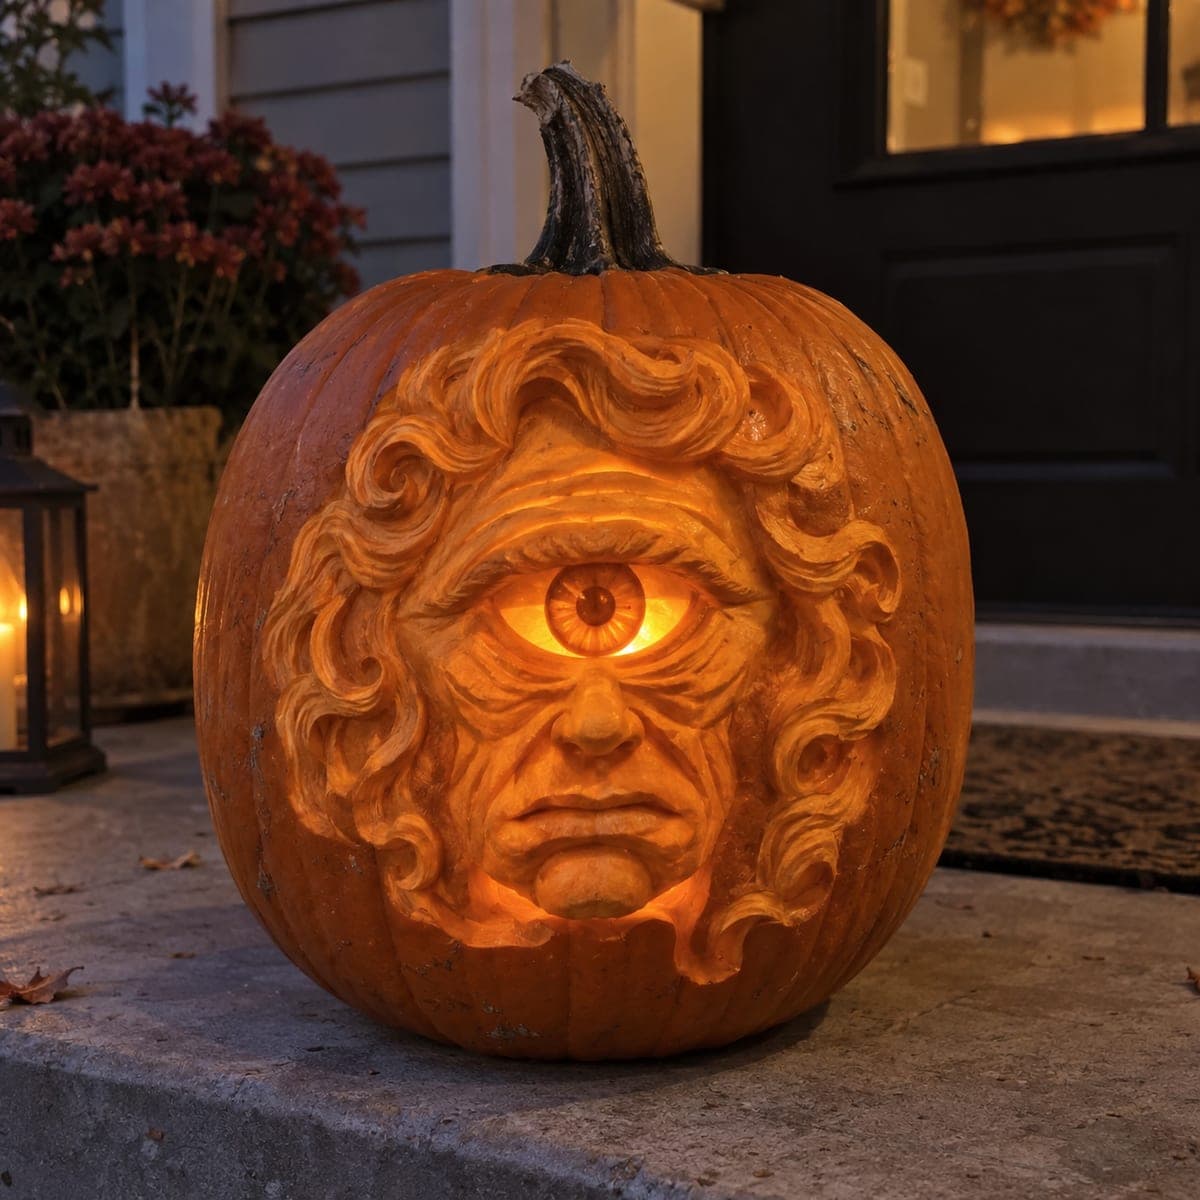
A scowling cyclops glares from this pumpkin with a single backlit eye blazing in the center of its sculpted brow, ringed by deep curling locks of carved hair. The face is built in 3D relief while the eye alone is cut thin enough to glow, which is what makes the design land at night. Sculpt the hair swirls with a large loop tool before detailing the frown, and place a bright LED directly behind the eye socket for maximum menace on the porch.

This is an AI-generated concept image: a realistic, carvable design idea rather than a photo of a finished carve. AI concepts are always labeled and sit out the leaderboard and the contest.

No ratings yet · Sign in to rate

Comments (0)

  • No comments yet — be the first.

Save without an account. Sign in to like or comment.

Our tips for carving a similar design

The core trick here is contrast: the whole face and its curling hair are shaped in 3D relief on the pumpkin skin, while only the single central eye is cut thin enough to blaze with light. Everything else stays as sculpted orange, so the one glowing eye becomes the focal point at night. Plan to spend most of your time shaving depth into the brow, cheeks, frown, and hair swirls, and save the thin eye work for last.

Written by PumpkinCarvingIdeas.com, inspired by the image above. These are our suggestions, not instructions from the uploader. This approach to the AI concept has not been tested on a real pumpkin.

From pumpkin to porch

  1. Transfer the layout and open the pumpkin

    Pick a tall, smooth pumpkin with a broad front face and cut a lid or a bottom access hole so you can reach in and thin walls later. Scrape the inside wall behind the eye area down to about one inch so light can pass through easily. Tape your cyclops pattern to the front and poke the main outlines: the single eye, the brow ridge, the nose, the frown, and the boundary of the hair. Step back and check that the eye sits centered above the nose before you cut anything.

  2. Rough in the relief with a loop tool

    Using a large ribbon or loop tool, shave away the top skin around the face to establish which areas sit forward and which recede. Keep the brow and nose high, and lower the cheeks and the areas between hair curls. Work in shallow passes rather than gouging deep all at once, since you can always remove more. This stage is about big shapes, not detail.

  3. Sculpt the hair swirls

    Carve the curling locks as raised ridges by scooping out the valleys between them with a small loop tool. Let each curl overlap its neighbor so the light will catch the high edges later. Vary the depth so some curls read closer and others fall into shadow. Take your time; the hair frames the whole face and hides small mistakes elsewhere.

  4. Detail the frowning face

    Refine the nose, the heavy brow, and the downturned mouth by peeling the skin to different depths for soft shading. Deepen the crease under the brow and the corners of the frown so shadows pool there. Round the lips and cheeks gently with the loop tool. Keep the eye area untouched for now so you have solid material to detail against.

  5. Cut the glowing eye last

    Now carve the single eye. Peel the iris and lid areas thin for a dim glow, then cut fully through only the pupil and the brightest highlights so light punches out sharply. Leave thin bridges of skin for the eyelid rim and any lashes so nothing collapses. Because this is the one true cutout, do it carefully and last, after all the heavy sculpting is done.

  6. Light it and photograph

    Set a bright battery LED inside, positioned directly behind the eye socket so the beam concentrates there. Use a warm white or amber LED rather than a candle so the relief shading stays visible and the eye glows without soot or heat. Test in a dark room and nudge the light until the eye is the clear focal point. Shoot your photo at dusk on the porch for the best contrast between the dark face and the blazing eye.

Gather your supplies

Check things off as you get ready.

Work on a stable surface, keep your free hand out of the cutting path, and have an adult handle sharp tools.

Three levels of light

  • Leave intact

    The curling hair, the brow ridge, the nose, and the frowning mouth stay as untouched or lightly shaped skin so they read dark and sculptural.

  • Peel & shade

    The cheeks, the eye socket rim, and the iris are peeled to varying thinness for a soft mid-glow that shapes the face.

  • Cut through

    Only the pupil and the brightest catchlight in the eye are cut all the way through for the blazing focal point.

Learn the carving basics

Before you start cutting

How do I keep the single eye from looking flat or dead?

Layer your light levels inside the eye instead of cutting one plain hole. Peel the iris thin for a dim ring, then cut through only the pupil and a small highlight so the eye has depth. Placing the LED directly behind the socket also gives it that lit-from-within stare.

This is a 3D relief design, so how deep should I carve?

Most of the face is shaped by shaving the top skin, not by cutting through the wall. Keep your deepest relief scoops well short of the inner cavity, usually no more than a third of the way through the flesh. Only the eye pupil goes all the way through.

Since this is an AI concept, can a real pumpkin actually hold this much detail?

Yes, with the right pumpkin and patience. Choose a thick-walled variety and a large smooth front so you have room for the hair swirls and deep relief. Just keep the eyelid rim and any lashes as attached bridges rather than free-floating slivers so the carving stays sturdy.

Your take belongs here, too.

Changed a detail? Made it simpler? Share a photo of your version and tell the community what worked.

Share your pumpkin

More pumpkins like this

You've reached the end · 8 pumpkins
The Patch Report

Fresh pumpkins, in your inbox.

The best new carvings, ideas worth stealing, and how-tos for carving season. Short, seasonal, and gone by November.

A short email during carving season. Unsubscribe anytime. See our privacy policy.