Halloween Pumpkin Carving Contest · Starts October 1st · $500 in prizes
← Back to ideas
@ai_concepts
Jul 9, 2026
Snarling Monster Face 3D Pumpkin SculptureAI
0

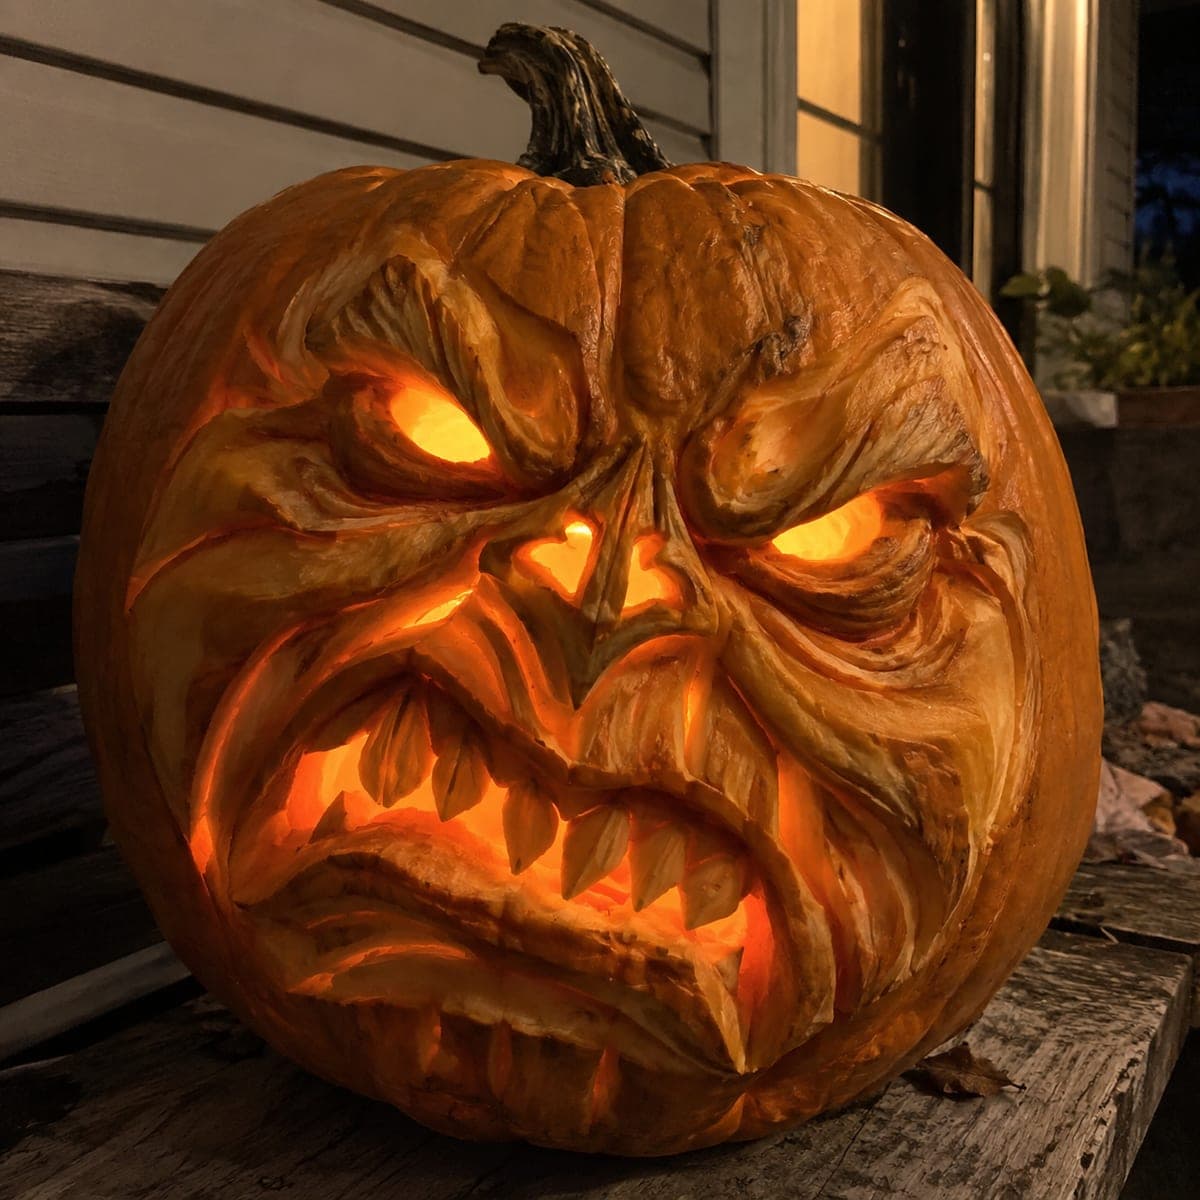
Snarling Monster Face 3D Pumpkin Sculpture

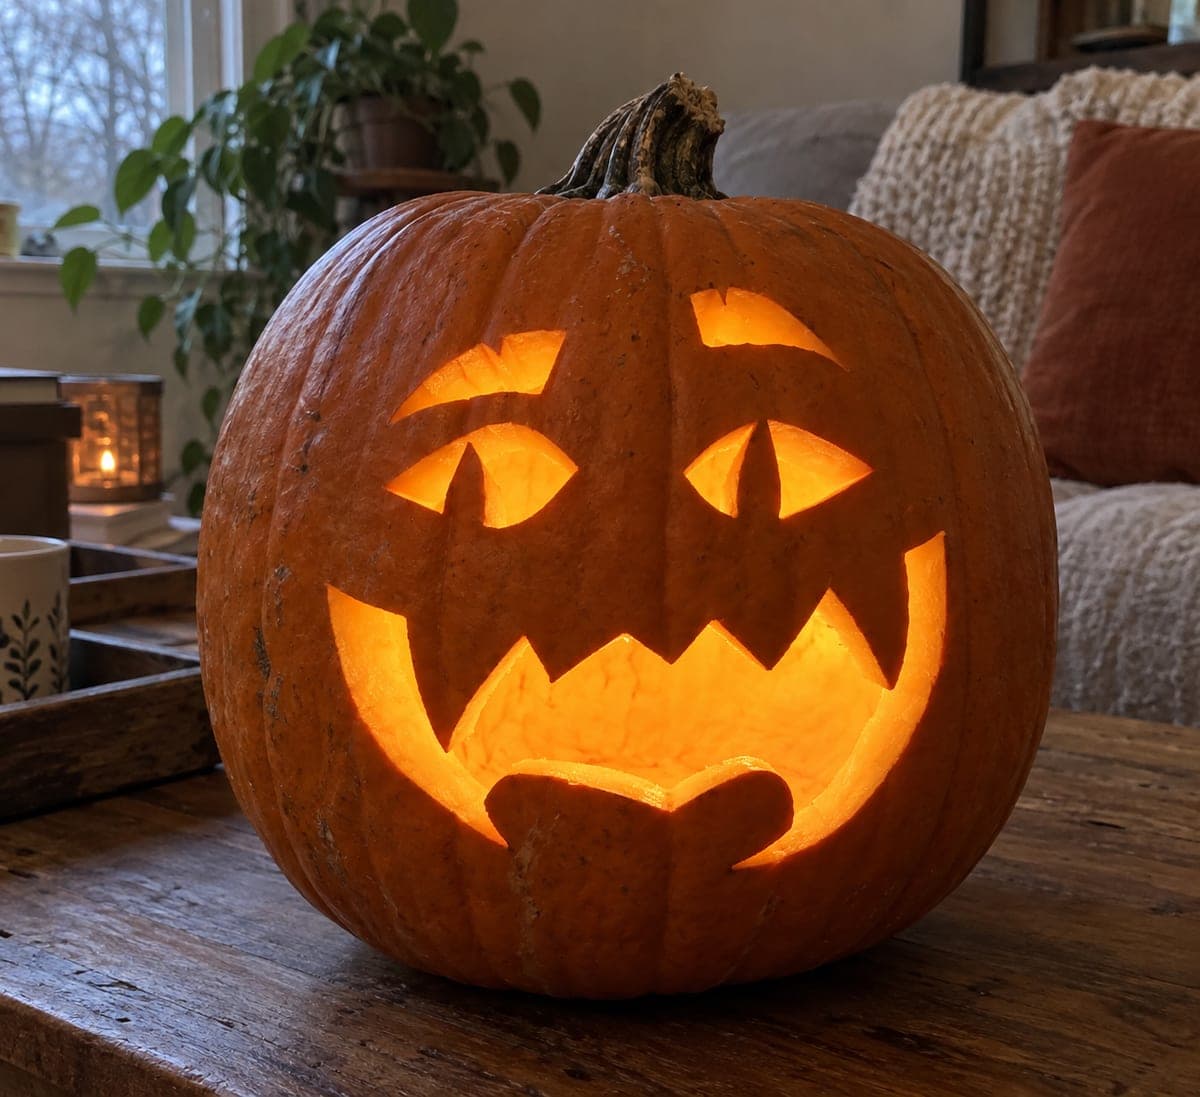
Furrowed brows, blazing eyes, and a mouthful of jagged teeth are sculpted deep into this pumpkin in the style of extreme 3D carving. The scowl comes from thick rolled brow and cheek forms, so rough those masses in with a large loop tool before opening the eyes and mouth to let light through. Carve it the day before display, because deep sculpts soften fast, and mist it with water to extend its life.

This is an AI-generated concept image: a realistic, carvable design idea rather than a photo of a finished carve. AI concepts are always labeled and sit out the leaderboard and the contest.

No ratings yet · Sign in to rate
Comments (0)

  • No comments yet — be the first.

Save without an account. Sign in to like or comment.

Our tips for carving a similar design

The whole look leans on relief sculpting rather than flat cutting, so the scowl is built from thick rolled masses of skin for the brows, cheeks, and lips while only the eyes and mouth are opened for light. Rough in those big forms first with a large loop tool, then refine the wrinkles and teeth, and save the true cutouts for last. On an AI concept like this you are recreating the effect on a real pumpkin, so keep every tooth and lip fat enough to stay attached.

Written by PumpkinCarvingIdeas.com, inspired by the image above. These are our suggestions, not instructions from the uploader. This approach to the AI concept has not been tested on a real pumpkin.

From pumpkin to porch

  1. Pick a big pumpkin and open the back

    Choose the largest, thickest-walled pumpkin you can find, since deep sculpting eats into the flesh. Cut a wide access hole in the back, not the top, so the front stays uninterrupted for the face. Scrape the inside wall behind the face down to about an inch and a half so light can eventually pass through the thin spots. Wipe it dry and let it sit before you draw.

  2. Transfer the face map

    Sketch or transfer rough guide lines for the brow ridge, the eye sockets, the nose, and the wide snarling mouth. Mark which areas will stay high, like the brows, cheeks, and lips, versus the sunken sockets and mouth cavity. Keep the tooth positions lightly dotted so you can shape around them later. Do not carve anything through yet.

  3. Rough in the big masses

    With a large loop tool, scoop away background flesh to raise the brow ridge, the puffed cheeks, and the heavy lips as thick rolled forms. Work in broad passes and step back often to read the shadows, since depth is what sells the scowl. Leave plenty of material standing so you can refine later. Rougher is fine at this stage.

  4. Refine wrinkles and teeth

    Switch to a small loop and a detail knife to carve the furrow lines between the brows, the folds along the cheeks, and the individual jagged teeth. Keep each tooth wide at the base and blunt at the tip so it will not snap or wilt. Skin-peel the shallow wrinkle valleys so they will glow softly. Test the light angle as you go.

  5. Open the eyes and mouth last

    Now cut fully through the eye slits and the mouth gaps between the teeth to let the brightest light escape. Cut the eyes first, then the mouth openings one gap at a time so the teeth stay braced by the pumpkin around them. Keep the openings smaller than they look in the concept, because thin walls tear. Drop in a battery LED, never a candle, to check the glow.

  6. Preserve and photograph

    Deep sculpts soften and slump within a day, so carve this the day before you display it. Mist the whole surface with water and wrap it in plastic in the fridge overnight to slow drying. Set it on a porch step at dusk, light it from inside, and shoot slightly to the side so the raised brows and cheeks throw long shadows. Re-mist between showings to buy extra hours.

Gather your supplies

Check things off as you get ready.

Work on a stable surface, keep your free hand out of the cutting path, and have an adult handle sharp tools.

Three levels of light

  • Leave intact

    The high brow ridges, cheeks, and outer lips stay full-thickness and dark for bold shadow.

  • Peel & shade

    The furrow lines, cheek folds, and thinned wall behind the teeth glow dim orange.

  • Cut through

    The eye slits and the gaps between the jagged teeth are cut through for the brightest light.

Learn the carving basics

Before you start cutting

How do I keep the teeth from breaking or wilting?

Carve each tooth wide at the base and slightly blunt at the tip, and cut the mouth gaps one at a time so the surrounding flesh keeps bracing them. Avoid long thin points, which snap and slump fast. Thicker teeth read just as sharp under low light.

Do I have to cut all the way through for the 3D look?

No, and that is the key trick here. Most of the effect comes from relief sculpting with a loop tool, where you shave away layers to build raised forms and shaded valleys. Only the eyes and the mouth gaps get cut fully through for glow.

Why carve it the day before instead of days ahead?

Deep sculpting exposes a lot of moist flesh, which dries and slumps within a day or two. Carving the day before display keeps the crisp ridges sharp for photos. Misting with water and refrigerating overnight in plastic buys you extra time.

Your take belongs here, too.

Changed a detail? Made it simpler? Share a photo of your version and tell the community what worked.

Share your pumpkin

More pumpkins like this

You've reached the end · 8 pumpkins
The Patch Report

Fresh pumpkins, in your inbox.

The best new carvings, ideas worth stealing, and how-tos for carving season. Short, seasonal, and gone by November.

A short email during carving season. Unsubscribe anytime. See our privacy policy.