Halloween Pumpkin Carving Contest Β· Starts October 1st Β· $500 in prizes
← Back to ideas
@ai_concepts
Aug 29, 2026
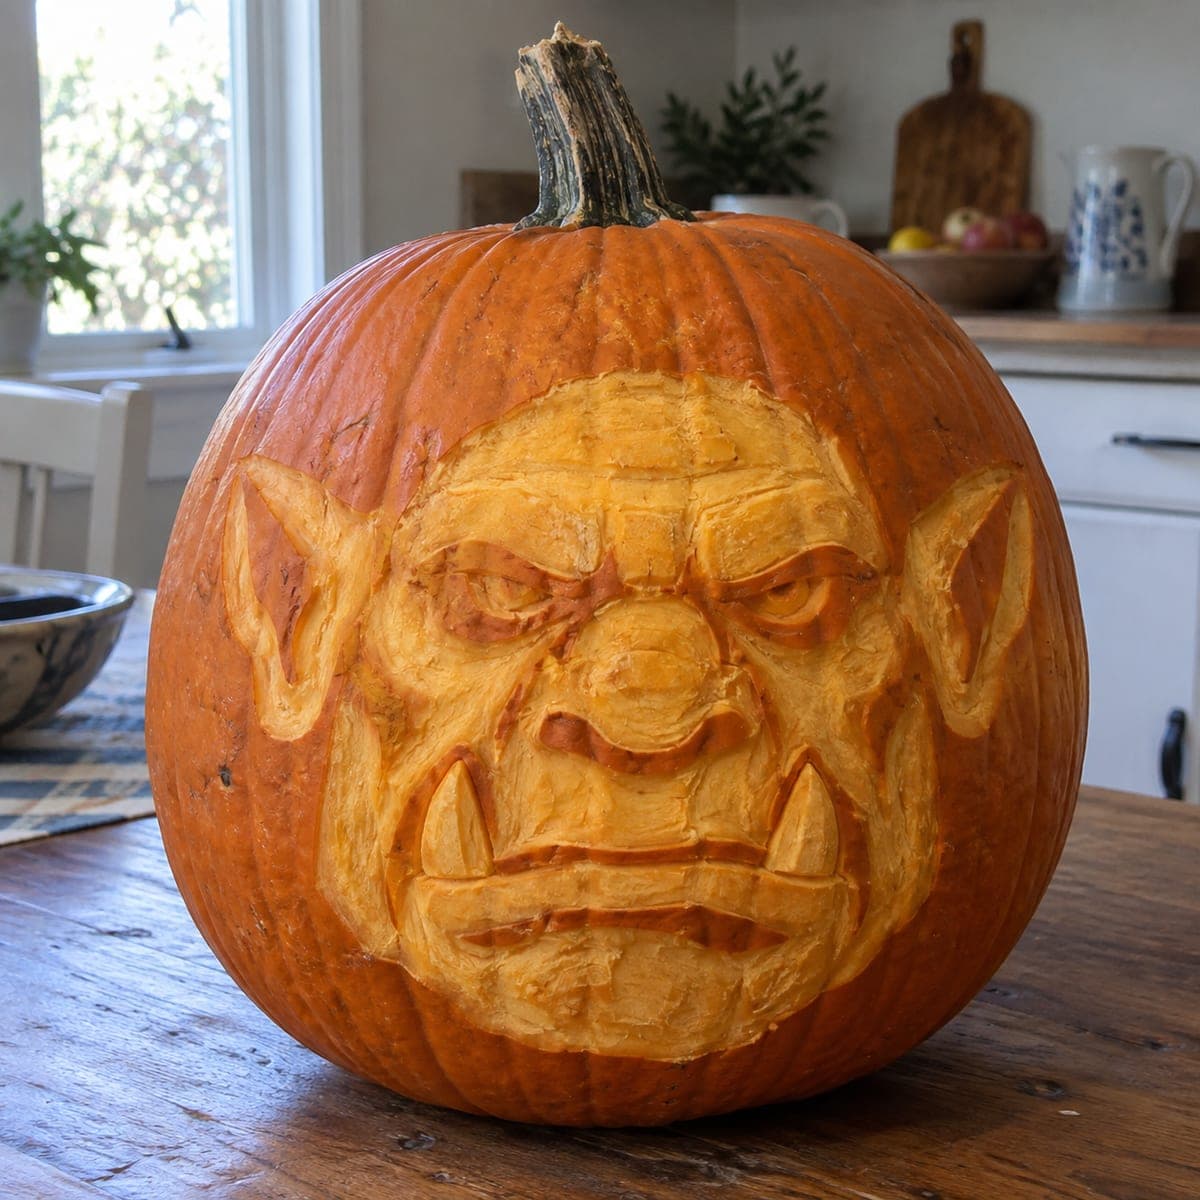
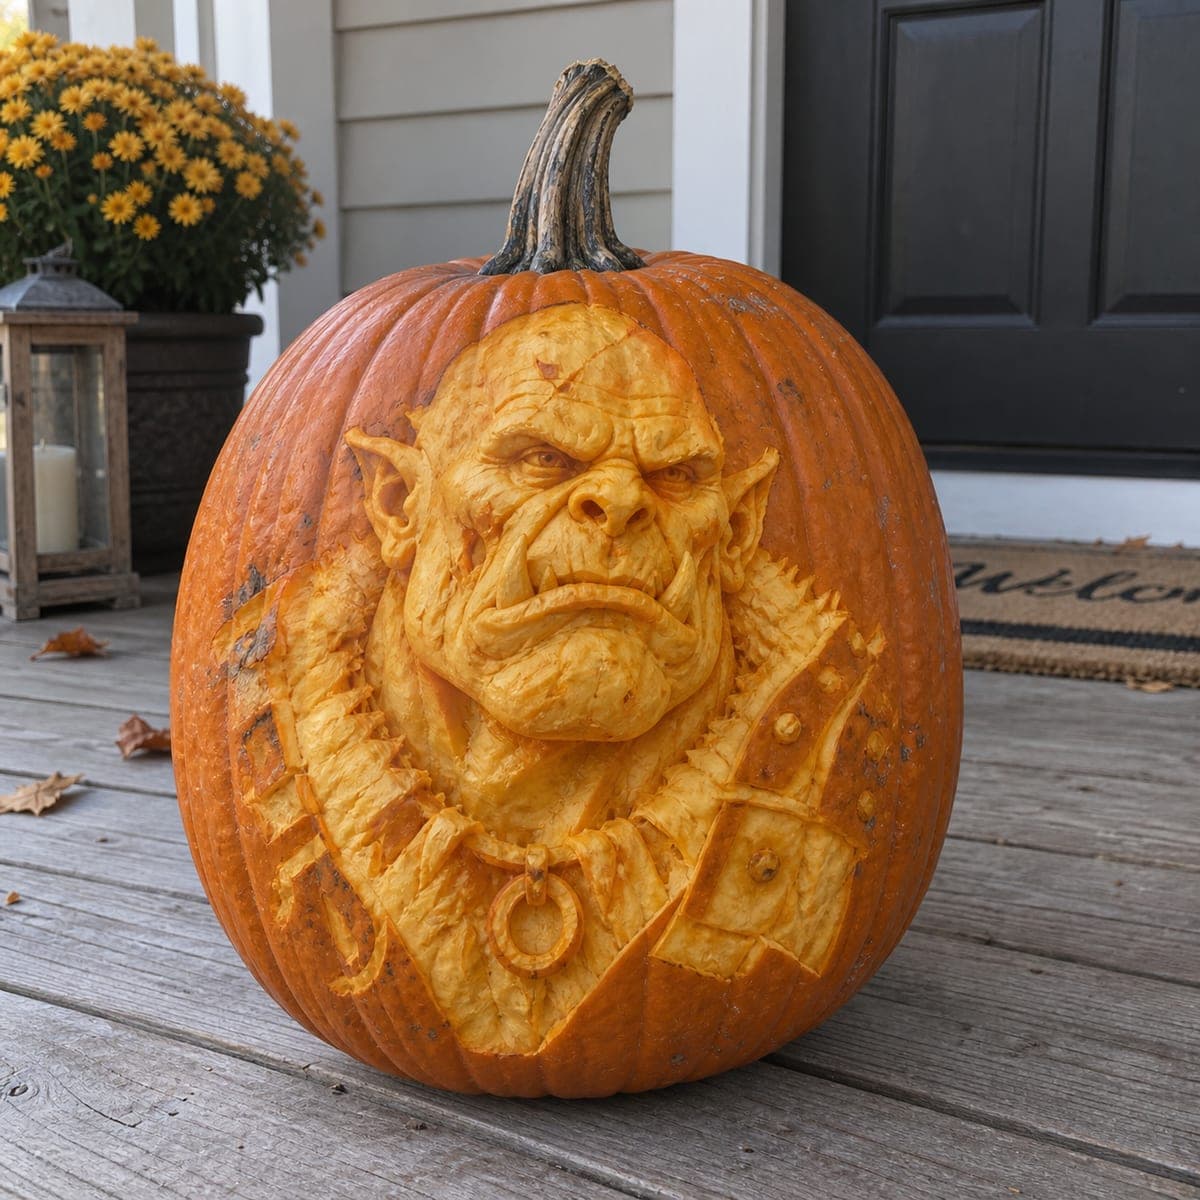
Grumpy Orc Face Sculpted Pumpkin CarvingAI
0

Grumpy Orc Face Sculpted Pumpkin Carving

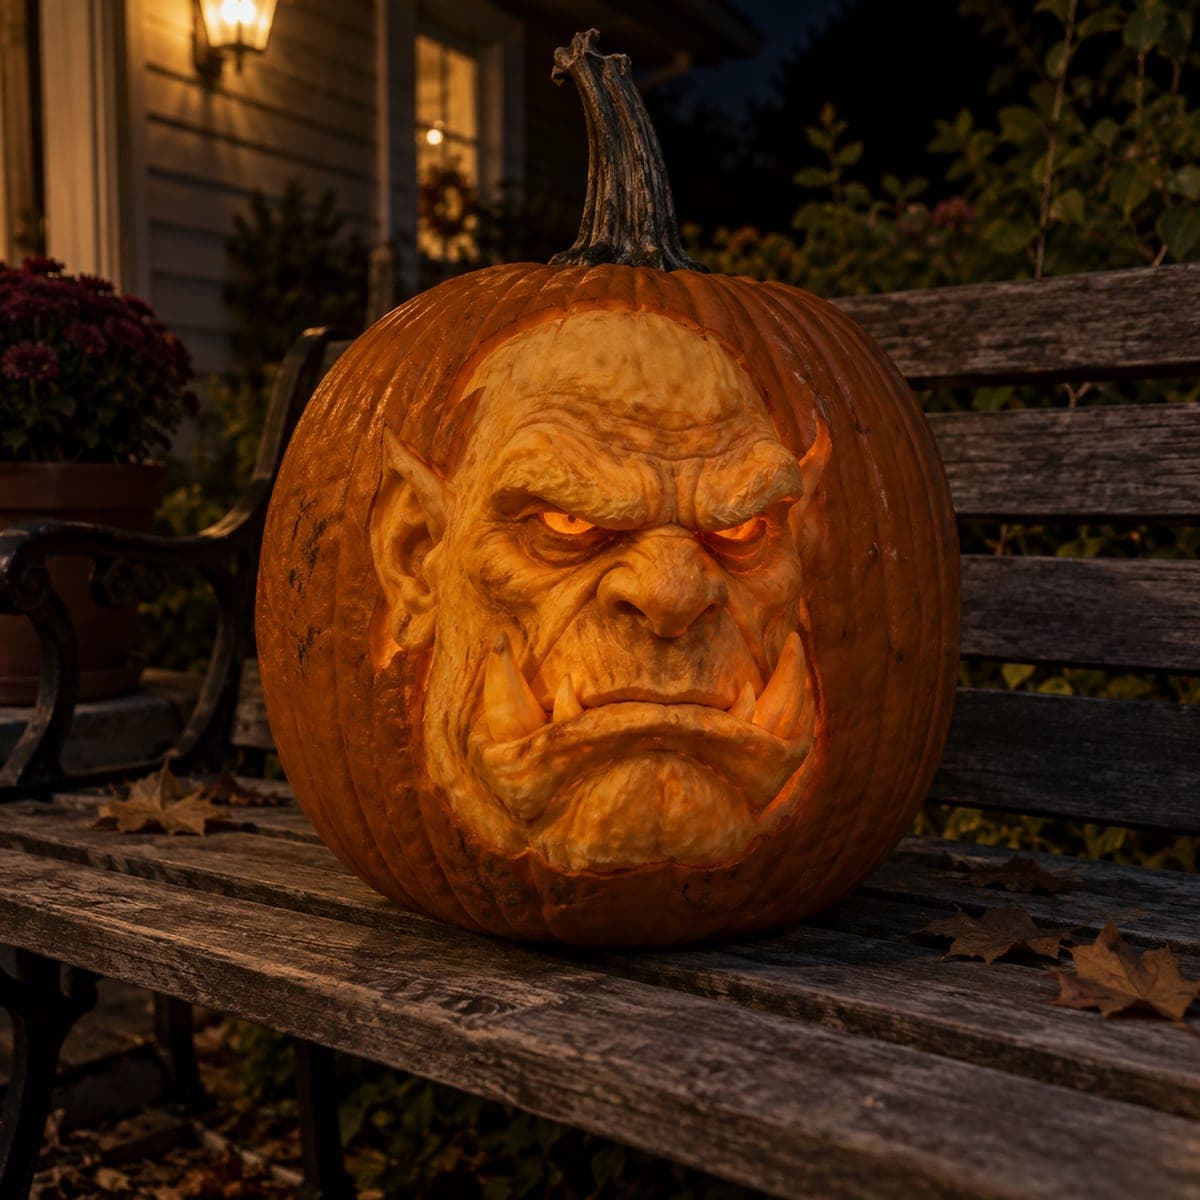
Pointed ears, a heavy scowl, and two upturned tusks give this sculpted orc face serious fantasy-villain presence, all carved in surface relief with no pierced openings. Establish the wide nose and brow ridge first since every other feature keys off them, then texture the forehead with shallow crosshatch gouges. Because it reads by daylight, it works on a bookshelf or entry table as well as the porch.

This is an AI-generated concept image: a realistic, carvable design idea rather than a photo of a finished carve. AI concepts are always labeled and sit out the leaderboard and the contest.

No ratings yet Β· Sign in to rate

Comments (0)

  • No comments yet β€” be the first.

Save without an account. Sign in to like or comment.

Our tips for carving a similar design

The core trick here is relief sculpting, where you shave away the outer skin at different depths instead of cutting all the way through. Everything keys off a strong central brow ridge and a wide, flat nose, so you block those in first and build the scowl, tusks, and pointed ears around them. Because this is a concept image and no real pumpkin exists, treat it as a plan for a daytime display piece that reads by shadow and skin color rather than by light shining through.

Written by PumpkinCarvingIdeas.com, inspired by the image above. These are our suggestions, not instructions from the uploader. This approach to the AI concept has not been tested on a real pumpkin.

From pumpkin to porch

  1. Pick a big pumpkin and transfer the face

    Choose a large, round pumpkin with a thick wall and a smooth front panel, since sculpting eats into that wall. Leave the top and stem intact because this design has no lid or interior gutting requirement for daytime relief work. Sketch the brow, nose, mouth, tusks, and ears with a washable marker, keeping the face centered and symmetrical. Step back and check the proportions before you remove any skin.

  2. Block in the brow and nose first

    Use a ribbon or loop tool to lower the skin around the heavy brow ridge so the forehead and nose stand proud. Establish the wide, flat nose and the deep scowl line between the eyes early, since every other feature lines up off these landmarks. Work in shallow passes and keep both sides even as you go. Have an adult handle the sharper detail knives throughout.

  3. Shape the eyes, cheeks, and mouth

    Carve the low, angry eye sockets under the brow and round the cheeks so they catch light and shadow. Cut the frowning mouth line and pull the lower lip forward with gentle scooping. Keep the surface curved and smooth so the orc looks fleshy rather than flat. Rotate the pumpkin often to judge the shadows from the front.

  4. Sculpt the tusks and pointed ears

    Leave the two upturned tusks slightly raised and rounded, carving the darker mouth area behind them so they pop forward. For the pointed ears, lower the skin around each ear shape and leave a bridge of flesh at the base so they stay firmly attached and will not snap off. Keep tusk tips blunt and thick rather than needle thin so they survive handling. Do not pierce all the way through anywhere on this design.

  5. Texture the forehead and refine

    Add shallow crosshatch gouges across the forehead for a rough, wrinkled orc skin look. Deepen the creases around the nose and mouth to strengthen the scowl. Peel a thin layer off the raised cheeks and brow so they glow a lighter orange against the darker recesses. Clean up stray marks and even out both sides.

  6. Preserve and photograph

    Wipe the whole surface and coat the exposed flesh with a thin layer of petroleum jelly to slow drying, since relief carvings dry out fast. Set it on a tabletop or shelf near soft daylight so the shadows read the scowl clearly. If you want a bit of night glow, tuck a small LED near the base rather than inside. Mist it and refrigerate overnight to keep it fresh for a few days.

Gather your supplies

Check things off as you get ready.

Work on a stable surface, keep your free hand out of the cutting path, and have an adult handle sharp tools.

Three levels of light

  • Leave intact

    The outer orange skin on the ears, brow crown, and edges of the face stays untouched and dark for contrast

  • Peel & shade

    The raised cheeks, brow, nose, and tusks get skin-peeled to a mid orange glow so they stand forward

  • Cut through

    Nothing is cut fully through on this relief design, so there are no bright pierced openings

Learn the carving basics

Before you start cutting

How do I keep the tusks and pointed ears from breaking off?

Since this is a relief carving, the tusks and ears stay attached to the pumpkin wall the whole time rather than sticking out on their own. Leave a solid base of flesh where each ear meets the face and keep the tusk tips blunt and thick. Avoid undercutting them so much that they become fragile flaps.

Do I need to cut all the way through the pumpkin?

No. This design reads entirely by depth, shadow, and skin color, so you only shave away the outer layers at varying depths. Keeping the wall intact makes the piece sturdier and lets it display well in daylight.

How do I get the wrinkled forehead texture?

Use a small loop or V gouge to make shallow crosshatch lines across the forehead after the brow is shaped. Keep the cuts light and slightly uneven so the skin looks leathery rather than mechanical. Deepen a few creases near the scowl to tie the texture into the angry expression.

Your take belongs here, too.

Changed a detail? Made it simpler? Share a photo of your version and tell the community what worked.

Share your pumpkin

More pumpkins like this

You've reached the end Β· 8 pumpkins
The Patch Report

Fresh pumpkins, in your inbox.

The best new carvings, ideas worth stealing, and how-tos for carving season. Short, seasonal, and gone by November.

A short email during carving season. Unsubscribe anytime. See our privacy policy.