Halloween Pumpkin Carving Contest · Starts October 1st · $500 in prizes
← Back to ideas
@ai_concepts
Aug 20, 2026
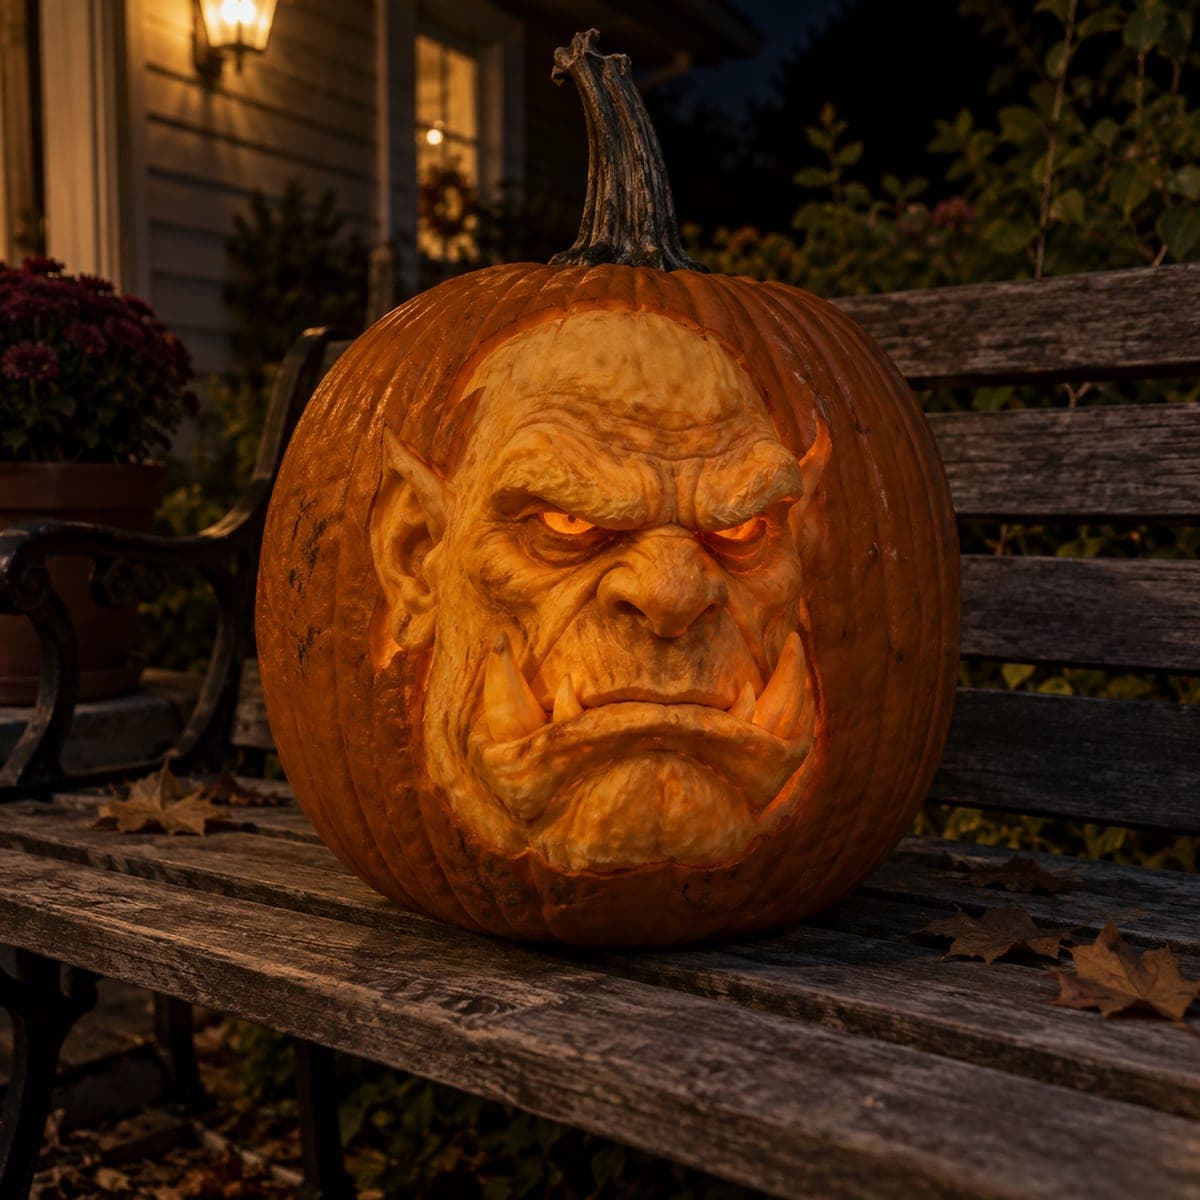
Battle-Worn Orc Warrior Sculpted Pumpkin BustAI
0

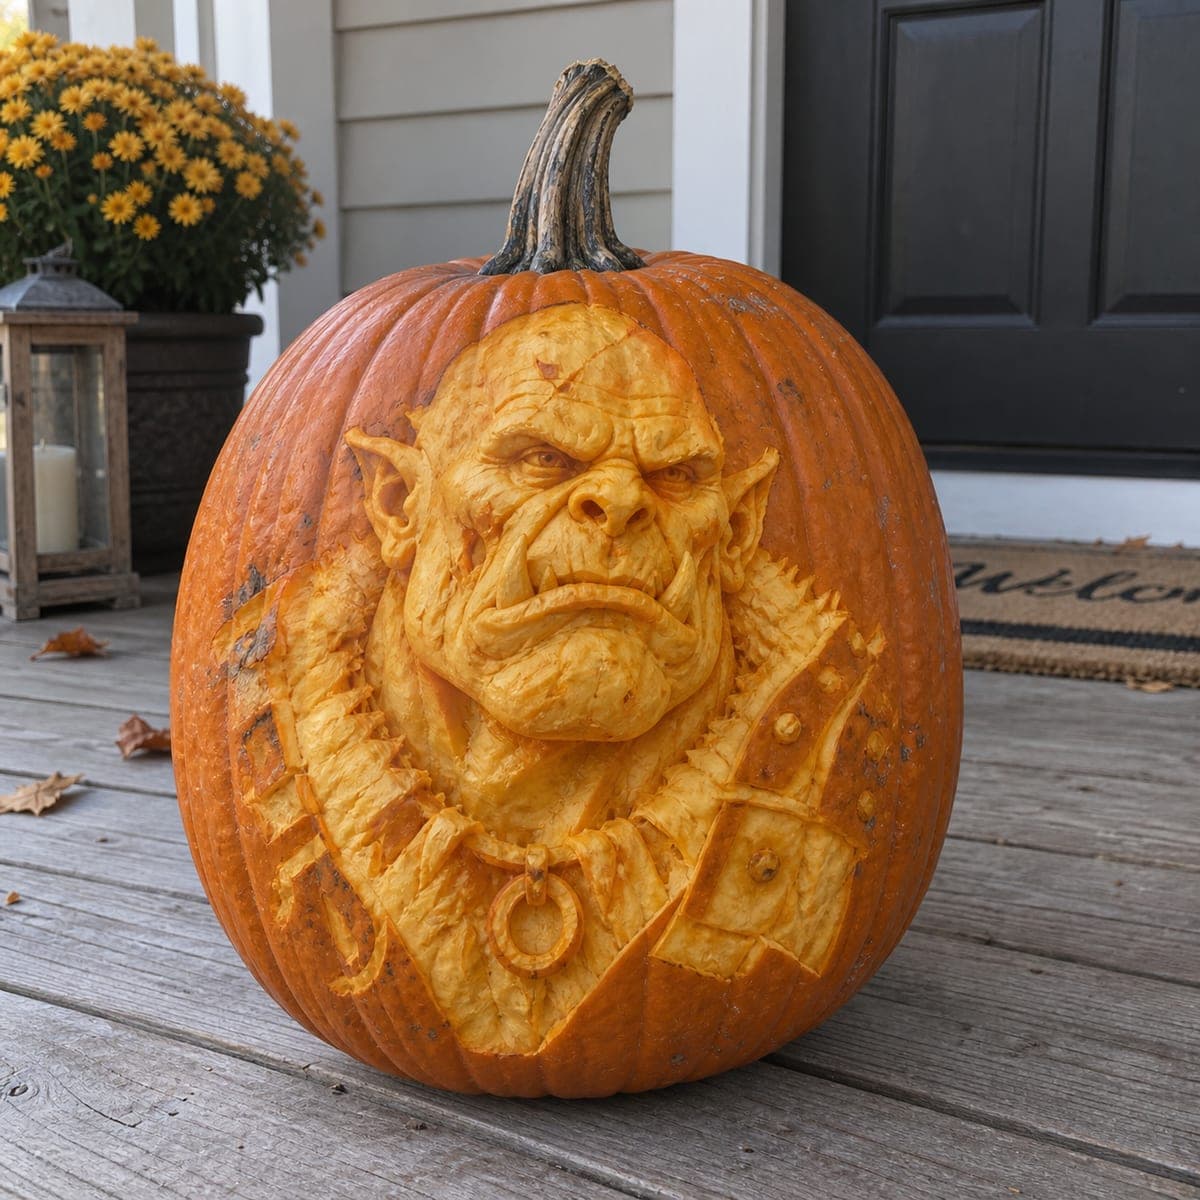
Battle-Worn Orc Warrior Sculpted Pumpkin Bust

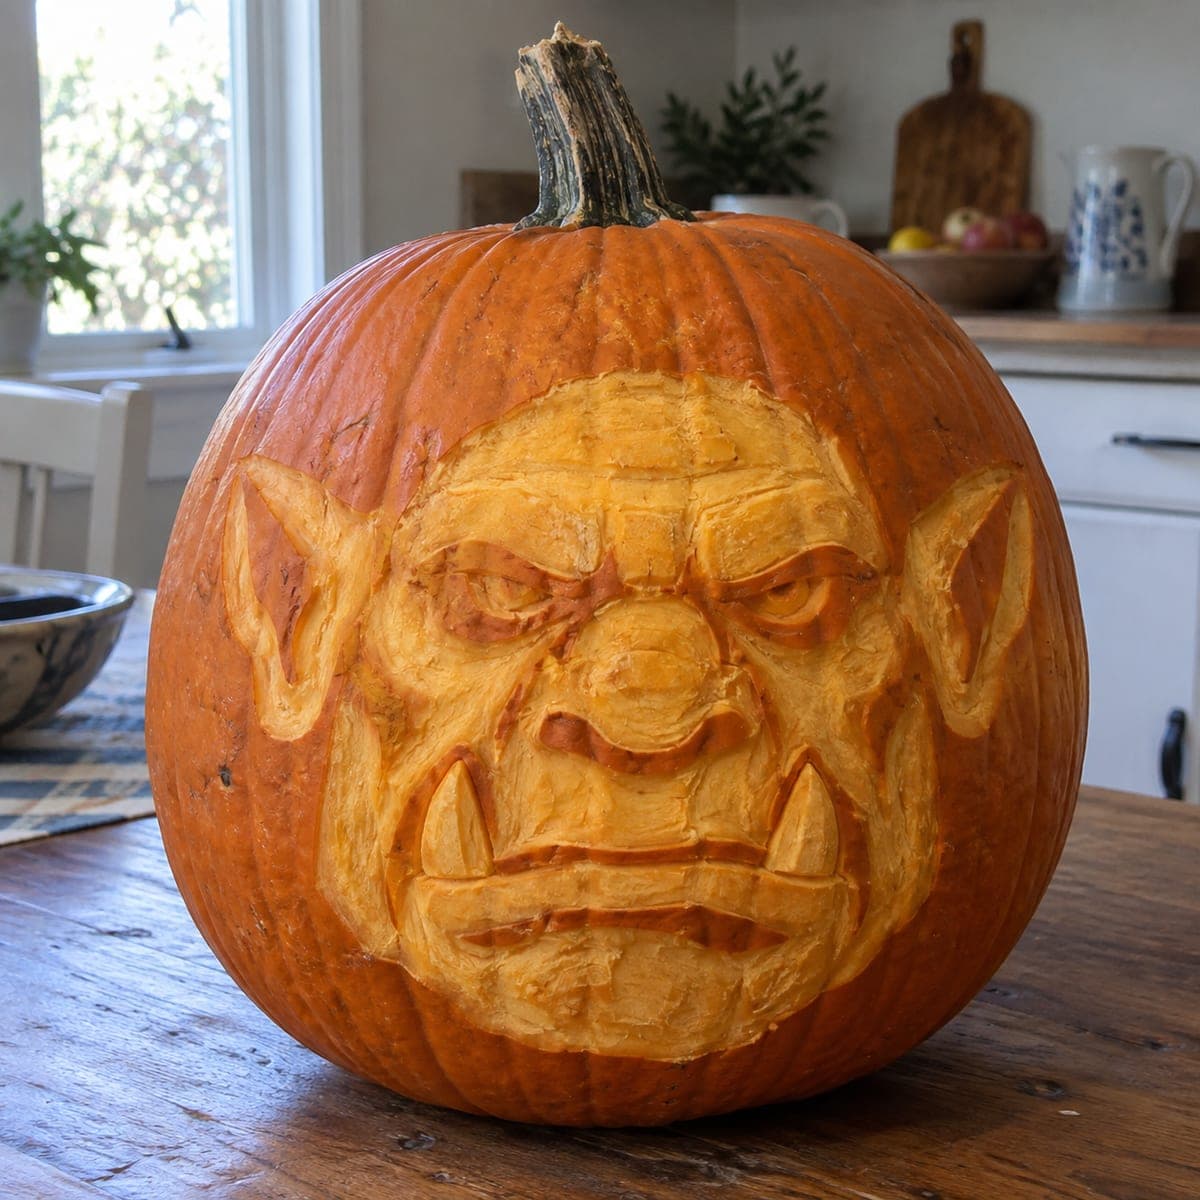
An orc warrior scowls from this pumpkin in a full sculpted bust, complete with jutting tusks, a scarred brow, pointed ears, and a spiked leather collar draped across his shoulders. Deep undercuts around the jaw and armor give the carving real shadow in porch light, no candle needed. Rough in the skull shape before any detail, carve the tusks proud of the lip so they read clearly, and texture the collar last.

This is an AI-generated concept image: a realistic, carvable design idea rather than a photo of a finished carve. AI concepts are always labeled and sit out the leaderboard and the contest.

No ratings yet · Sign in to rate
Comments (0)

  • No comments yet — be the first.

Save without an account. Sign in to like or comment.

Our tips for carving a similar design

This is a 3D relief bust that lives almost entirely in the pumpkin wall, so the whole effect comes from carving depth rather than cutting holes. The core trick is peeling and scraping skin to different depths so light passes through thin walls and gets blocked by thick ones. Rough in the skull mass first, then build the tusks, brow, and spiked collar as raised shapes that catch shadow.

Written by PumpkinCarvingIdeas.com, inspired by the image above. These are our suggestions, not instructions from the uploader. This approach to the AI concept has not been tested on a real pumpkin.

From pumpkin to porch

  1. Plan and prep the pumpkin

    Pick a tall, wide pumpkin with a smooth, thick front wall, since a sculpted bust needs meat to carve into. Cut a lid from the bottom or back rather than the top so the stem stays intact and the front face is uninterrupted. Scoop the inside until the front wall is about an inch and a half thick, checking with a nail or depth gauge. Transfer your orc outline with a marker or a pinpricked stencil so you know where the face, ears, and collar sit.

  2. Rough in the skull mass

    Use a large loop ribbon tool to remove skin across the whole face area first, establishing the broad planes of the forehead, cheeks, and heavy jaw. Do not chase detail yet, just get the big volumes and the general tilt of the head. Leave the area around the head slightly proud so the bust reads as raised from the background. Step back often to check the profile from the side.

  3. Shape the brow, nose, and eyes

    Carve the deep-set eyes by scooping shadow pockets under a heavy, scarred brow ridge. Round the broad nose and pull the cheeks back so the face has real dimension. Keep the eyes as recessed scoops rather than cut-through holes so they stay dark and menacing. A small loop tool and a detail knife let you refine the scar lines and the angry crease between the brows.

  4. Build the tusks and ears proud

    Leave the two lower tusks standing higher than the surrounding lip so they clearly jut forward, then clean the skin off around them for contrast. Undercut the base of each tusk slightly so it casts its own shadow, but keep enough attached width so they do not snap. Shape the pointed ears the same way, carving the back edge deeper than the tip. Work slowly here, since these are the thinnest raised details.

  5. Sculpt the spiked collar and armor

    Rough the shoulders and the leather collar as a band draped below the jaw, then scrape each armor plate and stud to a slightly different depth. Carve the spikes as small raised cones with shadow scooped around each base. Add the hanging ring last by cutting a shallow channel and a small opening in its center. Undercut the collar edge so it separates visually from the chest.

  6. Light it and photograph

    Skip candles and set one or two battery LED puck lights inside, angled up toward the face. Because this design relies on shadow, try a low side angle so the tusks and brow throw long shadows. Mist the carving with water and keep it cool to slow browning, and shoot your photo the same evening for the crispest detail. Wrap it in plastic in the fridge overnight if you need it to last.

Gather your supplies

Check things off as you get ready.

Work on a stable surface, keep your free hand out of the cutting path, and have an adult handle sharp tools.

Three levels of light

  • Leave intact

    The untouched orange rind around the head and behind the shoulders stays dark, framing the bust.

  • Peel & shade

    Skin peeled off the face, tusks, and armor glows dim orange and shows the sculpted planes.

  • Cut through

    Only tiny full cutouts like the center of the hanging ring go all the way through for a bright accent.

Learn the carving basics

Before you start cutting

There is barely anything cut through, so will an LED even show the design?

Yes, this is a relief carving that reads mostly by shadow, not backlight. Thin peeled areas glow softly while thick untouched skin stays dark, which is what gives the face its shape. Angle an LED up from inside and add a second light to the side so the tusks and brow cast shadows.

How do I keep the tusks from breaking off?

Carve them proud of the lip but keep a solid attached base, and avoid undercutting them so deeply that they become fragile spikes. Work them after the face is roughed in so you are not bumping them the whole time. Since this is a concept image, plan realistic thickness rather than needle-thin points.

My pumpkin wall is too thin for deep sculpting. What now?

Sculpted busts need a thick front wall, ideally an inch and a half or more, so choose a large heavy pumpkin from the start. If your wall is thin, keep the relief shallow and lean harder on peeled shading for depth. You can also fake extra shadow by scraping the background skin darker around the head.

Your take belongs here, too.

Changed a detail? Made it simpler? Share a photo of your version and tell the community what worked.

Share your pumpkin

More pumpkins like this

You've reached the end · 8 pumpkins
The Patch Report

Fresh pumpkins, in your inbox.

The best new carvings, ideas worth stealing, and how-tos for carving season. Short, seasonal, and gone by November.

A short email during carving season. Unsubscribe anytime. See our privacy policy.