Halloween Pumpkin Carving Contest · Starts October 1st · $500 in prizes
← Back to ideas
@ai_concepts
Aug 2, 2026
Queasy Emoji Face Pumpkin Spilling Painted SlimeAI
0

Queasy Emoji Face Pumpkin Spilling Painted Slime

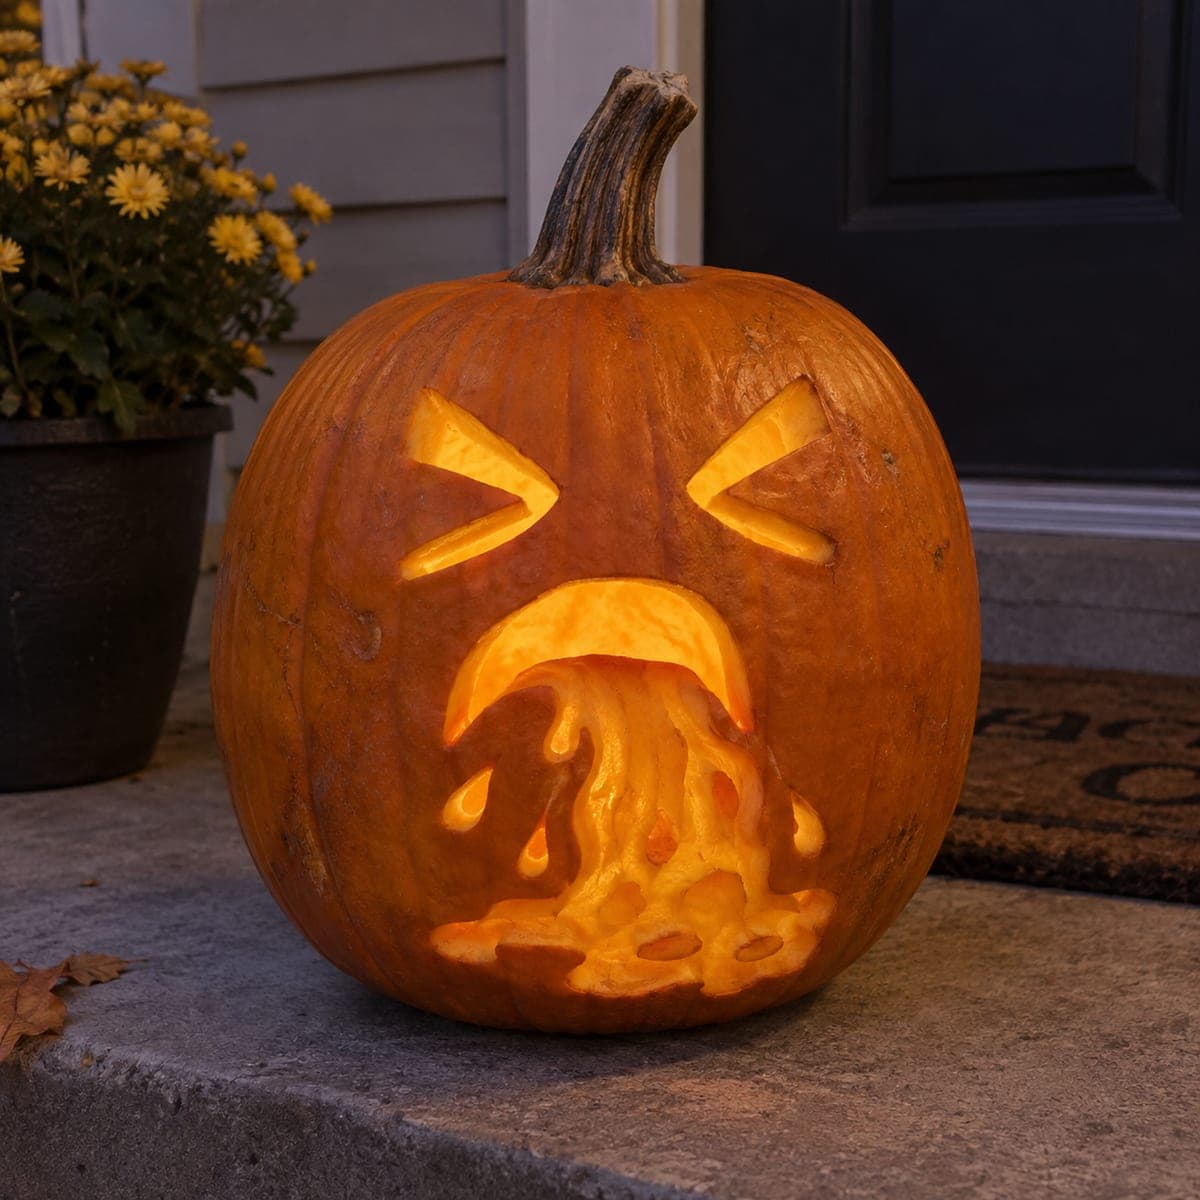
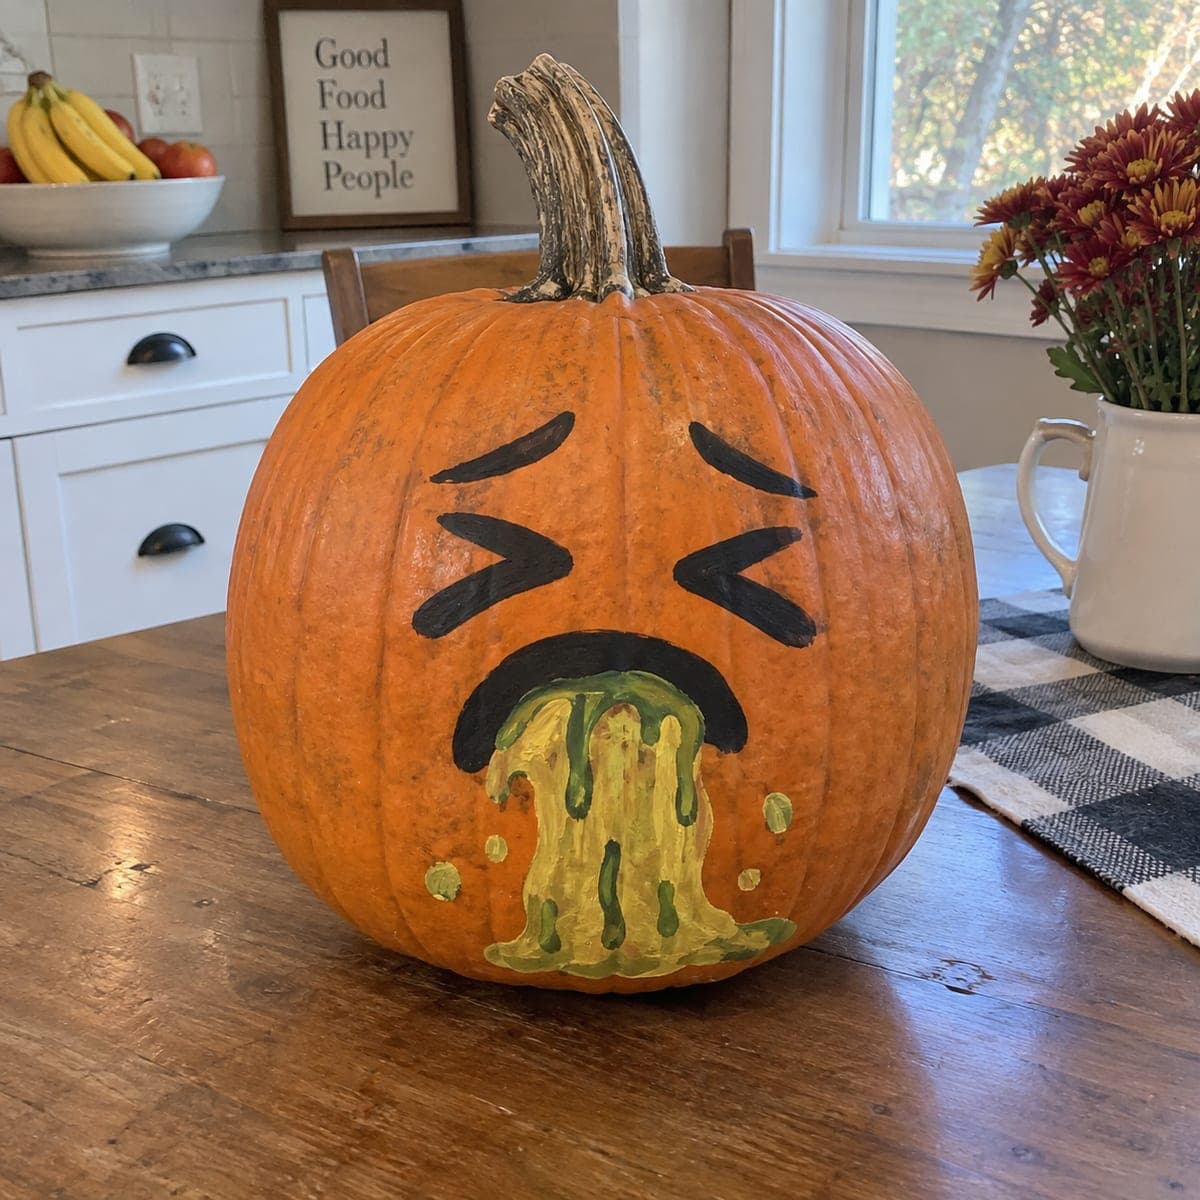
Squeezed-shut eyes and a stream of painted green slime make this sick-emoji pumpkin the class clown of the porch. It needs only black paint plus two greens, and the drips are actually easier to paint messy than neat. Start with the X-shaped eyes and brows to set the expression, then let the slime run from the mouth in loose vertical strokes with a few splatter dots.

This is an AI-generated concept image: a realistic, carvable design idea rather than a photo of a finished carve. AI concepts are always labeled and sit out the leaderboard and the contest.

No ratings yet · Sign in to rate
Comments (0)

  • No comments yet — be the first.

Save without an account. Sign in to like or comment.

Our tips for carving a similar design

This is a no-carve, all-paint design, so the whole trick is contrast: bold black features against the orange skin, plus a runny green slime pouring from the mouth. Paint the squeezed-shut X eyes and slanted brows first to lock in the queasy expression, then let the slime drip down in loose vertical strokes. Because the drips look better a little sloppy, this is a forgiving project for first-timers and kids working alongside an adult.

Written by PumpkinCarvingIdeas.com, inspired by the image above. These are our suggestions, not instructions from the uploader. This approach to the AI concept has not been tested on a real pumpkin.

From pumpkin to porch

  1. Pick and prep the pumpkin

    Choose a smooth, rounded pumpkin with a flat spot on the front for the face. Wipe the surface with a damp cloth and let it dry fully so paint sticks evenly. A slightly ribbed pumpkin is fine, but a smoother face gives you cleaner brush lines. Set it on newspaper or a tray to catch stray paint.

  2. Sketch the face lightly

    Use a washable marker or a pencil to rough in two angled brows up high, two X-shaped eyes below them, and a wide frowning mouth in the lower center. Keep the mouth open at the bottom so the slime has somewhere to pour. Step back and check that both sides look balanced before you commit. Light lines are easy to paint over, so do not press hard.

  3. Paint the black features

    With black acrylic and a medium round brush, fill the brows first, then the two X eyes, using short confident strokes. Paint the thick curved mouth outline last so you can adjust its width. Let this layer dry before adding the slime so the greens do not smear into the black. Two thin coats look better than one thick one.

  4. Add the green slime

    Load a brush with your lighter green and pull loose vertical drips down from the open mouth, letting some run longer than others. While that is still wet, streak in a darker green along the edges and center for depth. Messy is good here, so do not worry about smooth lines. Flick a few small dots to the sides with the brush tip for splatter.

  5. Seal and stage it

    Once everything is fully dry, brush on a clear acrylic sealer so the paint survives dew and handling. Set the finished pumpkin where the slime faces out, like a porch step or table. Tuck a battery LED puck or fairy lights behind or beside it for a soft evening glow, since the skin is not cut. Snap your photo in daylight to show off the colors.

Gather your supplies

Check things off as you get ready.

Work on a stable surface, keep your free hand out of the cutting path, and have an adult handle sharp tools.

Three levels of light

  • Leave intact

    The entire orange body stays untouched and dark, since nothing is cut into it.

  • Peel & shade

    For a subtle glow you could lightly scrape a thin ring of skin around the mouth before painting the slime edges.

  • Cut through

    If you want real light, an adult can cut out only the open bottom of the mouth so an LED shines through behind the slime.

Learn the carving basics

Before you start cutting

This is a concept image, so how would I actually make one?

No real pumpkin was carved for the picture, so treat it as inspiration for a painted design. Use a real pumpkin, sketch the face, and paint the features and slime with acrylics. The whole look is achievable with paint and no blades.

Can I light it up if it is all paint?

Yes, but since the skin is not cut, light has to come from outside or from one small optional opening. Set a battery LED nearby or behind the pumpkin for an evening glow. If you want light through the slime, have an adult cut just the open mouth.

How do I keep the slime drips from looking flat?

Layer a lighter green base first, then streak a darker green along the edges and down the center while the base is still slightly wet so they blend. Vary the length of each drip and add a few splatter dots to the sides. A little unevenness reads as gooey and realistic.

Your take belongs here, too.

Changed a detail? Made it simpler? Share a photo of your version and tell the community what worked.

Share your pumpkin

More pumpkins like this

You've reached the end · 8 pumpkins
The Patch Report

Fresh pumpkins, in your inbox.

The best new carvings, ideas worth stealing, and how-tos for carving season. Short, seasonal, and gone by November.

A short email during carving season. Unsubscribe anytime. See our privacy policy.