Halloween Pumpkin Carving Contest · Starts October 1st · $500 in prizes
← Back to ideas
@ai_concepts
Sep 25, 2026
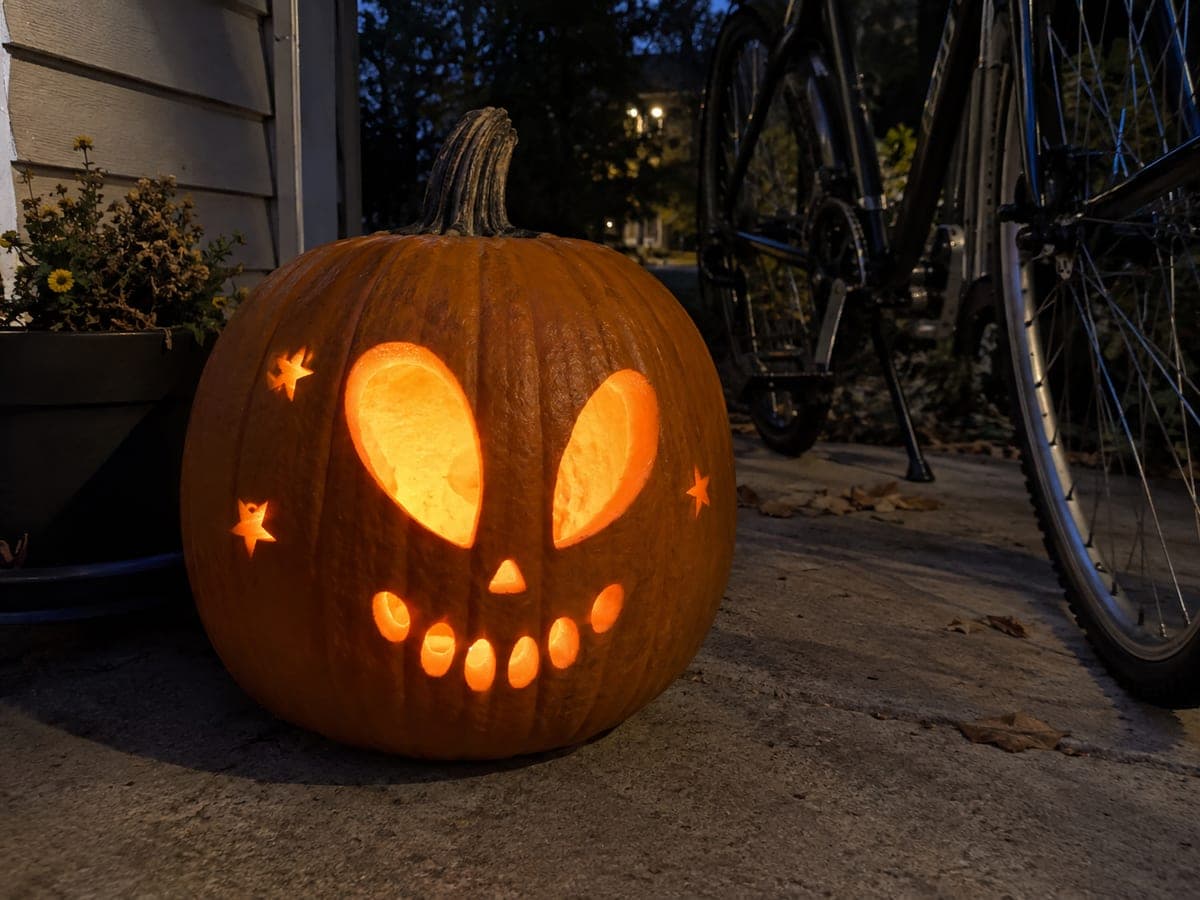
Quirky Alien Teardrop Eye Weird Pumpkin CarvingAI
0

Report this carving

Tell us what is wrong. Reports are private.

Quirky Alien Teardrop Eye Weird Pumpkin Carving

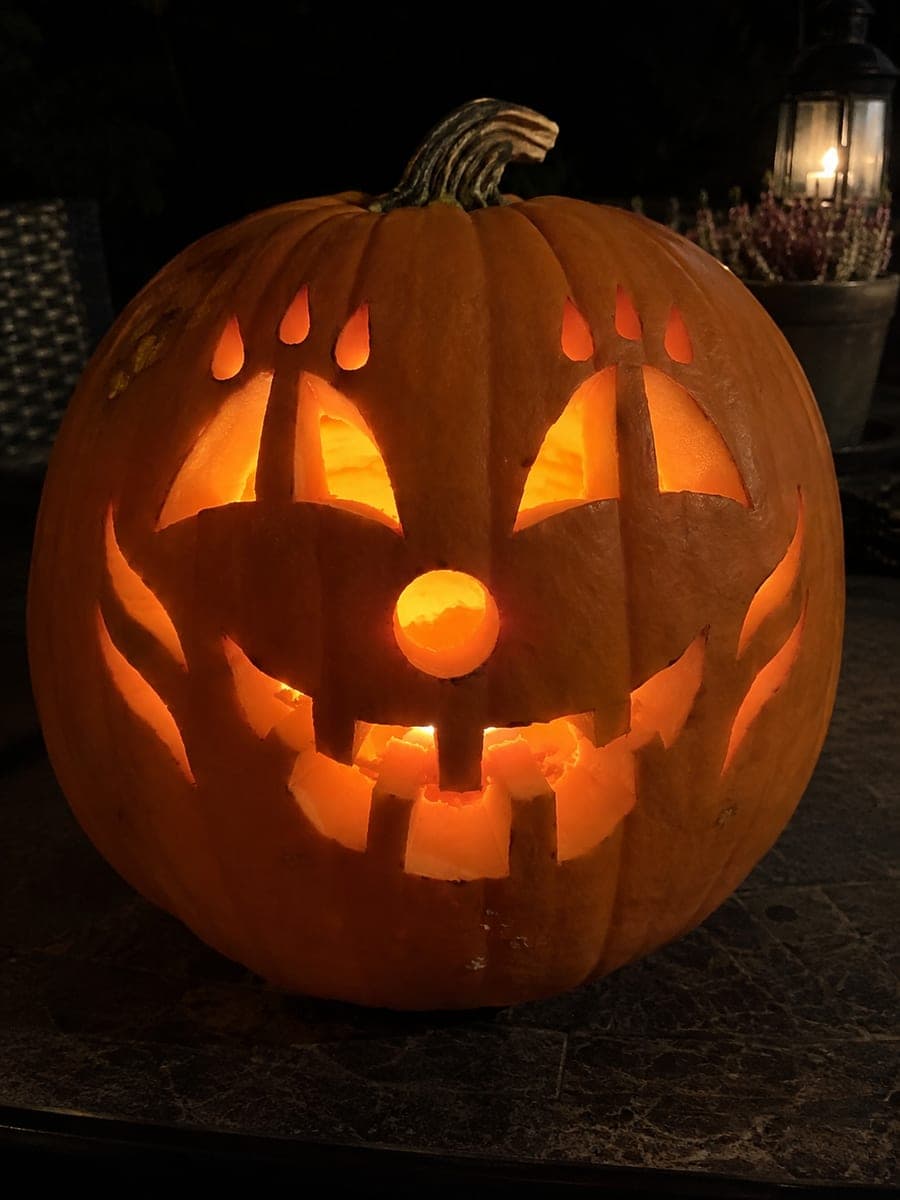
Two big teardrop eye openings, a tiny triangle nose, and six small oval mouth slots in a crooked grin give this weird pumpkin carving its distinctly extraterrestrial personality. The teardrop eyes point upward at a slight inward angle to suggest a furrowed alien brow. Cut the teardrops slowly from the narrow tip upward to maintain control through the curved base. No dark pupil islands means the full teardrop lights up, giving the face an unblinking, wide-eyed strangeness at night.

No ratings yet · Sign in to rate

Comments (0)

  • No comments yet — be the first.

Save without an account. Sign in to like or comment.

Our tips for carving a similar design

The teardrop eyes are the centerpiece: angled slightly inward at the top, they suggest a furrowed brow without any retained rind detail. Six oval mouth slots arranged in a crooked arc add a lopsided grin that looks genuinely alien. Because there are no pupil islands to retain, every aperture lights fully and evenly.

From pumpkin to porch

  1. Hollow and prepare

    Remove the back plug and scoop the interior until wall thickness is roughly an inch throughout. A thinner wall makes cutting curves easier but risks cracking, so keep at least three-quarters of an inch on the areas between the close-spaced mouth slots.

  2. Sketch the teardrop eyes

    Draw each teardrop with the narrow tip at the top and the wide curve at the bottom, angling both inner tips downward toward an imaginary nose bridge. Place the tips about two inches apart so the eyes feel close-set and intense. Check that both teardrops are the same size before cutting.

  3. Cut the teardrops tip-first

    Begin your saw cut at the narrow tip and work slowly downward through the wide curve. Starting at the tip gives you the most control through the tricky curved section at the base. Keep the saw blade perpendicular to the rind surface so the hole has clean vertical walls.

  4. Add the triangle nose

    Mark a small equilateral triangle centered between and below the eyes. Cut the three sides cleanly, pop out the plug, and set the triangle aside. The small nose hole provides a middle light point that separates the eyes from the mouth visually.

  5. Cut the six oval mouth slots

    Lay out six small oval slots in a slightly curved, crooked line below the nose, spacing them unevenly so the left side sits a little lower than the right. Cut each oval individually, working from the top down. Leave at least half an inch of rind between adjacent slots so none of them merge.

  6. Light and display

    Insert a warm LED light and display the pumpkin at eye level in a dim setting. The full-glow teardrop eyes and the dotted row of mouth slots create a convincingly otherworldly expression that gets better the darker the surroundings.

Written with AI to match this design

Gather your supplies

Check things off as you get ready.

Work on a stable surface, keep your free hand out of the cutting path, and have an adult handle sharp tools.

Three levels of light

  • Leave intact

    All uncut rind including the area between the eyes and between mouth slots stays dark

  • Peel & shade

    None, no skin-peeling on this design

  • Cut through

    Both teardrop eyes, the triangle nose, and all six oval mouth slots glow at full brightness

Learn the carving basics

Before you start cutting

How do I keep the teardrop tip from snapping off when I cut the curve?

Score the full outline lightly before making the cut-through pass. At the narrow tip, use very short strokes and reduce pressure. If the tip does chip, a thin dab of toothpick and craft glue can hold it in place temporarily for the display night.

What is the best way to get the six mouth slots evenly spaced without measuring tools?

Cut a small cardboard oval template matching your slot size and trace it six times along a gently curved pencil guideline. This keeps every slot the same size even if the spacing is intentionally irregular for the crooked-grin effect.

The eyes look symmetrical on my sketch but uneven on the pumpkin. What happened?

Pumpkin surfaces curve in multiple directions, so a flat sketch transfers slightly differently to each side. Mark the center line of the pumpkin vertically with a marker and measure each eye position from that line rather than from each other.

Your take belongs here, too.

Changed a detail? Made it simpler? Share a photo of your version and tell the community what worked.

Share your pumpkin

More pumpkins like this

You've reached the end · 8 pumpkins
The Patch Report

Fresh pumpkins, in your inbox.

The best new carvings, ideas worth stealing, and how-tos for carving season. Short, seasonal, and gone by November.

A short email during carving season. Unsubscribe anytime. See our privacy policy.