@boo_radley
Sep 5, 2026
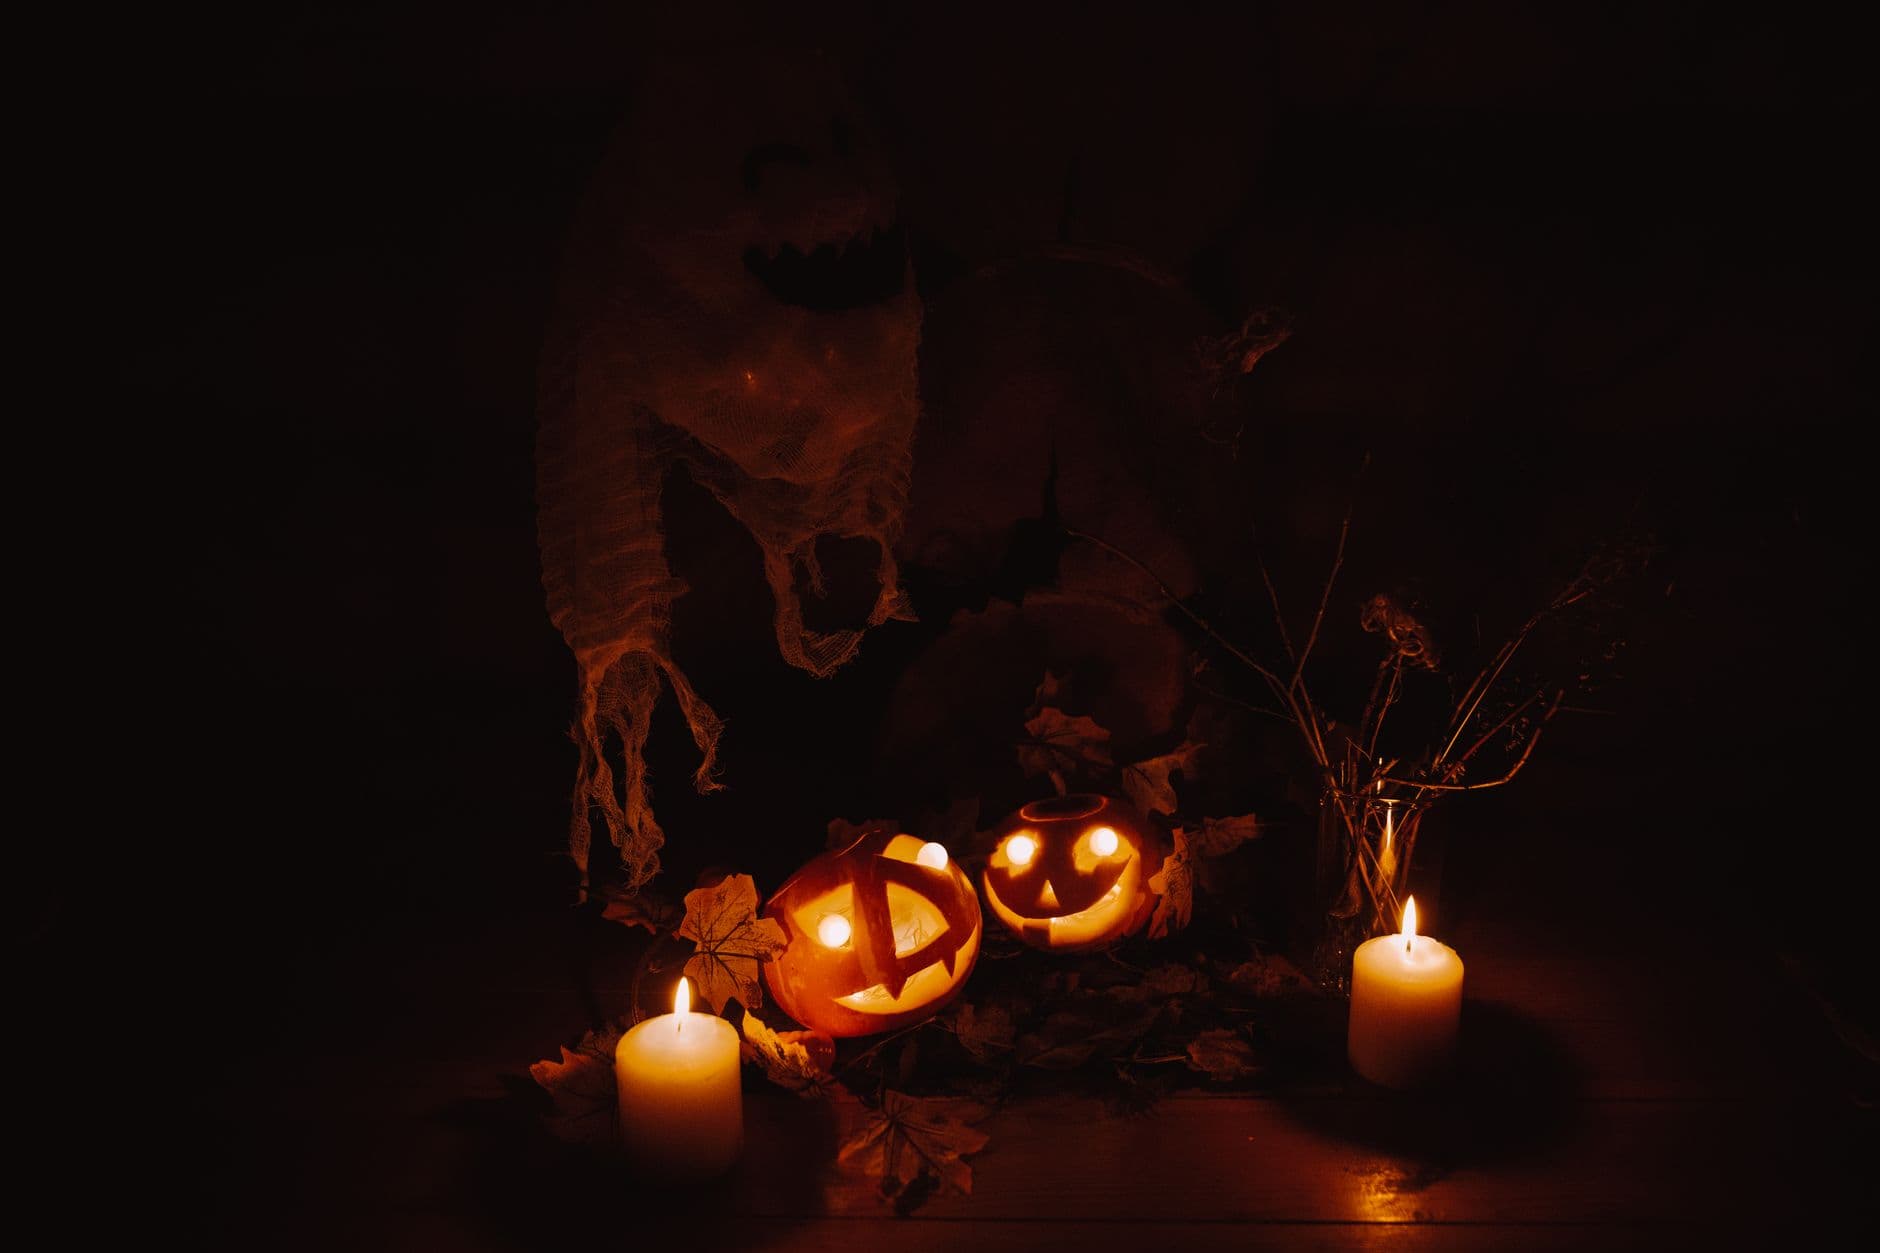
Séance for two
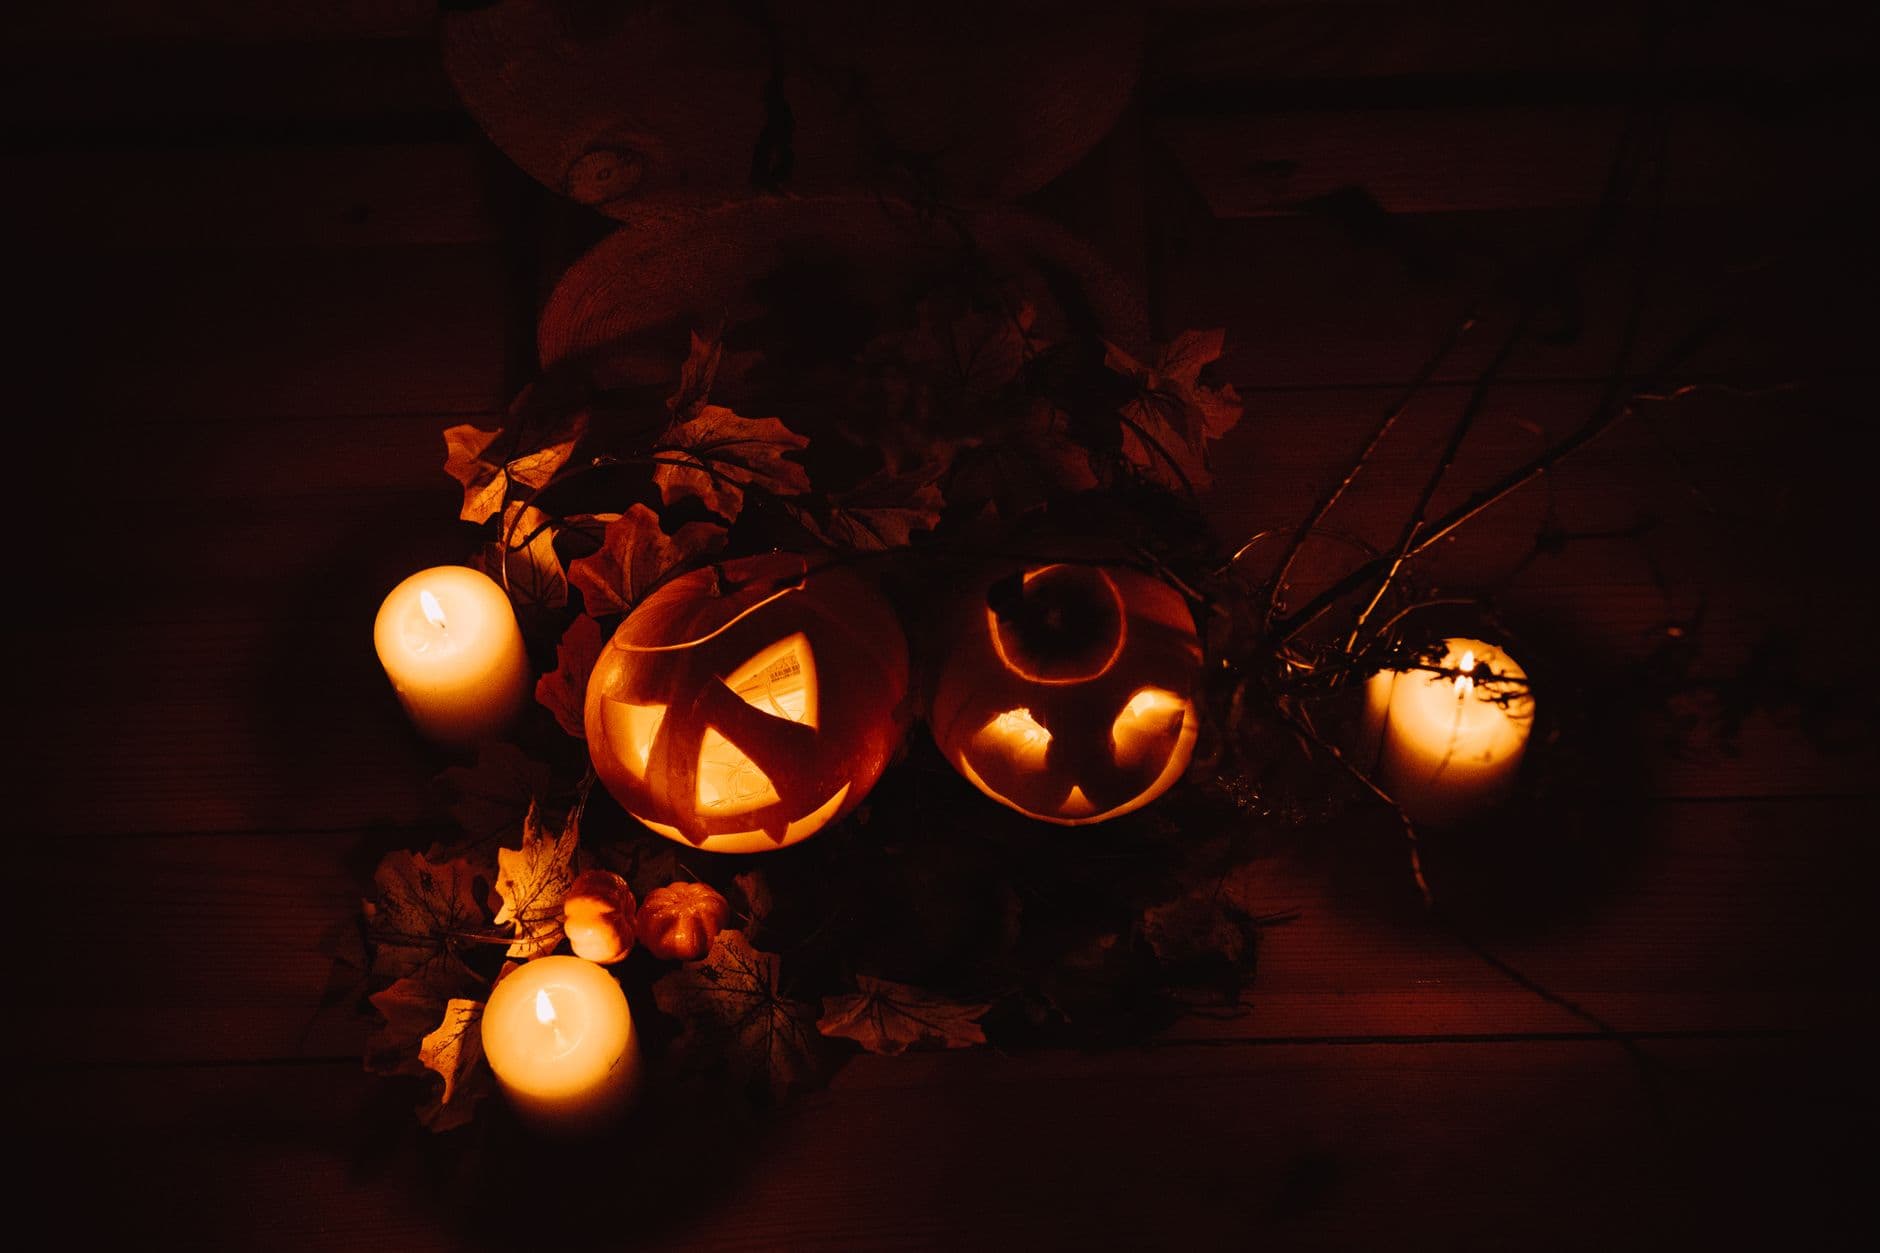
Two small jacks flickering between pillar candles while a cheesecloth ghost looms out of the dark behind them.
No ratings yet · Sign in to rate
Two small jacks flickering between pillar candles while a cheesecloth ghost looms out of the dark behind them.
The trick here is not one fancy pumpkin but two small ones playing off each other, one with sharp jagged features and one with a soft round grin, staged low between pillar candles. Keep the faces to clean geometric cutouts so the light punches through crisply, then let the cheesecloth ghost and scattered leaves do the scary work in the background. Simple carving, strong scene.
Written by PumpkinCarvingIdeas.com, inspired by @boo_radley's photo above. These are our suggestions, not instructions from the uploader, and this approach hasn't been tested on their exact carve.
Choose two small, round pumpkins that sit close in size so the pair looks intentional. Cut a lid on each at an angle so it wont fall in, then scoop the guts and scrape the front wall down to about one inch thick. A thinner wall lets the light glow through and makes cutting the faces much easier. Pat the insides dry before you start carving.
Give one pumpkin a mean look with angled triangle eyes, a triangle nose, and a wide toothy mouth. Give the other a friendly look with round or oval eyes and a simple smile. Tape a printed stencil to each and poke the outlines with a pin, or draw the shapes on with a washable marker. Keeping the two expressions different is what sells the little scene.
Start with the eyes and nose using a small carving saw, cutting straight in and taking your time on the corners. Let an adult handle the blade and always push the tool away from your body. Cut the smaller shapes before the big mouth so the face stays rigid while you work. Gently push each piece out from the inside rather than pulling it forward.
The mouth is the largest opening, so carve it last to keep each pumpkin strong while you work. On the toothy jack, leave a little extra width around each tooth so they dont snap off. Clean up any ragged edges with the tip of your saw or a paring knife. If a tooth feels loose, trim it shorter rather than risk it breaking.
Drop a battery LED tea light or a small puck light into each pumpkin, warm white or amber for that campfire glow. Set the pair low and close together, then place real pillar candles to the sides and front where they are clear of anything flammable. Scatter dried leaves around the base and hang loose cheesecloth behind and above to read as a looming ghost. Keep the cloth well back from any open flame.
Turn off the overhead lights so the only glow comes from the pumpkins and candles. Get down to table level and shoot slightly toward the pumpkins so the faces are the brightest thing in frame. Let the background fall into shadow so the ghost stays half hidden and mysterious. A phone on a steady surface or small tripod will handle the low light better than shooting handheld.
Check things off as you get ready.
Work on a stable surface, keep your free hand out of the cutting path, and have an adult handle sharp tools.
The pumpkin skin around both faces stays uncarved so it reads as dark orange and frames the features.
Optional shallow skin-scraping around the friendly jacks smile or eyes for a soft dim halo.
The triangle eyes and nose and both mouths are cut fully through for the brightest, sharpest glow.
Use battery LED lights inside the pumpkins instead. Real flame inside a small pumpkin scorches the lid and can dry out and ignite the shell over a long evening. Save the real pillar candles for the open tabletop around the display where you can watch them, and never near the cheesecloth.
Carve the teeth a little chunkier than the stencil shows and dont cut them too tall and thin. Cut the mouth last so the face stays stiff while you work the smaller shapes. If a tooth wobbles, trim it shorter rather than trying to save a fragile point.
Hang the cheesecloth higher than the pumpkins and let it drape unevenly so folds catch a little light. Keep it in soft shadow rather than fully lit so your eye fills in the shape. Placing it a foot or two behind the pumpkins adds depth and keeps it safely away from the candles.
Changed a detail? Made it simpler? Share a photo of your version and tell the community what worked.
The best new carvings, ideas worth stealing, and how-tos for carving season. Short, seasonal, and gone by November.

Comments (0)