Halloween Pumpkin Carving Contest · Starts October 1st · $500 in prizes
← Back to ideas
@ai_concepts
Jul 16, 2026
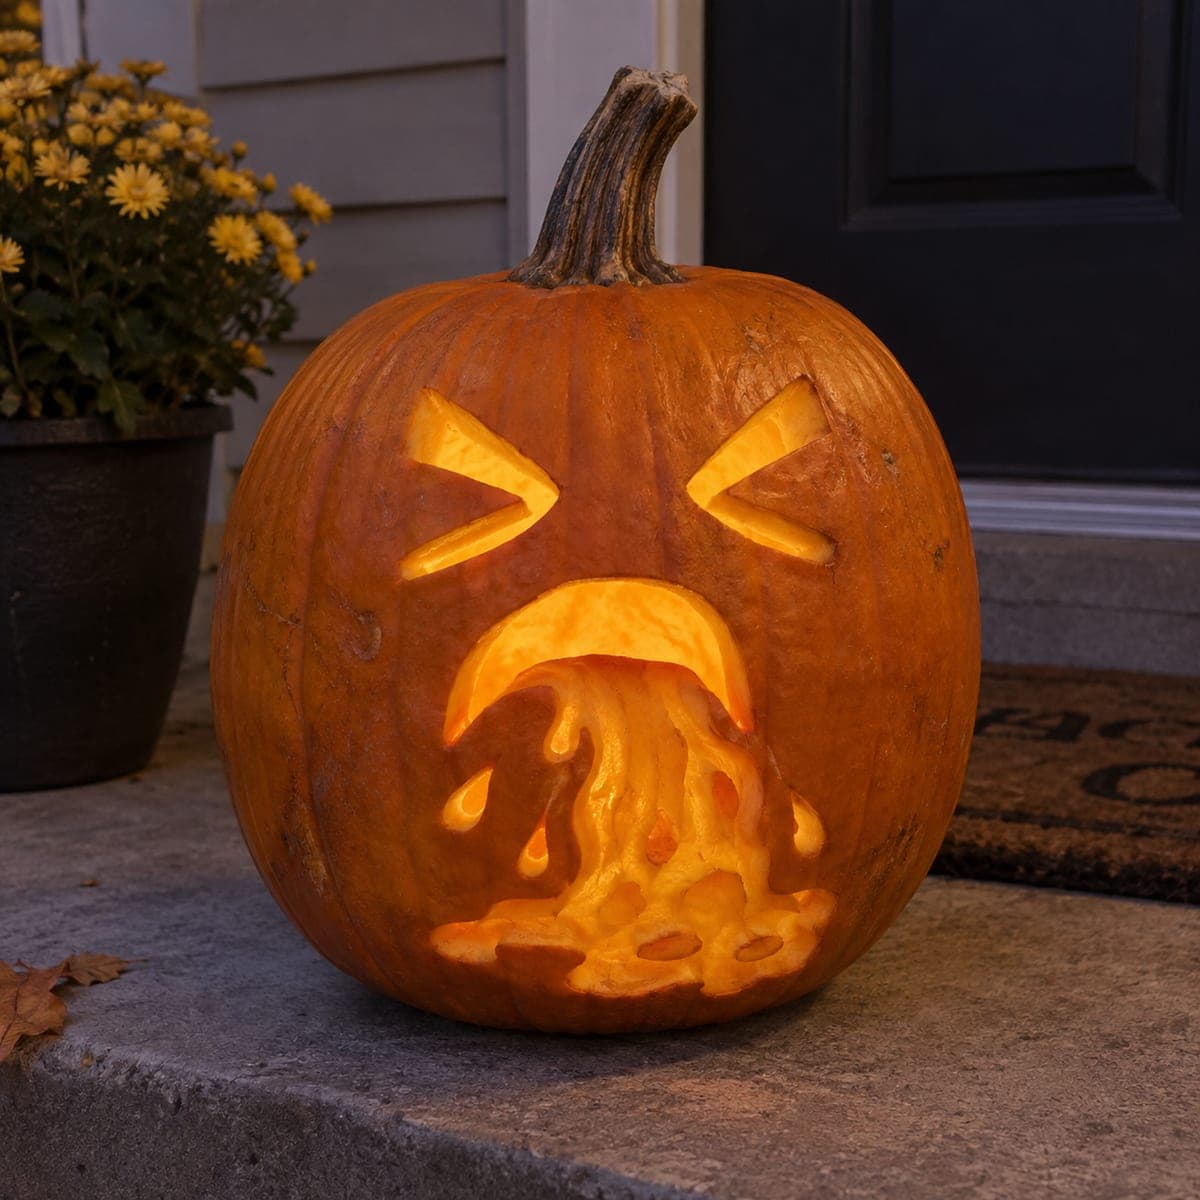
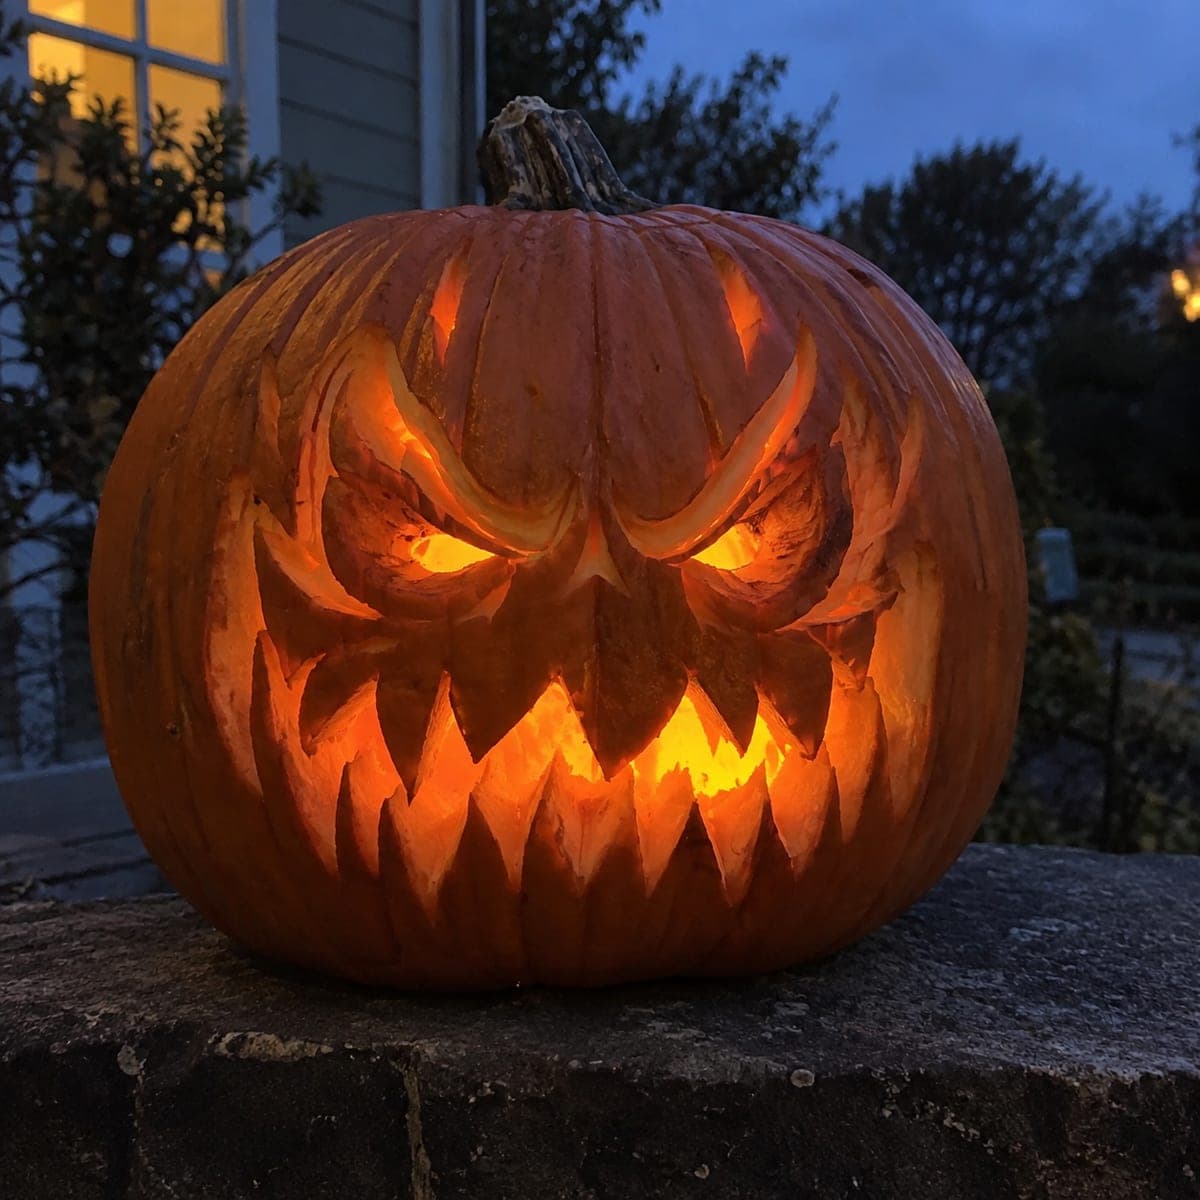
Screaming Frightened Face Jack-O-Lantern Outdoor GlowAI
0

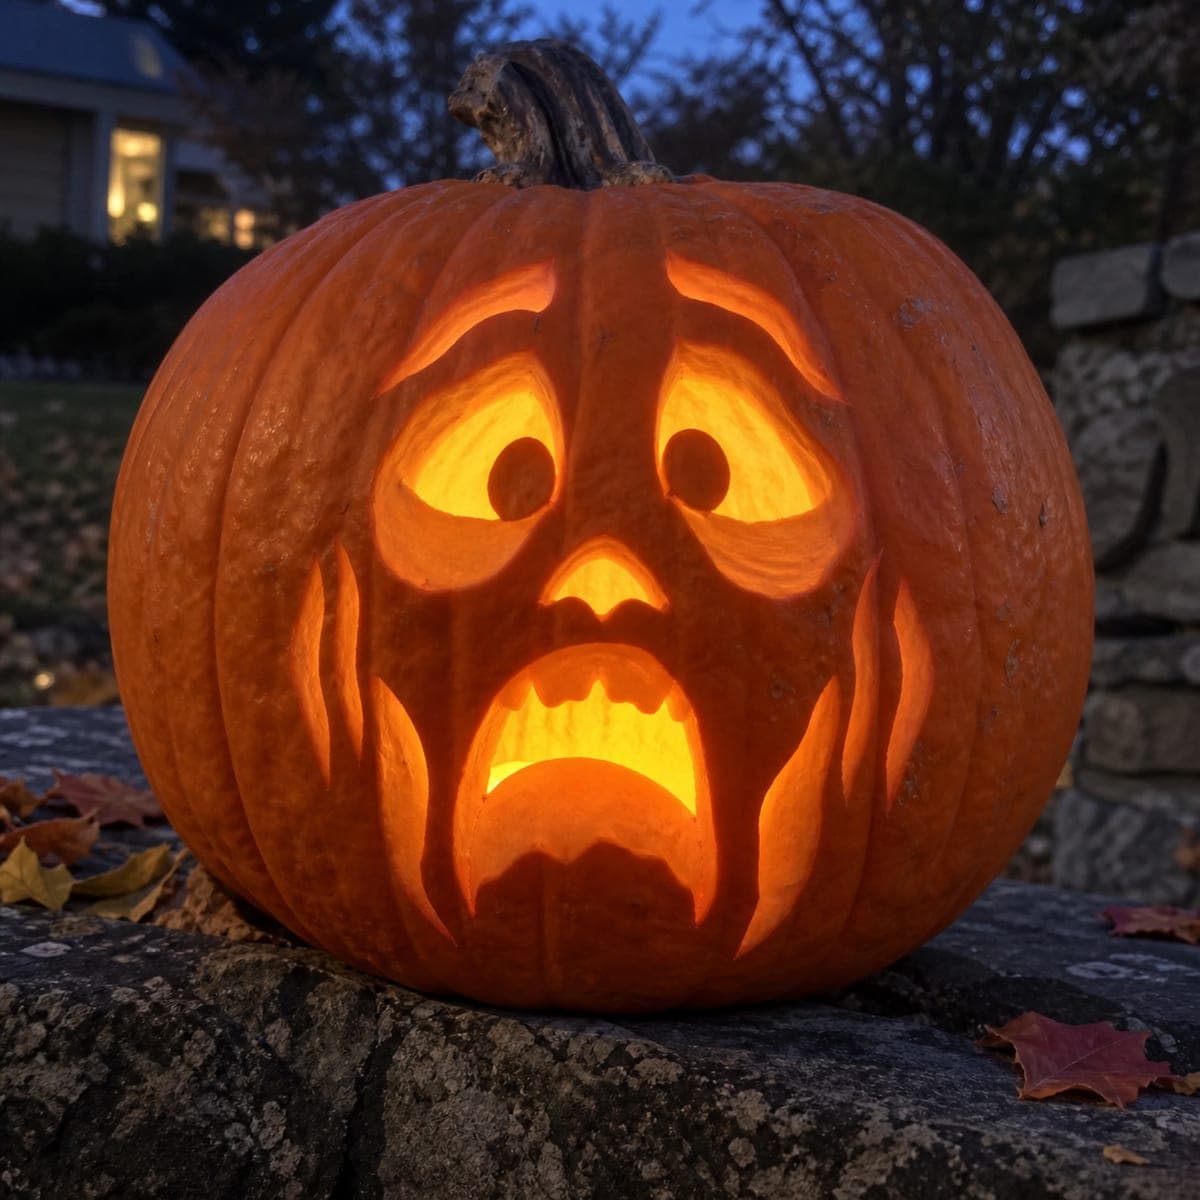
Screaming Frightened Face Jack-O-Lantern Outdoor Glow

Wide circular eyes and a gaping oval mouth give this pumpkin the look of pure panic, a nod to the classic horror-movie scream pose. The carved drips below the mouth add a melting quality that makes the face feel like it is coming apart in fear. Carve the eyes as full circles first, then cut the lower lip with a curved knife to get the trembling bottom edge. Set on a stone wall or step with a bright LED inside, this glowing pumpkin carving idea creates an eerie greeting for Halloween visitors.

This is an AI-generated concept image: a realistic, carvable design idea rather than a photo of a finished carve. AI concepts are always labeled and sit out the leaderboard and the contest.

No ratings yet · Sign in to rate
Comments (0)

  • No comments yet — be the first.

Save without an account. Sign in to like or comment.

Our tips for carving a similar design

The core trick here is contrast between clean full-circle cutouts and softly shaded, half-carved details. The round eyes and gaping oval mouth are cut all the way through for maximum brightness, while the raised brows, cheeks, and the drips below the mouth are peeled thin so they glow dim and give the face its melting, terrified expression. Plan your cuts so the big mouth opening comes last, keeping the pumpkin wall strong while you work.

Written by PumpkinCarvingIdeas.com, inspired by the image above. These are our suggestions, not instructions from the uploader. This approach to the AI concept has not been tested on a real pumpkin.

From pumpkin to porch

  1. Prep and open the pumpkin

    Pick a large, round pumpkin with a smooth front for the face. An adult should cut a lid or, better for a screaming face, a bottom opening so the pumpkin sits flat on a wall or step. Scoop out the insides and thin the front wall to about one inch so light passes through the peeled areas. A thinner wall makes shading much easier later.

  2. Transfer the panic face

    Print or draw the design with two large round eyes, curved worried brows, and a tall oval mouth. Tape the pattern to the front and poke the outlines with a pin or transfer tool. Mark clearly which parts are full cutouts, the eyes and mouth, and which are shading, the brows, cheeks, and drips. This planning step keeps you from cutting through a spot meant to stay dim.

  3. Carve the eyes as full circles

    Start with the two round eyes since they are the brightest, boldest feature. Use a small serrated saw and take slow, steady strokes, rotating the pumpkin rather than forcing the blade. Keep the circles even and leave a small solid dot or bridge if you want the pinpoint pupils to read as dark centers. Clean the edges so the light comes through crisp.

  4. Cut the screaming mouth last

    The gaping oval mouth is the largest opening, so save it for last to keep the wall sturdy. Cut the top outline first, then shape the trembling lower lip with a curved knife or gouge for that wavy, quivering edge. Work from the center outward and support the pumpkin with your free hand away from the blade. Removing this big piece last prevents the front from sagging while you carve the finer details.

  5. Shade the brows, cheeks, and drips

    Switch to a ribbon or lino gouge and peel just the skin off the raised brows, the puffy under-eye cheeks, and the long drip shapes running down from the mouth. These stay attached to the pumpkin and glow a soft orange, which sells the melting, coming-apart look. Vary how deep you scrape to get lighter and darker tones. Leave the surrounding skin untouched so the shaded areas stand out.

  6. Light it and stage the photo

    Drop a bright battery LED inside, warm white or amber works best for that eerie glow. Set the pumpkin on a stone wall or step at dusk so the shaded drips catch the light. Never use an open candle, since the thin walls and dry insides are a fire risk. Snap your photo when the sky is deep blue for the strongest contrast.

Gather your supplies

Check things off as you get ready.

Work on a stable surface, keep your free hand out of the cutting path, and have an adult handle sharp tools.

Three levels of light

  • Leave intact

    The outer face skin around the eyes, brows, and jawline stays untouched and dark.

  • Peel & shade

    The worried brows, under-eye cheeks, and the melting drips below the mouth are skin-peeled for a dim orange glow.

  • Cut through

    The two round eyes and the gaping oval mouth are cut fully through for the brightest light.

Learn the carving basics

Before you start cutting

How do I keep the wide round eyes from looking flat?

Leave a small solid dot or a thin bridge of skin in each eye to act as a pupil, which adds depth and a sense of direction to the stare. You can also lightly peel a ring around each cutout so the glow softens at the edges. Crisp, clean circle cuts read best from a distance.

What is the best way to get the trembling lower lip?

Draw the wavy edge before you cut, then follow it slowly with a small curved knife rather than a straight saw. Take short strokes and let the blade follow the curve so the bumps stay even. Since this is the mouth opening, cut it last so the wall stays firm while you shape it.

Since this is a concept image, will a real pumpkin hold this shape?

Yes, as long as you keep the drips attached to the surface as shaded areas instead of thin free-hanging cutouts. The large mouth is the biggest structural risk, so thin the wall evenly and carve that opening last. A one inch wall gives you good glow while staying strong.

Your take belongs here, too.

Changed a detail? Made it simpler? Share a photo of your version and tell the community what worked.

Share your pumpkin

More pumpkins like this

You've reached the end · 8 pumpkins
The Patch Report

Fresh pumpkins, in your inbox.

The best new carvings, ideas worth stealing, and how-tos for carving season. Short, seasonal, and gone by November.

A short email during carving season. Unsubscribe anytime. See our privacy policy.