Halloween Pumpkin Carving Contest · Starts October 1st · $500 in prizes
← Back to ideas
@ai_concepts
Jul 9, 2026
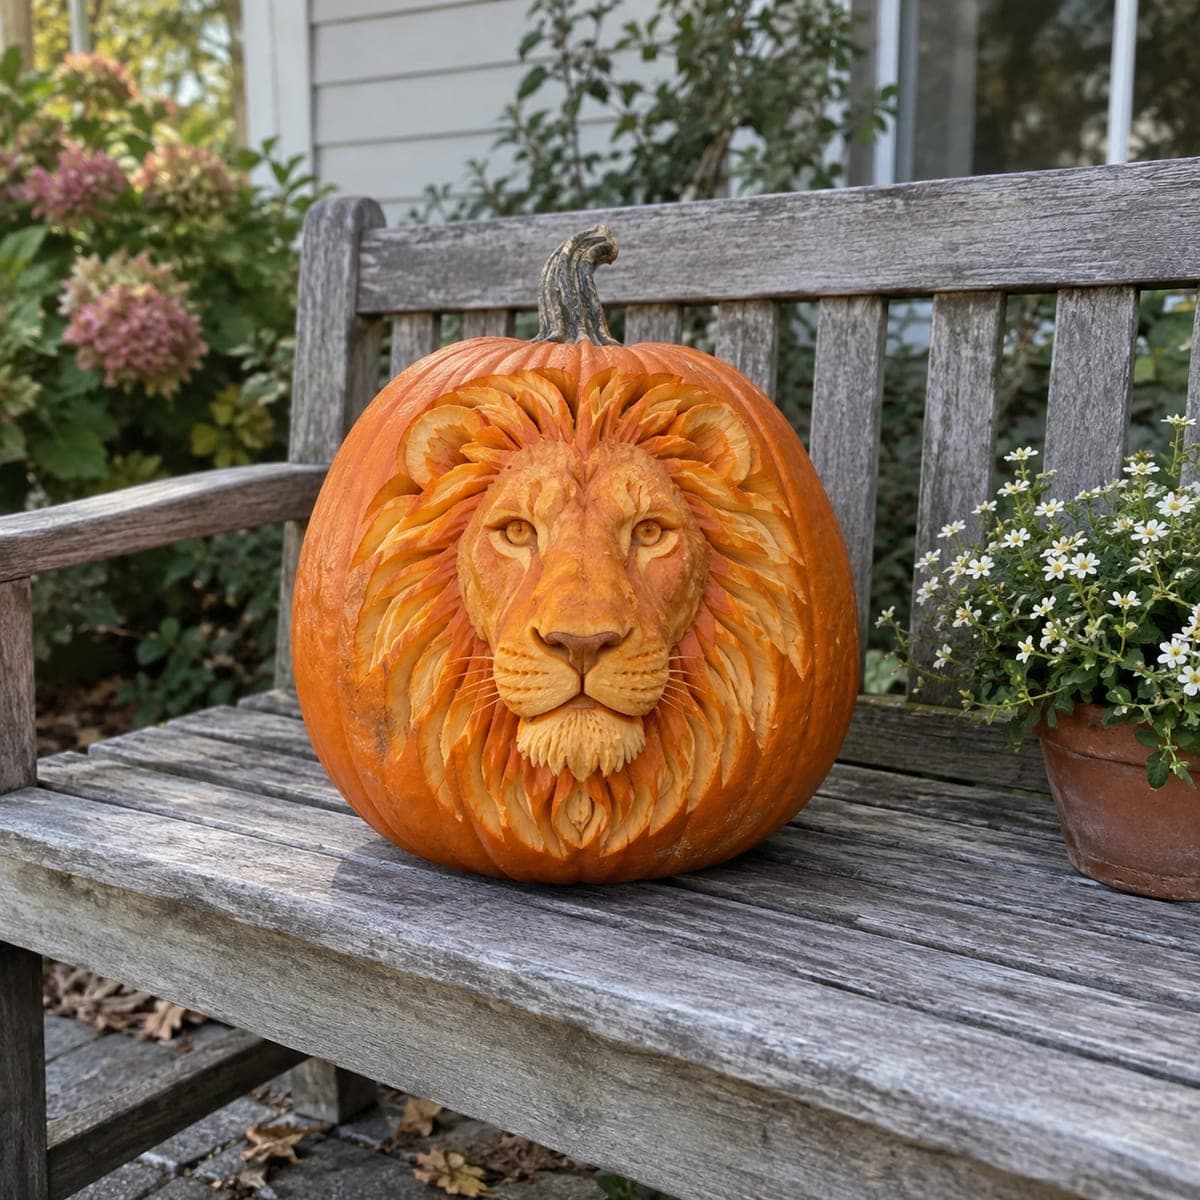
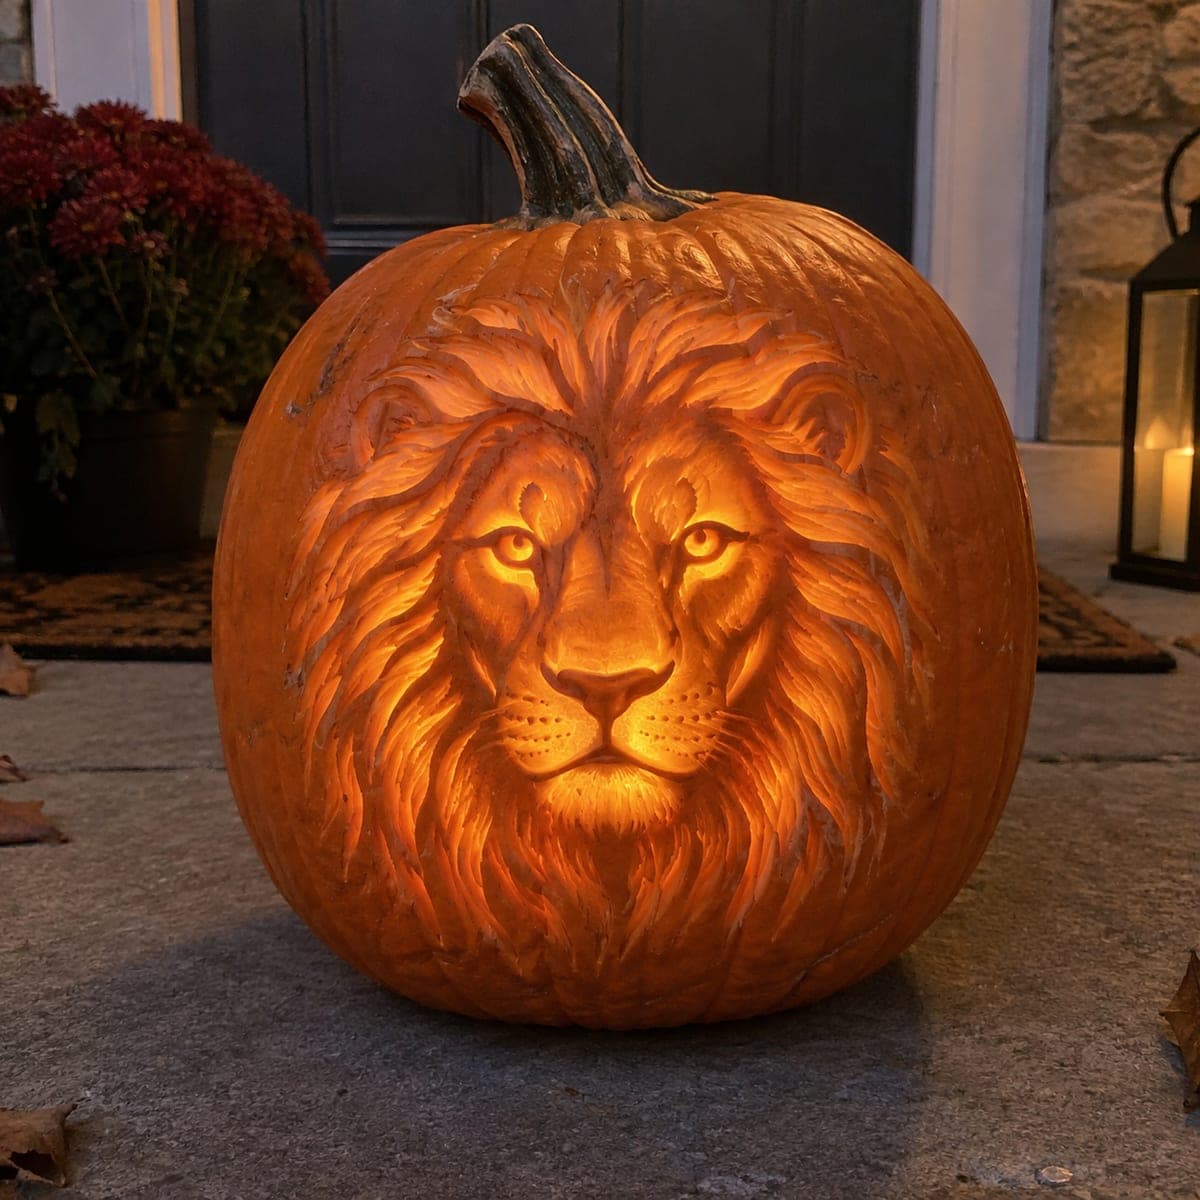
Sculpted Lion Head Pumpkin With Flowing ManeAI
0

Sculpted Lion Head Pumpkin With Flowing Mane

A lion's face emerges from this pumpkin in full three-dimensional relief, its mane swirling outward in deep ribbon-like carves that catch afternoon light. This is sculpture more than carving; the nose, brow, and muzzle are modeled at different heights with clay-sculpting ribbons and loop tools. Rough in the major planes of the face before any mane detail, keep your tools stropped, and mist the finished surface with water and lemon juice to slow browning.

This is an AI-generated concept image: a realistic, carvable design idea rather than a photo of a finished carve. AI concepts are always labeled and sit out the leaderboard and the contest.

No ratings yet · Sign in to rate

Comments (0)

  • No comments yet — be the first.

Save without an account. Sign in to like or comment.

Our tips for carving a similar design

The core trick here is relief sculpting, not cutting all the way through the wall. You carve the lion's face and mane by removing skin and flesh at different depths so the modeled forms catch light and cast their own shadows. Rough in the big planes of the face first, then work outward into the ribbon-like mane last so you always have solid material to sculpt against.

Written by PumpkinCarvingIdeas.com, inspired by the image above. These are our suggestions, not instructions from the uploader. This approach to the AI concept has not been tested on a real pumpkin.

From pumpkin to porch

  1. Plan and transfer the layout

    Since this is an AI concept, picture how you want the finished lion to sit and pick a large, evenly shaped pumpkin for the wall thickness you need. Sketch the face circle in the center, then the mane rings spiraling outward, using a washable marker. Keep the eyes, nose, and muzzle mapped near the middle where the surface is flattest. Do not open the pumpkin from the top yet, since you want a full solid wall to sculpt into.

  2. Scrape the whole design area down to bare flesh

    Use a loop tool or ribbon tool to remove the outer orange skin across the entire face and mane zone. This gives you the lighter, workable flesh that shows sculpting depth. Leave the surrounding pumpkin skin intact as a dark frame. Work slowly and keep the removed layer shallow and even at this stage.

  3. Rough in the major face planes

    Establish the big forms before any fine detail. Push back the cheeks and the sides of the muzzle so the brow, nose bridge, and snout stand proud at different heights. Check the shape from a few feet away often, since relief reads by shadow, not line. Keep tools stropped so cuts stay clean and you avoid tearing the soft flesh.

  4. Model the eyes, nose, and muzzle

    Carve the eye sockets deeper and leave rounded eyeballs sitting inside them, then define the heavy brow above. Shape the nose as a raised triangle and hollow the nostrils slightly. For whiskers and thin muzzle lines, score shallow grooves rather than cutting through, so nothing snaps off. These small raised details are fragile, so save deep work around them for after they are shaped.

  5. Carve the flowing mane last

    Work outward from the face into the mane, cutting deep ribbon-like grooves that overlap in layers like feathers. Vary the depth so inner strands sit higher and outer strands drop into shadow. Leave narrow bridges of flesh between grooves so the strands stay attached and strong. This is the most time-consuming stage, so pace yourself and keep the surface misted.

  6. Preserve, light, and photograph

    Mist the whole carved surface with a mix of water and lemon juice to slow browning, and wipe away crumbs. If you want interior glow, cut a small access hole in the back or base now, after the sculpting is done, and set a battery LED inside. Use warm-toned LEDs and skip candles, since open flame near this much thin detail is a hazard. Shoot your photos in soft afternoon light to show off the mane shadows.

Gather your supplies

Check things off as you get ready.

Work on a stable surface, keep your free hand out of the cutting path, and have an adult handle sharp tools.

Three levels of light

  • Leave intact

    The ring of untouched skin around the whole design stays dark and frames the lion.

  • Peel & shade

    The entire scraped face and mane glow dim orange, with depth showing as soft shadow.

  • Cut through

    Optional thin grooves cut deepest in the mane let the most light through for accent highlights.

Learn the carving basics

Before you start cutting

Do I need to cut through the pumpkin wall at all?

Mostly no. This is a relief sculpture, so nearly all the effect comes from carving to different depths in the flesh, not from openings. If you want an inner glow, cut only a small access hole in the back or base for an LED, and do that after the sculpting is finished.

How do I keep the whiskers and thin muzzle lines from breaking?

Treat them as scored grooves in raised flesh rather than free-standing pieces. Keep them shallow and leave plenty of supporting material behind and beside each line. Carving deep cuts nearby before the details are set is the most common way they snap, so save that work for last.

How long will a sculpted pumpkin like this last?

Because so much skin is removed, it will brown and soften faster than a simple jack-o-lantern. Mist it with a water and lemon juice mix, wipe it dry, and store it somewhere cool between showings. Plan to carve it within a day or two of when you want to display it.

Your take belongs here, too.

Changed a detail? Made it simpler? Share a photo of your version and tell the community what worked.

Share your pumpkin

More pumpkins like this

You've reached the end · 8 pumpkins
The Patch Report

Fresh pumpkins, in your inbox.

The best new carvings, ideas worth stealing, and how-tos for carving season. Short, seasonal, and gone by November.

A short email during carving season. Unsubscribe anytime. See our privacy policy.