Halloween Pumpkin Carving Contest · Starts October 1st · $500 in prizes
← Back to ideas
@ai_concepts
Aug 20, 2026
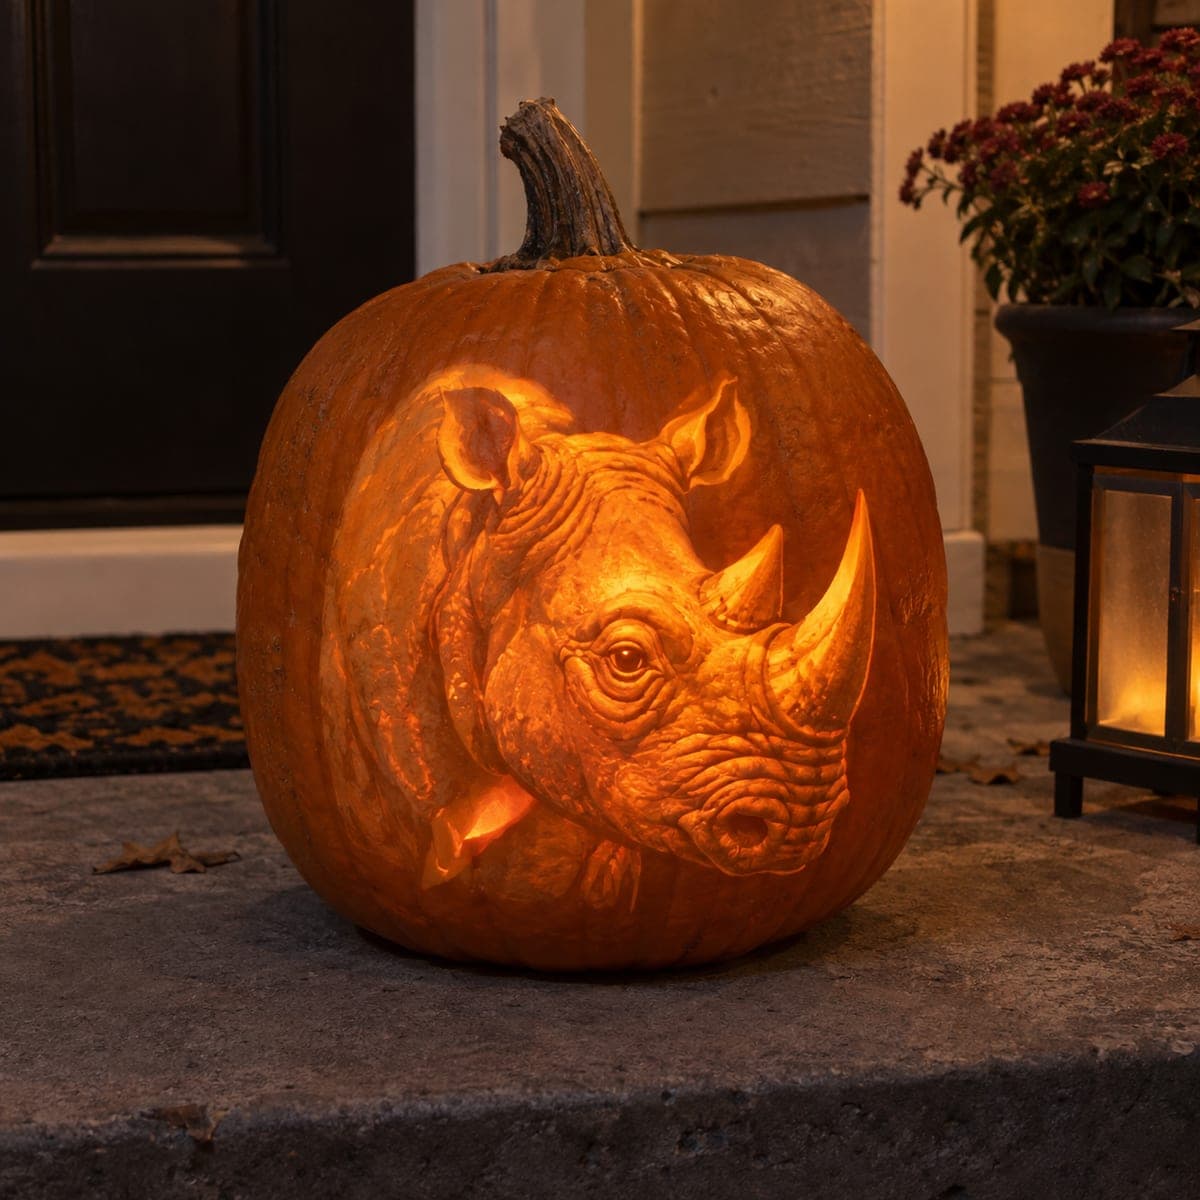
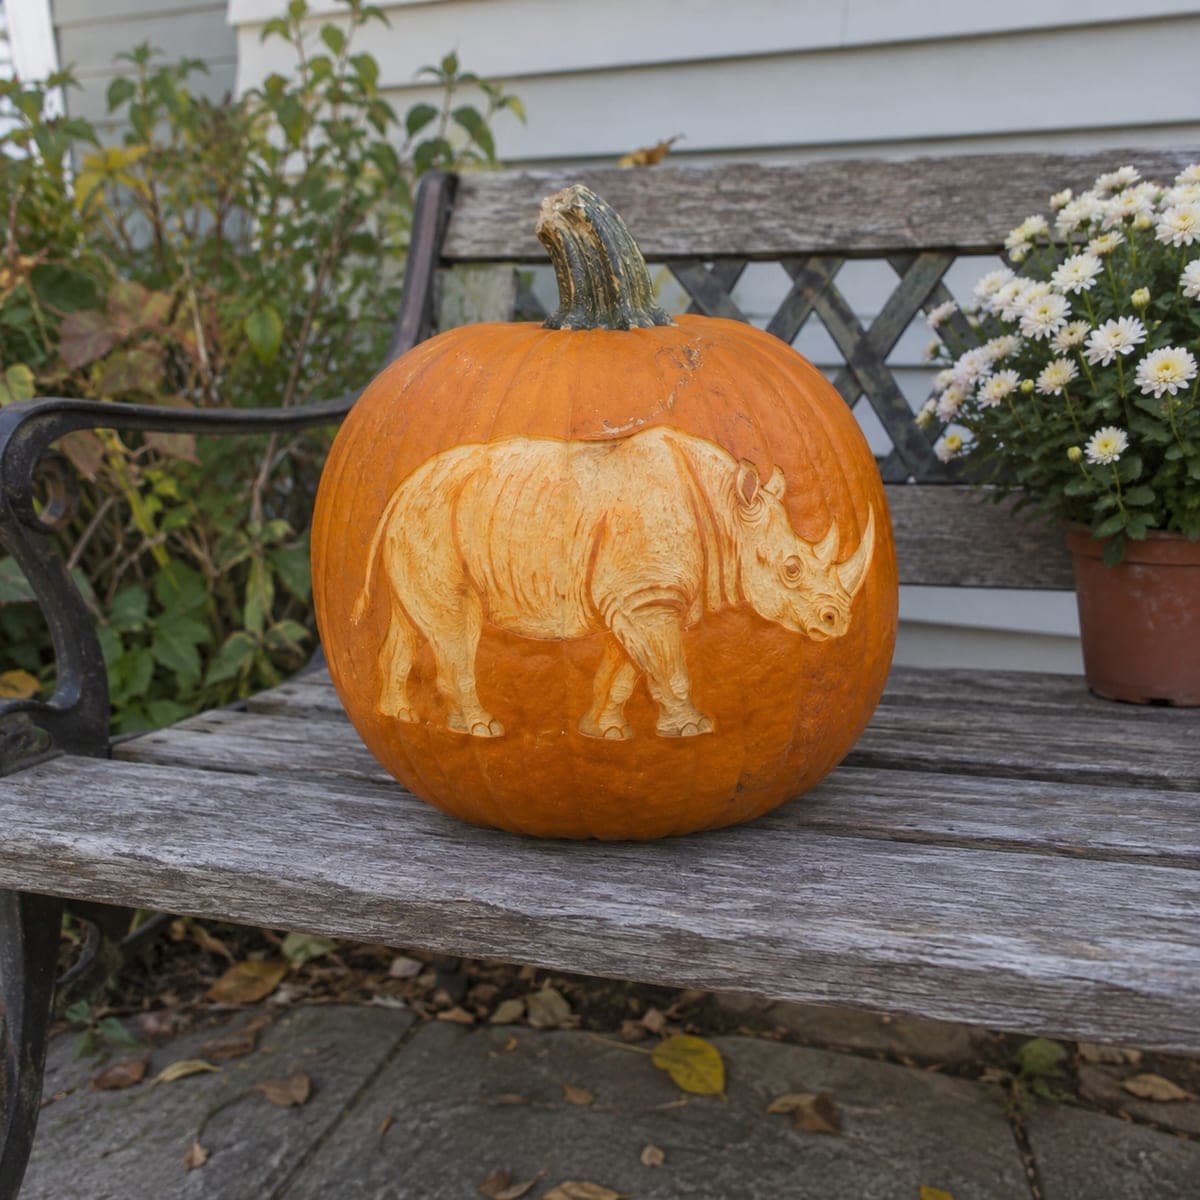
Rhino Head 3D Sculpted Pumpkin MasterpieceAI
0

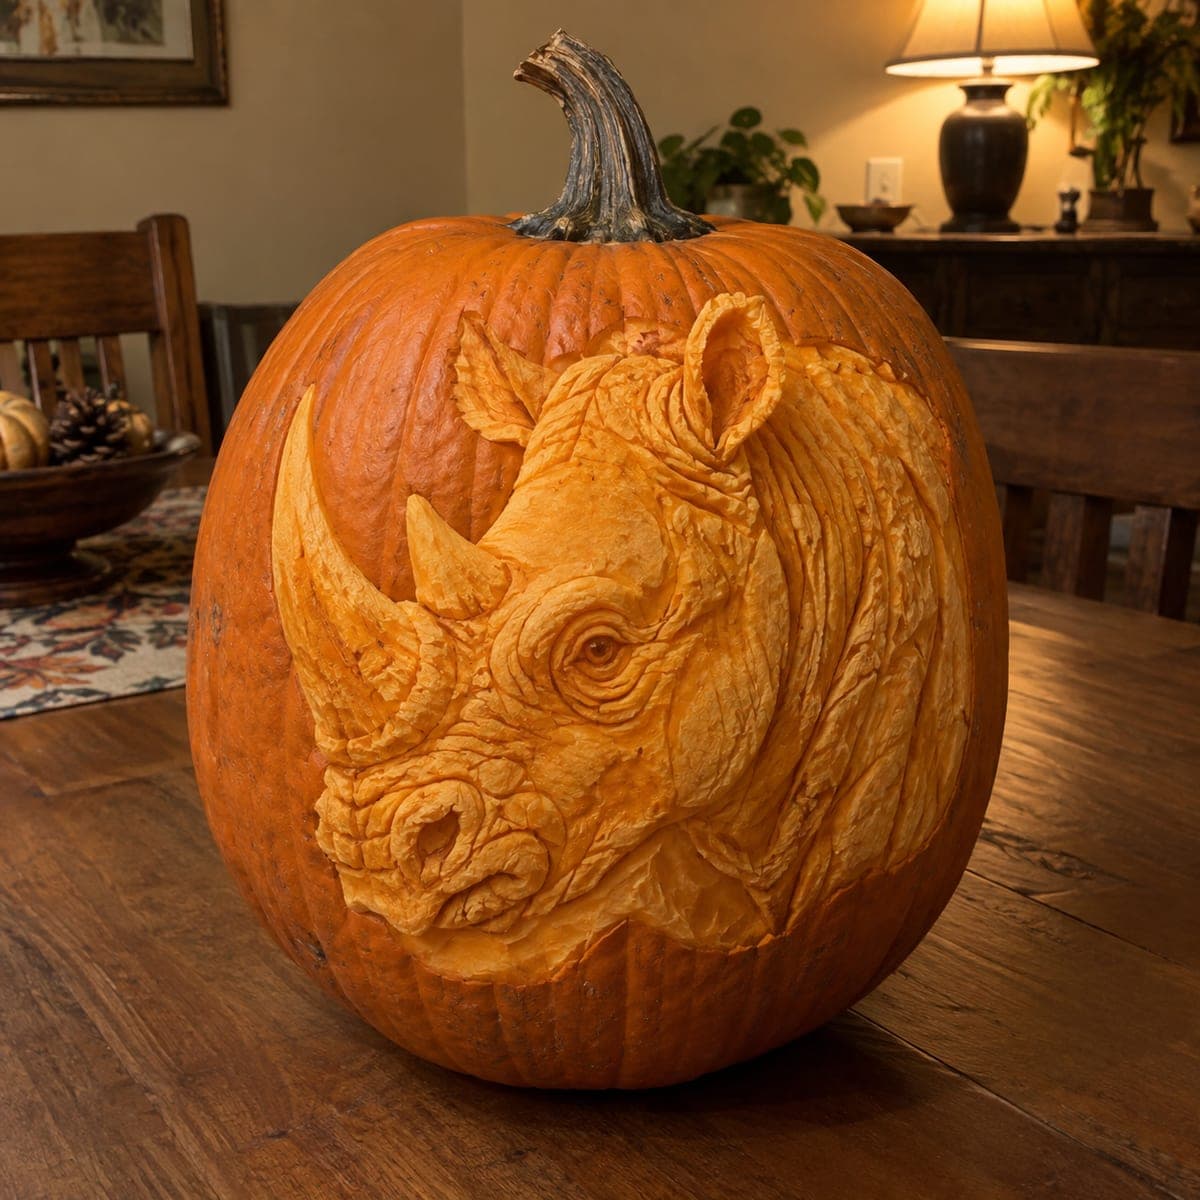
Rhino Head 3D Sculpted Pumpkin Masterpiece

A rhinoceros head emerges from this pumpkin in deep sculptural relief, from the ridged horn to the folds of skin along the jaw. Work like this calls for clay ribbon tools and loop knives rather than a poke-and-saw kit, carving the highest points shallow and the background deep to create real dimension. Mist the finished sculpture with water and refrigerate it overnight to keep the exposed flesh from shriveling before your party.

This is an AI-generated concept image: a realistic, carvable design idea rather than a photo of a finished carve. AI concepts are always labeled and sit out the leaderboard and the contest.

No ratings yet · Sign in to rate
Comments (0)

  • No comments yet — be the first.

Save without an account. Sign in to like or comment.

Our tips for carving a similar design

This design is a shaded relief sculpture rather than a lit lantern, so the whole trick is depth. You build the rhino by leaving the horn and brow ridge as the highest, shallowest points and cutting the background away deepest, then use skin-peeling to shade the folds along the jaw and neck. Since this is an AI concept image, treat it as a target to work toward on a real, thick-walled pumpkin.

Written by PumpkinCarvingIdeas.com, inspired by the image above. These are our suggestions, not instructions from the uploader. This approach to the AI concept has not been tested on a real pumpkin.

From pumpkin to porch

  1. Choose a big pumpkin and transfer the profile

    Pick the largest, most evenly round pumpkin you can find with a thick, firm wall, since relief work eats into the flesh without cutting through. Tape your rhino profile to the smoothest face and trace the main outline with a poker or pin, then add light marks for the horn, eye, ear, and the major skin folds. Do not open a lid or gut the pumpkin fully, because a solid wall gives you material to sculpt into. Just clear enough of the top interior to seat a light later if you want a faint glow.

  2. Establish the background and the high points

    Decide your levels first. The tip of the horn and the top of the brow are your highest, shallowest points, so leave those nearly at the original surface. Use a loop knife to scoop the background around the head down deep, working slowly from the outline inward. This single step of dropping the background is what makes the rhino appear to lift off the pumpkin.

  3. Rough in the major forms

    With a large loop tool, shape the broad masses next: the bulk of the muzzle, the cheek, the base of the horn, and the mounded ear. Keep everything rounded and general for now, checking the light from the side to read your shadows. Round every edge rather than leaving hard steps, since real skin folds are soft transitions. Step back often, because relief reads best from a few feet away.

  4. Peel for shading and skin texture

    Switch to smaller clay ribbon tools to peel the skin in the recessed folds along the jaw, throat, and around the eye. Peeled flesh glows a dimmer orange and reads as shadow, so use it to carve the wrinkles and the creases behind the ear. Vary your pressure to get soft gradients instead of flat scrapes. Leave a small polished catchlight of untouched skin in the eye so it looks wet and alive.

  5. Refine the horn, eye, and edges

    Detail the horn last on this area with fine ridged strokes running up its length, keeping the base wide and attached so it never gets fragile. Sharpen the eye rim, the nostril, and the inner ear with the tip of a small loop, deepening only where you need a dark accent. Keep any deep hollows connected by short walls of flesh so nothing snaps off. Avoid cutting fully through the wall except for a couple of small vents high up if you plan to light it.

  6. Preserve and photograph

    Sculpted flesh dries fast, so mist the whole surface with water, wrap it loosely, and refrigerate it overnight until party time. Bring it out shortly before guests arrive and mist once more to freshen the color. Light it from the side with an LED spotlight rather than from inside, since raking light is what makes the folds and horn pop. Never use a candle near all this exposed flesh.

Gather your supplies

Check things off as you get ready.

Work on a stable surface, keep your free hand out of the cutting path, and have an adult handle sharp tools.

Three levels of light

  • Leave intact

    The horn tip, the brow ridge, and the eye catchlight stay as untouched skin for the darkest, firmest highlights.

  • Peel & shade

    The jaw folds, throat wrinkles, and the shadow behind the ear are skin-peeled for a soft dim glow that reads as shading.

  • Cut through

    Only a couple of small hidden vents high on the pumpkin, plus the deepest background hollows, go all the way through for faint light.

Learn the carving basics

Before you start cutting

Do I light this from inside like a normal jack-o-lantern?

Not mainly. This is a relief sculpture, so the depth reads best under raking light from the side. Set an LED spotlight low and off to one angle so the horn and folds cast real shadows, and skip interior candlelight entirely.

How thick a wall do I need for relief this deep?

Aim for the thickest pumpkin you can find, ideally with a wall over two inches. You are carving down into the flesh instead of through it, so you need material to remove. A thin-walled pumpkin will blow out to daylight before you get any depth.

How do I keep the sculpted flesh from shriveling before my party?

Exposed flesh dries and curls within hours. Mist the finished piece thoroughly with water, wrap it loosely, and refrigerate it overnight. Pull it out just before guests arrive and give it one more light misting to refresh the color.

Your take belongs here, too.

Changed a detail? Made it simpler? Share a photo of your version and tell the community what worked.

Share your pumpkin

More pumpkins like this

You've reached the end · 8 pumpkins
The Patch Report

Fresh pumpkins, in your inbox.

The best new carvings, ideas worth stealing, and how-tos for carving season. Short, seasonal, and gone by November.

A short email during carving season. Unsubscribe anytime. See our privacy policy.