Halloween Pumpkin Carving Contest · Starts October 1st · $500 in prizes
← Back to ideas
@ai_concepts
Aug 2, 2026
Rhino Relief Carved Pumpkin SculptureAI
0

Rhino Relief Carved Pumpkin Sculpture

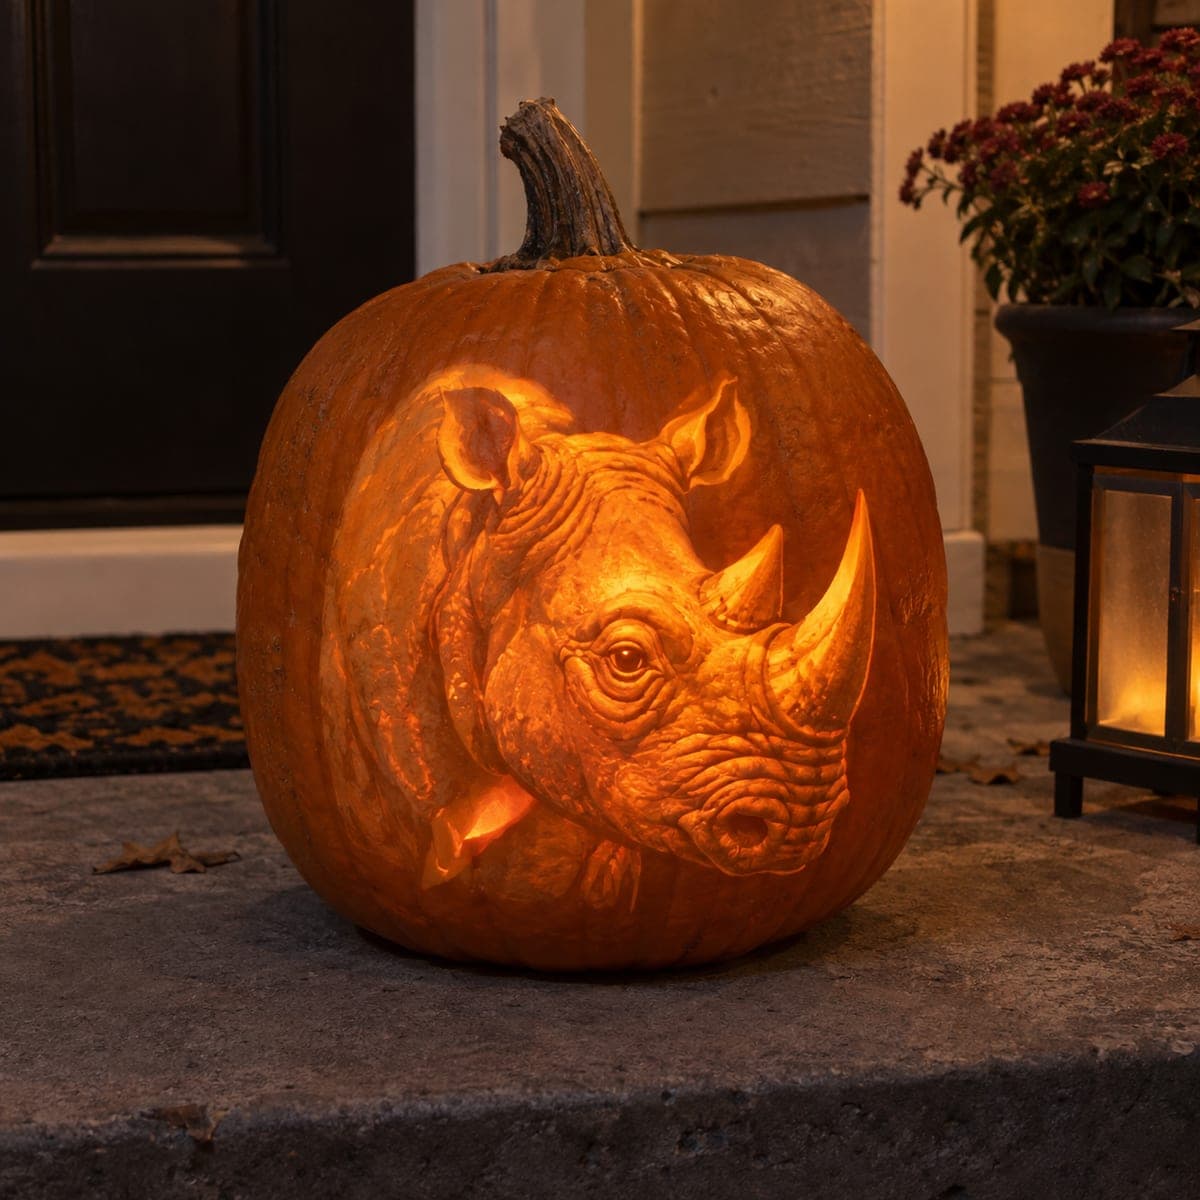
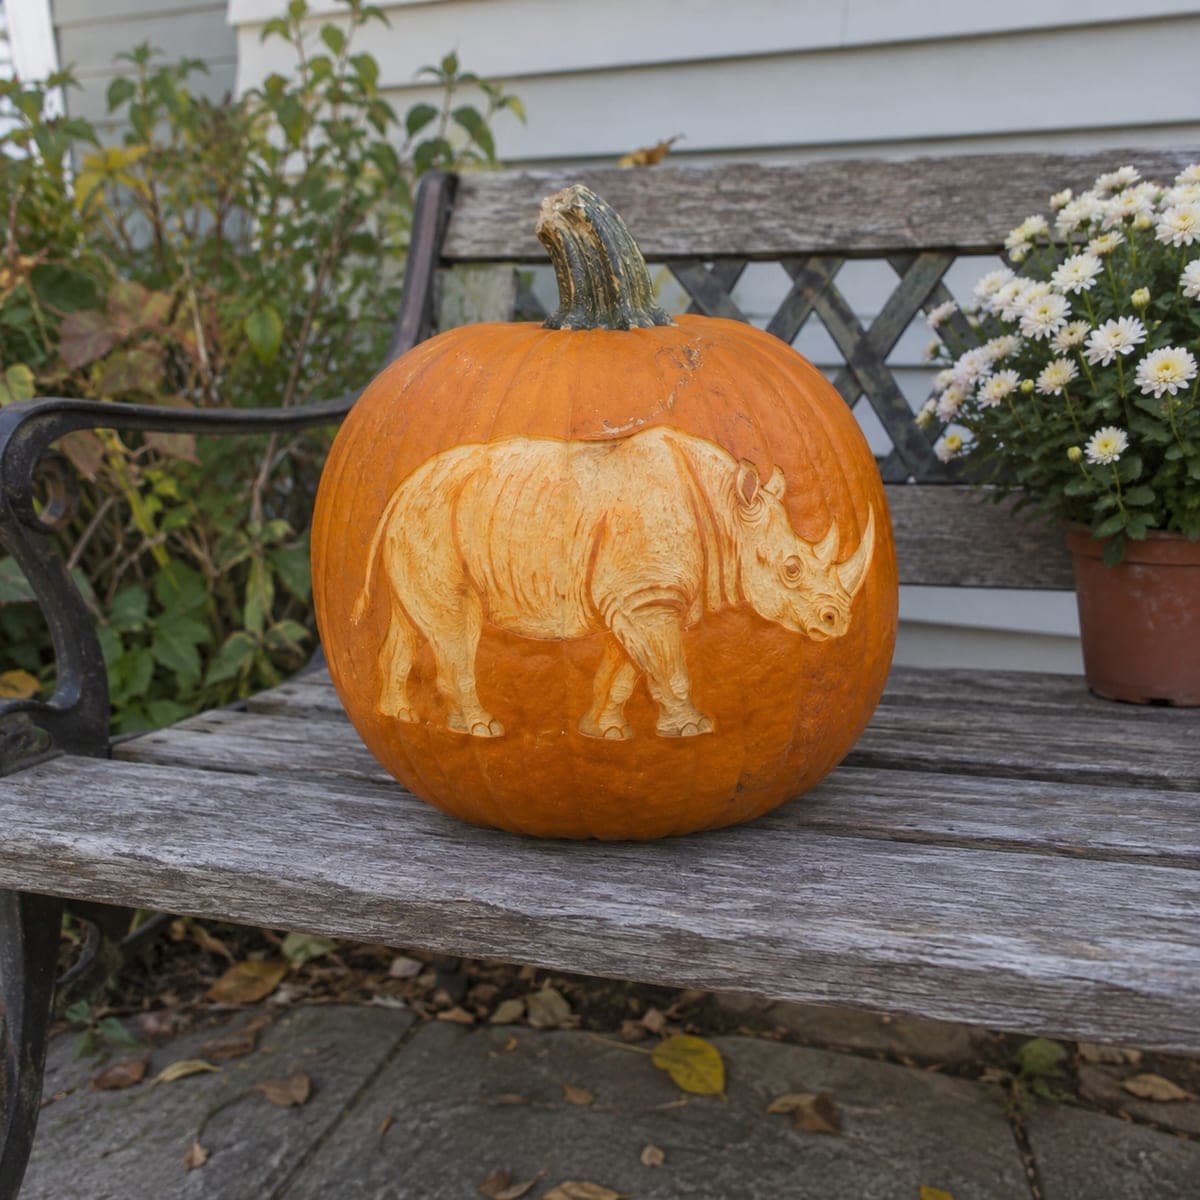
A full-bodied rhinoceros marches across this pumpkin in raised relief, its armored skin folds, curved horns, and sturdy legs shaved from the pale flesh beneath the rind. Because the design relies on depth rather than light, it photographs beautifully outdoors in daytime on a garden bench. Remove the background skin around the silhouette first, then round the body masses and cut the skin folds as crisp grooves. A coat of petroleum jelly on the exposed flesh slows browning.

This is an AI-generated concept image: a realistic, carvable design idea rather than a photo of a finished carve. AI concepts are always labeled and sit out the leaderboard and the contest.

No ratings yet · Sign in to rate
Comments (0)

  • No comments yet — be the first.

Save without an account. Sign in to like or comment.

Our tips for carving a similar design

This is a relief carving, meaning the rhino is sculpted from the pale flesh under the rind rather than cut all the way through. The core trick is depth: you peel away the background skin around the silhouette, then round the body and scoop crisp grooves for the skin folds and horns. Because it reads by shadow and contrast, it looks best in daylight on a bench, no light required inside.

Written by PumpkinCarvingIdeas.com, inspired by the image above. These are our suggestions, not instructions from the uploader. This approach to the AI concept has not been tested on a real pumpkin.

From pumpkin to porch

  1. Pick a smooth, wide pumpkin and transfer the outline

    Choose a large pumpkin with a broad, even face and a thick wall, since relief work needs flesh to carve into. Wipe it clean and dry. Tape your rhino stencil flat, wrapping darts into the sides so the profile does not distort. Poke the silhouette and the main fold lines with a pin so you have a dotted map to follow.

  2. Score the silhouette and remove the background skin

    Trace the full rhino outline with a fine detail saw or a sharp lino gouge, cutting only through the orange rind, not deep into the flesh. Then use a ribbon loop tool to shave the skin off the entire background around the animal, exposing the pale flesh evenly. Keep the depth shallow and consistent, about a quarter inch, so the rhino stands proud of a smooth field. Work slowly at the outline so the edge of the silhouette stays crisp.

  3. Round the big body masses

    Now sculpt the rhino itself in three dimensions. Use the loop tool to gently round the shoulder hump, belly, and haunch so light rolls across them, leaving the highest points near the back closest to the original rind. Sink the legs and the underbelly a little deeper to push them behind the near-side legs. Step back often to check the forms read from a few feet away.

  4. Cut the skin folds and leg creases as grooves

    Switch to a smaller V-gouge or detail loop and carve the armored folds as clean, curved grooves at the neck, shoulder, and hip joints. Keep each groove shallow but sharply cut so it throws a thin shadow. Add short parallel strokes to suggest the rough hide texture, and define the toes with a few firm nicks. Vary the depth so nearer folds are deeper and read stronger.

  5. Shape the horns, head, and eye

    The two horns and the ear are the fragile parts, so carve them as raised relief still attached to the flesh rather than free-standing points. Round the front horn to a smooth ridge and taper the smaller second horn behind it. Scoop a shallow socket for the eye and leave a small raised bump inside it to catch light. Keep the ear folded and thick at the base so it cannot snap off.

  6. Seal, clean up, and photograph

    Brush away crumbs and even out any rough shaved areas with a dry cloth. Coat all the exposed flesh with a thin layer of petroleum jelly to slow browning and keep the contrast bright. Set the pumpkin on a garden bench in soft daylight and shoot from slightly to the side so the grooves cast shadow. Re-coat with jelly each morning to keep it fresh for several days.

Gather your supplies

Check things off as you get ready.

Work on a stable surface, keep your free hand out of the cutting path, and have an adult handle sharp tools.

Three levels of light

  • Leave intact

    The orange rind left as the raised high points on the rhino's back and upper body stays darkest.

  • Peel & shade

    The shaved flesh across the rounded body and the background field glows pale and matte in daylight.

  • Cut through

    No full cutouts here, so keep every groove shallow; the deepest fold lines read as the darkest shadow lines.

Learn the carving basics

Before you start cutting

Do I need to put a light inside this pumpkin?

No. This design reads by carved depth and daylight shadow, not by glow, so it is meant for daytime display. If you want it visible at night, aim an external LED spotlight across the surface from the side to rake light into the grooves. Never light a shell this thin from inside, as it would wash out the relief.

How do I keep the shaved flesh from turning brown so fast?

Exposed flesh browns within a day, which actually adds depth, but you can slow it with a thin coat of petroleum jelly right after carving. Reapply each morning and keep the pumpkin cool and out of direct sun. A light wipe with lemon water before the jelly also helps hold the pale color.

How thin can I make the horns without them breaking?

Keep the horns as raised relief attached to the body, not carved out into free-standing points. Leave them thick at the base and round the top into a ridge rather than a sharp spike. This keeps them structurally sound while still reading clearly as horns from a few feet away.

Your take belongs here, too.

Changed a detail? Made it simpler? Share a photo of your version and tell the community what worked.

Share your pumpkin

More pumpkins like this

You've reached the end · 8 pumpkins
The Patch Report

Fresh pumpkins, in your inbox.

The best new carvings, ideas worth stealing, and how-tos for carving season. Short, seasonal, and gone by November.

A short email during carving season. Unsubscribe anytime. See our privacy policy.