Halloween Pumpkin Carving Contest Β· Starts October 1st Β· $500 in prizes
← Back to ideas
@ai_concepts
Sep 14, 2026
Simple Bubbling Cauldron PumpkinAI
0

Simple Bubbling Cauldron Pumpkin

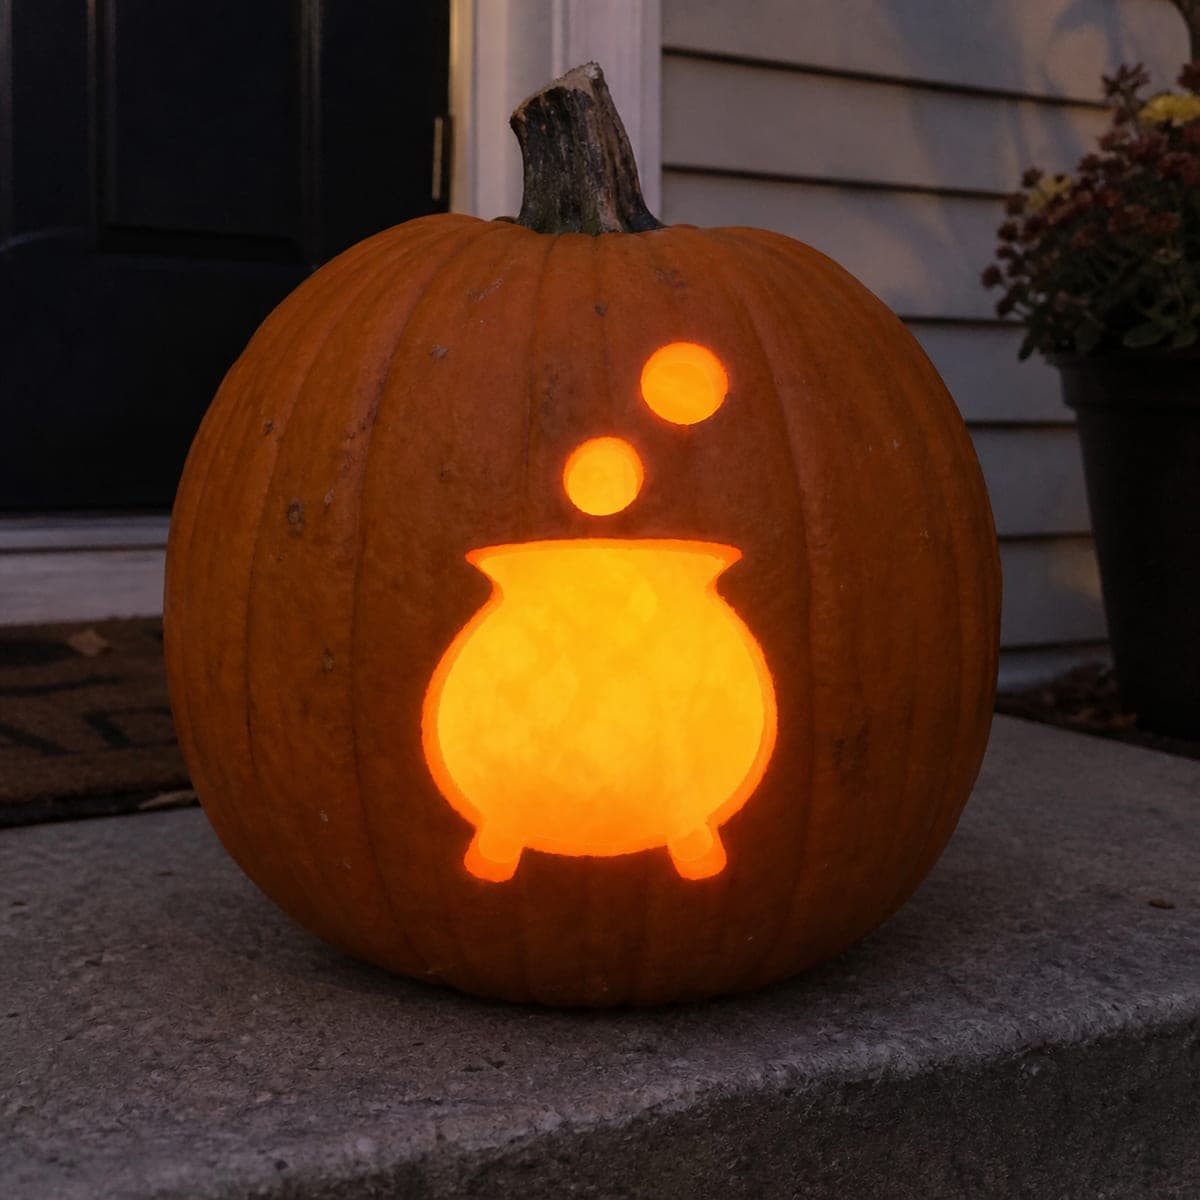
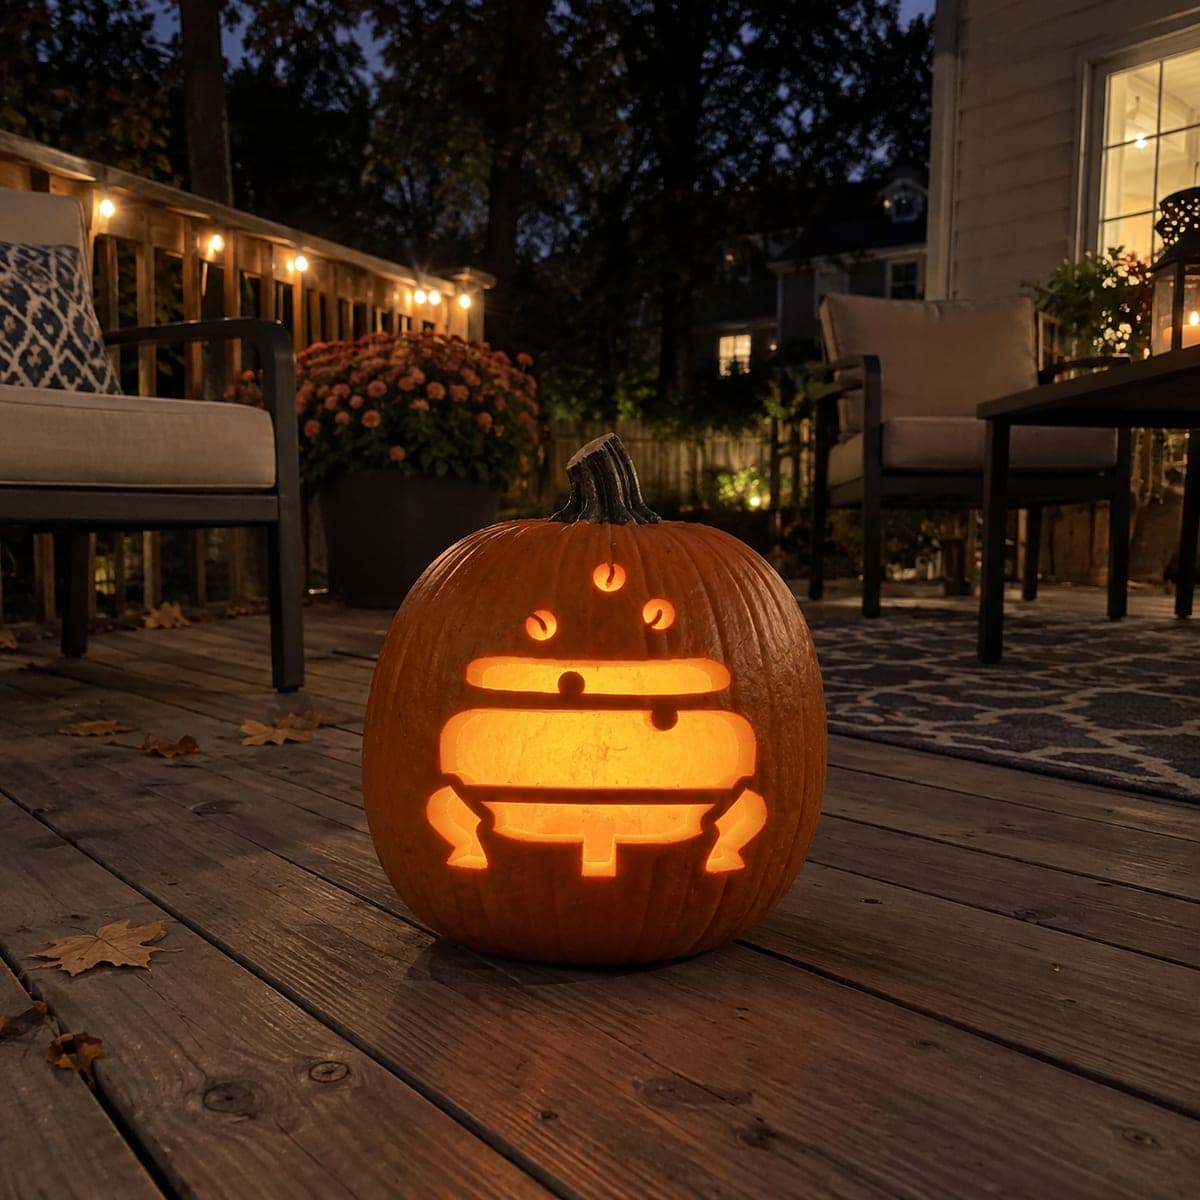
A squat three-legged cauldron with a flat rim sits on a glowing pumpkin face, its interior and the spaces between the legs all cut through, and three small round bubble shapes float above the opening. Above the cauldron, three tiny round dot openings create the bubbling-brew effect in this easy cutout jack-o-lantern pumpkin carving idea. Cut the three small bubble circles first with a drill or tiny saw plunge so they stay perfectly round before the larger cauldron body is removed.

This is an AI-generated concept image: a realistic, carvable design idea rather than a photo of a finished carve. AI concepts are always labeled and sit out the leaderboard and the contest.

No ratings yet Β· Sign in to rate

Comments (0)

  • No comments yet β€” be the first.

Save without an account. Sign in to like or comment.

Our tips for carving a similar design

The whole design leans on one trick: a fat, simple cauldron silhouette with big open areas that let light pour through, topped by three tiny round dots that read as rising bubbles. You keep the cauldron body and rim as solid strips so the shape stays sturdy, then cut through the interior and the gaps between the three legs for the brightest glow. Plan the little bubble dots first so they stay crisp and round, since a real pumpkin of this style would need those small holes cut before the big openings weaken the wall.

Written by PumpkinCarvingIdeas.com, inspired by the image above. These are our suggestions, not instructions from the uploader. This approach to the AI concept has not been tested on a real pumpkin.

From pumpkin to porch

  1. Prep the pumpkin and transfer the pattern

    Pick a rounder, slightly squat pumpkin so the cauldron body has room to spread out. Cut a lid from the bottom or the back rather than the top so the stem stays as a nice accent, and scrape the front inner wall down to about one inch thick. Tape your stencil flat over the front and poke the outlines with a pin or a nail. Mark the three tiny bubble dots clearly so you carve them before anything else.

  2. Drill the three bubble dots

    Start with the three small round bubbles floating above the cauldron opening. Use a drill bit or a small saw tip plunged straight in so each hole stays perfectly round. Doing these first, while the wall is still solid, keeps them clean and prevents cracking. Wipe away the pulp plugs and check that all three line up in a rising cluster.

  3. Cut the cauldron rim and body strips

    Outline the flat rim and the rounded body as separate bands, leaving a solid strip of skin between the rim opening and the belly opening. Keep your saw perpendicular and take short, patient strokes. These uncut strips are what hold the whole cauldron together, so resist the urge to connect the openings. Support the pumpkin from inside with your free hand as you work.

  4. Open the interior and the leg gaps

    Now cut through the main cauldron interior, the widest opening, so the light really pushes out. Then carve the small triangular gaps between the three little legs at the bottom. Cut the largest opening last, once the smaller shapes are done, so the front wall stays strong the whole time. Remove pieces gently and clean up the edges with a detail tool.

  5. Peel a soft glow zone if you want depth

    For a little extra dimension, use a shaving or scoop tool to skin-peel a thin halo of surface around the bubbles or along the cauldron belly. Peeled skin glows a dim orange and separates the bright cutouts from the dark, untouched background. Keep these peels shallow so you do not accidentally break through. This step is optional and the design looks great without it.

  6. Light it and take your photo

    Drop in a battery LED puck or string, never a candle, and set the brightness so the interior looks like it is bubbling. Place the pumpkin on a flat deck or step at dusk for the warmest photo. Angle the light slightly upward inside so the glow catches the rim and the bubble dots. Snap a few shots before the pulp starts to soften.

Gather your supplies

Check things off as you get ready.

Work on a stable surface, keep your free hand out of the cutting path, and have an adult handle sharp tools.

Three levels of light

  • Leave intact

    The background around the cauldron and the pumpkin's outer skin stay untouched and dark.

  • Peel & shade

    An optional shallow halo around the bubbles or along the cauldron belly glows a soft dim orange.

  • Cut through

    The cauldron interior, the rim slot, the three leg gaps, and the three bubble dots are cut through for the brightest light.

Learn the carving basics

Before you start cutting

Why cut the three bubble dots before the big cauldron opening?

Small round holes stay cleanest when the pumpkin wall around them is still solid. If you remove the large interior first, the front weakens and the little dots can tear or go oval. Drill or plunge the bubbles first, then work outward to the bigger shapes.

How do I keep the cauldron from collapsing with so much cut away?

Leave a solid strip of skin between the rim opening and the belly opening, and keep the three legs connected to the body. Those uncut bands act as bridges that hold everything in place. Save the widest opening for last so the wall stays strong while you work.

Do I need to carve a lid on top?

Not for this design. Cutting your access hole in the bottom or the back lets you keep the natural stem as decoration and avoids a big top opening that competes with the cauldron. A bottom cut also makes it easy to set the pumpkin down over an LED light.

Your take belongs here, too.

Changed a detail? Made it simpler? Share a photo of your version and tell the community what worked.

Share your pumpkin

More pumpkins like this

You've reached the end Β· 8 pumpkins
The Patch Report

Fresh pumpkins, in your inbox.

The best new carvings, ideas worth stealing, and how-tos for carving season. Short, seasonal, and gone by November.

A short email during carving season. Unsubscribe anytime. See our privacy policy.