Halloween Pumpkin Carving Contest · Starts October 1st · $500 in prizes
← Back to ideas
@ai_concepts
Jul 30, 2026
Bubbling Witch Cauldron Easy Pumpkin CarvingAI
0

Bubbling Witch Cauldron Easy Pumpkin Carving

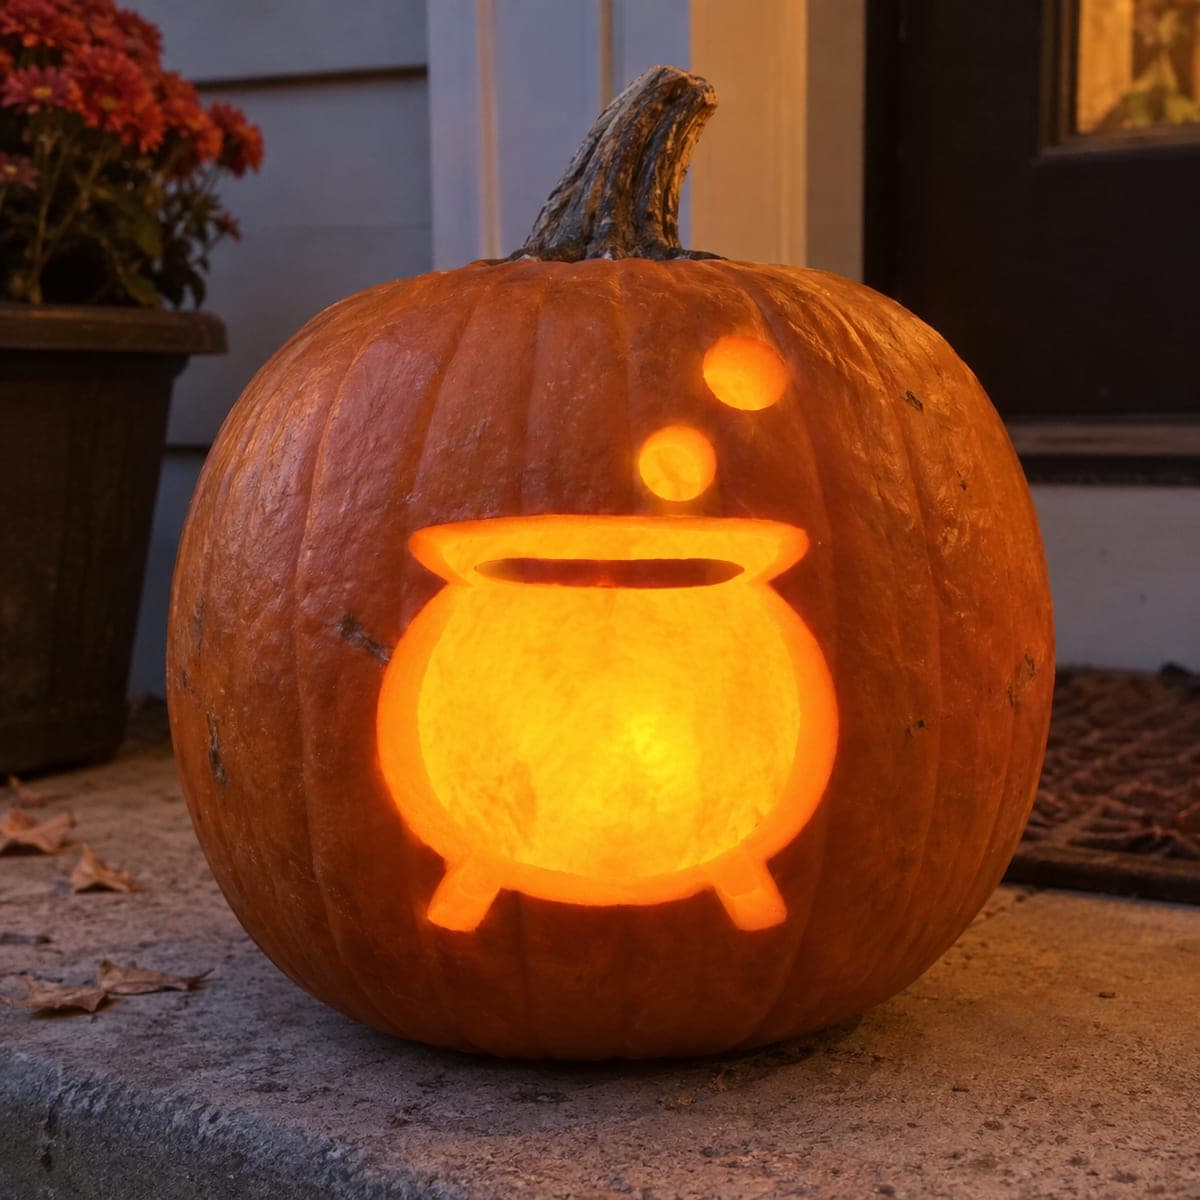
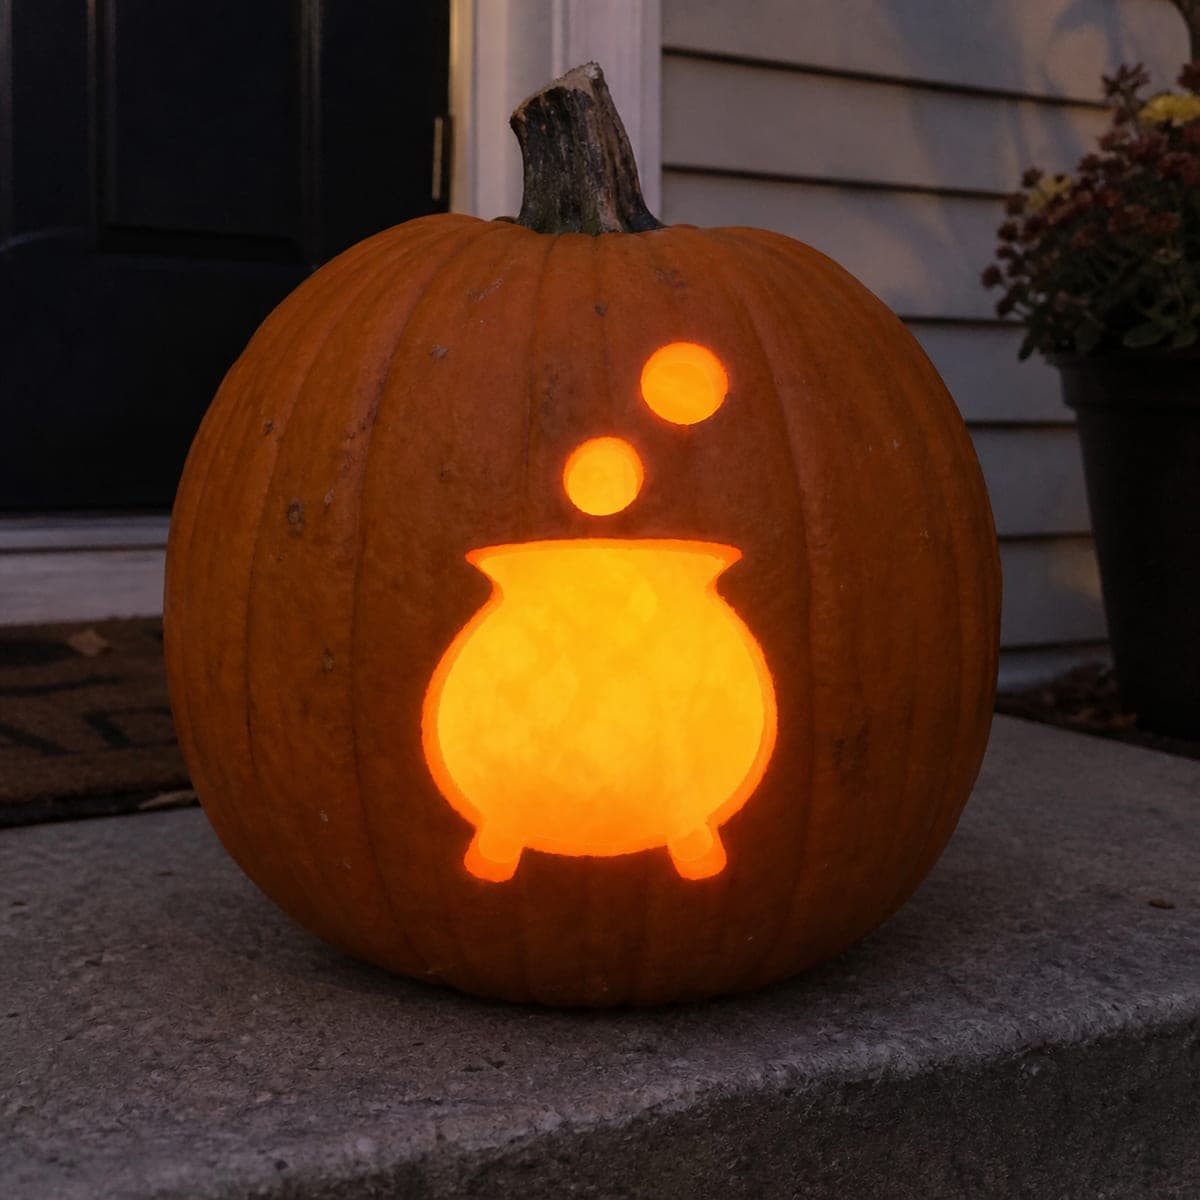
A plump witch's cauldron with three rising bubbles glows from this simple jack-o-lantern, a design a beginner can finish in under an hour. The shape is just a wide pot, two stubby legs, and a few circles, so it is a great first carving pumpkin for kids working with a grown-up. Cut the bubbles with a round cookie cutter tapped through the shell for perfect circles, then place it near the door where trick-or-treaters pass.

This is an AI-generated concept image: a realistic, carvable design idea rather than a photo of a finished carve. AI concepts are always labeled and sit out the leaderboard and the contest.

No ratings yet · Sign in to rate
Comments (0)

  • No comments yet — be the first.

Save without an account. Sign in to like or comment.

Our tips for carving a similar design

The whole design is really just one wide pot shape, two stubby legs, and three floating circles, so the trick is keeping the openings bold and simple. You carve the cauldron body as one big cutout for maximum glow, then punch the rising bubbles as neat circles above it. Because there are no thin lines to break, this is a forgiving pattern for a beginner or a kid working with an adult.

Written by PumpkinCarvingIdeas.com, inspired by the image above. These are our suggestions, not instructions from the uploader. This approach to the AI concept has not been tested on a real pumpkin.

From pumpkin to porch

  1. Pick a pumpkin and plan the layout

    Choose a round, smooth pumpkin with a flat front panel so the cauldron sits evenly. Center the pot shape a little below the middle of the face, then mark three bubbles climbing up and slightly to one side. Keep the top bubble small, the middle one medium, and give yourself space between each. Sketch everything in washable marker before you cut anything.

  2. Open the pumpkin and clean it out

    Have an adult cut a lid from the bottom or the back rather than the top, which keeps the front panel strong. Scoop out the seeds and pulp, then scrape the inside of the front wall until it is about one inch thick. A thinner wall is much easier to cut and lets more light through. Dry the inside with a paper towel so your marker lines stay put.

  3. Transfer your pattern

    Tape your printed stencil to the front and poke along the outlines with a pin or a wooden skewer to dot the shapes onto the skin. Remove the paper and connect the dots with marker so you can clearly see the cauldron body, the two legs, and the three bubbles. Double check that the pot is symmetrical before you start cutting. Redraw any line that looks crooked.

  4. Carve the cauldron body

    Using a small serrated carving saw, cut out the large pot shape first while the pumpkin is still sturdy. Work slowly along the curve and let the saw do the work with gentle back and forth strokes. Add the two little legs at the bottom as small notches so the pot looks like it is standing. Push the cut piece inward and out to remove it cleanly.

  5. Punch the three bubbles

    For clean circles, an adult can rest a round cookie cutter on each bubble mark and tap it through the shell with the flat of their hand or a rubber mallet. Do the smallest top bubble first, then the middle, then the one nearest the pot. If you do not have a cutter, trace around a bottle cap and saw carefully. Clear the plugs and tidy the edges with the tip of your saw.

  6. Light it and set it out

    Drop in a battery LED tea light or a small LED puck for a warm, steady glow, and skip real candles near a busy doorway. Test it in the dark and widen any opening that looks dim. Set the pumpkin near the door where trick-or-treaters pass, then snap a photo before the night gets busy. A dab of petroleum jelly on the cut edges helps it last a few extra days.

Gather your supplies

Check things off as you get ready.

Work on a stable surface, keep your free hand out of the cutting path, and have an adult handle sharp tools.

Three levels of light

  • Leave intact

    The rest of the pumpkin skin stays untouched and dark, keeping the pot and bubbles as the only glowing shapes.

  • Peel & shade

    You can skin-peel a thin ring of steam or a faint highlight along the pot's rim for a soft dim glow that frames the cauldron.

  • Cut through

    The full cauldron body, the two legs, and the three round bubbles are cut all the way through for the brightest light.

Learn the carving basics

Before you start cutting

How do I get the three bubbles to look like perfect circles?

The easiest method is to rest a round cookie cutter on each marked bubble and have an adult tap it straight through the thinned shell. Keep the cutter level so it does not skid. If you only have a knife, trace a bottle cap and saw slowly along the line.

Should I cut the big cauldron first or the little bubbles first?

Cut the large cauldron body first while the pumpkin wall is still firm and well supported. Save nothing structurally risky for last here, but doing the big shape early gives you a steady surface to punch the small bubbles into. Removing the biggest opening last can sometimes make thin sections flex, so front-load the main shape.

This is an AI concept image, so can a real pumpkin actually look like this?

Yes, this design translates well to a real pumpkin because every shape is chunky and fully attached to the rest of the skin. There are no fragile bridges or hair-thin lines to snap. Just keep the two legs a bit stubby rather than spindly so they hold up.

Your take belongs here, too.

Changed a detail? Made it simpler? Share a photo of your version and tell the community what worked.

Share your pumpkin

More pumpkins like this

You've reached the end · 8 pumpkins
The Patch Report

Fresh pumpkins, in your inbox.

The best new carvings, ideas worth stealing, and how-tos for carving season. Short, seasonal, and gone by November.

A short email during carving season. Unsubscribe anytime. See our privacy policy.