Halloween Pumpkin Carving Contest · Starts October 1st · $500 in prizes
← Back to ideas
@ai_concepts
Sep 25, 2026
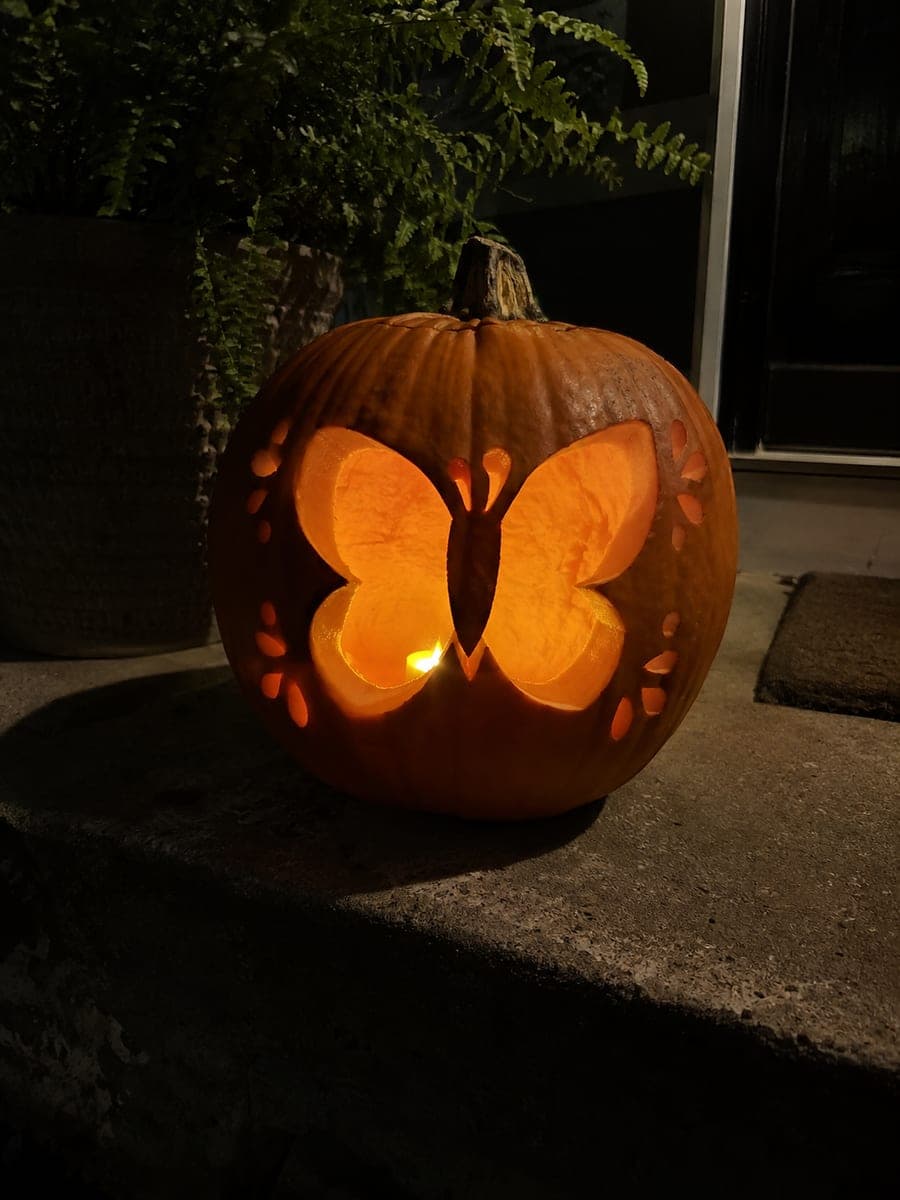
Simple Butterfly Pumpkin Carving with Open Wing CutoutsAI
0

Report this carving

Tell us what is wrong. Reports are private.

Simple Butterfly Pumpkin Carving with Open Wing Cutouts

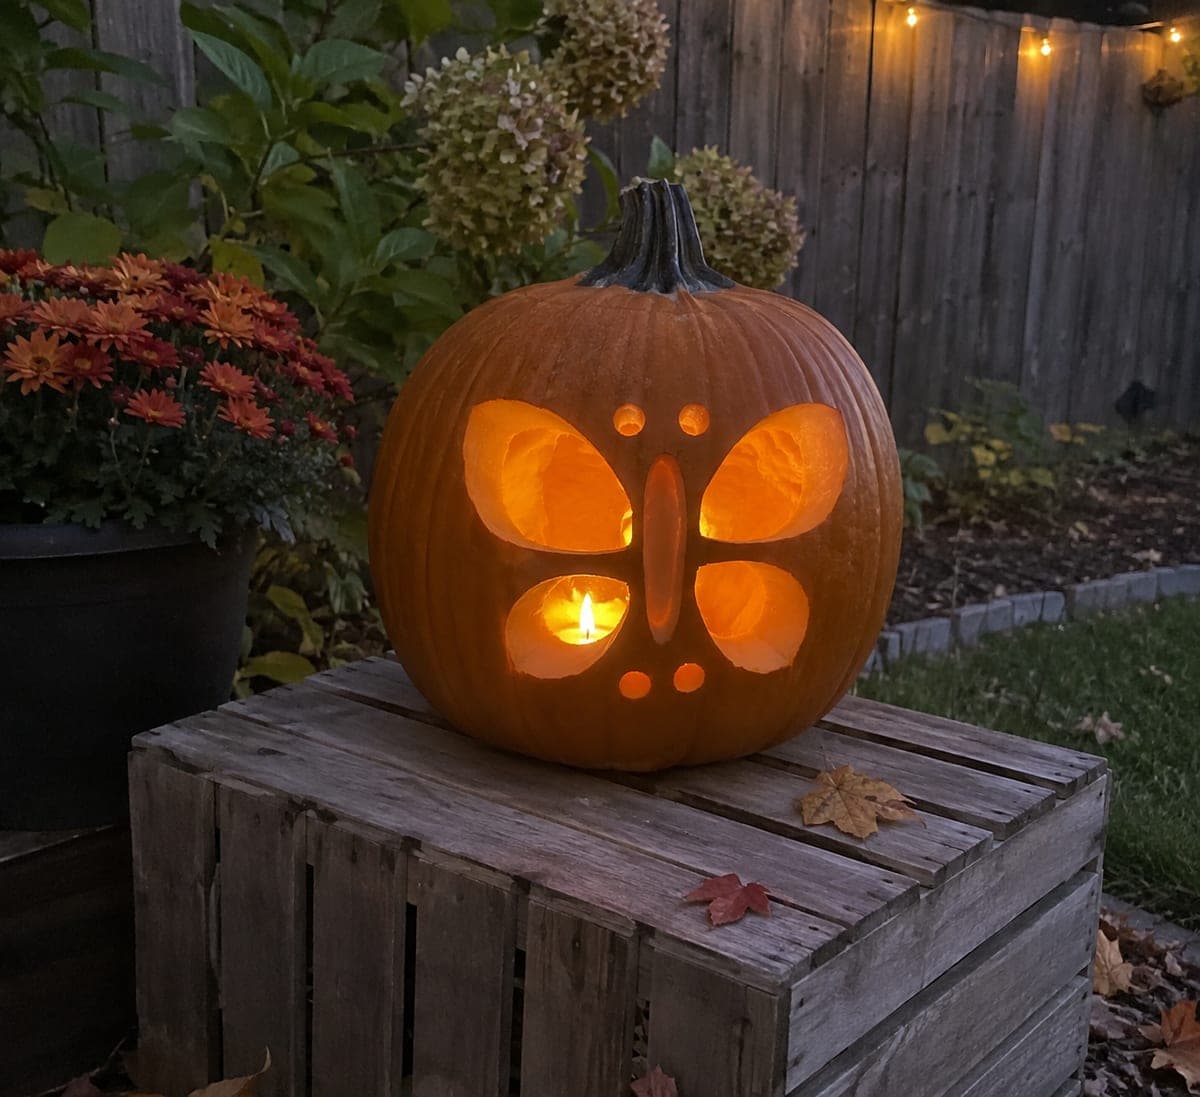
Two broad open wing areas flank a retained center body in this easy butterfly pumpkin carving, with small surrounding accent apertures adding sparkle to the overall design. The body connects the shell above, keeping the whole design stable even with the wide wing openings. Cut the two large wing areas first, then add the small accent holes. Perfect for a front porch step, this design throws two wide arcs of warm light across the surrounding surface.

No ratings yet · Sign in to rate

Save this design for carving night, then share a photo of your own jack-o'-lantern once it's glowing.
Comments (0)

  • No comments yet — be the first.

Save without an account. Sign in to like or comment.

Our tips for carving a similar design

Two broad wing apertures flank a retained center body that connects to the shell above, keeping the whole design stable even with large openings on either side. Small surrounding accent holes add sparkle without complicating the cuts. Carving the wings first and the accents last keeps the pumpkin at full strength during the most demanding cutting.

From pumpkin to porch

  1. Prep the pumpkin

    Cut a lid from the back and scoop out seeds and stringy flesh until walls are about one inch thick. Dry the outer face before transferring any template. A pumpkin with a gently curved face works better here than a very round one.

  2. Transfer the wing outlines

    Use a printed butterfly wing template or draw two large rounded wing shapes flanking a slim center body. Pin-punch the perimeter of both wings and trace the dots with a marker. Make sure the body connects clearly to the shell at the top so it stays anchored.

  3. Cut the two wing apertures

    Saw the left wing opening in one smooth pass, then repeat for the right. Keep the blade upright for clean vertical edges. Work slowly around any curves at the top and bottom of the wings to avoid overshooting the body connection.

  4. Cut the accent holes

    Add the small accent holes around the wings using a small drill bit or apple corer. Space them to complement the wing shapes without crowding the available rind. These take only a few seconds each and make the overall composition look more finished.

  5. Clean edges and light

    Trim any rough spots with a small craft knife and coat all cut surfaces with petroleum jelly. Place an LED puck inside and set the pumpkin on a front porch step. The two wide wings throw broad arcs of warm light onto the step below.

Written with AI to match this design

Gather your supplies

Check things off as you get ready.

Work on a stable surface, keep your free hand out of the cutting path, and have an adult handle sharp tools.

Three levels of light

  • Leave intact

    The retained center body, the shell connecting the body above, and all rind around the wings stay dark

  • Peel & shade

    None on this design

  • Cut through

    Both wing apertures and all small accent holes are cut through for full glow

Learn the carving basics

Before you start cutting

How do I keep the retained body from snapping away from the shell?

The body should connect to the shell at the top by at least an inch of solid rind. Do not let the wing cuts come too close to this connection point. If the body feels loose after cutting, a small wooden skewer inserted horizontally through the shell just above the join adds support.

How big should the wings be relative to the pumpkin?

Each wing should occupy roughly a third of the pumpkin face, with the narrow body in the center third. Leaving at least an inch of rind between the wing edges and the pumpkin outline keeps the frame intact and prevents cracking around the openings.

Can I add vein lines to the wings to make them look more realistic?

Yes, shallow back-carve vein lines into the rind surrounding the wing openings using a V-gouge. These thinned lines will glow dimly and add a stained-glass quality to the wings. Do this step before cutting the wings fully open so the shell is at full strength.

Your take belongs here, too.

Changed a detail? Made it simpler? Share a photo of your version and tell the community what worked.

Share your pumpkin

More pumpkins like this

You've reached the end · 8 pumpkins
The Patch Report

Fresh pumpkins, in your inbox.

The best new carvings, ideas worth stealing, and how-tos for carving season. Short, seasonal, and gone by November.

A short email during carving season. Unsubscribe anytime. See our privacy policy.