Halloween Pumpkin Carving Contest · Starts October 1st · $500 in prizes
← Back to ideas
@ai_concepts
Aug 10, 2026
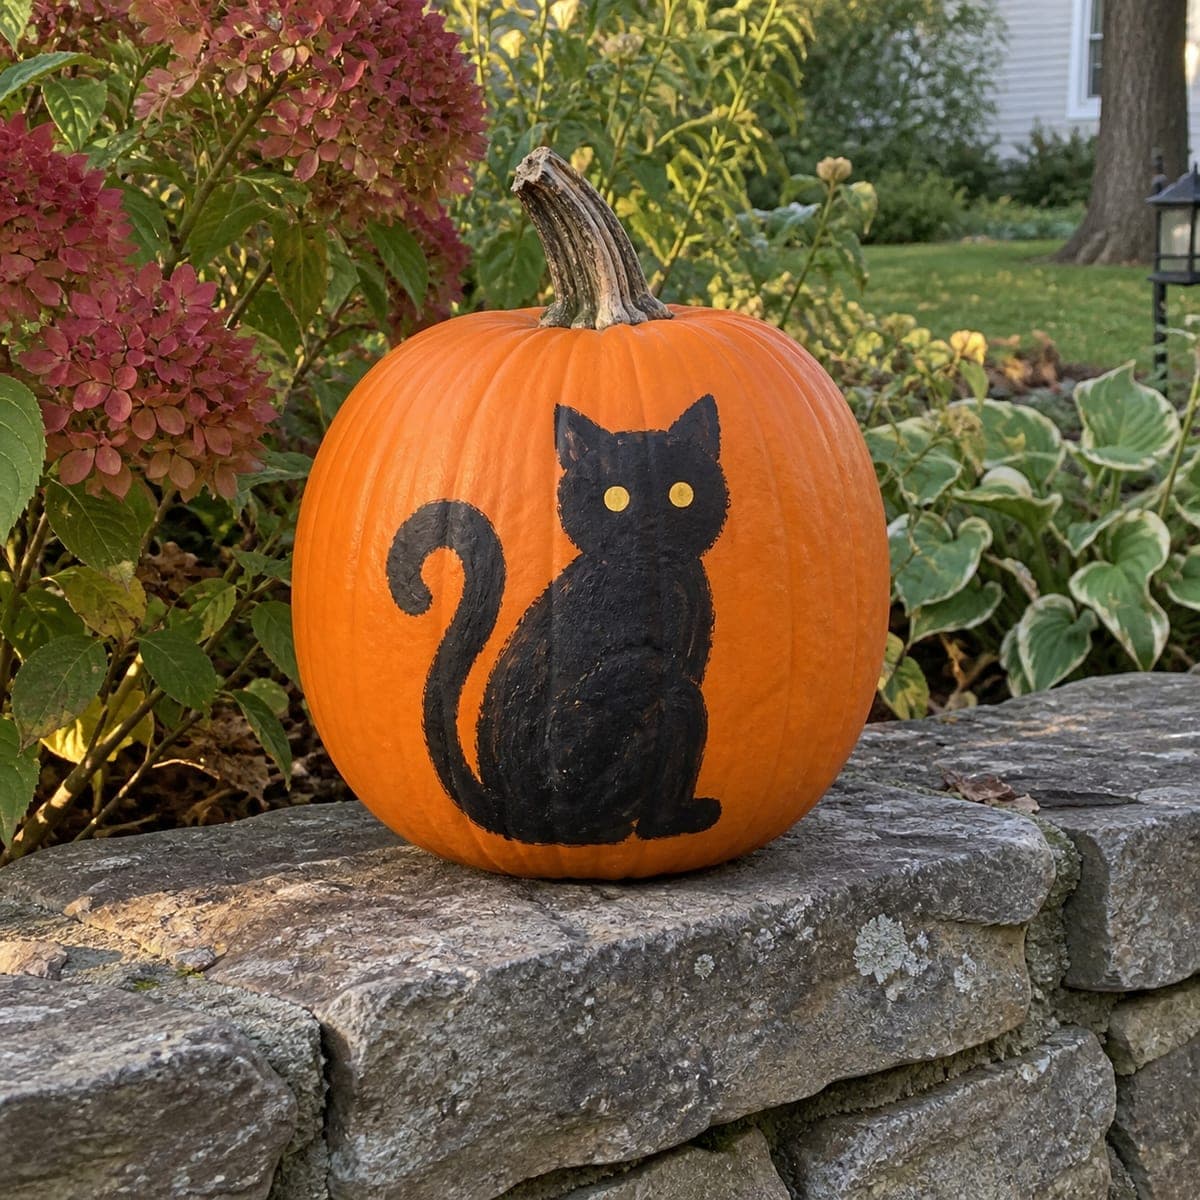
Sitting Cat Silhouette Pumpkin Carved in ReliefAI
0

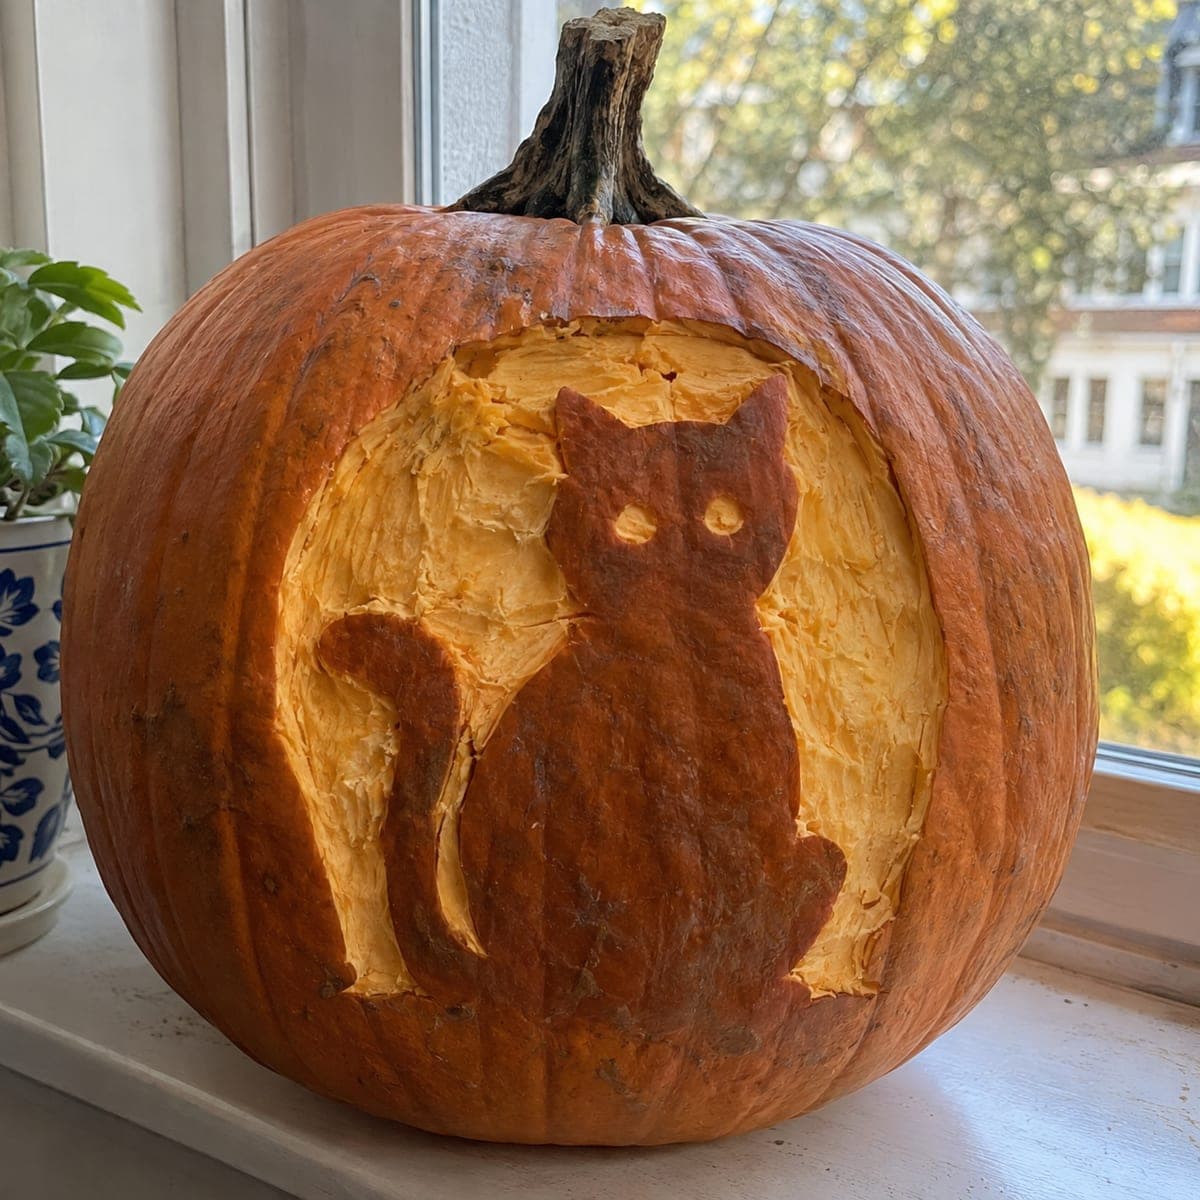
Sitting Cat Silhouette Pumpkin Carved in Relief

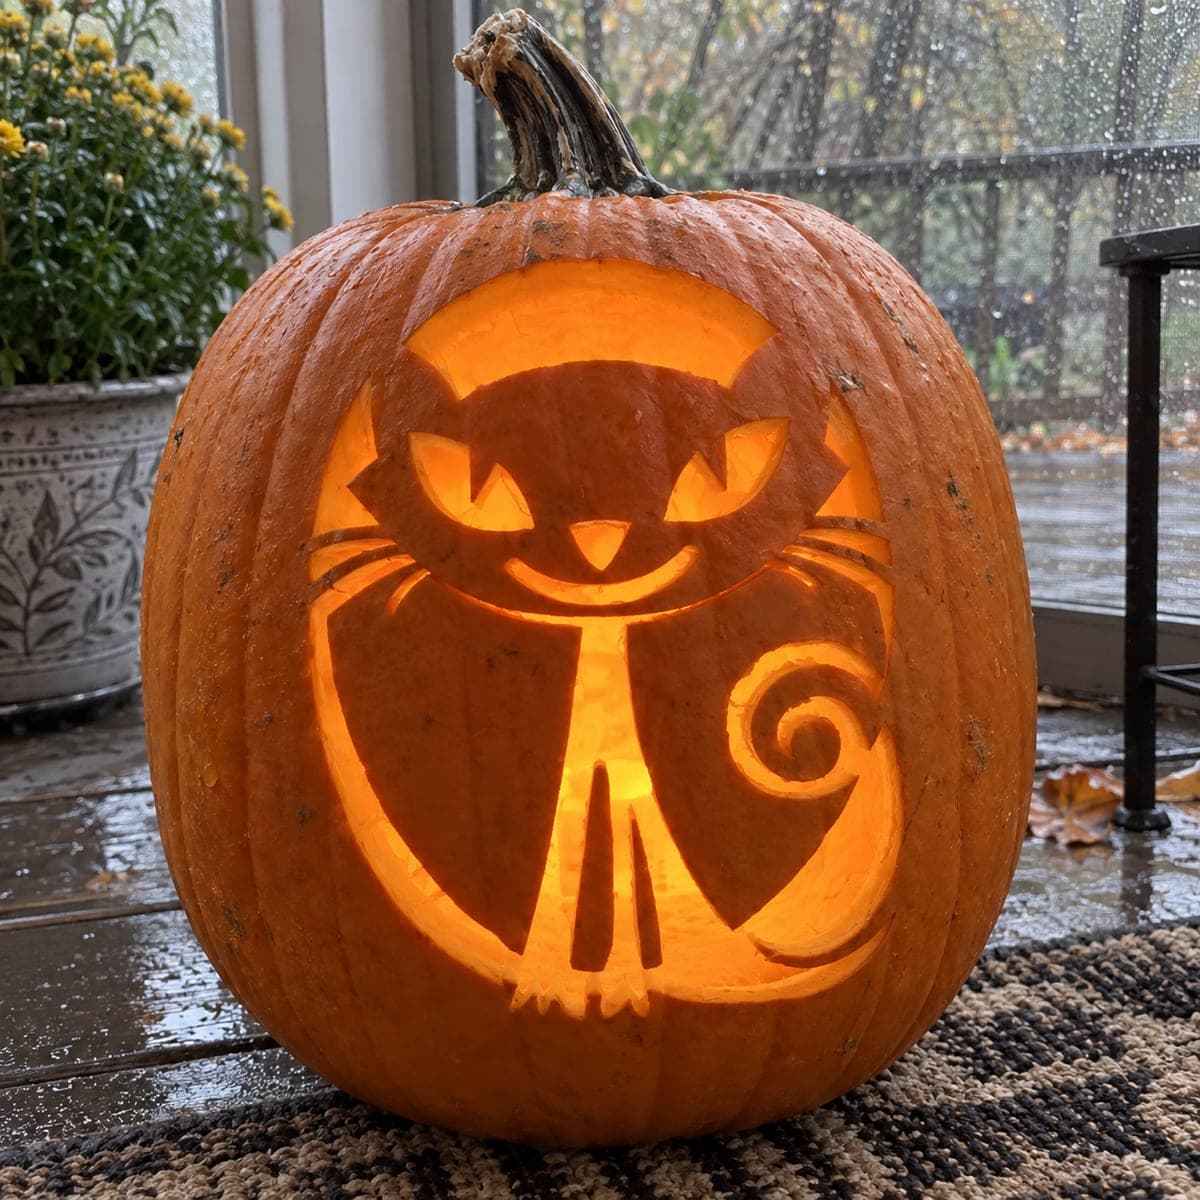
A calm sitting cat is left raised in dark skin while the circular background around it is carved away, creating a classic silhouette pumpkin with a windowsill-friendly finish. The pale recessed backdrop makes the cat pop in daylight, and a small light inside adds a soft halo at night. Score the cat outline deeply before removing the background, and keep the tail connected to the body so the shape stays intact.

This is an AI-generated concept image: a realistic, carvable design idea rather than a photo of a finished carve. AI concepts are always labeled and sit out the leaderboard and the contest.

No ratings yet · Sign in to rate
Comments (0)

  • No comments yet — be the first.

Save without an account. Sign in to like or comment.

Our tips for carving a similar design

The core trick here is reverse carving, or relief. Instead of cutting the cat out, you leave the cat in dark untouched skin and remove the round background around it so the shape stands out. A small amount of light inside adds a soft glow at night while daylight does most of the work.

Written by PumpkinCarvingIdeas.com, inspired by the image above. These are our suggestions, not instructions from the uploader. This approach to the AI concept has not been tested on a real pumpkin.

From pumpkin to porch

  1. Plan and open the pumpkin

    Pick a pumpkin with a wide, smooth front panel so the cat has room to sit. Cut a lid from the bottom or back rather than the top, which keeps the front face clean and makes it easy to reach an LED later. Scoop the inside until the front wall is about one inch thick so light passes through the peeled areas evenly. Wipe the front dry before transferring your design.

  2. Transfer the cat and the circle

    Tape your sitting cat stencil to the center of the front and mark a large circle around it for the background. Poke the outlines with a pin or trace them with a washable marker. Include the two small round eyes and make sure the tail curves back and stays touching the body. Step back and check that the cat reads clearly before you cut anything.

  3. Score the cat outline deeply

    Before removing any background, run a detail blade along the full cat outline, pressing straight in to a firm depth. This clean border protects the cat edge when you start clearing the area around it. Keep the tail connected to the body and the paws connected to the base so nothing floats free. Take your time on the ears and the curve of the back, since those edges define the whole shape.

  4. Peel the background to a glow

    Using a lino or ribbon tool, shave the skin off the circular background right up to your scored cat line. Remove only the orange skin and a thin layer beneath so the wall thins and turns pale, letting a dim glow through in daylight and at night. Work in shallow passes and keep the depth roughly even for a smooth backdrop. Leave the cat itself at full skin so it stays dark and crisp against the light.

  5. Cut the eyes last

    Once the background is finished, cut the two small eyes all the way through the wall so they read as the brightest points. Keep them small and round with a fine blade, and do not link them to any other cut. Because the cat is otherwise solid skin, these tiny openings give it a spark of life without weakening the shape. Clean up any rough inside edges with the tip of your knife.

  6. Light it and photograph

    Set a battery LED puck or string inside, never a candle, and position it low so it washes up behind the cat. Place the pumpkin on a windowsill where daytime light shows the pale backdrop and evening light adds the halo. Rub a little petroleum jelly on cut edges to slow drying. Snap your photo early, since peeled surfaces stay freshest in the first day or two.

Gather your supplies

Check things off as you get ready.

Work on a stable surface, keep your free hand out of the cutting path, and have an adult handle sharp tools.

Three levels of light

  • Leave intact

    The cat body, tail, ears, and paws stay as untouched skin so the silhouette reads dark and solid.

  • Peel & shade

    The circular background around the cat is shaved thin to glow a soft dim orange.

  • Cut through

    Only the two small round eyes are cut through for the brightest points of light.

Learn the carving basics

Before you start cutting

How do I keep the tail from breaking off?

Keep the tail touching the body along its length rather than floating in the open background. Since this is a relief design, the tail is solid skin left in place, not a thin cut piece, so it stays strong. Just avoid thinning the skin right at the tail when you peel the surrounding area.

How deep should I peel the background?

Aim to remove the skin and a thin layer of flesh so the wall there is roughly a quarter inch thinner than the rest. That is enough to glow softly without cutting through. Test one small patch against the light first, then match that depth across the whole circle.

Will the cat show up during the day too?

Yes, that is the strength of this design. The dark skin cat against the pale peeled circle reads clearly in daylight without any light at all. The interior LED simply adds a gentle halo once the sun goes down.

Your take belongs here, too.

Changed a detail? Made it simpler? Share a photo of your version and tell the community what worked.

Share your pumpkin

More pumpkins like this

You've reached the end · 8 pumpkins
The Patch Report

Fresh pumpkins, in your inbox.

The best new carvings, ideas worth stealing, and how-tos for carving season. Short, seasonal, and gone by November.

A short email during carving season. Unsubscribe anytime. See our privacy policy.