Halloween Pumpkin Carving Contest · Starts October 1st · $500 in prizes
← Back to ideas
@ai_concepts
Jul 26, 2026
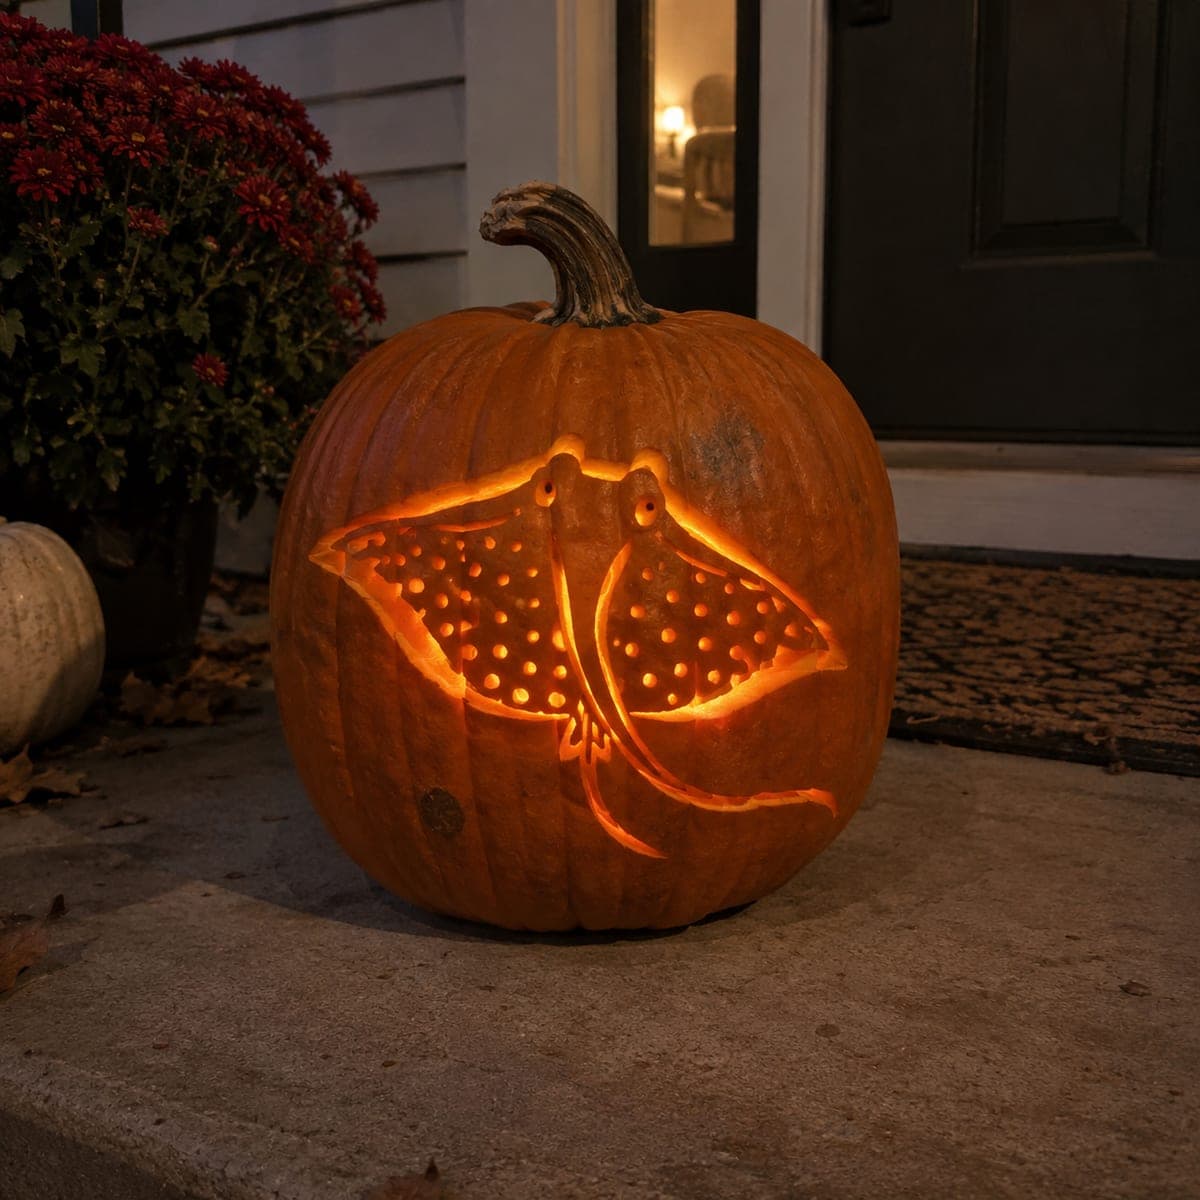
Spotted Stingray Cutout Pumpkin Carving at NightAI
0

Spotted Stingray Cutout Pumpkin Carving at Night

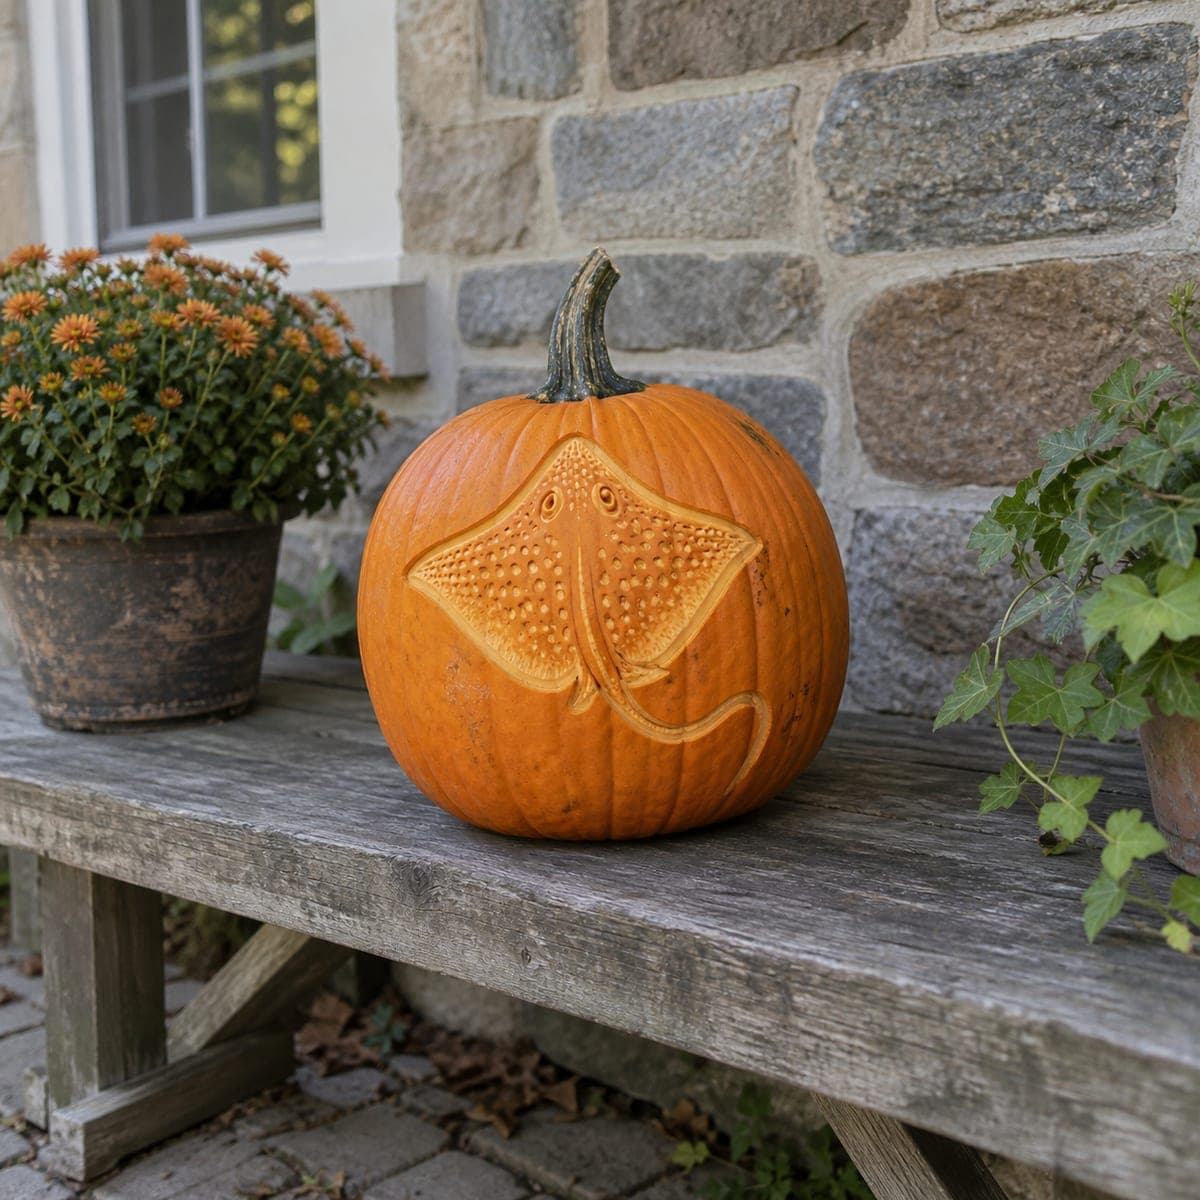
A manta ray glides across this pumpkin's surface with its wide diamond-shaped body cut through the wall and dozens of small circular spots also carved out, so candlelight spills from every opening in a constellation-like pattern. This ocean-themed pumpkin carving idea is more distinctive than standard face designs and the spot cutouts are easy to punch with a small round drill bit or apple corer. Carve the outer body shape first, then drill the spots from the center outward so the drill has stable pumpkin wall to bite into. The glowing spots resemble bioluminescence when lit from within.

This is an AI-generated concept image: a realistic, carvable design idea rather than a photo of a finished carve. AI concepts are always labeled and sit out the leaderboard and the contest.

No ratings yet · Sign in to rate

Comments (0)

  • No comments yet — be the first.

Save without an account. Sign in to like or comment.

Our tips for carving a similar design

The core trick here is contrast between one big diamond-shaped cutout and a scatter of small round holes that read like glowing spots. You carve the outer body silhouette first, then punch the dots from the center outward so the drill always has firm pumpkin wall to press against. Kept simple, the whole thing lights up like a constellation when the LED goes in.

Written by PumpkinCarvingIdeas.com, inspired by the image above. These are our suggestions, not instructions from the uploader. This approach to the AI concept has not been tested on a real pumpkin.

From pumpkin to porch

  1. Prep the pumpkin and open the back

    Pick a large pumpkin with a wide, fairly flat front panel so the ray body has room to spread. Have an adult cut a lid in the back rather than the top, then scoop the inside until the front wall is about one inch thick. A thinner wall makes both the silhouette and the little spots much easier to cut cleanly. Dry the inside with paper towel so your pattern will stick.

  2. Transfer the ray pattern

    Tape your stingray stencil flat against the front and poke through the outline with a pin or a transfer wheel. Mark the outer diamond body, the two swept wingtips, the tail, and every spot location as a small dot. Peel the paper and connect any faint outline marks with a washable marker. Double check the wingtips stay connected to the body so nothing floats free.

  3. Drill the spots from the center out

    Using a small round drill bit or an apple corer, punch the spots starting near the middle of the body and working outward toward the edges. Keeping surrounding wall intact gives the tool something stable to bite into, so holes stay round and the wall does not crack. Go slow and let the bit do the work rather than forcing it. Clear each plug of pumpkin before moving to the next dot.

  4. Cut the body silhouette

    With the spots done, switch to a fine carving saw and cut the outer diamond outline and the wingtip edges. Save these larger openings for last so the wall stays rigid while you drill. Leave thin uncut bridges where the tail crosses over itself and where wingtips meet the body so those slender parts stay supported. Cut the tail as a narrow channel rather than a wide gap to keep it strong.

  5. Shade the eyes and refine

    For the two little eyes and any fine surface lines, peel just the skin instead of cutting through so they glow soft and dim. Clean up any ragged spot edges with the tip of your knife. Rub a thin coat of petroleum jelly on all cut edges to slow drying and keep the spots from shriveling. Wipe away leftover marker lines.

  6. Light it and photograph

    Set a bright battery LED inside, warm white or amber, and settle the pumpkin on a flat porch step. Test in the dark and add a second LED if the wingtips look dim. Shoot at dusk with no flash so the spots read like scattered bioluminescence. Keep the lid slightly cracked or add a vent hole at the back for airflow.

Gather your supplies

Check things off as you get ready.

Work on a stable surface, keep your free hand out of the cutting path, and have an adult handle sharp tools.

Three levels of light

  • Leave intact

    The pumpkin skin around the ray and the untouched background stay dark.

  • Peel & shade

    The eyes and any thin body lines get skin-peeled for a soft dim glow.

  • Cut through

    The big diamond body outline and every drilled spot are cut through for the brightest light.

Learn the carving basics

Before you start cutting

How do I keep the drilled spots from cracking into each other?

Space the dots so at least a finger-width of wall sits between them, and drill from the center of the body outward. That order leaves solid pumpkin around each new hole for the bit to grip. If two spots do merge, just treat it as one slightly larger opening and keep going.

The tail crosses over itself. How do I carve that without it falling apart?

Cut the tail as thin channels rather than removing wide sections, and leave a small uncut bridge of skin where the tail loops over. Peeling that crossover spot instead of cutting it also keeps the line readable while staying strong. Slender curved parts are the first to sag, so the more attached wall you keep, the better.

Since this is a concept image, what pumpkin shape actually works best?

No real pumpkin exists in the picture, so aim for a tall, wide pumpkin with a smooth front panel to hold the spread-out wing shape. A ribbed or lumpy surface will distort the round spots. Thinning the front wall to about an inch makes the drilling and the silhouette cut far more forgiving.

Your take belongs here, too.

Changed a detail? Made it simpler? Share a photo of your version and tell the community what worked.

Share your pumpkin

More pumpkins like this

You've reached the end · 8 pumpkins
The Patch Report

Fresh pumpkins, in your inbox.

The best new carvings, ideas worth stealing, and how-tos for carving season. Short, seasonal, and gone by November.

A short email during carving season. Unsubscribe anytime. See our privacy policy.