Halloween Pumpkin Carving Contest · Starts October 1st · $500 in prizes
← Back to ideas
@ai_concepts
Aug 13, 2026
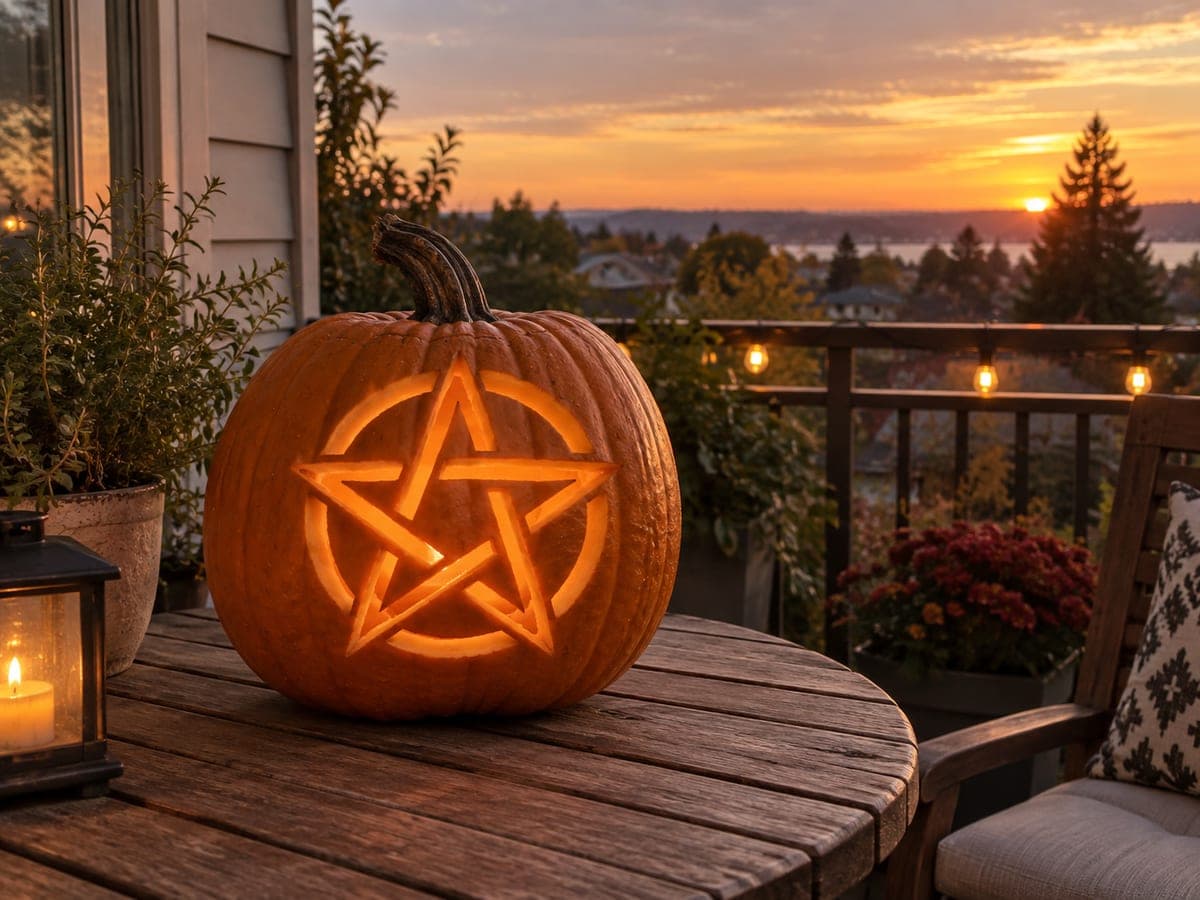
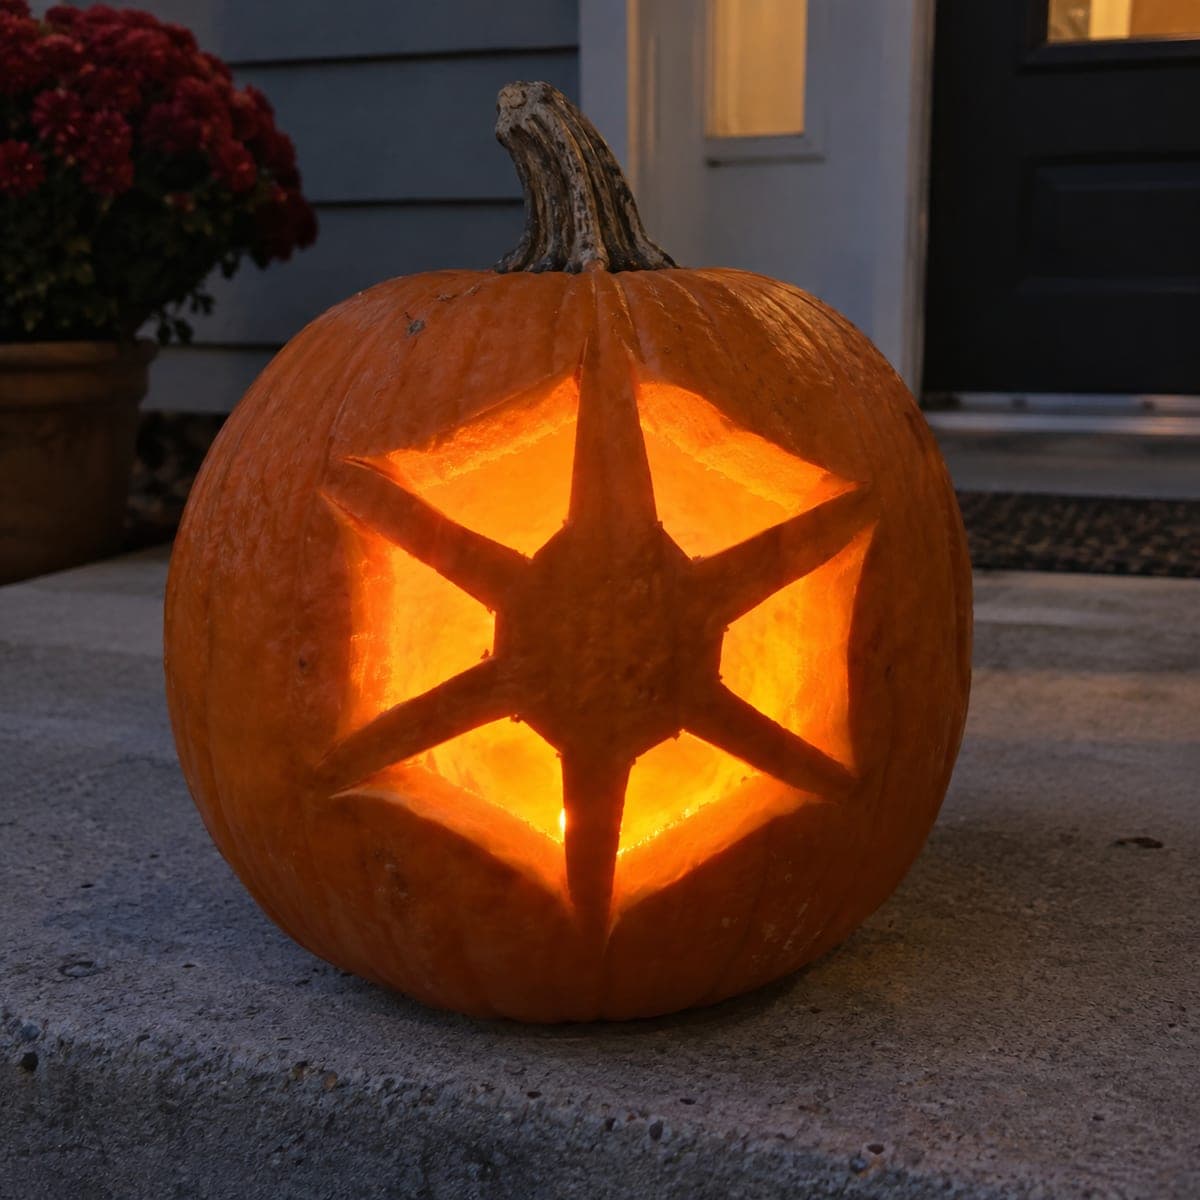
Star in Circle Geometric Glowing PumpkinAI
0

Star in Circle Geometric Glowing Pumpkin

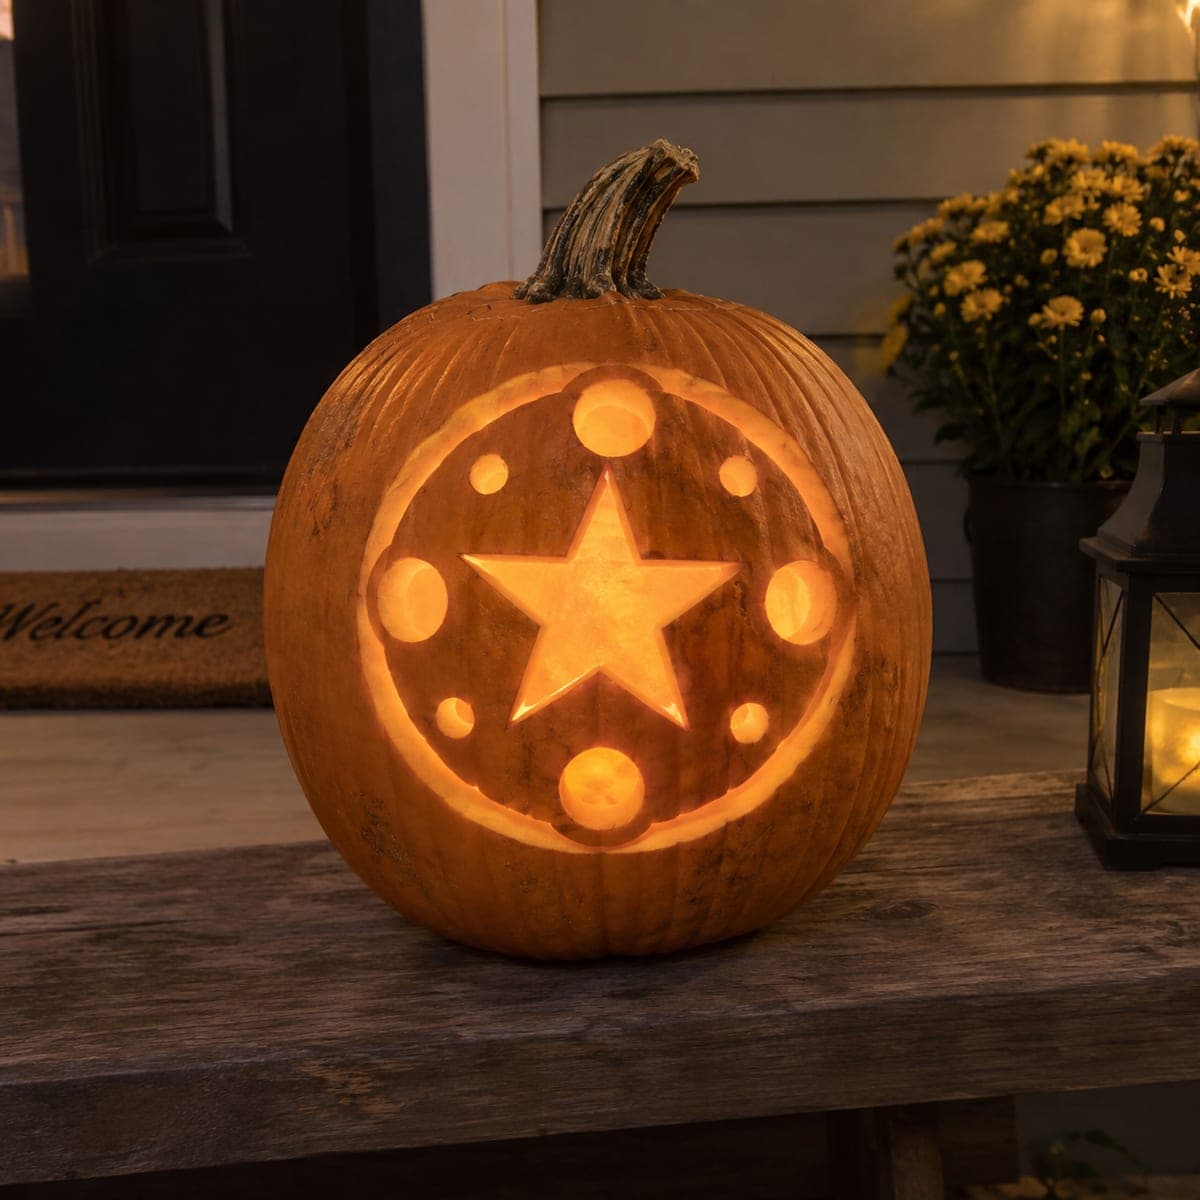
A five-pointed star sits inside a dotted circle, all carved as glowing cutouts on a small round pumpkin in a clean geometric pumpkin carving idea that suits any decor style. The symmetrical layout and simple shapes make this design ideal for carvers who want precision over complexity. Draw the circle with a compass or trace a round lid, then use a pencil to map the star points evenly before cutting. A warm LED tea light inside will make the star and dot pattern shimmer steadily without the fire risk of a real candle in a small pumpkin.

This is an AI-generated concept image: a realistic, carvable design idea rather than a photo of a finished carve. AI concepts are always labeled and sit out the leaderboard and the contest.

No ratings yet · Sign in to rate
Comments (0)

  • No comments yet — be the first.

Save without an account. Sign in to like or comment.

Our tips for carving a similar design

The core trick here is contrast between three depths: a dark untouched border, a softly glowing recessed field, and bright star and dot cutouts that punch all the way through. Since no real pumpkin exists for this AI concept, plan it as a symmetrical layout you map with a compass and evenly spaced pencil marks. Cut the small dots and the star last so the thin skin between them stays firm while you work.

Written by PumpkinCarvingIdeas.com, inspired by the image above. These are our suggestions, not instructions from the uploader. This approach to the AI concept has not been tested on a real pumpkin.

From pumpkin to porch

  1. Pick a small round pumpkin and clean it out

    Choose a compact, evenly round pumpkin so the circle reads as a true circle. Cut a lid from the bottom or the back rather than the top, which keeps the stem intact and lets you set the pumpkin over an LED light easily. Scrape the front inside wall down to about one inch thick so light passes through the peeled areas. A thinner wall glows more evenly and is easier to carve.

  2. Draw the circle and star

    Trace a round lid or use a compass to mark a clean circle on the front. Find the center, then use a protractor or a paper template to place the five star points evenly, 72 degrees apart. Sketch the star lightly in pencil first, and add the ring of dots in different sizes around it. Step back and check that the layout looks balanced before you cut anything.

  3. Score the outlines

    Go over your pencil lines with a poking tool or a thin blade to score shallow guide cuts. This locks in the design so smudged pencil will not lose your shape. Keep the scored star crisp, since its straight edges are what make the design look sharp. Do not cut deep yet, just define every line.

  4. Peel the background field

    Inside the circle, use a ribbon or lino tool to shave off only the orange skin around the star and dots, leaving the flesh beneath intact. This peeled surface will glow a soft dim orange and set off the bright cutouts. Keep the depth even so the field lights up uniformly. Leave the outer border of skin untouched so it stays dark and frames the whole design.

  5. Cut the star and dots through

    Now cut fully through the wall on the star and the dots so they become the brightest openings. Carve the small dots first, then the star, working from the center points outward with slow, controlled strokes. Keep at least a finger width of pumpkin between neighboring dots so the wall does not tear. Cut the largest openings last, when the surrounding shapes are already done and the panel is still strong.

  6. Light it and photograph

    Set a warm LED tea light or a small battery puck inside and never use a real flame in a pumpkin this small. Check that the star reads clearly and adjust the light position until the dots glow evenly. Wipe the cut edges and rub a little petroleum jelly on them to slow drying. Shoot your photo at dusk on a porch step for the warmest glow.

Gather your supplies

Check things off as you get ready.

Work on a stable surface, keep your free hand out of the cutting path, and have an adult handle sharp tools.

Three levels of light

  • Leave intact

    The wide outer border of skin around the circle stays untouched and dark to frame the design.

  • Peel & shade

    The field inside the circle, around the star and dots, is skin-peeled for a soft dim orange glow.

  • Cut through

    The five-pointed star and the ring of dots are cut all the way through for the brightest light.

Learn the carving basics

Before you start cutting

How do I get the five star points evenly spaced?

Mark the center of your circle, then measure 72 degrees between each point with a protractor, or print a five-point star template and trace it. Draw it in pencil first and check the balance before scoring. Even spacing is what makes this clean geometric design work.

Should the star be a cutout or a peeled shape?

In this design the star is a full cutout, so it reads as the brightest element against the softer peeled field around it. Cut it through cleanly for sharp edges. If you prefer a more subtle look, you could peel the star instead and cut only the dots, but the punched-through star gives the strongest glow.

How do I keep the dots from tearing the wall?

Leave at least a finger width of pumpkin between each dot and between the dots and the star. Carve the smaller dots before the largest opening so the panel stays firm. Use slow, controlled strokes with a small saw rather than forcing a big blade through.

Your take belongs here, too.

Changed a detail? Made it simpler? Share a photo of your version and tell the community what worked.

Share your pumpkin

More pumpkins like this

You've reached the end · 8 pumpkins
The Patch Report

Fresh pumpkins, in your inbox.

The best new carvings, ideas worth stealing, and how-tos for carving season. Short, seasonal, and gone by November.

A short email during carving season. Unsubscribe anytime. See our privacy policy.