@midnightcarver
Sep 7, 2026
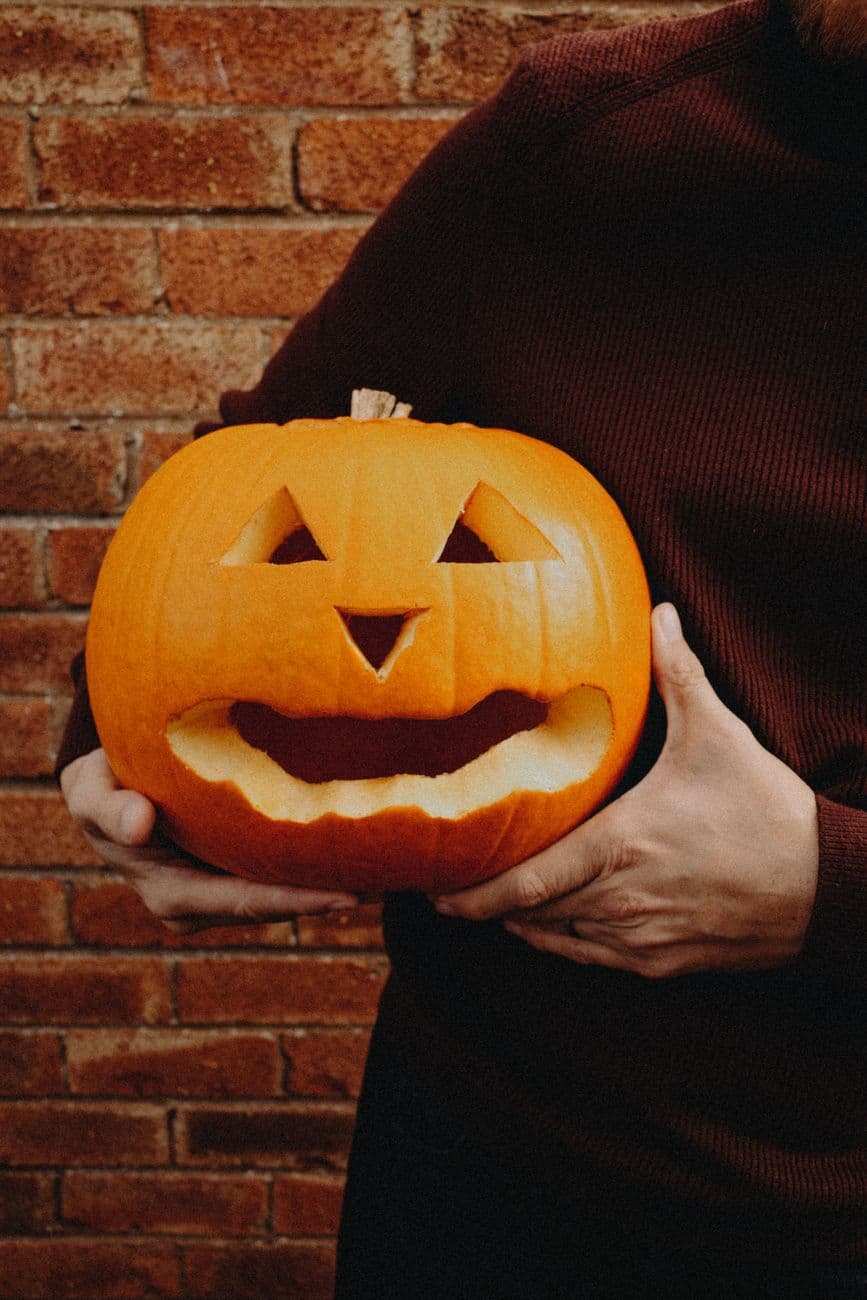
The whole charm here is simplicity: two triangle eyes, a small triangle nose, and a wide grinning mouth with a couple of blocky teeth. Everything is a clean cutout, so light pours straight through with no shading needed. Keep the shapes symmetrical and leave enough pumpkin wall between features so the face stays sturdy.
Written by PumpkinCarvingIdeas.com, inspired by @midnightcarver's photo above. These are our suggestions, not instructions from the uploader, and this approach hasn't been tested on their exact carve.
Choose a round pumpkin with a smooth, flat-ish front like the one shown. Wipe it clean and set it on a stable table at a comfortable height. Sketch your face lightly in washable marker before any cutting so you can adjust placement. Keep the eyes evenly spaced and the mouth centered below the nose.
Have an adult cut a lid at the top around the stem, angling the knife inward so the lid rests without falling through. Scoop out the seeds and pulp with a sturdy spoon or scraper. Thin the front wall to about one inch so cutting is easier and the glow is brighter. A thinner wall makes clean cutouts far less work.
Start with the eyes since they are small and low risk. Use a small serrated carving saw and cut each triangle with steady, gentle strokes rather than force. Push the cut piece out from inside using your finger or the spoon handle. Keep both triangles the same size and angle for that balanced, friendly look.
Draw a small triangle centered below and between the eyes, pointing down like in the photo. Cut it slowly since it is the smallest feature. Leave a good band of pumpkin between the nose and the mouth so the face does not weaken. Pop the piece free from the inside.
Cut the wide grin last because it is the biggest opening. Follow your marker line for the curved smile and shape the two blocky teeth along the top edge. Support the pumpkin wall with your free hand as you finish the cut so nothing cracks. Trim any rough edges for a smooth, happy mouth.
Drop in a battery LED tea light or puck light, never a candle. Set it inside and test the glow in a dim room, adjusting the light so the eyes and smile shine evenly. Pop the lid back on or leave it off for more airflow. Take your photo against a simple backdrop like brick to make the orange pop.
Check things off as you get ready.
Work on a stable surface, keep your free hand out of the cutting path, and have an adult handle sharp tools.
The entire outer skin of the pumpkin stays untouched and dark, keeping the round face solid.
Optional: lightly peel a thin outline around the eyes and mouth for a soft glowing border.
The two triangle eyes, the small nose, and the wide toothy smile are cut fully through for the brightest light.
Leave the teeth as chunky blocks connected to the top edge of the mouth rather than thin points. Cut the mouth opening around them last so the surrounding wall stays strong. If a tooth feels wobbly, make it a little wider next time.
In this friendly design the triangle eyes tilt slightly inward at the bottom, which softens the expression. Sketch them in marker first and step back to check the mood before cutting. Outward-tilting triangles read as more mischievous if you prefer that.
No, you can freehand it with a washable marker, which is part of the fun of a classic jack-o-lantern. Just mark a center line to keep the nose and mouth balanced. If you want perfect symmetry, a simple face stencil taped on works well too.
Changed a detail? Made it simpler? Share a photo of your version and tell the community what worked.
The best new carvings, ideas worth stealing, and how-tos for carving season. Short, seasonal, and gone by November.





Comments (0)