Halloween Pumpkin Carving Contest · Starts October 1st · $500 in prizes
← Back to ideas
@ai_concepts
Sep 25, 2026
Three Bat Silhouettes and Round Holes PumpkinAI
0

Report this carving

Tell us what is wrong. Reports are private.

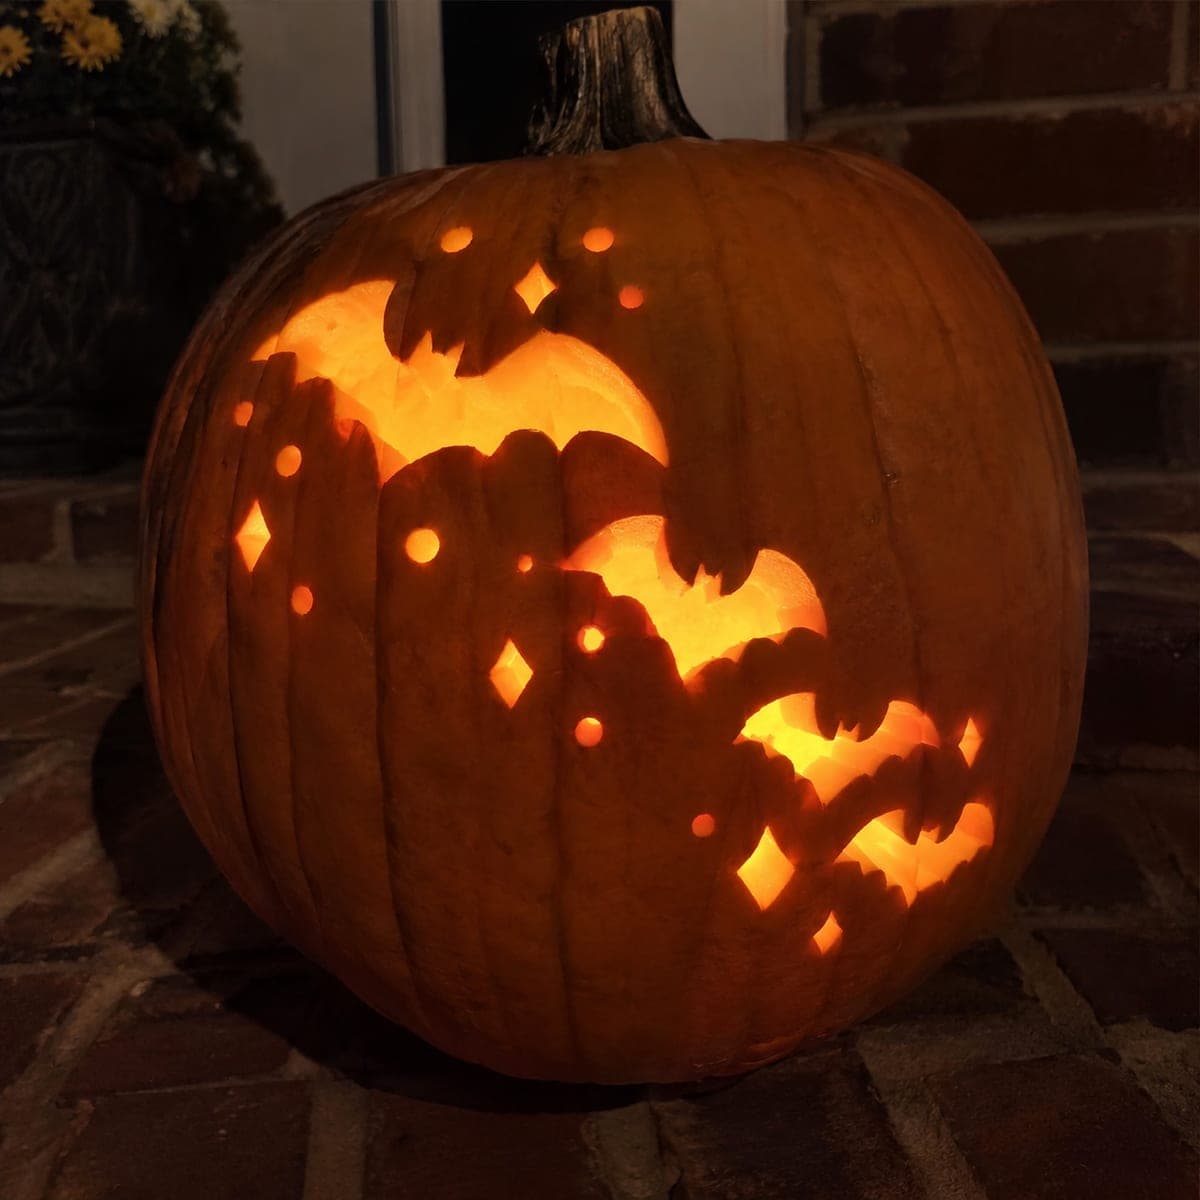
Three Bat Silhouettes and Round Holes Pumpkin

Three separate empty bat silhouettes and a cluster of circular apertures glow on a pumpkin at dusk, each shape separated by substantial rind that keeps the three-bat composition from weakening the shell. Stagger the bats at different heights and slight angles to suggest motion, as if the trio is in mid-flight, which also distributes the open area more evenly across the shell. The round holes scattered between and above them read as the bat-signal glow or distant stars.

No ratings yet · Sign in to rate
Comments (0)

  • No comments yet — be the first.

Save without an account. Sign in to like or comment.

Our tips for carving a similar design

Three separate bat silhouettes with substantial rind between each one distribute the open area across the pumpkin without concentrating weakness in a single zone. Staggering the bats at slightly different heights and angles suggests they are in motion rather than arranged in a pattern. Round holes scattered between and above the bats complete the atmospheric composition.

From pumpkin to porch

  1. Plan and hollow

    Before hollowing, hold the three bat templates against the pumpkin at different heights and angles to find a natural staggered arrangement. Mark the positions with a marker, then hollow through the back lid to about an inch wall thickness.

  2. Transfer all three bat templates

    Tape each template at its planned position, varying the angle of each bat slightly. Perforate all three outlines before removing the tape.

  3. Carve the center bat first

    Cut the center bat first, which typically sits at the most prominent position on the pumpkin. Free the piece and check that the surrounding rind looks solid before proceeding.

  4. Carve the flanking bats

    Cut each flanking bat, keeping the blade at least an inch away from the center bat at all points. Stagger their completion so you can assess structural balance after each one.

  5. Add the round accent holes

    Drill or saw round holes in the rind zones between and above the bats. Use varied spacing so the holes read as scattered rather than evenly distributed, mimicking a random star pattern.

  6. Light and display

    Set a wide-beam LED inside and display at dusk where ambient light still shows the orange rind as a warm backdrop to the multiple glowing apertures.

Written with AI to match this design

Gather your supplies

Check things off as you get ready.

Work on a stable surface, keep your free hand out of the cutting path, and have an adult handle sharp tools.

Three levels of light

  • Leave intact

    All broad rind between the three bat apertures and between accent holes

  • Peel & shade

    None

  • Cut through

    All three bat silhouettes and all round accent holes

Learn the carving basics

Before you start cutting

How much rind do I need to leave between bats?

At minimum an inch of solid rind between any two bat apertures. The more separation the better; the design reads more dynamically as a swarm when the bats appear to be at slightly different distances from each other.

Should all three bats face the same direction?

Varying the direction adds to the sense of motion. One bat facing left, one facing forward, and one facing slightly right suggests a swarm dispersing outward rather than a decorative row.

Will a single LED light all three bats evenly?

A single LED centered inside the pumpkin should reach all three bats if the pumpkin is not too wide. If the outer bats look dimmer, position the LED slightly off-center toward the dimmer side, or use two LEDs for even coverage.

Your take belongs here, too.

Changed a detail? Made it simpler? Share a photo of your version and tell the community what worked.

Share your pumpkin

More pumpkins like this

You've reached the end · 8 pumpkins
The Patch Report

Fresh pumpkins, in your inbox.

The best new carvings, ideas worth stealing, and how-tos for carving season. Short, seasonal, and gone by November.

A short email during carving season. Unsubscribe anytime. See our privacy policy.