Halloween Pumpkin Carving Contest · Starts October 1st · $500 in prizes
← Back to ideas
@ai_concepts
Jul 21, 2026
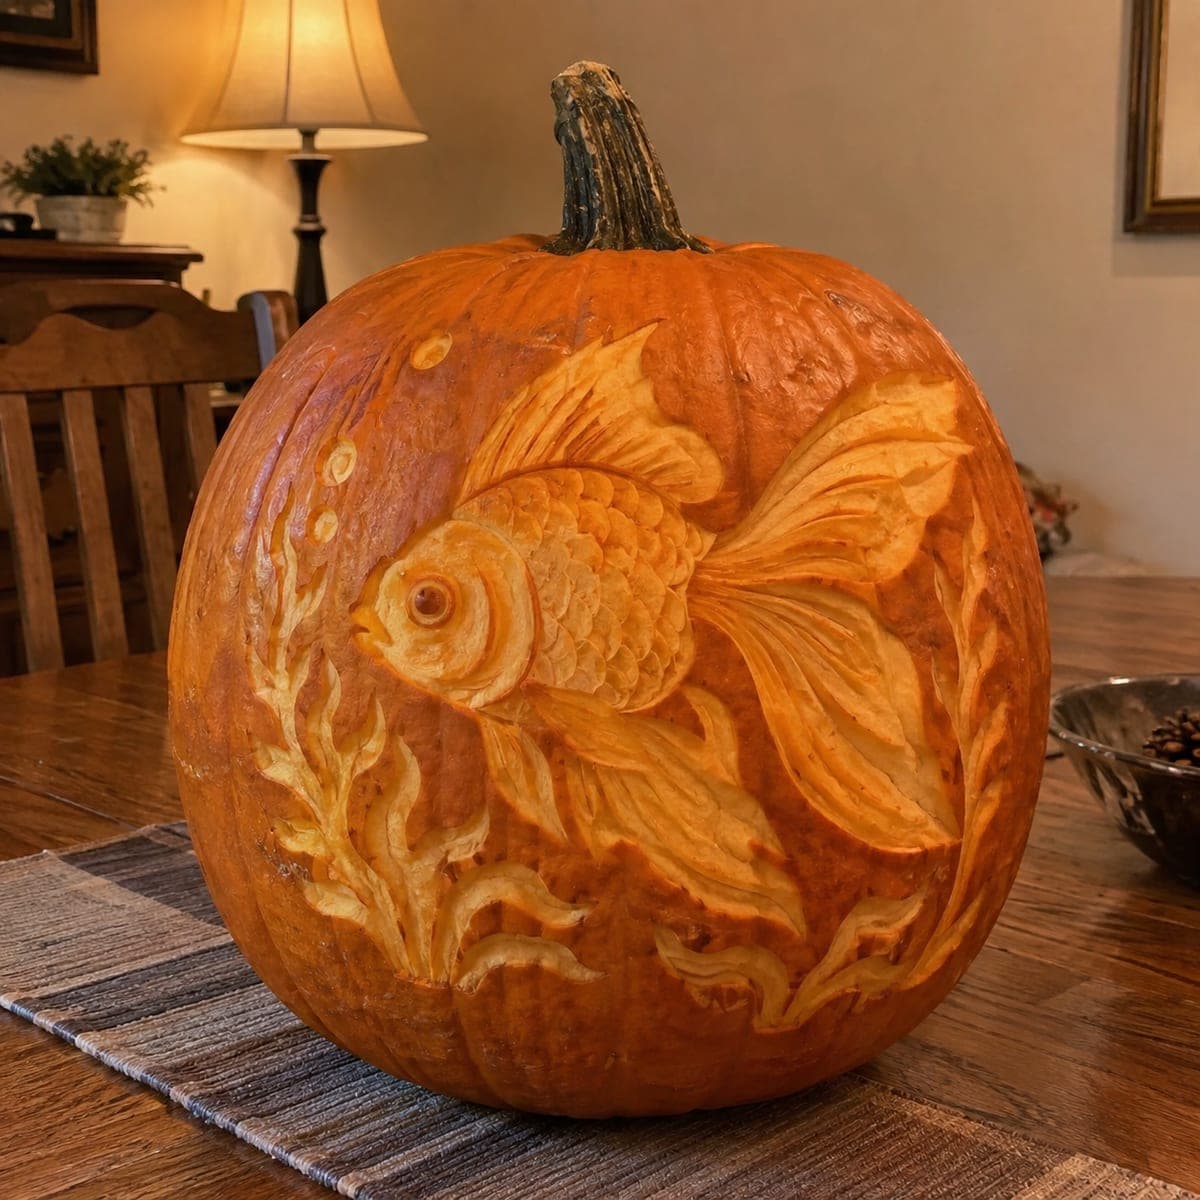
Trophy Bass Fish Relief Carved PumpkinAI
0

Trophy Bass Fish Relief Carved Pumpkin

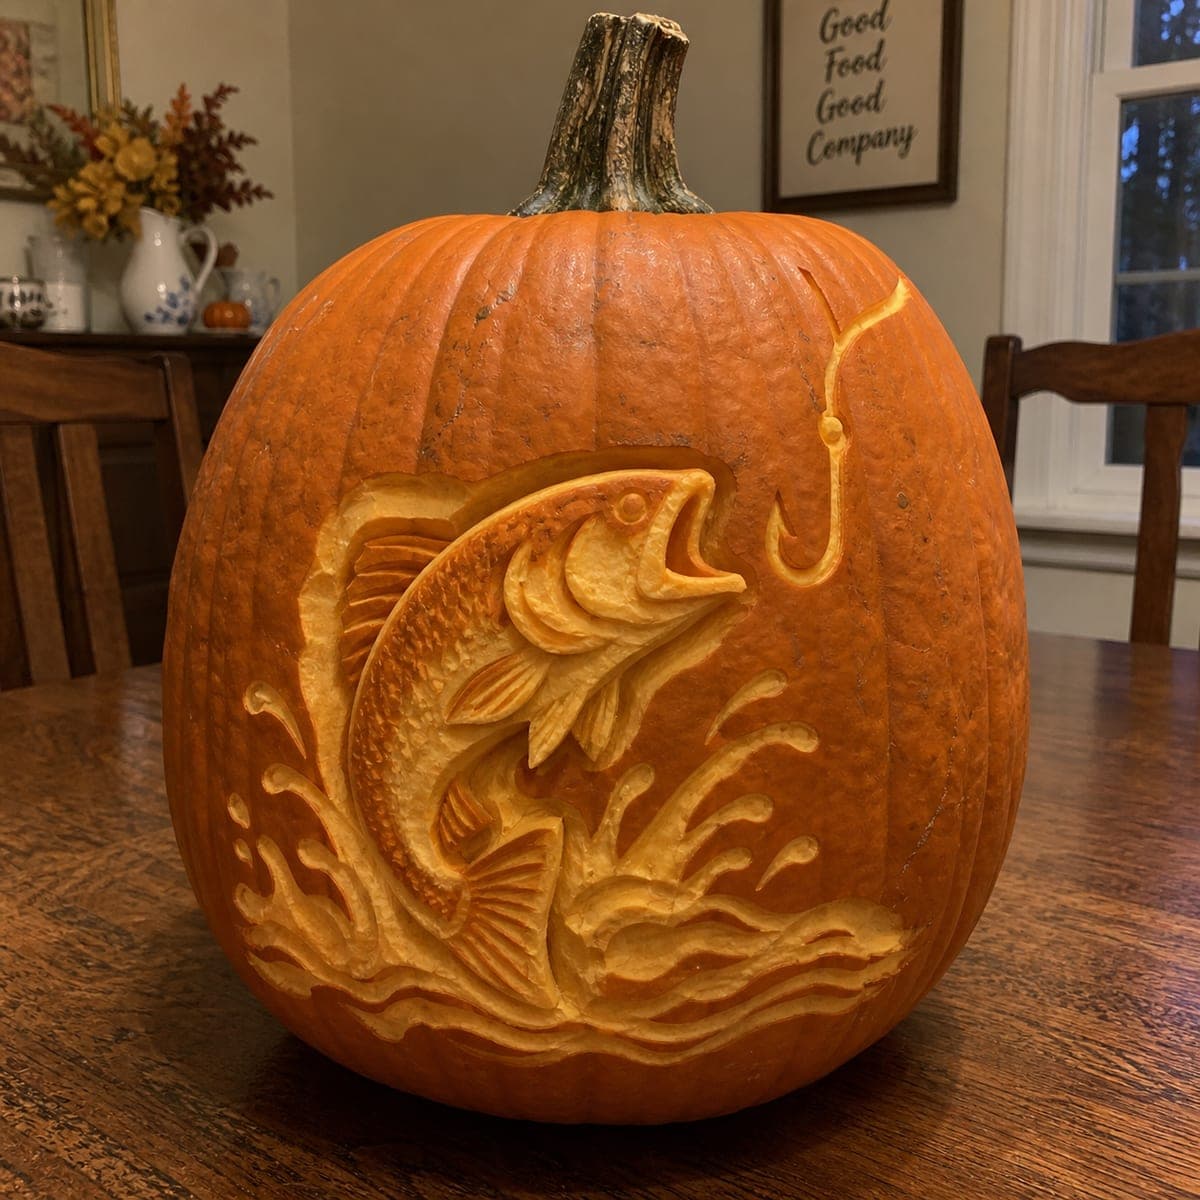
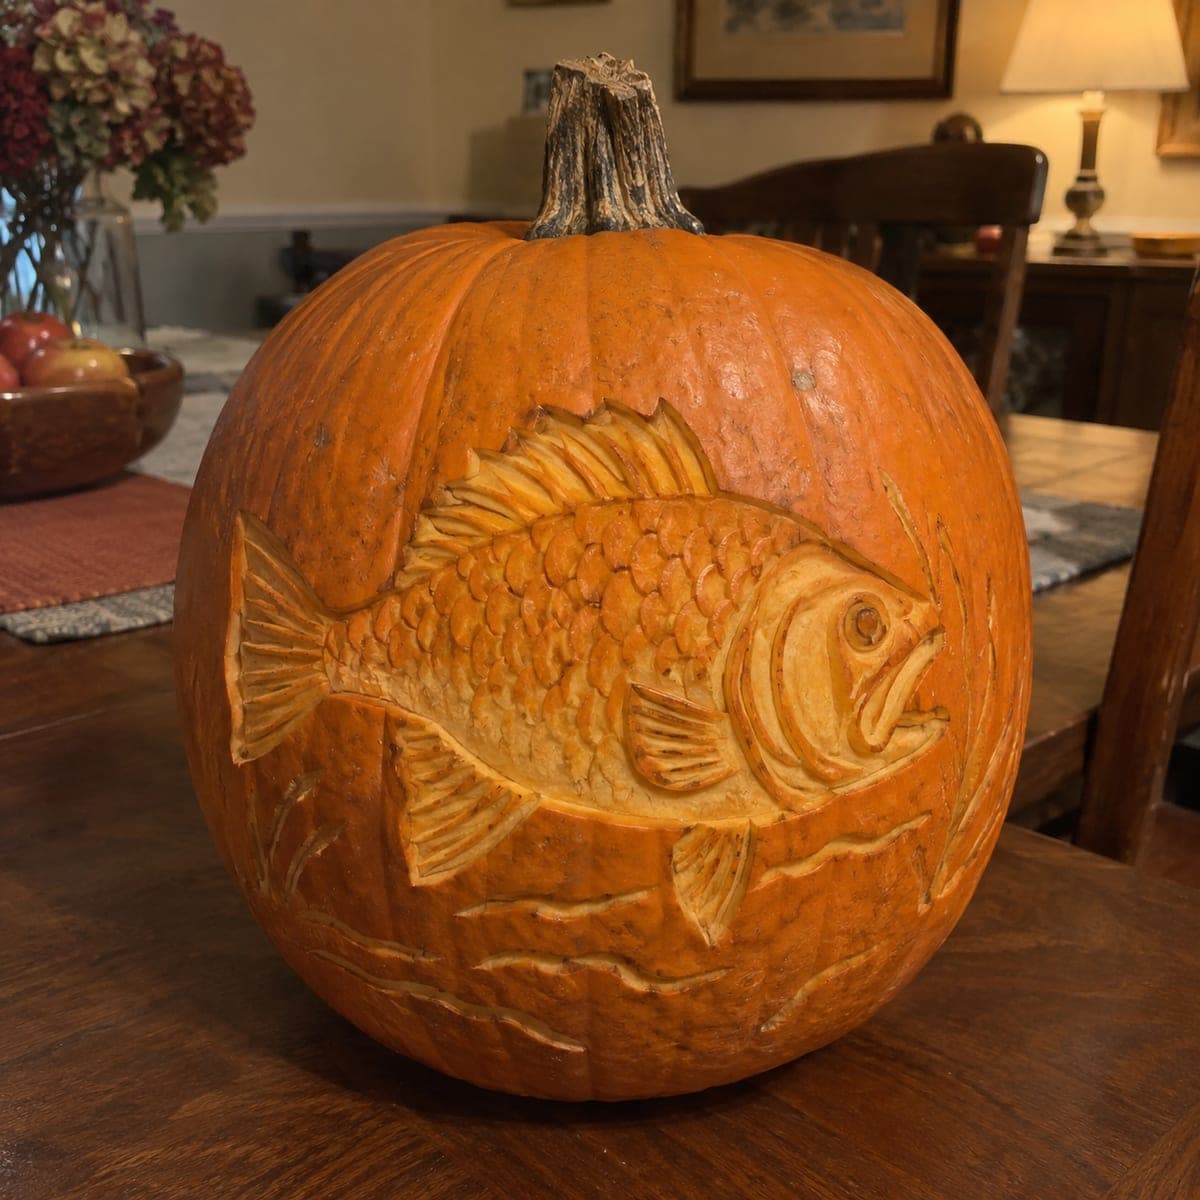
A largemouth bass leaps across this pumpkin in raised relief, every scale carved individually and water lines rippling around the fins. The fish stands proud of the background because the surrounding skin is cut back rather than the fish itself, classic relief technique. Scale texture goes fastest with a U-gouge worked in overlapping rows from tail to head. A great gift pumpkin for the angler in the family.

This is an AI-generated concept image: a realistic, carvable design idea rather than a photo of a finished carve. AI concepts are always labeled and sit out the leaderboard and the contest.

No ratings yet · Sign in to rate
Comments (0)

  • No comments yet — be the first.

Save without an account. Sign in to like or comment.

Our tips for carving a similar design

The core trick here is relief carving, where you cut back the background skin instead of the fish so the bass appears to leap forward. Peel and shave the surrounding pumpkin down to a lower level, then build the scales, fins, and eye by working detail into the raised fish body. The water lines are shallow gouge strokes that ripple out from the fins to tie the scene together.

Written by PumpkinCarvingIdeas.com, inspired by the image above. These are our suggestions, not instructions from the uploader. This approach to the AI concept has not been tested on a real pumpkin.

From pumpkin to porch

  1. Prep the pumpkin and transfer the design

    Pick a large, round pumpkin with a smooth, flat side for the fish. Cut a lid or a hidden hole in the back or base and scoop the wall on the carving side down to about one inch so it is easier to shave. Tape your bass pattern in place and poke the outline of the fish, fins, tail, and water lines with a transfer tool or pin. Trace the main scale rows lightly so you have guides once the paper comes off.

  2. Outline the fish and lower the background

    With a small detail saw or a sturdy loop tool, define the edge of the fish body and fins by scoring straight down about a quarter inch. Then shave the background skin away from that line, working outward so the fish stays raised while everything around it drops to a dimmer level. Keep the cut-back area even in depth for a clean, consistent glow. Leave the fish body itself untouched at full height for now.

  3. Carve the scales from tail to head

    Switch to a U-gouge and work overlapping rows of short scoops starting at the tail and moving toward the head, just as scales actually overlap. Keep each row staggered so the scales interlock rather than lining up in columns. Take shallow bites and let the rounded gouge do the work, cleaning out crumbs as you go. This texture is slow, so rest your hands and keep the blade angle steady for a uniform look.

  4. Shape the fins, tail, and mouth

    Use a small V-gouge to carve the thin rays in the fins and tail, keeping the lines slightly curved so they fan out naturally. Round the lips and open jaw with soft shaved cuts so the mouth reads as a leaping bass. Carve the gill plate as a curved raised ridge and shave a subtle hollow behind it. Keep every fin ray attached at both ends so nothing snaps off.

  5. Add the eye and water lines

    Carve the eye as a raised dome with a shallow ring around it and a shaved pupil for a lively look. Then run your V-gouge in long, sweeping strokes to cut the water ripples arcing out around the fins and below the fish. Vary the pressure so some ripple lines are shallow and some deeper for a bit of depth. Step back often to check the fish still stands proud of everything around it.

  6. Light it and photograph

    Drop a battery LED puck or a string of warm LEDs inside, never a candle, since the shaved relief will scorch. The untouched fish glows deep orange, the shaved background sits dimmer, and any spots you cut all the way through pop brightest. Shoot in a dim room so the raised scales cast tiny shadows and the fish looks three dimensional. Mist the cut surfaces with water and refrigerate overnight to keep it fresh for gifting.

Gather your supplies

Check things off as you get ready.

Work on a stable surface, keep your free hand out of the cutting path, and have an adult handle sharp tools.

Three levels of light

  • Leave intact

    The raised fish body, scales, and eye dome stay at full skin height for the deepest orange tone

  • Peel & shade

    The cut-back background around the fish and the shaved ripple lines glow a soft mid orange

  • Cut through

    Optional small through-cuts, such as the open mouth gap, let full light punch through brightest

Learn the carving basics

Before you start cutting

Do I need to cut all the way through the pumpkin for this design?

No, this is mostly a relief carving, so the effect comes from shaving skin to different depths rather than making holes. The fish and scales get their glow from thinned and untouched skin lit from inside. You can add a small through-cut at the open mouth if you want one brighter accent, but keep it minimal.

What is the fastest way to carve all those scales without them looking messy?

Use a U-gouge and work in overlapping rows from the tail toward the head, staggering each row so the scoops interlock like real scales. Keep the blade at a consistent angle and take shallow, even bites. Cleaning crumbs out as you go helps you see your spacing and keeps the rows tidy.

How thin can I make the fin rays without them breaking?

Carve the fin rays as shallow grooves in raised skin rather than as free-standing pieces, and always leave each ray connected at both ends. Since this is relief work, the fins stay backed by pumpkin wall, which keeps them strong. Avoid cutting narrow gaps clean through, as that is where thin details snap.

Your take belongs here, too.

Changed a detail? Made it simpler? Share a photo of your version and tell the community what worked.

Share your pumpkin

More pumpkins like this

You've reached the end · 8 pumpkins
The Patch Report

Fresh pumpkins, in your inbox.

The best new carvings, ideas worth stealing, and how-tos for carving season. Short, seasonal, and gone by November.

A short email during carving season. Unsubscribe anytime. See our privacy policy.