Halloween Pumpkin Carving Contest · Starts October 1st · $500 in prizes
← Back to ideas
@ai_concepts
Jul 12, 2026
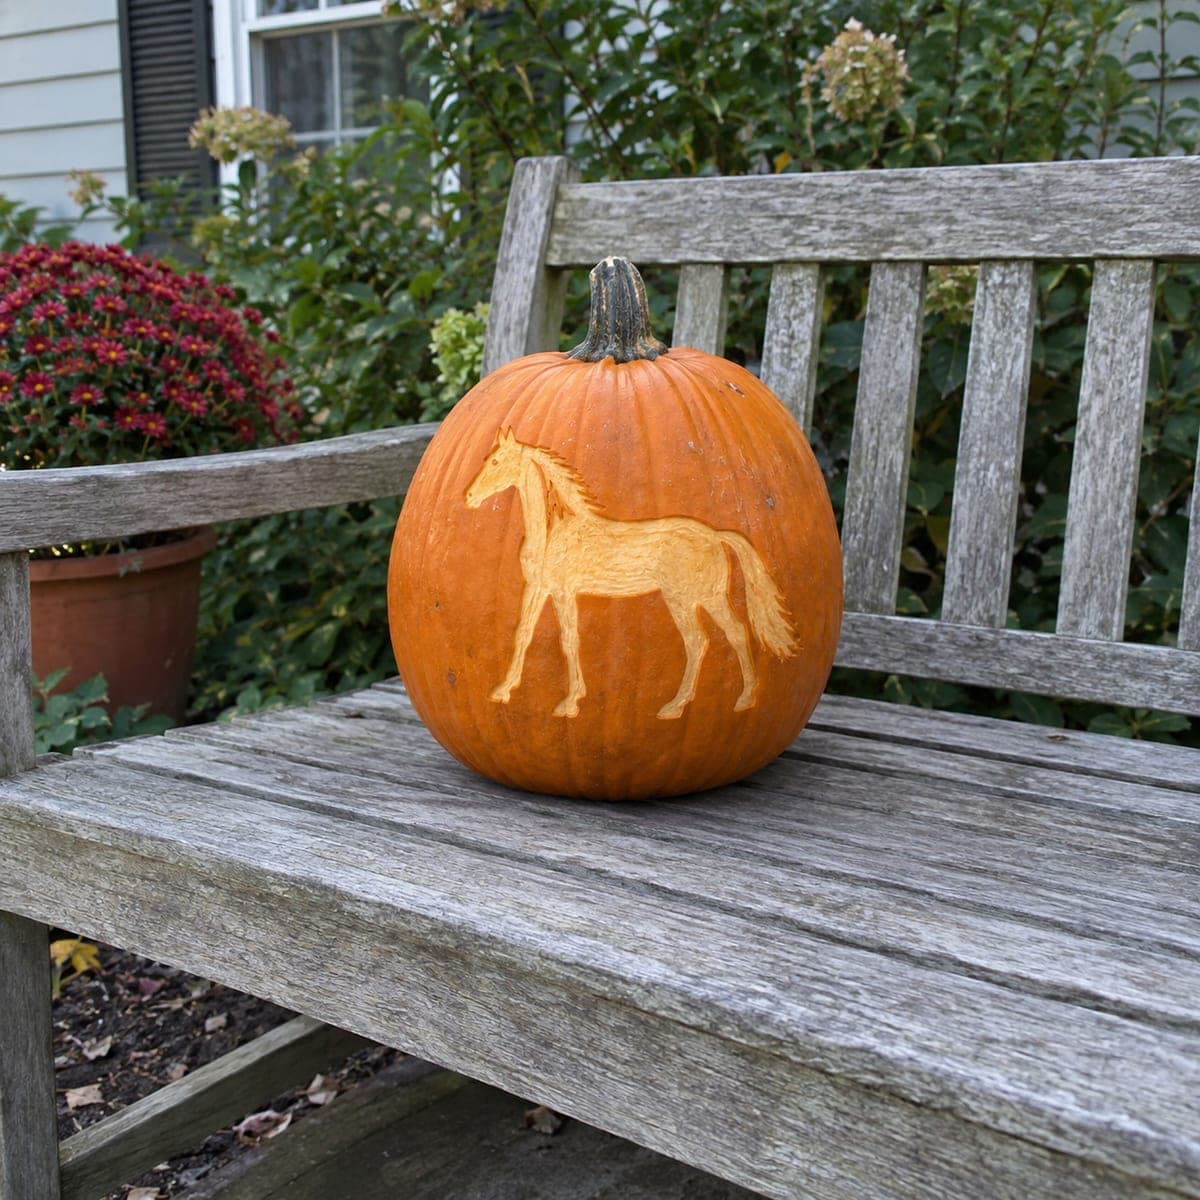
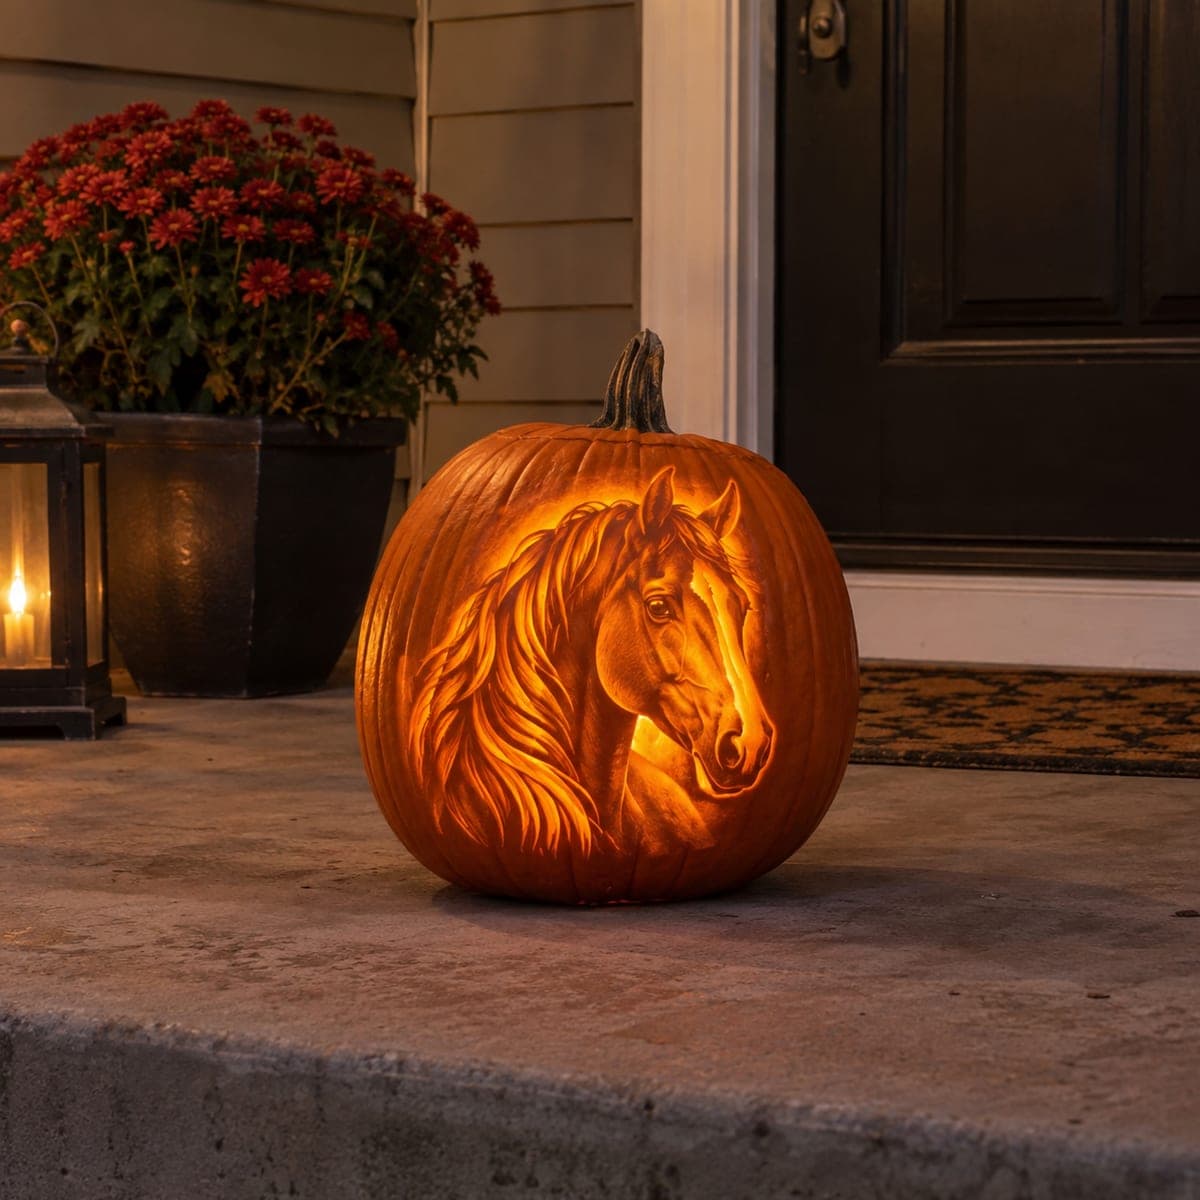
Trotting Horse Etched Pumpkin CarvingAI
0

Trotting Horse Etched Pumpkin Carving

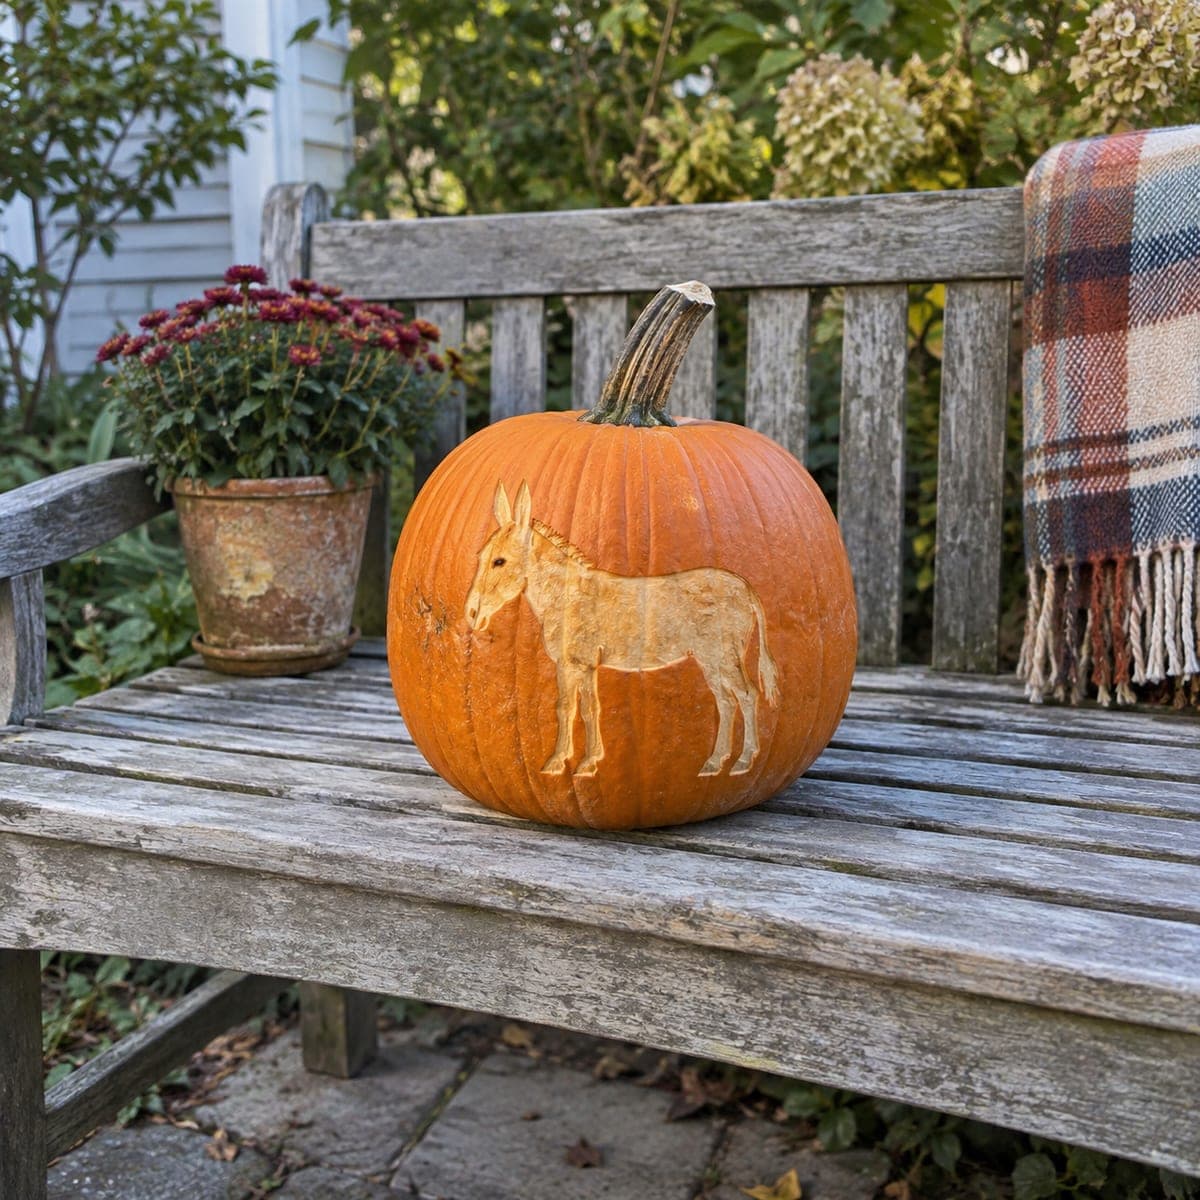
A horse steps forward with a flowing mane and tail on this etched pumpkin, the whole figure peeled from the skin so it shows pale gold against the rind in ordinary daylight. Horse lovers and farm households get a design that suits a bench or barn entrance without any lighting. Transfer a side-profile template, peel the body evenly, then pull a few extra shallow strokes through the mane and tail so they read as hair.

This is an AI-generated concept image: a realistic, carvable design idea rather than a photo of a finished carve. AI concepts are always labeled and sit out the leaderboard and the contest.

No ratings yet · Sign in to rate
Comments (0)

  • No comments yet — be the first.

Save without an account. Sign in to like or comment.

Our tips for carving a similar design

The core trick here is that nothing gets cut all the way through. The whole horse is peeled from the skin so the pale flesh reads as gold against the darker rind in plain daylight. Plan to transfer a clean side-profile template, peel the body to an even depth, then add a few shallow extra strokes in the mane and tail so they look like flowing hair.

Written by PumpkinCarvingIdeas.com, inspired by the image above. These are our suggestions, not instructions from the uploader. This approach to the AI concept has not been tested on a real pumpkin.

From pumpkin to porch

  1. Pick and prep your pumpkin

    Choose a large pumpkin with a smooth, fairly flat front panel so the horse has room to trot across it. Wipe the surface clean and dry it well. Since this is an etched design with no interior light, you can skip cutting a lid and gutting it if you like, which keeps the shell firm and long-lasting. If you do want the option of a light later, cut a small access hole in the back or bottom instead of the top.

  2. Transfer the template

    Print a side-profile horse stencil sized to fit your front panel with a little margin all around. Tape it flat, smoothing out wrinkles, and poke closely spaced dots along every outline with a pushpin or transfer tool. Trace the mane and tail edges too so you know where the hair strokes go. Peel the paper and connect the dots lightly with a washable marker if the outline is hard to read.

  3. Score the outline

    With a small detail saw or a sharp lino-style gouge, trace only the outer edge of the horse, cutting through the skin but not deep into the flesh. This gives you a crisp border to peel up to. Take the legs and the gap between them slowly, since those are the thinnest parts of the shape. Keep the blade shallow so you do not accidentally cut a hole through the wall.

  4. Peel the body

    Use a ribbon or loop tool to lift the skin off the entire horse shape, working down to an even shallow depth so the whole figure glows the same pale gold. Scrape in the direction of the outline so edges stay clean and do not tear. Aim for consistency rather than deep gouging, since a uniform peel is what reads as a solid horse in daylight. Step back often to check for dark patches you missed.

  5. Shade the mane and tail

    Go back into the mane and tail with a few extra shallow strokes, pulling the tool in the direction the hair flows. Vary the pressure so some lines sit a touch deeper and paler, which gives the impression of separate locks. Leave a thin ridge of untouched skin between strokes so the hair reads as strands rather than a solid block. A little contour scraping along the neck and haunch can suggest muscle if you want more depth.

  6. Clean up and set it out

    Trim any ragged edges with your detail knife and brush away loose pulp. Rub the peeled areas with a little vegetable oil or petroleum jelly to slow drying and keep the gold color fresh. Set the pumpkin on a bench or by a barn door where daylight rakes across it and shows the etched figure. Snap your photo in soft morning or late afternoon light for the best contrast.

Gather your supplies

Check things off as you get ready.

Work on a stable surface, keep your free hand out of the cutting path, and have an adult handle sharp tools.

Three levels of light

  • Leave intact

    The rind all around the horse stays untouched and dark, forming the background

  • Peel & shade

    The entire horse body, plus the mane and tail strokes, is skin-peeled to glow pale gold in daylight

  • Cut through

    Nothing is cut all the way through on this etched design, which keeps the shell strong

Learn the carving basics

Before you start cutting

Do I need a light inside for this to work?

No, this design is meant to show in ordinary daylight. The peeled flesh sits pale gold against the darker rind, so contrast comes from the surface, not a bulb. If you want a faint glow at dusk, drop in an LED puck and cut a small hole in the back rather than the top.

How deep should I peel the horse?

Just deep enough to remove the skin and reach the pale flesh underneath, usually an eighth to a quarter inch. Keep the depth even across the whole body so it reads as one solid color. Going too deep weakens the wall and can create dark shadowed dips.

How do I keep the thin legs from looking messy?

Score the leg outlines slowly and shallowly before you peel, so you have crisp borders to work up to. Since nothing is cut through, the legs stay fully supported by the shell and will not snap. Peel toward the outline rather than across it to avoid tearing the edges.

Your take belongs here, too.

Changed a detail? Made it simpler? Share a photo of your version and tell the community what worked.

Share your pumpkin

More pumpkins like this

You've reached the end · 8 pumpkins
The Patch Report

Fresh pumpkins, in your inbox.

The best new carvings, ideas worth stealing, and how-tos for carving season. Short, seasonal, and gone by November.

A short email during carving season. Unsubscribe anytime. See our privacy policy.