Halloween Pumpkin Carving Contest · Starts October 1st · $500 in prizes
← Back to ideas
@ai_concepts
Aug 20, 2026
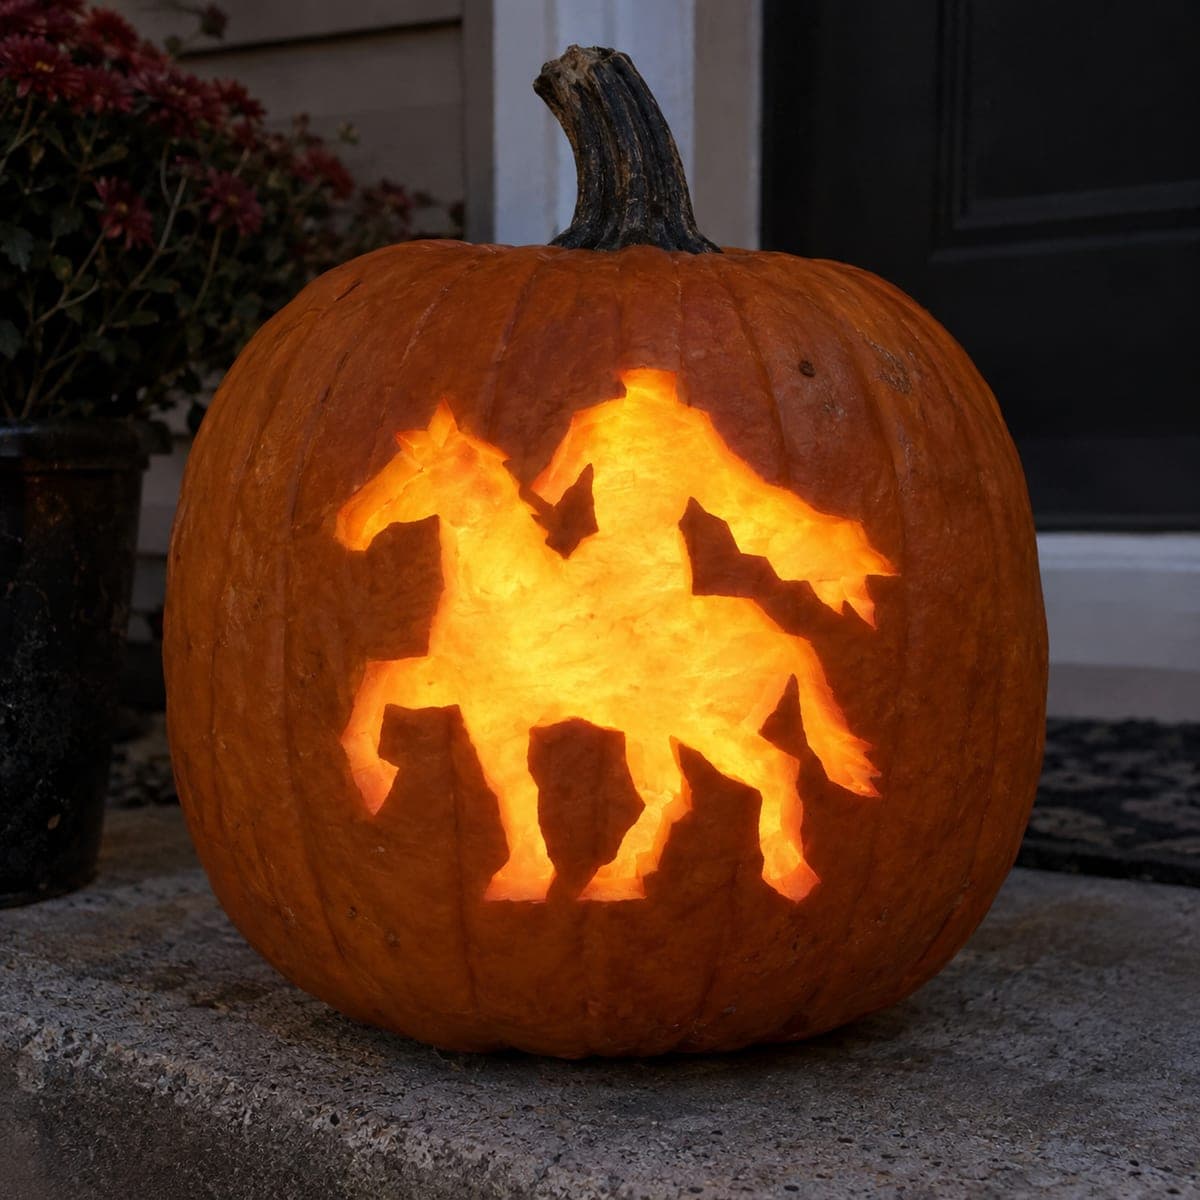
Galloping Horse Cutout Jack-O-Lantern GlowAI
0

Galloping Horse Cutout Jack-O-Lantern Glow

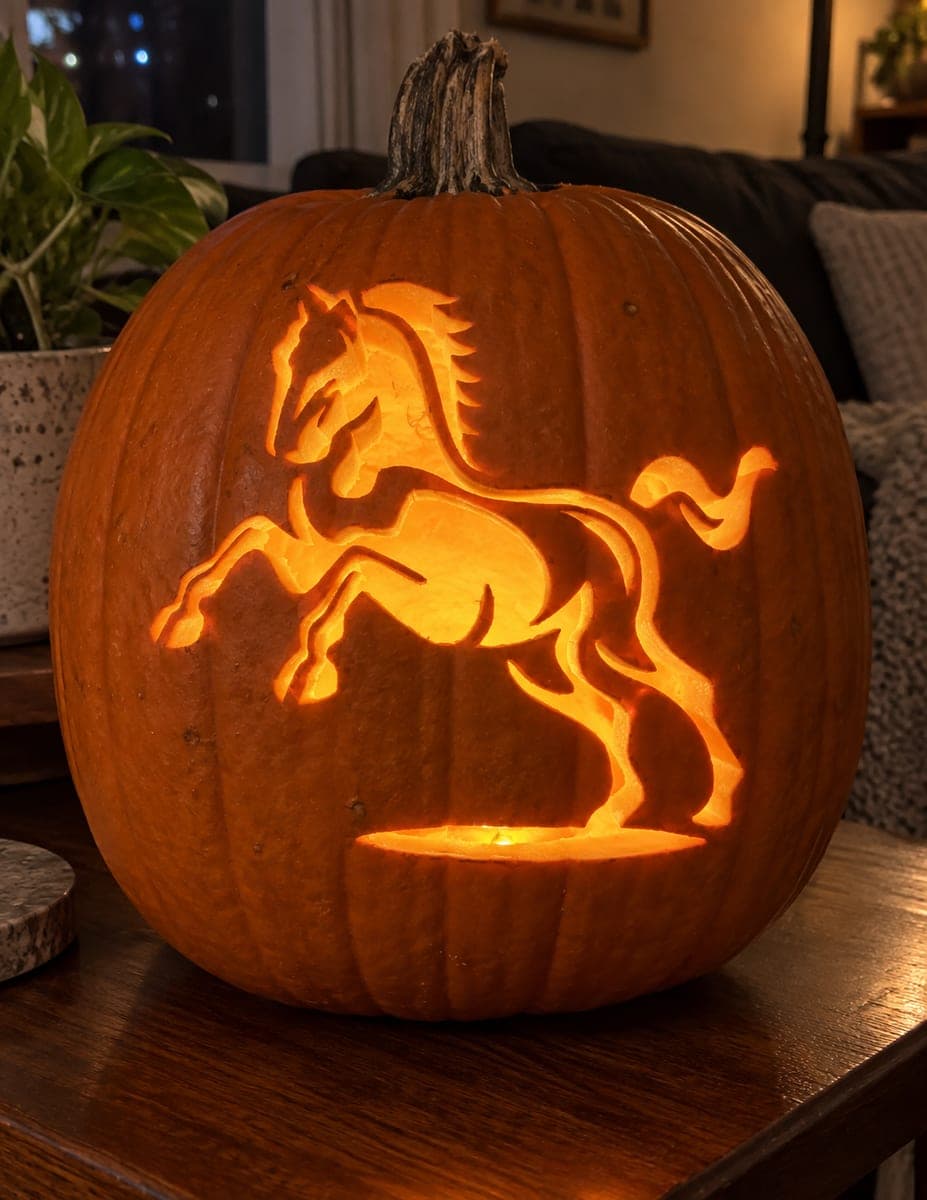
A horse mid-gallop is cut clean through this pumpkin in a simple but striking silhouette, the candle inside throwing warm amber light through every gap in the mane and hooves. The whole horse shape is pierced away as a single connected cutout, so the negative space is the glowing horse and the uncut rind frames it. Beginners can handle this design with a basic pumpkin saw and a printed horse stencil; just be sure to leave the mane connected to the neck and the tail to the body to keep the piece from falling in. A timeless pumpkin carving idea for any horse lover.

This is an AI-generated concept image: a realistic, carvable design idea rather than a photo of a finished carve. AI concepts are always labeled and sit out the leaderboard and the contest.
No ratings yet · Sign in to rate

Comments (0)

  • No comments yet — be the first.

Save without an account. Sign in to like or comment.

Our tips for carving a similar design

The whole trick here is one connected cutout: the horse shape is pierced clean through so the glowing negative space becomes the horse while the uncut rind frames it. Because it is a single silhouette with no delicate interior lines, it stays strong and forgiving. Plan to keep the mane joined to the neck and the tail joined to the body so nothing drops inward.

Written by PumpkinCarvingIdeas.com, inspired by the image above. These are our suggestions, not instructions from the uploader. This approach to the AI concept has not been tested on a real pumpkin.

From pumpkin to porch

  1. Pick and size your stencil

    Choose a galloping horse silhouette with a bold, connected outline and print it to fit the flattest face of your pumpkin. Test that the legs and hooves are thick enough to cut without crumbling. Keep the whole shape sitting a little above center so the light reads well at eye level. A simple outline works better than one with fussy interior detail.

  2. Prep and open the pumpkin

    Have an adult cut a lid from the bottom or back rather than the top, which keeps the front face clean and the shape stable. Scoop the inside until the front wall is about one inch thick so your saw glides through. A thinner wall carves faster and glows brighter. Wipe the surface dry before taping on your pattern.

  3. Transfer the outline

    Tape the stencil flat and use a poking tool or awl to dot along the entire horse outline, spacing holes close together on tight curves like the ears and legs. Pay extra attention to where the mane meets the neck and the tail meets the body. Peel the paper and connect the dots lightly with a marker if it helps you see the line. Double check the shape reads as one continuous piece.

  4. Saw the silhouette

    With a fine pumpkin saw, cut along the outline using gentle up and down strokes and let the blade do the work. Start with the interior details like the space between the legs, then work outward toward the body edge. Support the piece with your free hand as you finish so it does not tear loose early. Save the widest openings for last to keep the wall rigid while you work.

  5. Keep the bridges strong

    Leave the mane fully attached to the neck and the tail attached to the rump so the cutout hangs together as one connected shape. If any leg feels thin, stop and clean the edge instead of forcing the saw. Trim ragged edges from the inside with a small detail blade for a crisp silhouette. Gently push loose pieces out toward you rather than pressing inward.

  6. Light it and photograph

    Drop in a battery LED tea light or a small puck light for a safe, steady glow, and skip open flame. Set the pumpkin on a step or porch and dim the surrounding lights to make the amber horse pop. Shoot slightly below eye level so the silhouette fills the frame. Add a second LED inside if the center looks dim.

Gather your supplies

Check things off as you get ready.

Work on a stable surface, keep your free hand out of the cutting path, and have an adult handle sharp tools.

Three levels of light

  • Leave intact

    The entire uncut rind around the horse stays dark and frames the shape.

  • Peel & shade

    Thin the edges of the mane and hoof gaps slightly from behind for a soft amber halo around the cutout.

  • Cut through

    The full horse body, legs, mane gaps, and tail are cut clean through for the brightest glow.

Learn the carving basics

Before you start cutting

How do I keep the horse from falling into the pumpkin?

The mane and tail act as the anchors, so leave the mane connected to the neck and the tail connected to the body rather than cutting them free. Cut the interior gaps first and the outer body edge last so the wall stays firm as long as possible. Support each section with your hand as you finish the final strokes.

The legs look thin, how do I carve them safely?

Size your stencil so each leg is at least the width of your saw blade plus a little margin. Cut slowly with light strokes and clean the edges from the inside instead of forcing the blade. If a leg still feels fragile, widen it a touch on the pattern before you start.

Since this is a concept image, can a real pumpkin glow this evenly?

Yes, a single large cutout like this glows well because there is one big open area for light to pass through. Thin the front wall to about an inch and use one or two LED lights to fill the space evenly. Real rind will show ridges and texture that the concept image smooths out, which only adds character.

Your take belongs here, too.

Changed a detail? Made it simpler? Share a photo of your version and tell the community what worked.

Share your pumpkin

More pumpkins like this

You've reached the end · 8 pumpkins
The Patch Report

Fresh pumpkins, in your inbox.

The best new carvings, ideas worth stealing, and how-tos for carving season. Short, seasonal, and gone by November.

A short email during carving season. Unsubscribe anytime. See our privacy policy.