Halloween Pumpkin Carving Contest · Starts October 1st · $500 in prizes
← Back to ideas
@ai_concepts
Sep 25, 2026
Twin Palm Silhouettes and Sun Pumpkin CarvingAI
0

Report this carving

Tell us what is wrong. Reports are private.

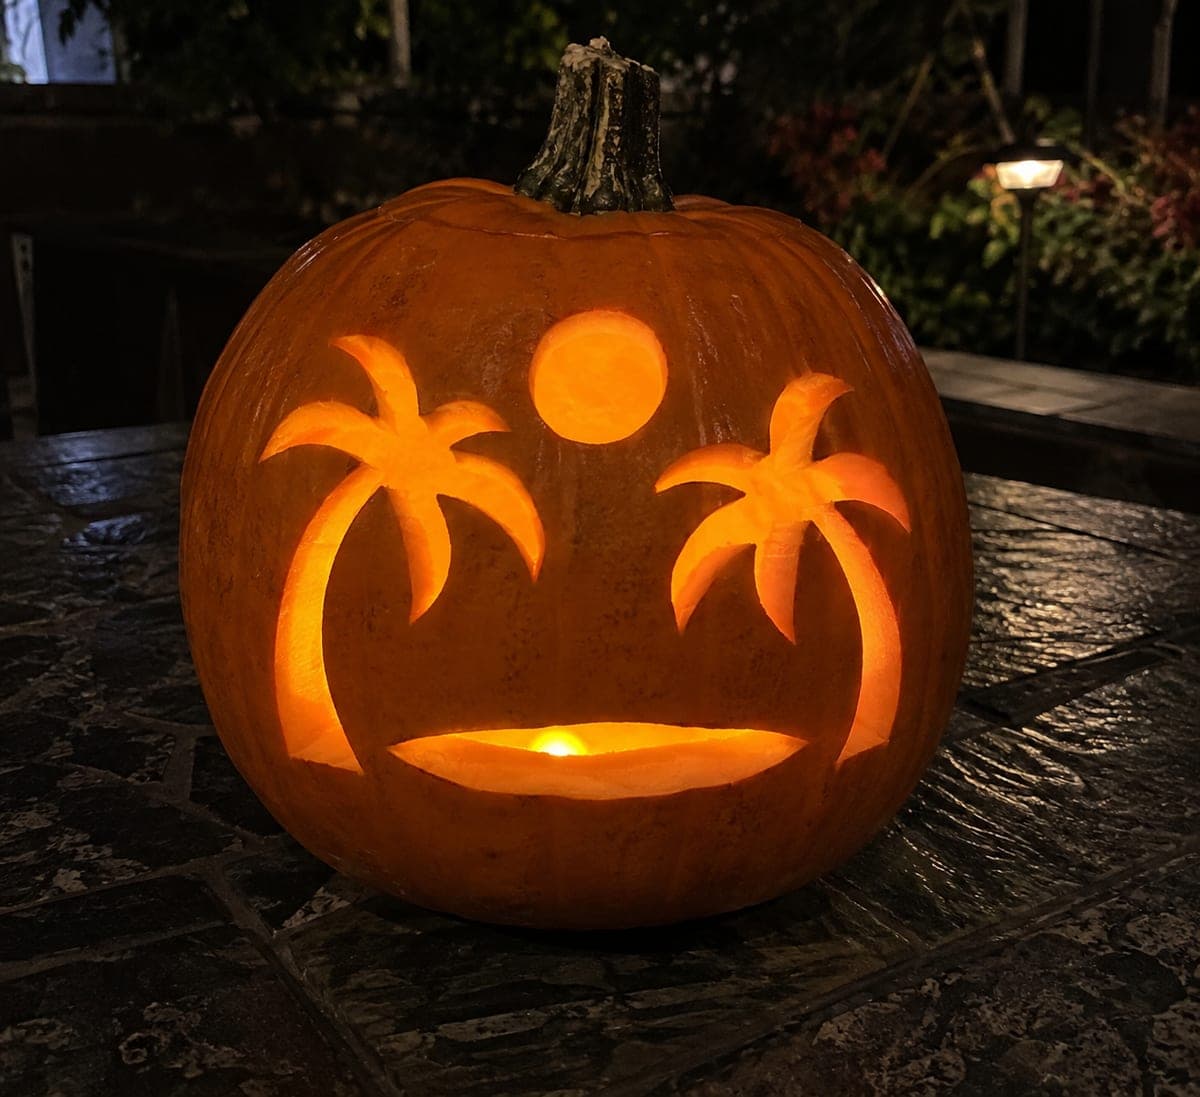
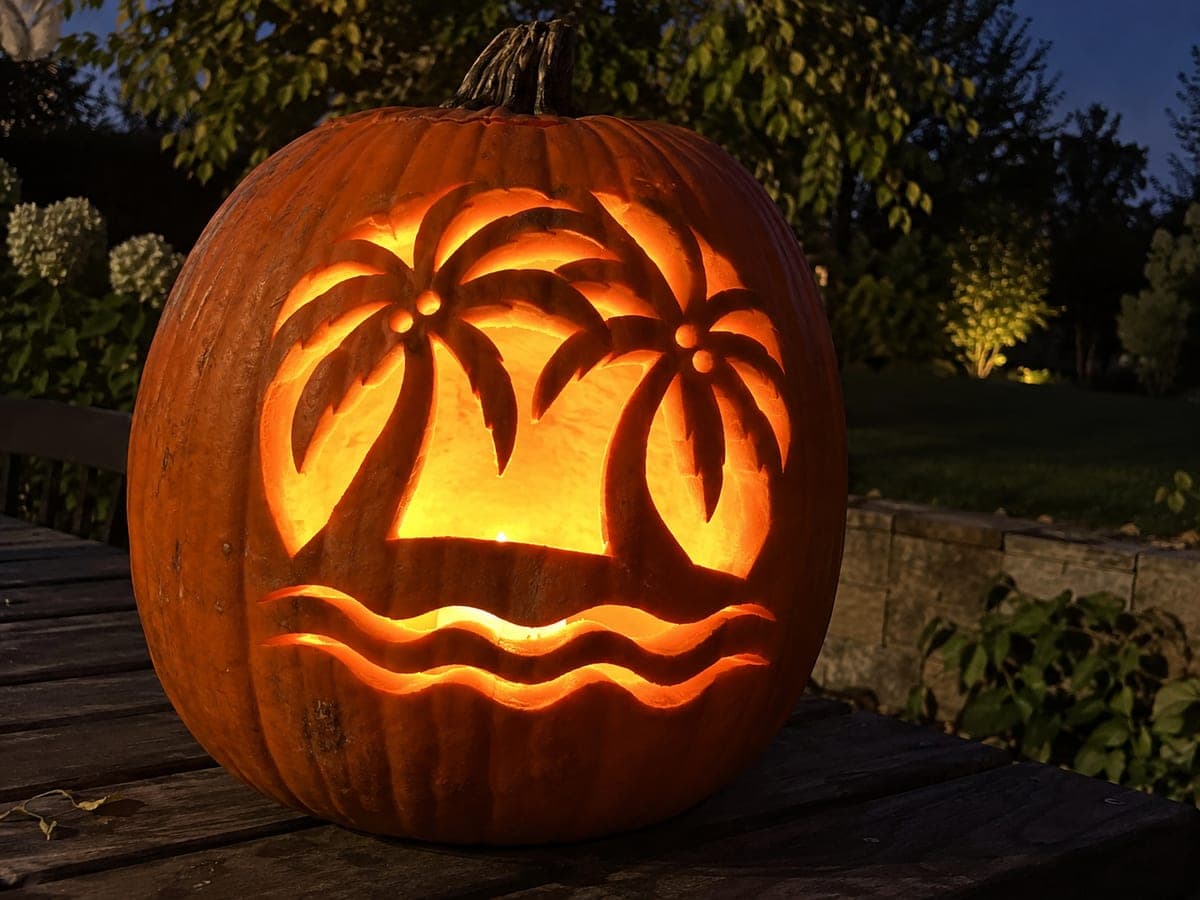
Twin Palm Silhouettes and Sun Pumpkin Carving

Two glowing palm silhouettes and a separate sun aperture glow side by side on this medium palm tree pumpkin carving, with sturdy rind retained between each motif for a structurally sound design. Cut the sun circle first at the top, then the two palm shapes working from the trunks upward to the leaf tips. Keeping the ground line between the trunks intact is important, so avoid connecting the two palm base cutouts. This tropical pumpkin carving idea works well on a tall, narrow pumpkin that gives the palm trunks room to stretch.

No ratings yet · Sign in to rate
Comments (0)

  • No comments yet — be the first.

Save without an account. Sign in to like or comment.

Our tips for carving a similar design

Three separate openings, two palm silhouettes and one sun circle, create the tropical scene, with solid rind left between each motif to keep the structure sound. A tall, narrow pumpkin gives the trunks the vertical room they need to look convincingly tall. Cutting from trunk base upward ensures you can check spacing before committing to the leaf tips.

From pumpkin to porch

  1. Prep and select your pumpkin

    Choose a taller pumpkin with a smooth face so both palm trunks have room to stretch. Cut an access lid at the back, scoop the interior to a consistent one-inch wall thickness, and wipe the face dry before transferring any designs.

  2. Transfer all three elements

    Position the sun circle near the top center, then place each palm silhouette to either side with the trunks pointing down. Tape the templates and perforate all outlines with a pushpin before removing the paper.

  3. Cut the sun circle first

    Start at the top of the pumpkin with the sun circle, as this is the simplest cut and anchors the arrangement visually. Cut along the perforated circle with a jab saw and pop out the disc. Clean any rough edges before moving on.

  4. Cut each palm from trunk to leaf tips

    Begin each palm cut at the wide trunk base and work upward toward the leaf tips in a single continuous pass. Keep the ground-line rind between the two palm bases intact by not connecting the two cutouts at the bottom. Confirm the gap between the palms is at least a half inch before making the final pass.

  5. Check structure and clean edges

    With all three elements cut, look at the remaining rind from inside the pumpkin. Each cutout should be fully isolated from the others by a solid rind bridge. Trim any rough spots with a detail knife, keeping cut edges clean.

  6. Light and display

    Place a bright LED tea light inside so it sits roughly centered behind all three openings. View from several feet away to confirm the sun and both palms glow evenly. A tall, narrow display spot such as a step riser shows off the vertical proportions of the design.

Written with AI to match this design

Gather your supplies

Check things off as you get ready.

Work on a stable surface, keep your free hand out of the cutting path, and have an adult handle sharp tools.

Three levels of light

  • Leave intact

    The rind between and around all three openings stays solid and dark.

  • Peel & shade

    None, all glowing areas are full through-cuts.

  • Cut through

    Both palm silhouettes and the sun circle are cut through for full amber backlight.

Learn the carving basics

Before you start cutting

How far apart should the two palm trunks be?

Leave at least a half inch of solid rind between the inner edges of the two trunk bases. This rind bridge is the most important structural support in the lower half of the pumpkin. A gap that is too narrow will flex or crack when you handle the pumpkin after carving.

Can I position the sun between the two palm crowns instead of above them?

Yes, centering the sun between the two crowns works well and can make the scene feel more like a classic tropical sunset. Just confirm there is solid rind between the sun aperture and each palm leaf tip before cutting, since those three openings will be close together at the top of the design.

Will a round pumpkin work if I cannot find a tall one?

A round pumpkin works but the palms will look shorter and stubbier. You can compensate by scaling the template down slightly and giving each trunk a gentle outward lean so the design reads as two distinct trees. Avoid placing the templates too close together on a wide round face, as the extra rind between them can make the composition feel sparse.

Your take belongs here, too.

Changed a detail? Made it simpler? Share a photo of your version and tell the community what worked.

Share your pumpkin

More pumpkins like this

You've reached the end · 8 pumpkins
The Patch Report

Fresh pumpkins, in your inbox.

The best new carvings, ideas worth stealing, and how-tos for carving season. Short, seasonal, and gone by November.

A short email during carving season. Unsubscribe anytime. See our privacy policy.