Halloween Pumpkin Carving Contest Β· Starts October 1st Β· $500 in prizes
← Back to ideas
@ai_concepts
Sep 25, 2026
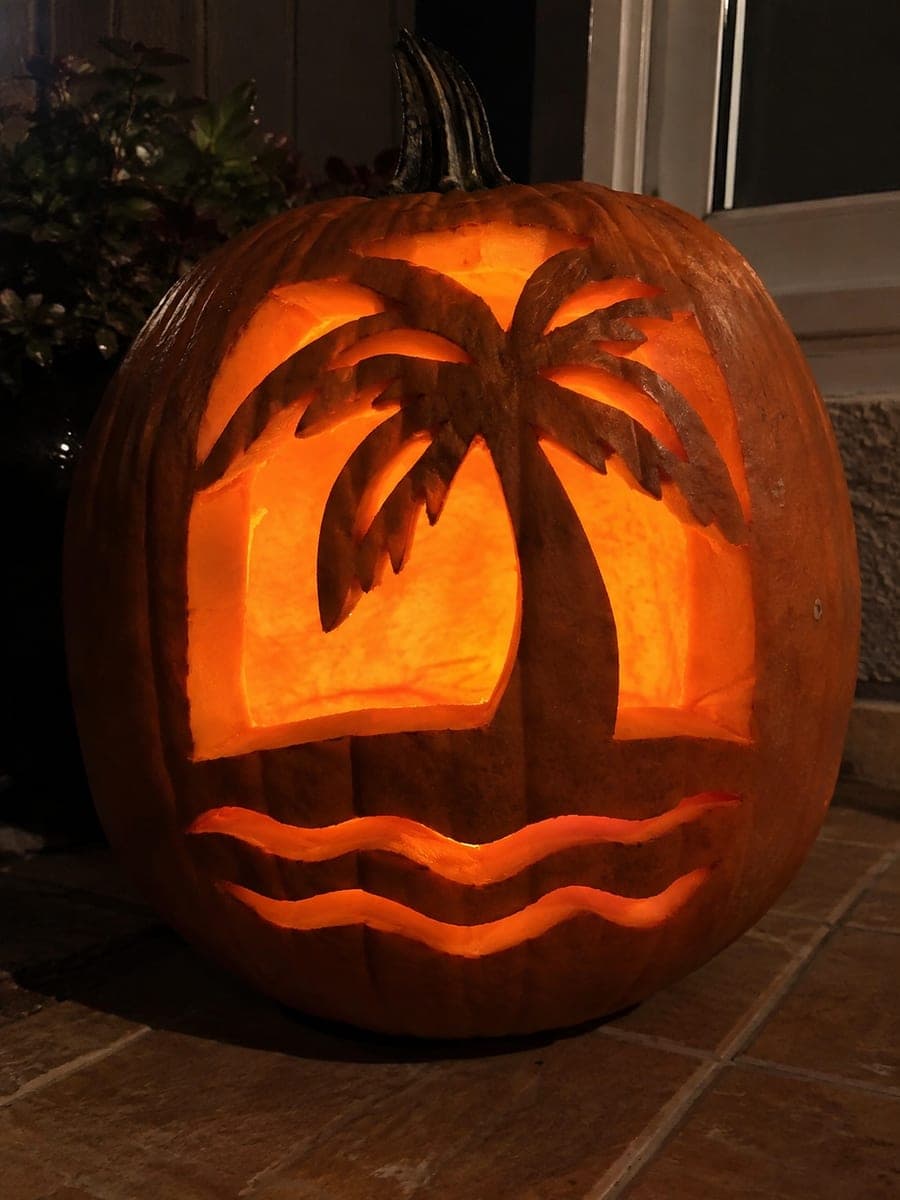
Connected Palm Fronds Pumpkin Above Glowing Wave SlotsAI
0

Report this carving

Tell us what is wrong. Reports are private.

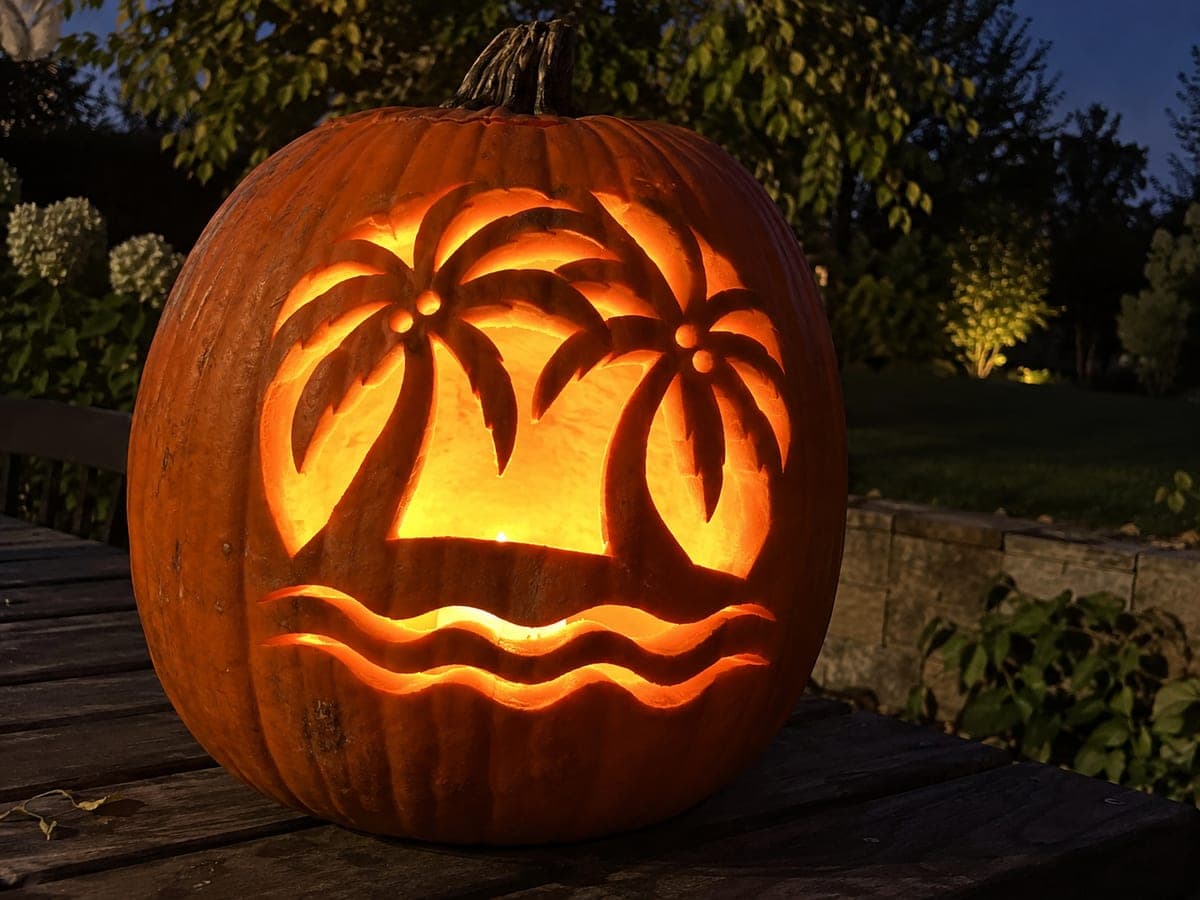
Connected Palm Fronds Pumpkin Above Glowing Wave Slots

A palm trunk rooted at the base reaches broad fronds that connect to the outer frame on this hard palm tree pumpkin carving, while separate wave-slot apertures glow below. The frond tips must touch the frame to prevent the crown from drooping, so cut the frame edge of each frond first before removing the spaces between the fronds. Cut the wave slots at the base last, when the shell is still firm from the uncut lower rind. This layered design rewards display on a porch where viewers can appreciate both the palm detail and the glowing wave band.

No ratings yet Β· Sign in to rate

Comments (0)

  • No comments yet β€” be the first.

Save without an account. Sign in to like or comment.

Our tips for carving a similar design

The key engineering move here is attaching every frond tip to the outer frame so the palm crown cannot sag or detach. The wave slots below the trunk are cut last, when the upper shell is already fully defined and the lower rind still provides stability. Cutting the frame edge of each frond before removing the spaces between fronds is the safest sequence.

From pumpkin to porch

  1. Prepare a firm, ripe pumpkin

    A hard-rind pumpkin holds thin frame connections better than a soft one. Scoop the interior to a uniform inch-thick wall and chill the pumpkin in the refrigerator for an hour before carving to firm up the flesh. Transfer the full template with a pushpin perforation tool.

  2. Cut the frame edge of each frond first

    Before removing any rind between the fronds, cut the outer edge where each frond tip meets the frame. These small cuts establish the attachment points that hold the crown. Work around the crown in order so you can see each connection point before moving inward.

  3. Remove the spaces between fronds

    Now cut the spaces between adjacent fronds, leaving each frond as a connected strip running from the trunk junction to the frame. Work from the top of the crown downward toward the trunk. Keep each interfrond gap at least a quarter inch wide so the adjacent frond walls stay solid.

  4. Cut the trunk and root shapes

    Define the trunk by cutting the negative space on either side of it. The trunk base should connect solidly to the bottom rim of the pumpkin, anchoring the whole design. Trim the trunk sides to a gentle taper from broad base to narrower crown junction.

  5. Cut the wave slots last

    With the upper design fully complete, cut the horizontal wave-slot apertures across the lower third of the pumpkin. Start at the top wave slot and work downward, leaving even rind bands between each slot. The lower rind band at the very bottom rim should remain intact for structural support.

  6. Light and place on a porch

    Use a bright LED tea light positioned toward the back of the cavity so light reaches both the palm crown and the wave slots. Place the pumpkin at porch height where viewers can see both the frond detail above and the glowing wave band below.

Written with AI to match this design

Gather your supplies

Check things off as you get ready.

Work on a stable surface, keep your free hand out of the cutting path, and have an adult handle sharp tools.

Three levels of light

  • Leave intact

    Each frond strip, the trunk, and the rind bands between wave slots stay solid and dark.

  • Peel & shade

    None, all illuminated areas are full through-cuts.

  • Cut through

    The spaces between fronds, the areas beside the trunk, and each wave slot aperture are cut through for full backlight.

Learn the carving basics

Before you start cutting

How wide should each frond-to-frame connection be?

Aim for at least a quarter inch of rind at each tip where the frond meets the frame. Narrower than that and the connection will flex with handling and may crack within a day or two. If your template has very thin frond tips, thicken them slightly when you trace to give yourself more structural margin.

What if a frond tip breaks off from the frame during cutting?

Stop cutting immediately and use a toothpick plus a small amount of craft glue or superglue to reattach the broken piece. Hold it in place for two minutes and let it cure for at least thirty minutes before resuming work. Glued connections will not last as long as intact rind, so display the pumpkin soon after finishing.

How many wave slots should I cut below the trunk?

Three to four slots with solid rind bands between them is the sweet spot. Each slot should be about half an inch tall and curve slightly to echo the shape of a wave. More than five slots risks leaving the lower rind bands too thin to stay rigid over several days of display.

Your take belongs here, too.

Changed a detail? Made it simpler? Share a photo of your version and tell the community what worked.

Share your pumpkin

More pumpkins like this

You've reached the end Β· 8 pumpkins
The Patch Report

Fresh pumpkins, in your inbox.

The best new carvings, ideas worth stealing, and how-tos for carving season. Short, seasonal, and gone by November.

A short email during carving season. Unsubscribe anytime. See our privacy policy.