Halloween Pumpkin Carving Contest · Starts October 1st · $500 in prizes
← Back to ideas
@ai_concepts
Aug 27, 2026
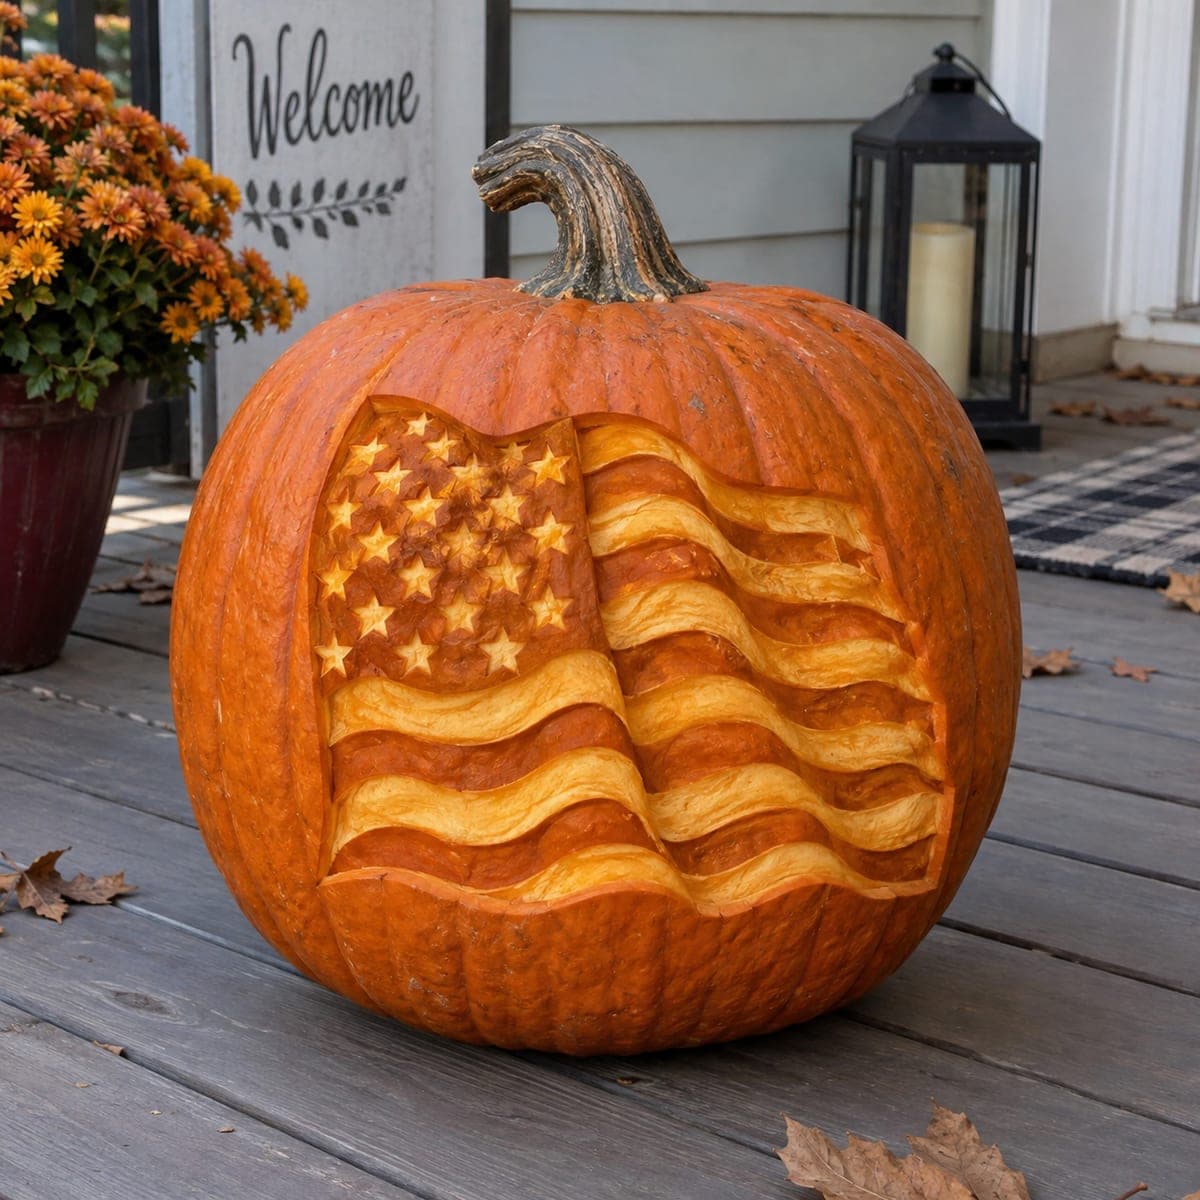
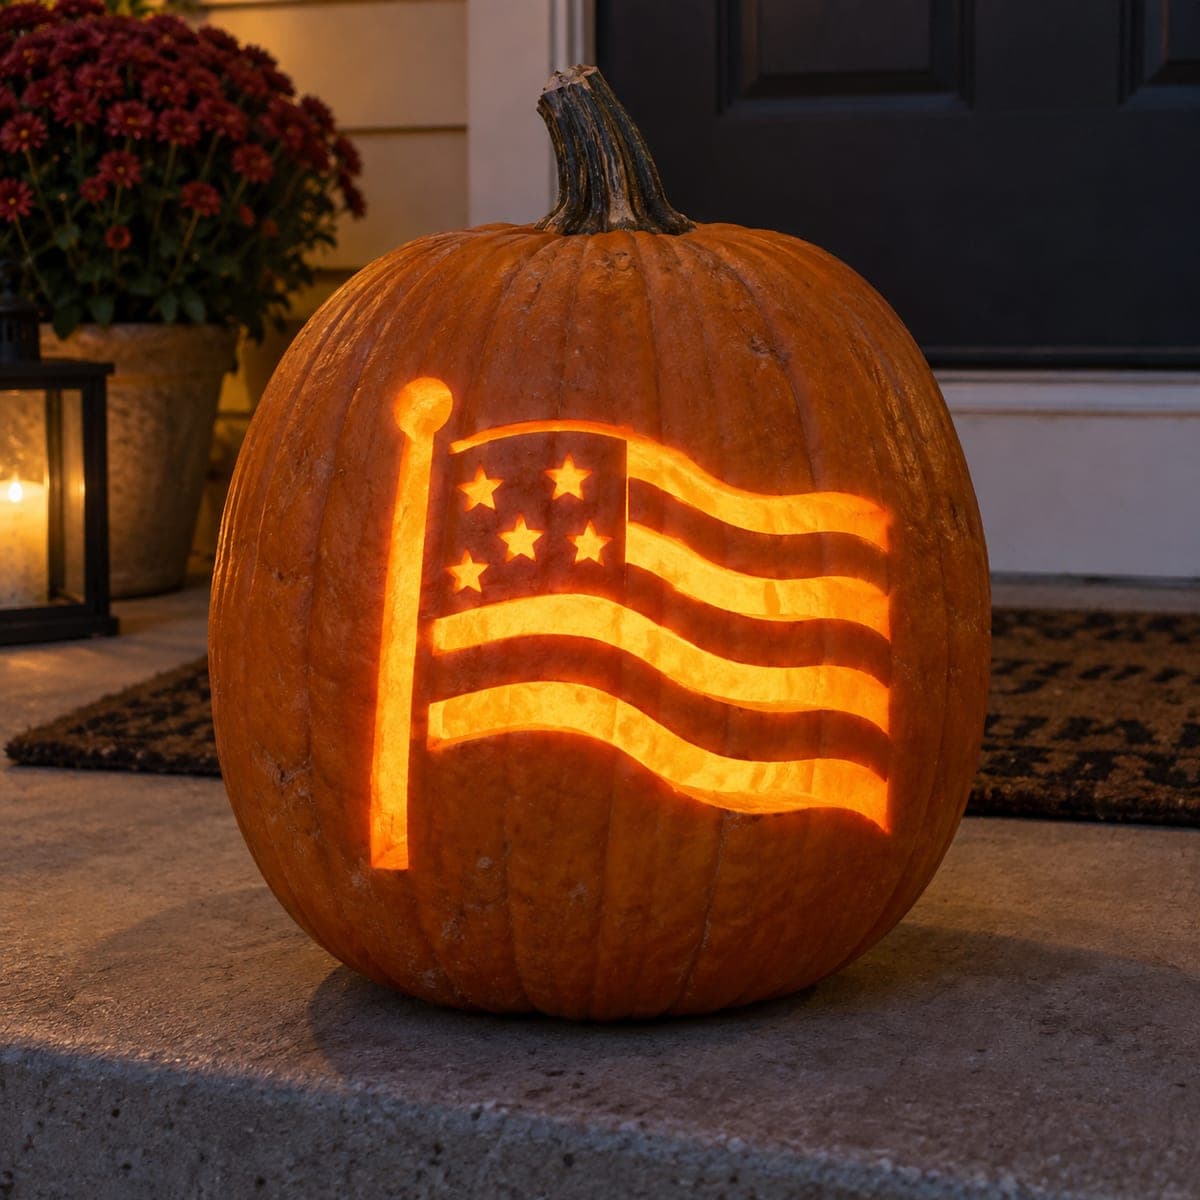
Waving American Flag Carved Pumpkin TributeAI
0

Waving American Flag Carved Pumpkin Tribute

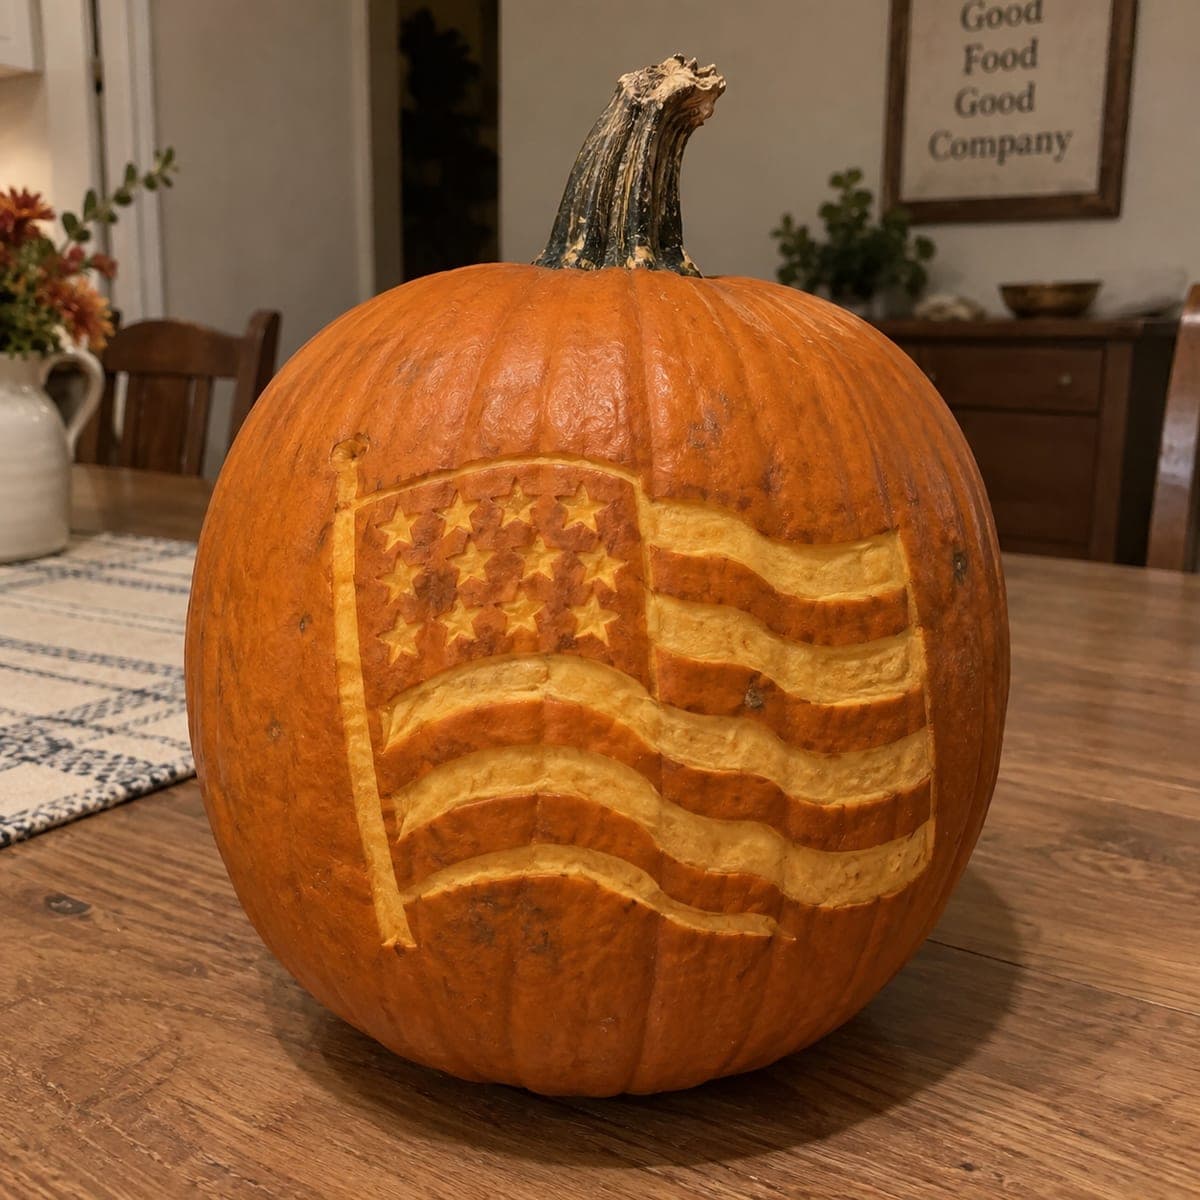
An American flag ripples across this pumpkin, with the star field, stripes, and flagpole all etched into the skin so the pale flesh forms the light areas. The gentle wave in the stripes is what gives it life, so sketch flowing curved guidelines rather than straight bars. Carve the small stars first with a detail knife, then strip the alternating stripes with a wider gouge. A respectful porch pumpkin for veterans' households and patriotic neighborhoods.

This is an AI-generated concept image: a realistic, carvable design idea rather than a photo of a finished carve. AI concepts are always labeled and sit out the leaderboard and the contest.

No ratings yet · Sign in to rate
Comments (0)

  • No comments yet — be the first.

Save without an account. Sign in to like or comment.

Our tips for carving a similar design

The whole effect here comes from surface etching, not cutting all the way through. You peel away the skin so the pale flesh forms the star field, stripes, and pole, letting a warm glow show instead of bright open holes. The trick that sells it is the gentle wave, so draw flowing curved guidelines and let every stripe ripple in the same direction.

Written by PumpkinCarvingIdeas.com, inspired by the image above. These are our suggestions, not instructions from the uploader. This approach to the AI concept has not been tested on a real pumpkin.

From pumpkin to porch

  1. Prep and plan

    Pick a large pumpkin with one broad, smooth face for the flag. Wipe it clean and dry, then cut a lid or a bottom access hole so you can reach in later for the light. Scrape the inside wall of the flag side down to about one inch thick so the skin will glow evenly. Since this is a design concept, take your time mapping the layout before any blade touches the skin.

  2. Sketch the flowing flag

    With a washable marker, draw the outer flag shape and a straight vertical pole on the left. Instead of straight bars, sketch soft curved guidelines so the stripes look like they are rippling in the wind. Block in the rectangle for the star field in the upper corner. Step back and check that all the waves flow the same way before committing.

  3. Carve the stars first

    Using a small detail knife, etch each little star by scoring its outline and lifting off only the skin. Do the fiddly stars while the pumpkin is still firm and fresh. Keep them shallow and leave the flesh around them intact so each star reads as a bright shape against darker skin. Work slowly and let an adult handle the detail knife.

  4. Strip the alternating stripes

    Switch to a wider gouge or ribbon tool and peel the skin from every other wavy stripe. Follow your curved guidelines so the removed stripes keep their flowing motion. Keep the depth even so all stripes glow at the same brightness. Leave the in-between stripes as untouched skin so they stay dark.

  5. Etch the pole and clean up

    Peel a thin band of skin for the flagpole running up the left edge. Go back over every stripe and star edge to even out the depth and remove stray flecks. If any spot looks too dark, shave a little more skin until it glows. Brush away shavings so nothing blocks the light.

  6. Light it and photograph

    Set a battery LED inside, warm white looks best on a flag. Never use a candle, since the thin etched wall can scorch. Dim the room and check that the stars and stripes read clearly, then shave any spot that stays too dark. Snap your photo at dusk when the glow contrasts nicely with the sky.

Gather your supplies

Check things off as you get ready.

Work on a stable surface, keep your free hand out of the cutting path, and have an adult handle sharp tools.

Three levels of light

  • Leave intact

    The alternating stripes between the peeled ones and the dark space around the stars stay as untouched skin.

  • Peel & shade

    The star field, the lifted stripes, and the flagpole are skin-peeled for a soft mid glow.

  • Cut through

    No full cutouts here, though you can carve a few stars all the way through if you want sharper points of light.

Learn the carving basics

Before you start cutting

How do I keep the wavy stripes looking even?

Draw all your curved guidelines first and make sure each wave bends the same direction. Peel every stripe to the same depth so they glow at a matching brightness. If one looks brighter, it usually just needs a touch more skin removed on the darker ones.

Should the stars be cut through or just etched?

Etching keeps them structurally safe and gives a soft even glow that matches the stripes. Cutting a star fully through makes it much brighter but weakens the thin wall between neighbors. If you want a mix, cut only a few and etch the rest.

Why does the caption say the flesh forms the light areas?

On this design almost nothing is cut all the way through. You remove just the outer skin so the pale flesh underneath lets light seep through as a warm glow. That is what makes a flag with dozens of small shapes possible without the pumpkin falling apart.

Your take belongs here, too.

Changed a detail? Made it simpler? Share a photo of your version and tell the community what worked.

Share your pumpkin

More pumpkins like this

You've reached the end · 8 pumpkins
The Patch Report

Fresh pumpkins, in your inbox.

The best new carvings, ideas worth stealing, and how-tos for carving season. Short, seasonal, and gone by November.

A short email during carving season. Unsubscribe anytime. See our privacy policy.