@carvequeen
Sep 5, 2026
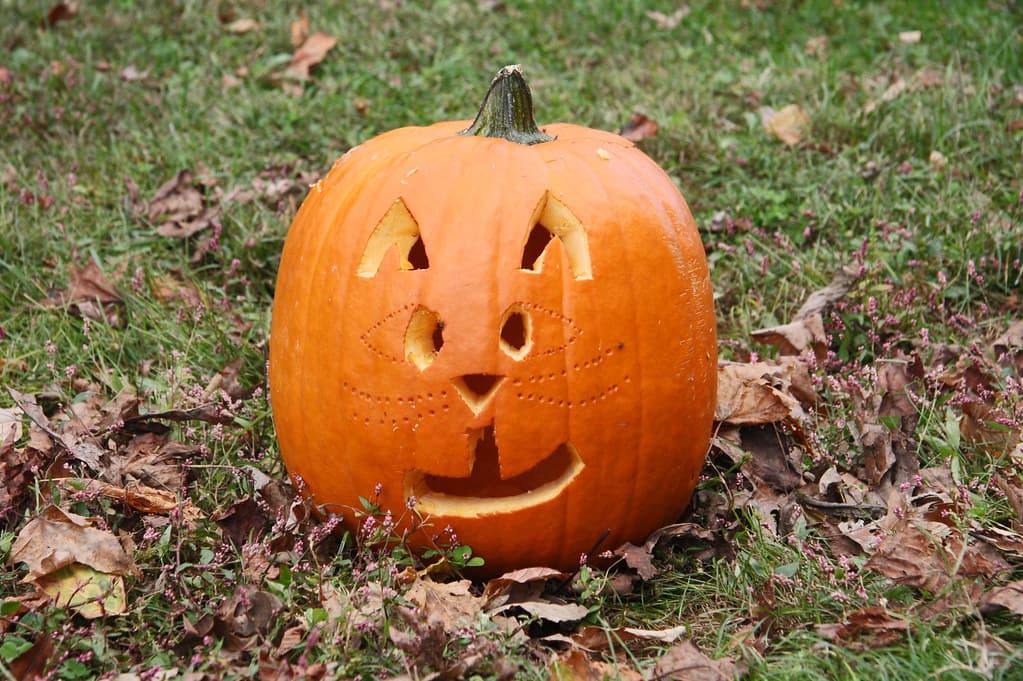
Whiskers on the lawn
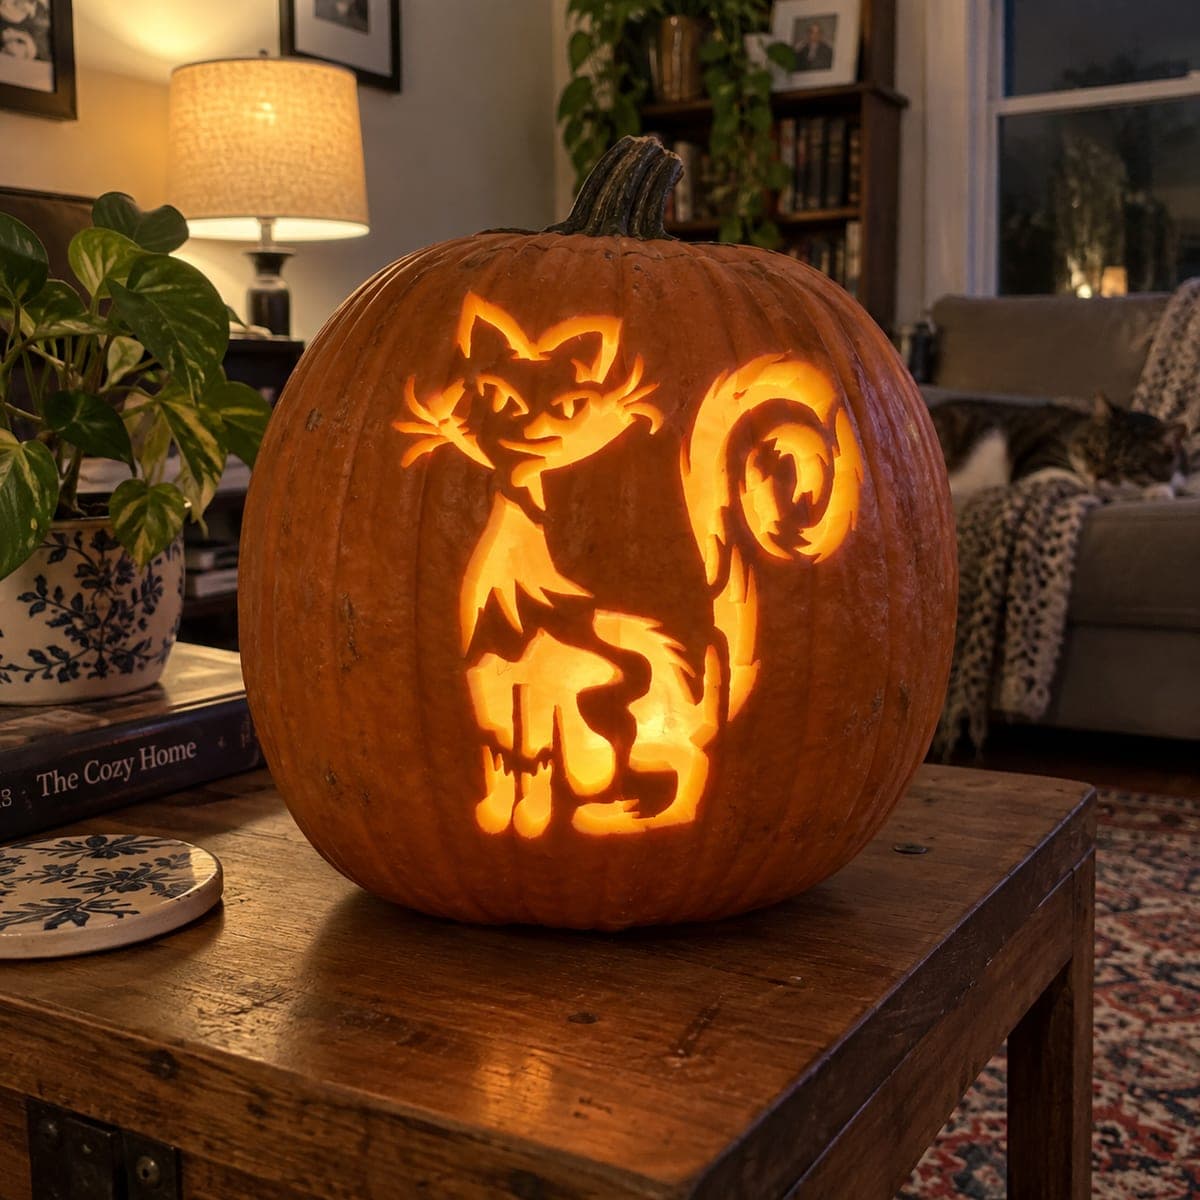
A cat face with poked-dot whiskers and freckles, triangle ears, and a happy grin, sitting in the leaves. Skin-deep dots handle the fine detail.
No ratings yet · Sign in to rate
A cat face with poked-dot whiskers and freckles, triangle ears, and a happy grin, sitting in the leaves. Skin-deep dots handle the fine detail.
The whole charm here is the mix of clean cutouts and tiny poked dots. Big shapes like the eyes, nose, mouth, and ear openings carry the glow, while the whiskers and cheek freckles are just a grid of pinholes that let out pinpoints of light. Plan the cutouts first, then add the dot work last so the face does not weaken while you carve.
Written by PumpkinCarvingIdeas.com, inspired by @carvequeen's photo above. These are our suggestions, not instructions from the uploader, and this approach hasn't been tested on their exact carve.
Choose a tall, smooth pumpkin with a flat area for the face. Cut a lid from the bottom or the back rather than the top so the stem stays as a nice topper. Scoop the inside until the wall behind the face is about one inch thick. A thinner wall makes both the cutouts and the poked dots much easier to work.
Tape your stencil flat against the face and mark the outlines with a poker tool or a pushpin. Trace the two triangle ears, the eyes, the small triangle nose, and the curved grin. Dot along the whisker lines and cheek freckles too so you have a full map. Peel the paper and check that everything reads as a cat before you cut.
Use a small serrated carving saw and start with the smallest shapes, the eyes and the nose. Saw with gentle in-and-out strokes and let the tool do the work. Push each piece out from the inside so the edges stay clean. Save the wide grin for later since it is the largest opening.
Carve the two triangle ear cutouts near the top of the face, keeping a solid band of skin between them and the eyes. Then cut the curved grin last, since it is the biggest hole and removing it earlier would make the face flex. Keep the little corner points of the mouth intact so the smile keeps its shape.
Now add the fine detail with a thin poker, an awl, or a large needle. Push straight through the wall in evenly spaced dots to form the whisker lines fanning off the cheeks and the small freckle clusters. Keep the spacing steady so the lines read clearly. These holes are structurally safe because each one is tiny and surrounded by solid skin.
Drop in a battery LED puck or tea light and settle the pumpkin into a bed of leaves like the photo. Flameless lights are safer and will not scorch the thin areas around the dots. Shoot at dusk so the pinpoint whiskers glow against the darker skin. A slightly low camera angle makes the grin look extra happy.
Check things off as you get ready.
Work on a stable surface, keep your free hand out of the cutting path, and have an adult handle sharp tools.
The main pumpkin skin across the cheeks and forehead stays untouched and dark, framing the face.
You can lightly shave the skin around the grin or ears for a soft halo, but this design leans on the poked dots for its dim points of light.
The eyes, triangle nose, ear triangles, and curved grin are cut fully through for the brightest glow, with the whisker and freckle pinholes adding tiny sparks.
Mark every dot from your stencil before you poke anything, so the spacing is planned rather than freehand. Work along each whisker line one dot at a time and keep the gaps consistent. If a hole ends up too small to glow, gently widen it with the same tool.
The mouth is the largest opening on this face, and removing it early lets the lower half flex and crack while you are still working. By saving it for after the eyes, nose, and ears, the pumpkin stays rigid. Cutting big openings last is a good habit for almost any design.
They hold up well as long as your wall is about an inch thick and you leave solid skin between shapes. Do not carve the ear cutouts all the way to the eyes, and keep the corners of the grin intact. Handle the pumpkin from the base, not by the stem, to avoid stressing the face.
Changed a detail? Made it simpler? Share a photo of your version and tell the community what worked.
The best new carvings, ideas worth stealing, and how-tos for carving season. Short, seasonal, and gone by November.
Comments (0)